

Making an Emergency Day Tank
I had been chasing an air leak in the fuel line for the entire duration of a 4000 nm passage from Ecuador to Puerto Montt, Chile. The engine would run for between 2 and 6 hours before the air bubble would become big enough to cause it to die. I had replaced or tightened every hose clamp, fitting and questionable section of fuel hose, but the problem remained.
We would be passing through Canal Chacao, the passage that separates the mainland of Chile from the large island of Chiloe. Once inside, the winds are fickle, the currents are strong, and there are numerous hazards for the remaining 50 nm to Puerto Montt. We needed to be able to rely on our engine.
One solution to the problem would be to build a day tank. It sits higher than the engine, gravity feeding fuel to the secondary fuel filters. If air does get into the fuel system, the bubbles will migrate upward into the day tank and dissipate rather than collecting in the injector pump.
I would need a container to act as the tank and enough fittings and hose to connect everything together. To get fuel up into the day tank, I could use the engine's lift pump, an electric fuel pump or even, as a last resort, refill the day tank with a funnel. Since a lift pump can't be turned off while the engine is running, this approach would require a return line on the the day tank to prevent it from overflowing. An electric pump has several advantages. It makes filling and refilling the day tank easy and efficient, and it can be turned on and off as needed. Since I had one on hand, the decision was easy.
Scrounging up the parts
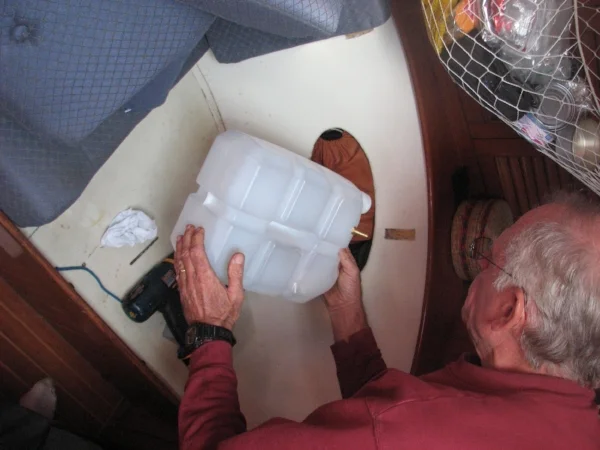
We began a scavenger hunt looking for parts that could be used to complete the project. To serve as the tank, I used an empty 10 liter water container. To connect hoses to the tank, I found two brass fittings with the right size barbed hose connection on one side and a male NPT fitting on the other. The sides of the water container were too thin to simply thread the fittings into them, so I fabricated 'nuts' by cutting two small pieces of starboard about 2” in diameter and drilling a hole in each that was slightly smaller than the threads on the fittings. The material was soft enough that the brass fittings worked as a tap and cut threads into the material. I then cut two small rubber gaskets for each fitting, one inside and one outside the tank wall, to insure each fitting would be leak free. Lastly, I drilled a 1/4” hole in the cap of the container to serve as a vent. The fitting assembly is illustrated in figure 1.

To screw the fittings in place, I had to cut an opening in the top large enough to get my hand inside to hold the fabricated 'nuts' and gaskets while screwing the fittings into them. I sealed the opening as best I could with plastic and duct tape. I determined how much fuel we could put in the tank without risking a spill while on a heel or in rough water and put a line on the outside of the tank with a marker to indicate this safe fill level. I then strapped the tank in place above the engine.
The fuel pump was mounted on a stringer in the engine room, and a switch with a fuse was wired in to control the pump. The wiring diagram is shown in figure 2.

The last step was to plumb everything together. I had plenty of spare fuel line, and the necessary hose connections to complete the job, but if I hadn't, I could have 'borrowed' what I needed from the original fuel supply system. I rerouted the fuel feed line from the input side of the engine's lift pump to the electric fuel pump. The output of the electric fuel pump went directly to the day tank. A diagram of the entire system is shown in Figure 3.

We ran the engine for several hours to gain some confidence in it before continuing on to Puerto Montt. The day tank performed flawlessly. I estimated we could put enough fuel in the tank to last at least an hour at normal cruising speed. We used an egg timer set for 45 minutes when motoring. When it went off, one of us would go down to the engine room, turn on the pump, and wait until it filled to the mark. The pump was then shut off and the timer reset.
The entire project took less than half a day. While I resolved to make a more permanent version, we continued using the temporary day tank for more than a year, cruising Patagonia for a season and crossing the Pacific to New Zealand, before I built the permanent version. The new one looks better, refills itself and can't spill out the top, but the temporary system probably would have continued working for years more, and it certainly got us out of a tight situation.