The Blue View - Reefing

reef drawing  

Neptune has has been very good to us over the years. When we do something stupid or ill advised, he usually provides us a with a lesson to show us the error of our ways. These lessons almost always result in some embarrassment, frequently involve a short term adrenaline rush, and, on occasion, has resulted in some damage to the boat. Fortunately, he has helped us avoid any major catastrophes, and the damage to our egos was usually much greater then the damage to Nine of Cups.

One of his first lessons was on reefing the sails. This is a maneuver used to reduce the sail area when the wind increases (as opposed to the other kind of reef – the hard kind we bump into every once in awhile – that's another of Neptune's lessons for a future blog). We had only been on Cups for a couple of months and were heading up the east coast of Florida. Marcie had just brought dinner up to the cockpit when we saw a big squall heading our way. We had all our sails up, but surely we had enough time to eat our dinner and then reef down before it got to us. Ten minutes later, as our dinner plates scattered to the winds (literally) and we were hunkered down on the floor of the cockpit fearing for our lives, we learned Neptune's lesson about reefing and reefing early.

Since then, we always reef at the first sign of bad weather. On a long passage, we reef down just before dark each day as a precaution. We have streamlined our reefing technique and it now only takes a couple of minutes to add or let out a reef.
 

Reef Dwg1


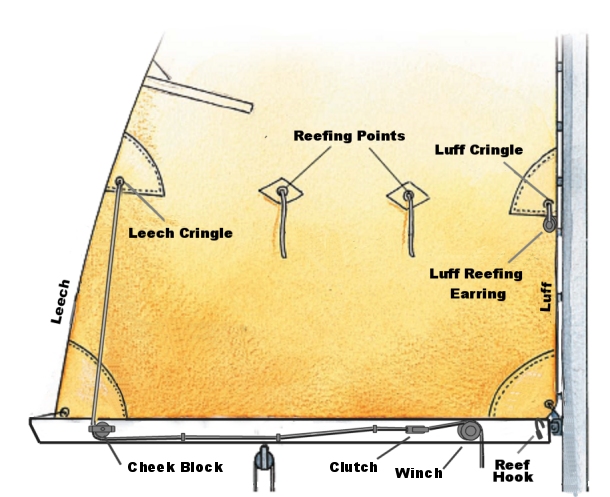
On Nine of Cups, we use a simple slab reefing system. Our main sail has three sets of reefs. The sketch only shows one reef, but our sail has two more sets of cringles and reefing points located higher up on the sail, as well as two more cheek blocks and rope clutches. We also have duplicates of the reefing lines, blocks, clutches and winch on the other side of the boom, so we can always reef on the windward side of the boat. Our procedure for reefing is slightly different depending on whether we are sailing into the wind or downwind. I will describe the process for the former first.

If the wind is coming from forward of the beam, reefing is quite simple. First, we remove the downward tension on the boom by slacking off on the vang and mainsheets. The aft end of the boom is raised a small amount by bringing the topping lift in a turn or two. Then the mainsail is lowered by letting out some of the main halyard. We have marks on the main halyard for each of the reefs, so we know just how much to let out.

One of us goes forward to the windward side of the mast and pulls the luff reefing earring down and hooks it over the reef hook. Next, the leech cringle is winched down until the cringle is close to the boom. Then the main halyard is tensioned, the boom tension is adjusted using the vang, and the mainsheet is trimmed. The whole maneuver usually takes less than five minutes (perhaps less for more agile sailors!).

If we are sailing downwind, the process is similar, but slower and more controlled. The mainsheet is cranked in, if necessary, until the boom is well away from the shrouds, and then the tension is removed from the vang. One of us, usually me, goes forward to the mast and pulls down on the luff while the sail is slowly lowered a foot or so. The leech cringle is then cranked in. The mainsail is lowered another foot or so while I continue to pull down on the luff and keep tension on the leech cringle. These steps are repeated, a foot at a time, until the luff reefing earring can be hooked over the reef hook. Once the earring is secured, the process is the same for downwind or upwind. With two of us, it usually takes about ten minutes to reef downwind. It can be done by one person, but the time would probably be doubled.

There are a lot of different methods and variations of these methods for reefing, all with pros and cons, but this is what works for us. Though I wouldn't ever consider us fast learners, Neptune has a way of making lessons stick vividly in our minds. We reef fast and early.
The Blue View - Buttoning Up Nine of Cups

button up cups  

Heading back to the States to join Marcie, I knew I'd be leaving Nine of Cups on her own for a few months, and just like leaving a house for vacation, there were a lot of things that had to be done to button her up before leaving.


long checklist


I had a long checklist, and I spent the day and a half before departure taking care of what could be done ahead of time. The list included things like flushing the outboard engine and draining the fuel, decanting the diesel fuel from the on-deck jerry cans into the main tanks, doubling the dock lines, securing everything on deck, disconnecting the shore power, and a whole host of other chores.


panel


The solar panels will keep the batteries topped up, and the solar power regulator will keep the batteries from being overcharged. The wind generator was shut down and tied off. Friends in the marina were given our contact information and will be keeping an eye on Cups while we're gone.

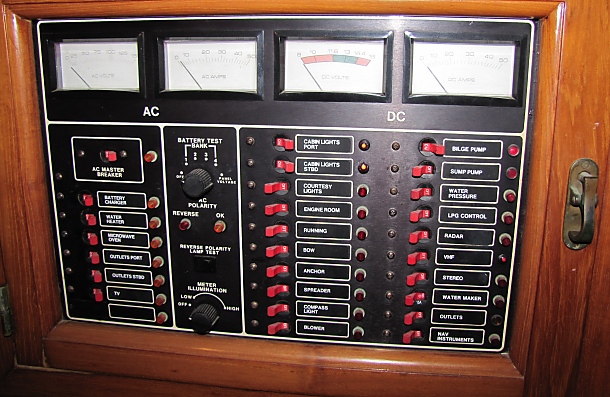
There were a number of items that had to wait until just before leaving. Since I was departing for the airport at 4:30 in the morning, I got up at 3AM to take care of last minute things like turning off the propane tanks, closing the remaining thru hulls, and turning off circuit breakers.


pickling the head


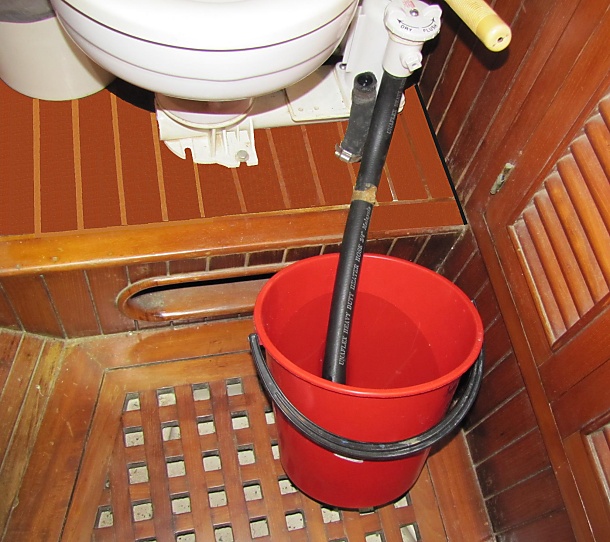
One task that had to wait until the last minute was pickling the sink drains and head. The sinks drain directly overboard and once the thru hull valves are closed, stagnant seawater sits in the hose between the sink and the thru hull. Likewise, the head is flushed with seawater. If the seawater is allowed to sit for a few days in these hoses and the toilet and its pump, they will all begin to smell like low tide on a mud flat. After a few months, all kinds of interesting sea life will be growing in them. To prevent this, I flush the head with a freshwater/bleach mixture, and put a little bleach into each sink drain.

After all the hammering, sawing and epoxying I've been doing to her innards over the last few weeks, perhaps Nine of Cups was looking forward to a little alone time, but I think she looked a little forlorn as I walked away in the early morning on my way to the airport to head to the U.S.

If you are interested in getting a copy of our decommissioning list, send an email and we will happily send it along.

The Blue View - An Edible Knot

edible knots  

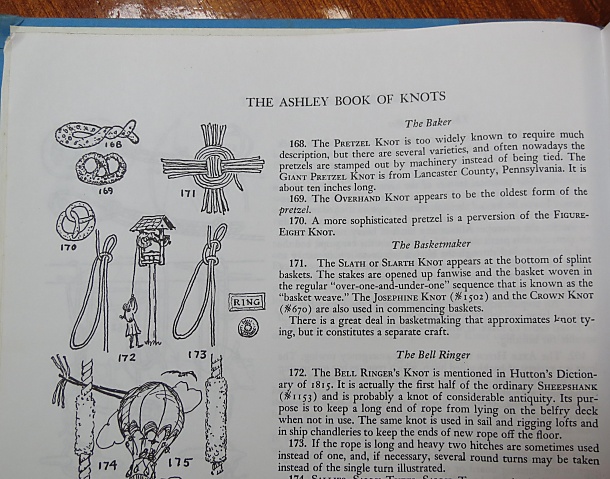
I've referred to The Ashley Book of Knots in previous Blue View Blogs. Of his 3,854 knots, my very favorite is his knot #169. It is difficult to untie, jams easily and is not very strong. The only thing going for it is that it tastes great.
 

pretzels ready to eat


Since today is National Pretzel Day, it only seemed fitting to talk about pretzels in today's blog. I like big, soft pretzels right out of the oven, slathered with mustard. I have my own recipe for pretzels, and I've made these on long passages and more than once on a cold, rainy afternoon in a remote anchorage. And of course, I use Ashley's knot #169, the Pretzel Knot to form the pretzels.


ashley knot for pretzel


I boil the pretzels before baking. I think it adds to the flavor and gives them a softer, firmer skin. The time they are allowed to boil is important. If they aren't boiled long enough, they will be too soft, while boiling them too long makes them tough.

Edible Knots
Recipe Type: Snack
Author: David Lynn
Ingredients
  • For 1 dozen pretzels
  • 1 tbsp (15 grams)yeast
  • 1 tbsp (12 grams) sugar
  • 1 tsp (5 grams) salt
  • 2 tbsp (30 grams) soft butter or margarine
  • 1 cup (250 ml) warm water
  • 3 cups (300 grams) flour
  • 2 tbsp (30 grams) coarse sea salt to sprinkle on Pretzels before baking
  • 2 tbsp (25 grams) baking soda mixed in 4 cups (1 liter) water in a saucepan (non-aluminum).
  • Greased cookie sheet
Instructions
  1. Put yeast, sugar, salt, butter or margarine, water and 1/3 of the flour into a medium mixing bowl. Stir mixture until it is smooth. When the yeast starts to bubble, add the remaining flour. Stir the mixture until it is too stiff, then begin kneading. Knead the dough until it is smooth and no longer sticky. Cover the bowl, set it in a warm place and allow the dough to rise until it doubles in size, about an hour.
  2. When the dough has risen enough, punch it down, and knead for a minute or so. Divide into 12 equal parts and roll each with your hands into 12-15-inch long ropes. Use the photos or Ashley's Book of Knots #169 to form each into a pretzel knot. While the pretzels rest for a few minutes, grease the cookie sheet and bring the the baking soda/water mixture to a boil on stove. Preheat oven to 475 F (250 C).
  3. Boil them for 1 minute on one side, then flip them over with a slotted spoon and boil one minute on the other side. When each pretzel is done, remove from the water and let it drip for a few seconds before placing on the cookie sheet.
  4. Sprinkle the pretzels with the coarse sea salt and bake for 12-15 minutes or until they are golden brown.
  5. Serve with mustard – either the basic yellow type or a spicy brown mustard.
  6. If they aren't eaten right away, they can be refrigerated and reheated at 250 F (120 C) for a few minutes.
  7. We're pretty sure this works, but we usually eat them so fast, there are none to re-heat.