The Blue View - Buoying the Anchor Chain

This is an odd subject. In a previous Blue View, I talked about reefing the sails and how we do it aboard Nine of Cups. That made my mind wander a bit and I thought about the other definition of a reef – those hard spots we've had close encounters with from time to time. From that, my thoughts moved on to some of the magnificent South Pacific coral atolls we visited. And then I recalled the rather unusual anchoring technique we used in those atolls. While we were in Patagonia, we spent a pleasant evening with a French sailor we met there. He was going on to Tierra del Fuego, where we had just been, and we were headed out across the Pacific, where he had just arrived from. These chance meetings are always a great opportunity to go over each others' charts and share information over a glass of wine. We shared with him the unusual anchoring techniques used in the deep, tight anchorages of southern Chile, and he shared with us his anchoring technique for the Pacific atolls that are typically strewn with coral heads, also known as “bommies”.

An atoll is usually a ring-shaped coral reef surrounding a lagoon. Sometimes the reef is high enough to form a number of islands. Often there is a passage into the lagoon that is large enough to sail through and into the protected waters inside. Getting through one of these passages is often good for an adrenaline rush as they are subject to strong currents, large standing waves and the occasional coral head. Once inside, the waters are calm and pristine, and every bit what you imagine a South Pacific paradise would be like. The lagoons are, however, usually dotted with coral heads that are rarely charted, so navigating and anchoring amongst them can be a challenge.


AC buoy1  Initial


To anchor, you look for a sandy spot clear of coral heads. You make sure there are no coral heads within the area that the boat will swing that are close enough to the surface to be a threat, and drop the hook. You then let out adequate chain and set the anchor by backing up until you are sure it is well dug in. A prudent sailor will probably attach an anchor snubber, and keep an eye on things for awhile to make sure the swinging room is adequate and that the boat is staying put, but the anchoring task is essentially done.


tangled


In an atoll, even if there are no coral heads close enough to the surface to hit the boat, there are quite likely a number of them well below the surface. As the wind, tide and current change, your chain will get wrapped around these coral heads. This is bad for a number of reasons.

The first reason is that your chain will damage the coral. If the hundreds or thousands of sailboats that came before you and anchored where you are didn't already kill the coral, you will certainly continue to push it towards its demise. It's also not good on your chain, and if you are using rope rode, the coral will quickly chafe through it.

The second reason is that when it is time to leave, you may need a snorkeler in the water to give directions as you maneuver the boat to unwrap and retrieve the chain. This can take awhile and isn't something you want to worry about if you have to leave in a hurry.

The third reason is that you may wrap so much chain around the bommies that you have no scope left. If there is any wave action at all, the stress on the boat is immense, as there may be no slack at all in the chain.


buoyed


To prevent this, our friend taught us how to buoy the anchor chain to keep it away from the coral heads. Pearl farming is quite the business in the Pacific, and big plastic floats are used everywhere. These floats are always escaping, and as you voyage through the region, it is not hard to collect a few on deserted beaches. You can also use fenders or empty fuel or water cans.

Start by attaching a 3' (1m) line to each float. I use a bowline, and whip the end to the knot to make sure it can't come loose from the float. Gather these on the foredeck when it is time to anchor. As you let the chain out, after the first 50 feet (15m) or so, start attaching a float every 15 to 30 feet (5-10m). I loop the end of the line through a link in the chain and tie another bowline. Make sure the knot is very tight, then tie a stopper knot in the end to help ensure the bowline doesn't work itself loose. (We have lost an occasional float, so I am open to suggestions on a better knot.) The distance apart will depend on the type of float you are using and the weight of your chain. Some experimentation may be needed to get it just right. Using salvaged pearl farm floats and 3/8” HT chain, I find that spacing them about 20' (6m) apart works well for Cups. When you raise anchor, untie each float as it gets close to your bow roller.

When the wind is light, the chain will float above the coral heads. When the wind picks up, the chain will straighten out much like it would without the floats. I usually let out a bit more chain than normal, just to be safe. We've had some pretty good blows, and, knock on wood, haven't had any issues.

As we were leaving the area, we donated the floats to local fishermen who gratefully accepted them.

The Blue View - Top 10 Power Tools to have Aboard

If there is one recurring theme throughout my blog posts, it is that I have a lot of tools, spares and parts aboard. I've mentioned on more than a few occasions that Nine of Cups sits quite a bit a lower in the water because of all the added tonnage, and a lot of interior storage space is devoted to these items. Power tools are no exception, and I have quite a few. None are truly essential, I suppose. I do have handsaws, files, sanding blocks and a hand drill aboard, and, perhaps surprisingly, they are used frequently. But for most projects, power tools provide such a time and labor savings, that I think of them as almost essential.

The following is a list of my top ten power tools. It is somewhat in order, but the importance of a tool depends heavily on the project, so the order might well change frequently.

1. Electric Drill. This is, without doubt, the most used and probably most important power tool aboard. Try drilling a 3/8” hole through a stainless steel backing plate with a hand drill sometime if you are skeptical. When we first moved aboard Cups, I brought my heavy duty, 1/2” AC powered drill with me. I was not too fond of the NiCad powered tools that were available 15 years ago, but I now have a second, Lithium Ion powered drill aboard that is quite satisfactory for most day-to-day projects. While there are some projects that still require the big guy, my Ryobi 18V drill handles most of the everyday projects.

grinder2. Angle Grinder. Before we moved aboard Cups, I didn't even know what this tool was or why I would need one. It is a hand held tool with a 3-1/2” to 5” high speed rotating wheel. You can get a variety of wheels for it – grinding, cutting, sanding, polishing. It is sort of a Dremel tool on steroids. When I was replacing our fuel tanks, I used a metal cutting wheel to cut out the old tanks. When I was doing the deck repair job, it quickly cut out the deck sections with a cutting wheel, then smoothed the inner surfaces with a sanding wheel. I have polished stainless parts with a succession of fine sanding wheels followed by a polishing wheel. I have used it innumerable times when doing fiberglass repairs or for shaping hunks of metal when fabricating a part. It has a myriad of uses aboard. It also has some drawbacks. It is a very aggressive tool and can very quickly remove, cut or grind a lot more material than you intended. It has a powerful motor with a lot of torque. Unlike a Dremel tool, the motor won't stall if it binds as it is cutting through a material, but will kick back instead. Since it can be locked in the 'On' position, it can be quite dangerous if it gets out of your hands. In addition, it is very loud and generates an amazing amount of dust, sparks, dirt and/or debris. Given all its drawbacks, it is still a very important tool to have aboard.

3. Jig Saw. I have a small, inexpensive Makita jig saw with a variety of blades for cutting wood, plastic and metal. It has been with us since our first year aboard and gets a lot of use.

4. Dremel tool. My trusty Dremel is important enough to have rated its own blog post. I won't repeat it all here, but hardly a week goes by that I don't dig it out for some task.

5. Sander. I have a Makita palm sander that sees a lot of action. If it ever dies, I might consider replacing it with a random orbital sander, but until then, I am quite happy with the one I have.

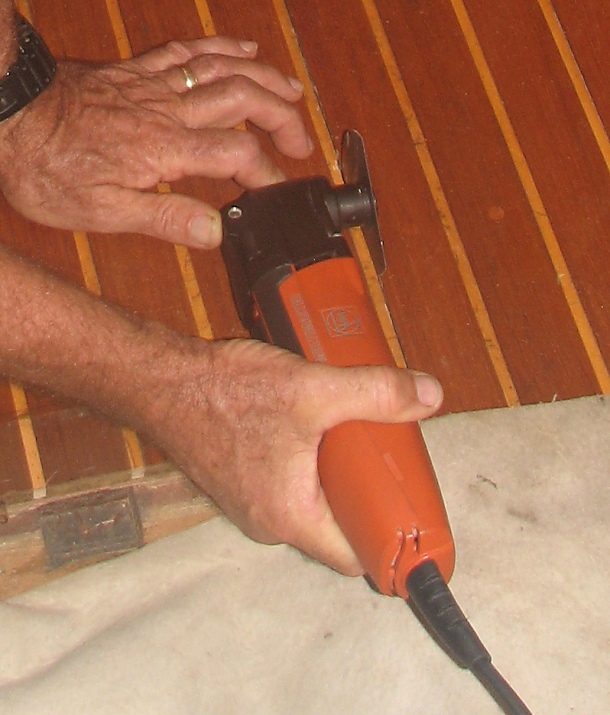
multi tool6. Multi-tool. Until a couple of years ago, the Fein company had a patent on this technology, and the cost of one of their tool was hundreds of dollars. Now that their patent has expired, most all the major tool companies have their own version of the multi-tool, and the price has dropped dramatically. It has three attachments, all of which utilize a very high speed oscillatory action. Instead of a rotating wheel, the attachment vibrates at a very high speed. It has a cutting blade for cutting metal, wood or plastic. The blade is very thin, and since it vibrates instead of rotating, it makes very fine, controlled cuts. It also has a sanding attachment that does a great job in small, hard to get to areas. The third attachment is for stripping finishes. I haven't tried this attachment yet, but if it works as well as the others, it will be used frequently aboard Cups.

7. Vacuum. We originally had a small, hand held battery powered vacuum. If you wanted to pick up a few dropped crumbs and the battery hadn't gone flat, it was almost adequate. For any serious vacuuming task, it was hopeless. We then invested in a Panasonic portable household vacuum. It has a permanent filtering system in it that does not use bags – a big plus for us. It has a hose, so I can use it when I'm sawing or sanding something to keep the dust in check before it gets everywhere. And it is powerful enough to get the dirt out of those little cracks and crannies. It does a good job on our louvered-door lockers, too

8. Gasoline Generator. We have a small, quiet, efficient 2kva gas generator that sees a lot of use when we are away from the marina, which is usually about 10 months out of every year. The solar and wind generators can keep up with our needs for the most part, but if I am doing a project that requires one of the other power tools on this list for any length of time, I fire up the generator. If it is cloudy and/or calm, the generator can power the battery charger to recharge the house batteries. Or if I am doing some lengthy underwater maintenance, I power my hookah system with it. It is stored below decks when not in use, but I always make sure to run the engine and internal fuel tank dry before bringing it below.

9. Heat Gun. Another tool I didn't know I needed. It is great when used with a paint scraper when it is time to strip the old varnish off and refinish the brightwork. If you soften the old varnish with the heat gun, the scraper quickly removes it in long strips. I also use it for shrinking heat shrink tubing, and it is much better than using a match or torch for this job.

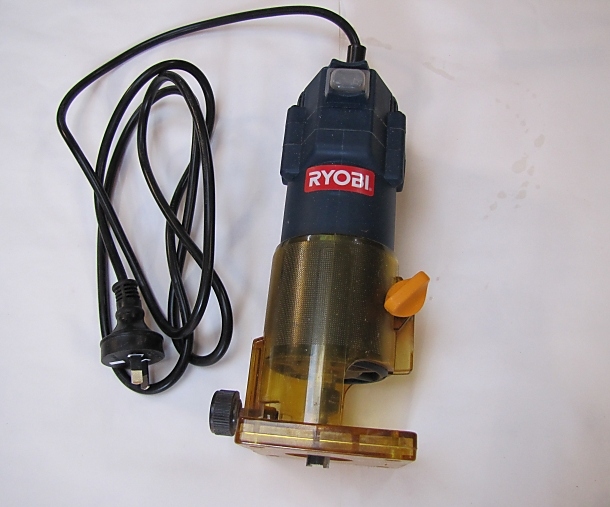
router10. Router. Last on the list is my router and laminate trimmer. I have a router attachment for my Dremel tool which is reasonable for small jobs. When I embarked on the refrigerator/freezer project, there was a lot of routing to be done which was much more than the Dremel could handle. The local Australian 'Big Box' home supply store had a discontinued Ryobi router on the discount bargain table, so I picked it up. It has been invaluable on this project, but I'm not sure, yet, how much I will use it in the future. I think its two biggest drawbacks aboard are how much sawdust it generates and how loud it is. It may end up being traded for something more useful at a future swap meet somewhere.

Honorable Mentions

There are a few more tools that didn't quite make the Top 10 list, but are worthy of a mention:

1. Air Compressor. This is the heart of my hookah system. I also use it for pressure checking plumbing and the refrigeration system, blowing out clogged orifices and jets, and several other tasks.

2. Circular Saw. I no longer have a circular saw aboard. The one I had died a few years ago and I didn't replace it. While it did see a fair amount of use, there aren't that many jobs that can't be done reasonably well with either a hand saw or the jig saw. If I were to replace it, I'd go with the Ryobi battery-powered version.

3. Vacuum Pump. We have a small vacuum pump aboard that is used when we or another cruiser have a problem with a refrigerator/freezer. (Seems like a frequent theme in my blogs, doesn't it?). If you have a component failure or a leak, the system must be pumped down to a vacuum before recharging with refrigerant. Ideally, you would refill it with nitrogen gas and pump it down a second time to help purge the system of any residual air or moisture in the system, but this isn't practical for most of us. The vacuum pump can also be used when vacuum bagging an epoxy or fiberglass repair when it is desirable to apply an even pressure over a large area.

So that's my list aboard Nine of Cups. What tools do you consider essential aboard your boat?

The Blue View - Restoring a Rush Rocker

bea rocks  

There used to be a Canadian television series called Red Green. Red was a backwoods handyman, inventor, and philosopher whose solutions to problems invariably backfired and were always hilarious. One of his favorite sayings was, “If the women don't find you handsome, at least let them find you handy”. At my age, that's probably about all I can hope for.


rocker before pic


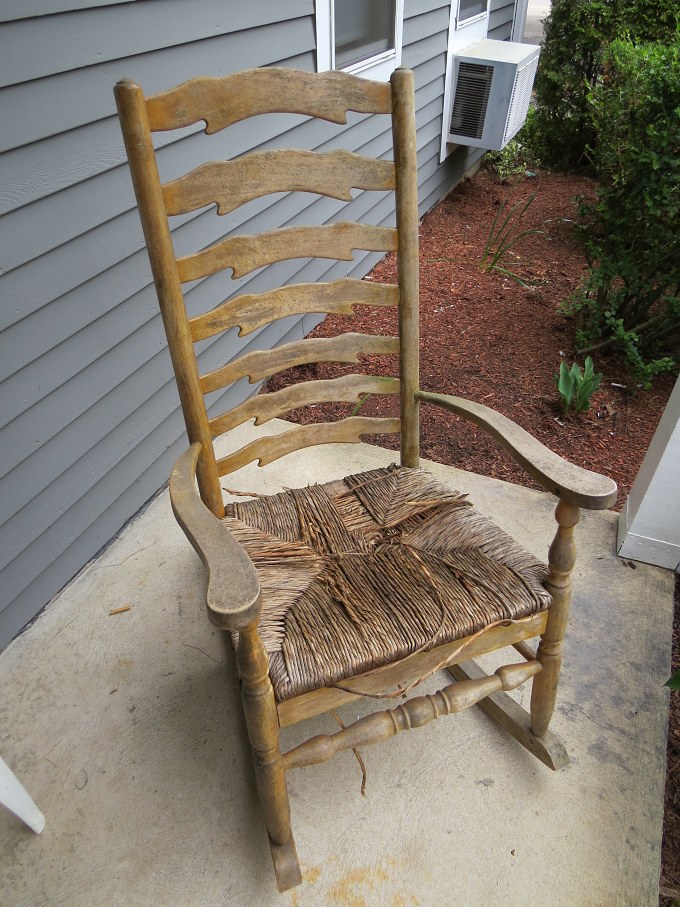
It is unbelievably easy these days to pick up the knowledge necessary for just about any 'How-To' project. No matter how obscure the subject, there always seems to be half a dozen You Tube videos just a click away. A case in point was repairing Marcie's mom's rocking chair. As Marcie mentioned in her recent blog, the rush seat of Bea's chair had deteriorated so much over the past five winters that it was no longer useable. The varnished finish was pretty much gone as well, and it seemed like it might be a good project to keep me occupied during our extended stay here with Bea.

As is often the case when I start researching some subject on the internet, it is hard to stay focused and easy to get offtrack. It took me a good couple of hours to learn the difference between cane seats and rush seats, for example, as I got sidetracked onto a thread about the history of rush weaving (which, by the way, was historically made of seaweed), then to how seaweed was harvested, then to kelp harvesting on King Island where we were not too long ago, then to … well, you get the idea.


removing old rush


Modern rush material is made of paper, although it is still possible to get authentic seaweed rush. It is a very heavy paper rolled into a continuous, somewhat stiff cord. It comes in several diameters, and you can buy a large roll of it or smaller one pound rolls. I measured the seat and the diameter of the old rush material, and using the formulas provided by the supplier, it was simple to determine that I would need to buy two rolls of 5/16” rush cord. In addition, there were a couple of inexpensive tools needed – some wedges and pegs. The former make it easier to keep the weave tight and the latter help to weave the last few turns of the cord.


frame and new rush


The heart of the seat of a rush chair is a simple wooden frame. The rush cord is soaked in water for a few seconds to make it pliable, then woven around the outside of the frame. The weaving process is simple and straightforward, with a pattern that is repeated until you run out of frame to weave. Since it is quite unwieldy to work with a roll that is a few hundred feet long, you work with 30 foot sections. The end of one section is tied with a reef or square knot (knot # 1204 in Ashley's Book of Knots) to the next section, and you strategically locate the knot, so that it is hidden under the weave on the bottom of the seat. When you have completed the weaving, the loose end is tied off and neatly hidden once again, and the job is done. There are a few “gotcha's” and techniques to be aware of, but these were all explained quite well in the three or four You Tubes I watched. Refinishing the chair was simple enough. I sanded the remains of the old finish off, applied a coat of maple stain, and then three coats of a polyurethane satin finish.

It took probably four or five hours to research the project, an hour to order the supplies, and half a day to weave the seat. The refinishing required a couple hours of sanding, and an hour a day for four days to apply the stain and polyurethane. Add a couple of hours to round up the refinishing supplies, and the total was around 18 man-hours.


rush before and after


The end results were pretty good in my estimation. The professional chair “re-caners” needn't worry about a new competitor, however. The cost of the supplies ($24 plus shipping for the rush supplies plus about $20 for the refinishing supplies) was more than Bea paid for the chair to begin with ($20 at the Salvation Army Thrift Store), and if you added in my time at even minimum wage, the cost of redoing the chair would probably be more than a new one would have cost. But it was a satisfying diversion, a new skill learned, and I'm thinking the women living at Bea's apartment may have even found me handy. Red Green would be proud.

Check out this YouTube link for a good “rush”.