#TBT - Crisscrossing the Dateline

Since we're not aboard Nine of Cups sailing at the moment (be patient, we'll be back aboard soon), reminiscing by reading and sharing some old blogs is a good way to refresh our memories about life aboard during passages. Storms are a popular topic of discussion among old salts and newbie sailors alike. These posts recount a couple of miserable days on our 2011 passage from the Chatham Islands back to New Zealand's North Island. chatham passage route

En route to Mainland New Zealand

 Day 6 -Across the dateline

Around 10 AM today, we finally crossed 180 degrees and are now in the Eastern Hemisphere again, west of the dateline. The winds have been obstinate and we're clawing our way back to the New Zealand mainland and fighting for every inch of westerly gain. The ride is uncomfortable with big waves and it's squally making sitting in the cockpit unpleasant.

We were hoping to clear East Cape by this evening, but the wind increased and our tack, though gaining us westerly progress, diminished our northerly progress. Thus, we are too far south to clear the cape as we had hoped and with gale warnings in force and the wind and waves increasing each hour, we finally could make no progress at all and opted to heave-to for the evening until the worst of the winds and waves had passed.

Usually heaving-to allows a pretty comfortable ride, but tonight we are heeled over and being tossed about. Though Cups seems to be weathering the storm well enough, the crew is not.

Day 7 - Blown back across the dateline again

zig zag route

Yesterday's miserable winds and weather deteriorated significantly overnight and though we were hove-to, life aboard was most unpleasant. Winds increased to 40+ knots with commensurate wave height and wave action. The wind shrieked and Cups shook and shuddered. The noise was deafening as huge waves crashed with a sudden bang and washed over her. Heavy rain punctuated with hail bombarded the decks.

Prisoners below, there was little we could do, but wait it out. "Grinning" was out of the question; "bearing it" was the only option. At one point I complained to David "Get me off this ride!" to which he replied with grin "I'll work on it". Trying to sleep was useless. We napped a bit, but we were always shaken awake by the sudden jolts and jars of the boat … an amusement ride gone amok. We were lame and sore, back and limbs aching from being scrunched up and wedged in the same position for so long on this heel.

sometimes no wind

The morning sun rose displaying a mackerel-clouded blue sky … a change in the weather on its way. Our position at dawn had us back east of the dateline. We had been blown back 25 miles east during the night. The wind had abated to westerly 30s, allowing some northerly progress, but against the built-up NW waves. We crawled along awaiting the promised SW winds in the next day or two. The sea is a washing machine, but on a slightly more gentle cycle.

Just after dark, we heard a loud snap and the main started luffing. We are triple-reefed and the reefing line broke. It's a brand new line, so it must have chafed through. With much difficulty, David was able to use the port side reefing line to secure the reef again and then reinforced it with another line. Getting this accomplished with the wind blowing 30+ knots, the boat thrashing on a heel and the waves crashing on and around him was a monumental task.

By the end of the day as I write, we have only recaptured the 25 miles we lost overnight plus two positive miles...a total of 27 miles to the good in a whole day … 25 of which we'd already sailed. We are still just off East Cape and on the east side of the dateline. The promised SW winds are coming, but the forecast is now calling for gale and/or storm conditions with winds up to SW 50 knots. Oh, my! THIS is the part of cruising that sucks!

In summary ...

The passage back to New Zealand was one of our biggest challenges. We had no wind (0-5 knots), too much wind (50+ knots), rarely the right amount of wind (15-20...lovely) and mostly "on the nose" wind (NW). We anticipated 4-5 days to get back and it took us forever moving at a sea slug's pace, usually in the wrong direction.

We suffered our first-ever knockdown in a storm just off East Cape which blew out our mainsail, tore the bimini to shreds, knocked out a deck stanchion and generally took our breaths away. Additionally, we had watermaker and transmission problems which thankfully, David was able to fix en route. We hove-to for another night and, sick and exhausted, we lay ahull for another after the mainsail blew. The projected 750 mile passage took 12 days and was actually 1,140 nm by the time we reached Opua.

Just saying … it's not always paradise out there.
The Blue View - Series Drogue DIY Pt. 2

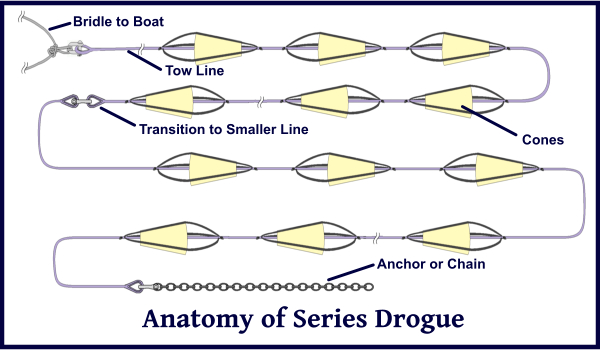
Drogue2 Making a Drogue

In the last Blue View, I talked about why we liked the idea of a series drogue and why we think it is as good as any other method for handling major storm conditions. I also discussed why we felt it is far superior to any alternative tactic we know of when the waves are breaking. In this blog, I'll talk about how to make your own series drogue. The design and construction details of a series drogue were published as part of a publicly funded study completed by the U.S. Coast Guard and Don Jordan, and are freely available to the public. I used this as my guide when we made ours along with lots of practical advice from our friends at Sailrite.

The illustration gives an overview of the construction. The cones are the same size for any boat – larger boats simply add more line length and increase the number of cones. As the number of cones increases, the initial line size must also increase to handle the added load.

construction of a drogue

The bridle performs two functions. It splits the load, distributing it between two strong points on the transom, and it provides a turning moment to keep the boat stern-to to the waves. Each leg of the bridle should be 2.5 times the transom width, plus an allowance for the splice and for attachment to the boat.

The following table provides a quick summary of line sizes and the number of cones needed for different size boats. Use the gross tonnage for your vessel and then add 10%. The total load on the boat is shown in the second column. The third column in the table shows the load on the attachment points on each side of the transom. The line lengths shown in the fourth column is the length for the towing line. These lengths also include 5 feet at each end for splicing. A double braid line should be used rather than a three strand, which has a tendency to unlay as it is towed. The line sizes specified in the table are based on average strengths for double braid nylon line from several manufacturers. Check the breaking strength of the line you purchase.

Monohull

Displacement

(lbs)

Load

(lbs)

Load at

Attachment

Points (lbs)

Line Length

Required

(ft)

Line Size

(inches)

No. of

Cones

Weight at end of line

(lbs)

10,000

8000

5600

250

5/8”

100

15

15,000

12000

8400

260

3/4”

110

15

20,000

14000

9800

150/150

3/4”,5/8”

120

15

25,000

17000

11900

155/155

1”,5/8”

130

25

30,000

20000

14000

165/165

1”,5/8”

140

25

35,000

23000

16100

170/170

1”,5/8”

150

25

40,000

25000

17500

125/125/125

1”,3/4”,5/8”

160

30

45,000

28000

19600

130/130/130

1-1/8,3/4”,5/8”

170

40

50,000

30000

21000

135/135/135

1-1/8,3/4”,5/8”

180

50

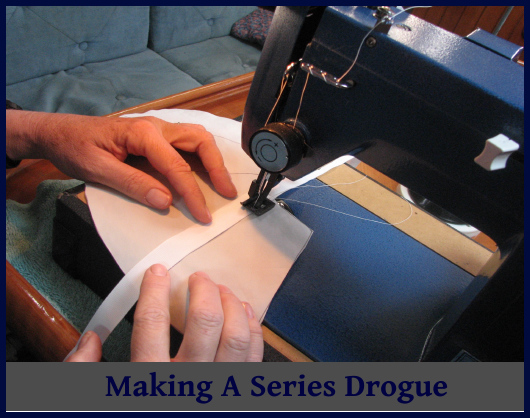
For example, Nine of Cups has a gross tonnage of 18 tons, so we used 40,000 lbs as our displacement when designing the drogue. We needed to make and attach 160 cones to three lines, each 125 feet long. This seemed daunting at first, but it proceeded quickly once we got into the project. We set goals for ourselves to complete a given milestone each evening, e.g. draw and cut out 25 cones or cut 100 strips of nylon tape.

A 1-1/2 ounce ripstop nylon material was recommended for the cones. We used an old mainsail, which was much heavier than necessary. The emphasis is on the word ‘old’ in the last sentence. This sail had been retired for about four years and stowed on the forward bunk. Before we spent a lot of man-hours making all those cones, we wanted to be sure the sailcloth had not deteriorated and lost too much of its strength. To test the material, we made up a dozen cones, attached them to a line and, during one passage, dragged them for 24 hours. Our speed varied between 4 and 6 knots. The cones held up fine, but we did learn a few things about the construction and stitching.

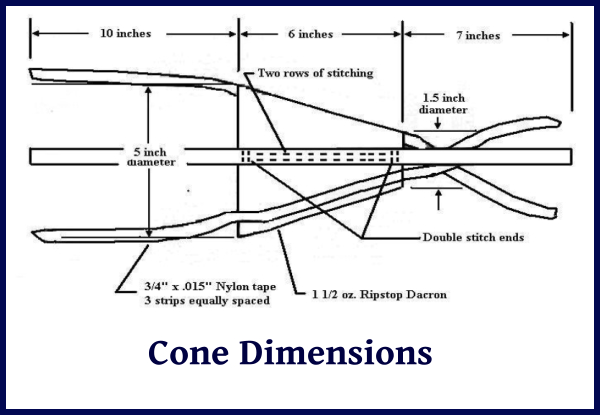
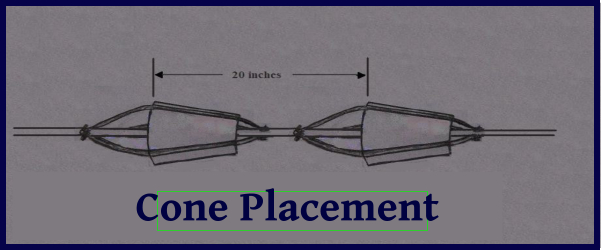
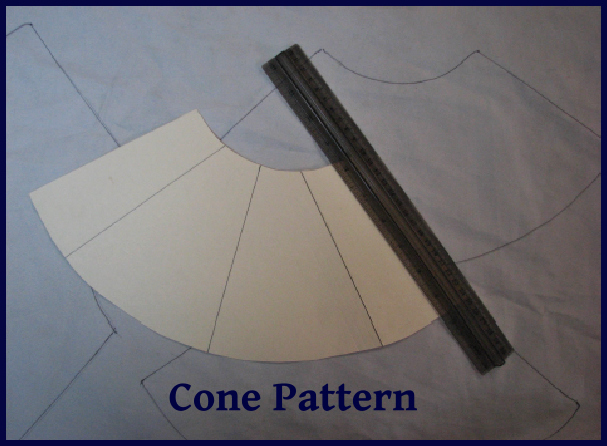
The illustrations below show the recommended size and placement of the cones. We made a pattern out of cardboard to mark the outline of each cone for cutting. We also used the pattern to mark each cone to aid in aligning the nylon tape for sewing. We first tried cutting each cone using a hot knife, but found this to be too slow. We switched to a pair of electric scissors and then used a butane lighter to seal the edges.

cone dimensions

cone placement

cone pattern

The next step was to cut and mark each length of nylon tape. We placed pieces of masking tape on a flat surface to serve as a template for measuring, cutting and marking each strip of nylon. These strips were then sewn to the cones. One thing we discovered with our test run was that it was important to double stitch the tape at each end.

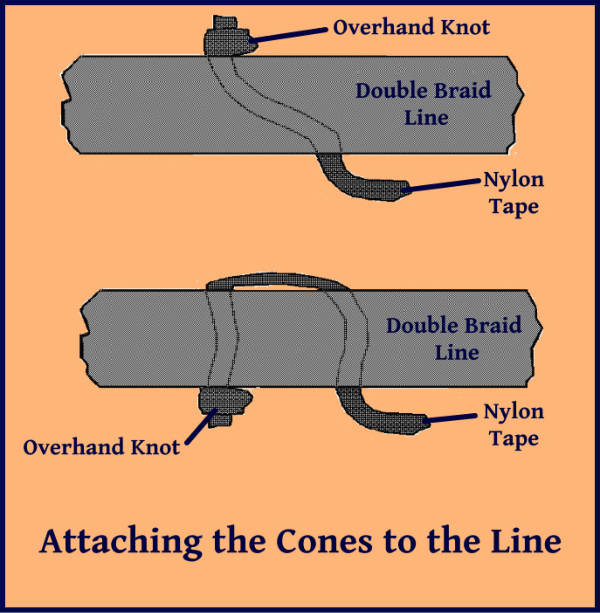
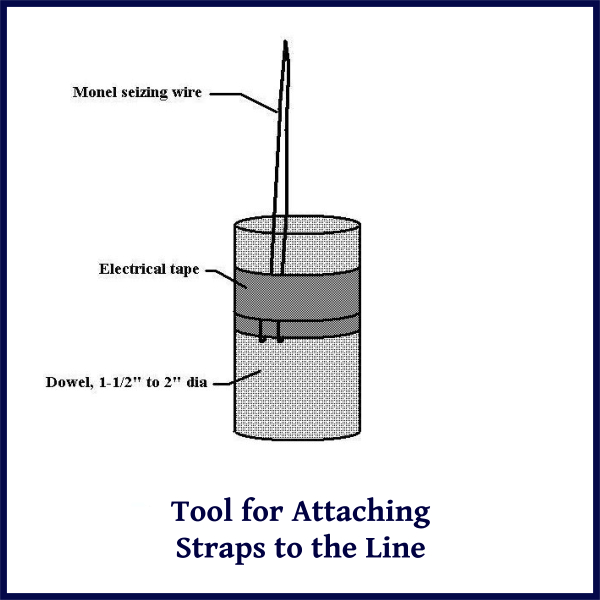
Each piece of cone material was then folded in half and double stitched together. The last step was to turn each cone right side out so that the seam was on the inside. It probably doesn’t matter, but we sewed each cone so that the tape was on the outside of the finished cone. We next began attaching each cone to the line. The first step was to mark the line at 20 inch intervals, leaving 5 feet or so at each end for splicing. Each cone was threaded onto the line, then the end of each strip of tape from the cone (six per cone) was pulled through the line and tied with an overhand knot using either the single or double pass method. We already had a splicing wand that worked well for this process, but you can make a tool using seizing wire bent into a loop and taped to a wooden handle.

attaching cones

tool

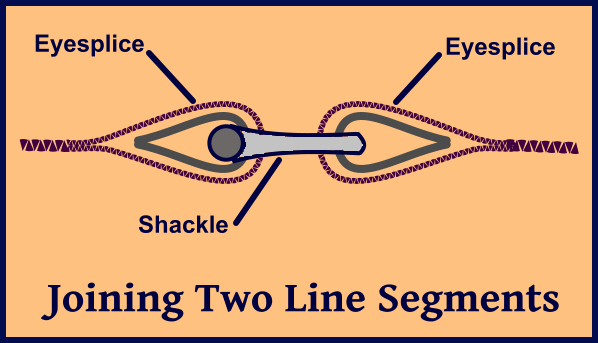
The next issue was the attachment of the line segments, towing line, bridle and anchor. A proper splice is stronger than any knot. The line we bought, however, was manufactured in South America and we found it was almost impossible to splice eyes into it, unlike the line we were used to that was made in the U.S. Instead of splicing eyes into each end, we resorted to using knots to attach the line segments together. Ideally, we would have spliced heavy metal thimbles in the ends of the lines and attached them together with heavy duty shackles. For the weight at the end of the line, we used a 20 foot length of 3/8” chain. We attached it with a shackle to a standing bowline at the end of the line.

eyesplice and thimble

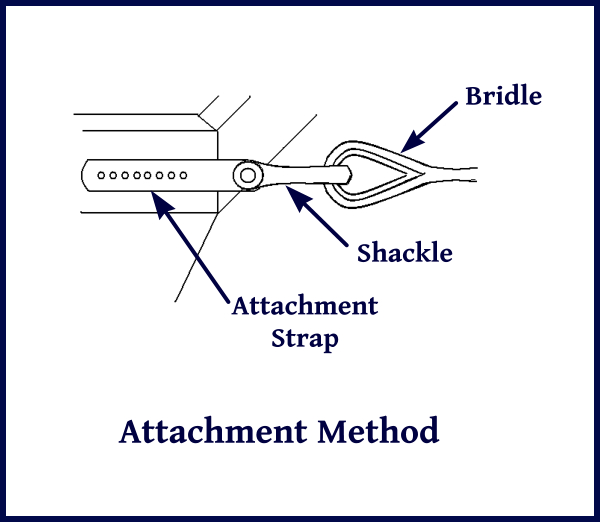
An important aspect of the overall system is the attachment points on the boat. These must, of course, be strong enough to withstand the load. The bridle splits the total load between the two corners of the transom, making the load at each attachment point no more than 70% of the total load. Most cleats and sheet winches, however, are not designed to withstand stresses of this magnitude. The ideal alternative is to make attachment points similar to chain plates by bolting stainless straps to each corner of the transom. These should be through bolted and utilize backing plates. Use heavy shackles to attach each tow line.

cone attachment

The following table lists conservative size straps and shackles for several boat sizes. If cleats are used, make sure they are rated for the load and are bolted through the deck with substantial backing plates.

Load at attachment

point (lbs)

Strap Size (Inches)

Bolts

Shackle Size

10,000

¼ x 2.25 x 14-3/8 inch

4 each

½ Inch

14,000

¼ x 2.25 x 18-3/8 inch

6 each

5/8 Inch

18,000

3/8 x 2.25 x 22-3/8 inch

8 each

¾ Inch

22,000

3/8 x 2.5 x 26-3/8 inch

10 each

¾ Inch

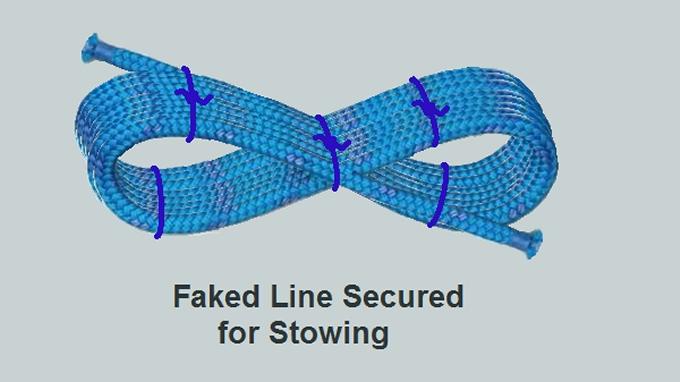
Chafe may be an issue as well. We actually used dyneema for the bridle which is more chafe resistant than nylon, and enabled us to use a smaller diameter line. The last issue is the stowage of the drogue. The total weight of our drogue system was too much to handle, so we separated the line segments and only connected them together when we needed to deploy it. We stow each segment the way we stow our spare rope anchor rode using figure-eight flakes.

faked line secured for stowing

Now that the drogue is all designed and built, how do we deploy it? How do we get it back aboard again? I'll cover that in the last installment of this 3-part series next week.

Nevada Caucusing - What's That?

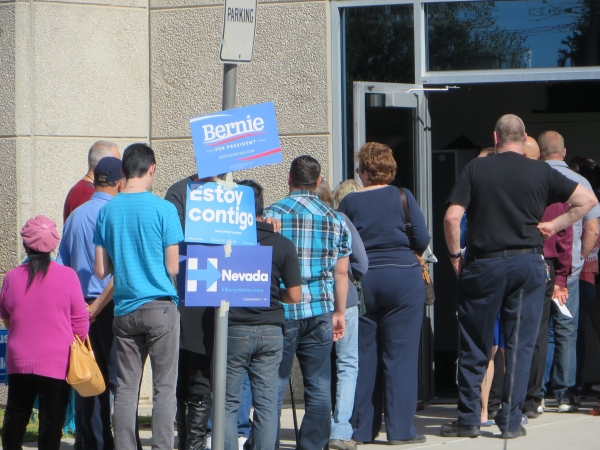
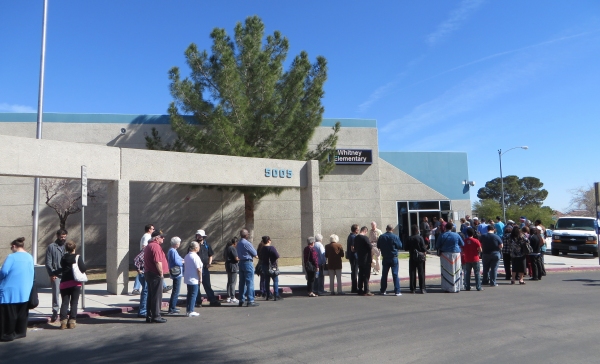
What's a caucus? And why do we care? The word “caucus” derives from the Algonquin “cau-cau-as'u” which roughly translates to “adviser” in American English, a term used in American politics as early as the mid-18th century. In the USA, in order to determine who will be the candidate for President for each major political party, there are either primary elections or caucuses or a combination of both held in each state. Of the 50 states, only 12 states, plus 2 territories and the District of Columbia use caucusing We've voted in primaries before, but never participated in a caucus. Last Saturday, the Democratic caucus was held in Nevada and our precinct caucus was being held at the Whitney Elementary School, walking distance from home. We feel it's inappropriate to discuss political issues in our blog, but thought it might be interesting to share the caucusing process. It was definitely a new experience for us. political signs

We sauntered over around 10:45. A constant stream of cars was heading into the school parking lot. As we approached, we noted that the queue for registration was very long and very slow. People were sweltering and squinting in the Nevada late morning sun. We had used an on-line caucus registration process which was supposed to streamline check-in.

long line

Truly, this was one of the most disorganized events we'd ever seen. There were a myriad of volunteers, but none seemed to know what was going on and we received conflicting directions from nearly everyone we talked to. We finally edged our way into the school building at one fellow's suggestion and advanced further forward in the line. We saw an unmanned, open laptop with a hand-lettered sign marked “Express Check-in”. Hmm … just a thought … “Is anyone using that computer at the moment?”, I asked. “No” was the resounding response from all the folks milling around waiting to register. With our trusty iPhone in hand, we retrieved the individual texts we'd received earlier with our own unique pre-registration code. We entered them into the express computer while wearing our magic decoder rings and performing the secret handshake and in a couple of seconds a wonderful thing happened … shazam … we were checked in.

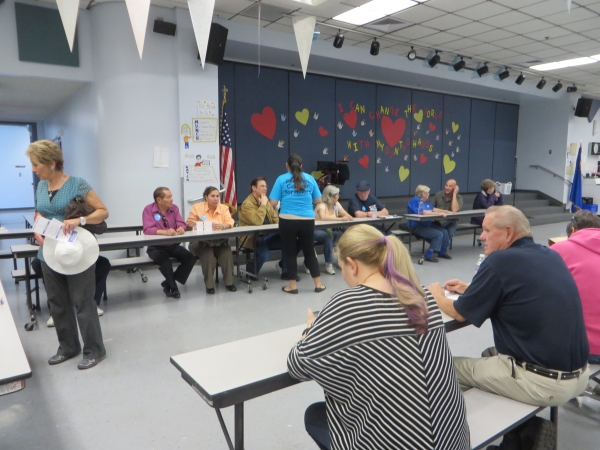
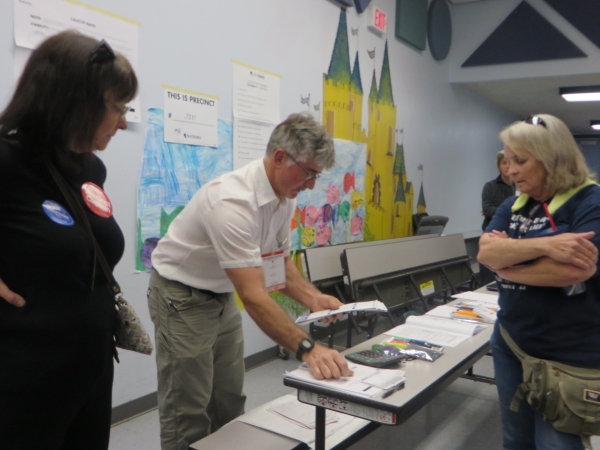
Next, we needed to find the caucus room for our precinct. Several folks pointed us in the direction of the precinct rooms. We wandered purposefully, following big black arrow signs through a labyrinth of hallways to the various rooms, but none showed our precinct number and we ended up back where we started from … which was lucky because they'd changed the meeting place for our precinct caucus to the registration hall we'd originally registered in. We attempted to sit down. “Are you for Bernie?”, a fellow asked. “We're uncommitted at the moment”, David replied. “Can we still sit here?” No one seemed to know. We scrunched ourselves into low cafeteria tables with attached bench seats. This is an elementary school and everything seemed mini.

precinct caucus

Around 12:35, the doors were closed, the registration lines ended and the precinct chief got to work … kind of. The fellow leading the group had misplaced some letters he was supposed to read and finally, after consulting the rules and regs one more time, called the caucus to order. We thought it might work according to parliamentary procedure/Robert's Rules of Order or something of the like, but no, chaos continued. He shouted over the boisterous group, but his little voice didn't carry. One strong-voiced woman (not me) finally got the group's attention and we strained to listen to the chief's instructions.

counting

He took a count of the total number in the group … three times with three different results. He asked for some help. There were 46 folks in the precinct group. Next, he passed around an envelope for contributions. “The suggested contribution is $16”, he advised. What is this … church? $16 for what? I thought this caucusing thing was free. “It's for the Democratic party”, he said, “because everyone who works here is a volunteer.” We didn't get it. If everyone is a volunteer and we assume the use of the school building was free and the only things we received were Bernie buttons, Hillary stickers and two #2 yellow pencils, what exactly were we contributing to?

The chief instructed us to “align”. Bernie supporters on one side. Hillary supporters on the other. Those uncommitted (there were 6 of us) were instructed to stand up in the middle of the two groups. Well, that seemed a vulnerable place to be … and it was. We had read about the process, and we thought this would be an opportunity to rationally discuss each candidate's positions with informed supporters. Instead, within seconds, we were surrounded by Bernie and Hillary zealots, screeching at each other, making few valid or viable arguments for their candidates, but rather out-screaming their opponents. Sort of persuasion by intimidation and volume. There was no relief and certainly no order. The chief said “8 more minutes remain”. Oh, my … “What if we prefer to remain uncommitted?”, we asked the chief. “Then you just leave”, he responded.

alignment voting

Well, we committed to the least objectionable candidate just so we could observe the rest of the process. One old, grizzled fellow missing his front teeth congratulated us on our decision to join “his” team. We weren't sure that was a good thing.

What followed was more bedlam as we turned in our caucus cards and they were counted. The chief made a big show of writing the results and doing the “caucus math” calculations with a huge black magic marker on a large tally sheet hung on the wall. He made a mistake … putting results for Sanders in Clinton's column. A mighty ruckus ensued. Chagrined, he crossed out the wrong numbers and corrected the error. Sanders won … 26 to 24. The chief then set about determining how many of the 10 total delegates each candidate was allowed. Sanders-6 and Clinton-4. The selection of delegates was very methodical. “Who wants to be a delegate?” he asked the group. People raised their hands. He counted 4 on the Clinton side and 6 on the Sanders side (making only one mistake) and then gave the newly appointed delegates their paperwork. These folks will continue on to the county level sometime in April.

That's it. That was a caucus in Nevada … kind of like herding yowling cats and then asking them to vote. The overall state result was a win for Clinton … 53% to Sanders 47%. By all accounts, attending the Republican caucus was even more lively.