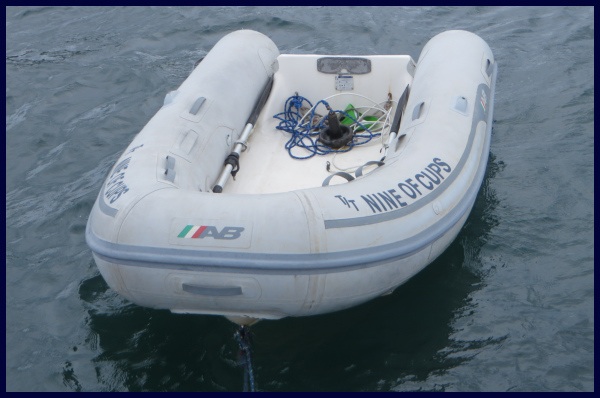
 Our venerable dinghy is well into her ninth year aboard Nine of Cups. She's seen a lot of nice soft sand beaches, but she's also seen her share of barnacle encrusted, concrete jetties, rocky shores and coral reefs. On several occasions, she's gotten roughed up by an amorous fisherman's panga as well. Maybe it's her full-bodied figure or her soft sides that attract these rough characters, or maybe she just likes 'bad boys', but they always seem drawn to her and vice versa. Nine years of the sun's UV rays have also taken their toll. She's made of hypalon material, which is more resistant to UV damage than PVC, but not impervious to the sun's effects.
Nine years of living aboard Cups probably makes her about 80 years old in dinghy years. With a little luck, she has a few more years left in her, but no one is going to mistake her for a young, perky gal. Her color is faded, she's had some transom gel coat repairs and her bottom has been repaired and repainted a few times. She also has a dozen or so patches now – some to keep the air in the pontoons and some to keep the water outside the dinghy.

Hypalon material is more difficult to patch than PVC material. Since both our current dinghy and her predecessor were made of hypalon, I've probably applied 20-25 patches by now, most of which are still stuck. I think I may be starting to get the hang of it.
We used to buy those patch kits sold by the chandleries. They came with a small amount of two part adhesive and several small patches, and were outrageously expensive. Even worse, we found that these had a shelf life of only 6-12 months. More than once we bought one of these kits, only to discover that the adhesive and/or accelerator had dried up or evaporated in its unopened container when we needed it. Plus, on the occasions we got a really big tear, the patches weren't large enough to cover the hole.
Then I found several online suppliers that provide gear for river rafting companies, many of whom use hypalon boats. I could buy the hypalon patch material by the foot, and they had some great two part adhesives. Even better, both the material and the adhesive were much more reasonably priced. I found that the adhesive goop itself had a good shelf life – years instead of months, and the accelerator was just MEKP, a chemical available at most boatyards and chandleries. It only lasts a year or so, but it's easy to find and inexpensive to replace.
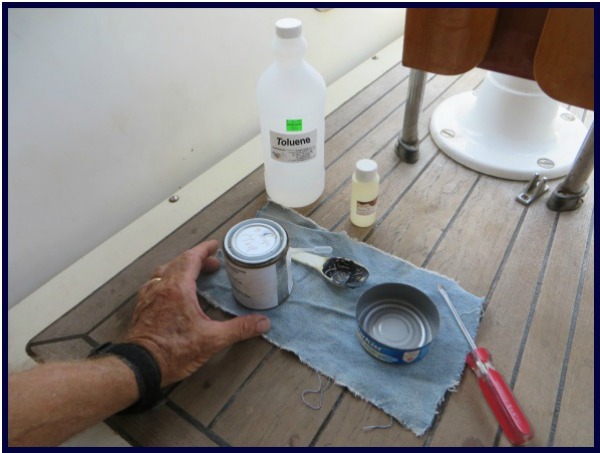
On to the patching process … I cut the patch so that it will extend at least an inch beyond the chafed area or hole. I'll be seeing this patch for a long time, so I want it to look nice – or as nice as a dinghy patch can look. I use a pen and straightedge to mark the sides of the patch. The corners should be rounded, so I use a bottle cap or something similar as a template to make the radii uniform, then carefully cut it out. I position the patch and mark the outline on the dinghy.
I use toluene to clean the area to be patched, then lightly sand the area with 220 grit sandpaper. The objective is to scuff the surface – not sand through it. If the area to be patched is more than just a pinhole leak, I deflate the pontoon. (If it's a cut I'm repairing, the pontoon will already be deflated). If the hole is really large, I stitch it together first with whipping thread and needle.
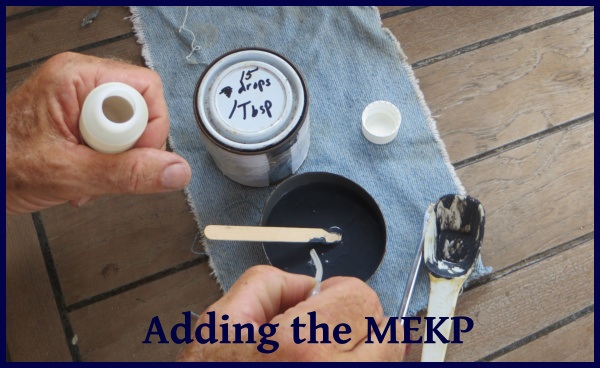
The glue is a two-part adhesive, and the mixing ratio of the two parts varies with the brand. The particular adhesive I'm currently using requires adding enough MEKP to equal 4% of the adhesive. If my math is correct, this equates to 15 drops of MEKP per tablespoon of adhesive, and this ratio seems to work. I measure and decant the amount of adhesive I'll need (I save old tuna cans for this purpose), then use an eyedropper to add the appropriate amount of MEKP. I use a small craft stick to thoroughly mix it. The pot life of the adhesive after it is mixed is short – it starts getting thick after 10-15 minutes, so there isn't time to dawdle before applying it.
One or two thin coats are applied with a brush and allowed to dry completely, then a final coat is applied and allowed to dry until it is barely tacky. If I rush it and don't wait long enough, which is my tendency, the patch will not stick well or take forever to cure. Depending on the adhesive and the ambient temperature, it might take 2-4 hours to dry completely and another ¾ to 1-1/2 hours to get to the 'barely tacky' stage. A fresh batch of adhesive, a clean can and a new brush will be needed for each coat.
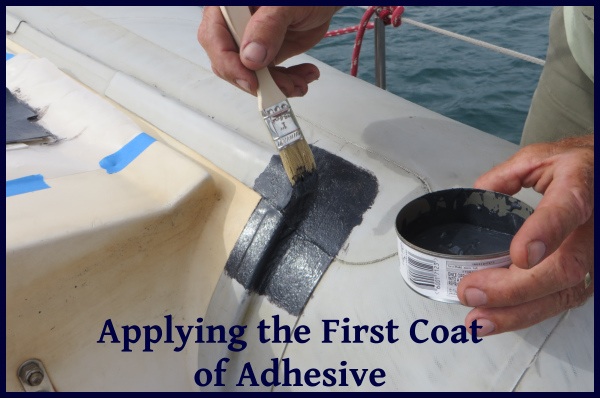
The adhesive is black, and will be quite apparent if it is smeared outside the patch. On the other hand the patch will not adhere anywhere there is not a good coverage of adhesive, so when I'm painting it on, I try hard to get the adhesive right up to and not beyond the outline of the patch.
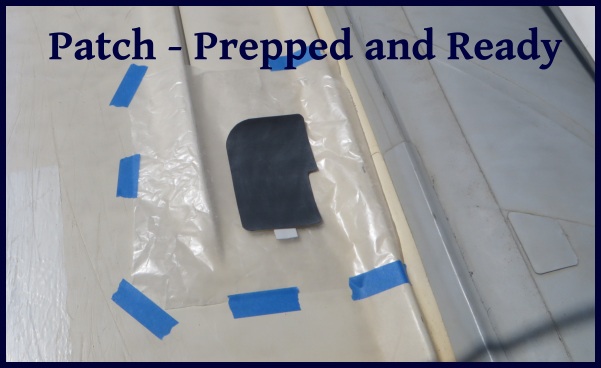
The back of the patch must also be painted with adhesive. I tape some waxed paper to the dinghy near the area to be patched and set the patch on it - I want the adhesive on the patch to dry at the same rate as the adhesive on the dinghy. If it's windy out, I use some double-sided tape on the under side of the patch to keep it from blowing away.
Once the adhesive has been applied and cured the correct length of time, I carefully position the patch and stick it on. This is contact adhesive, which means that the patch cannot be re-positioned once the two surfaces come into contact with each other, so this step takes some care. I use my fingers to press it down thoroughly, and follow up by using an epoxy roller to work out any bubbles and ensure the patch is bonded.
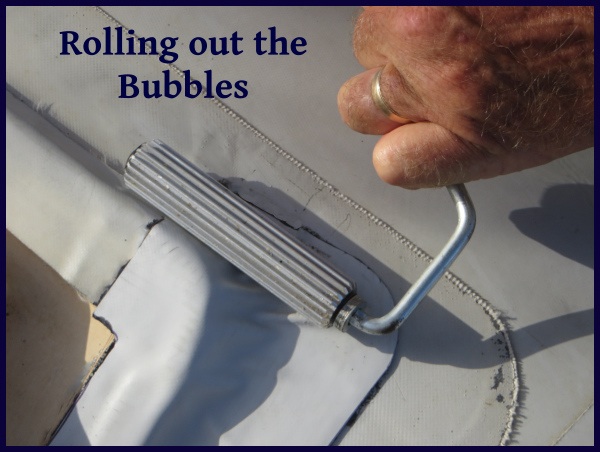
I use a rag dampened with a small amount of toluene to clean up any unwanted glue, then use alcohol sparingly to remove the pen marks. The patched area should be allowed to cure at least 24 hours before re-inflating or returning the dinghy to the water.
Since we will be without a dinghy for a couple of days, it takes a little planning if we aren't in a marina. I've patched the dinghy on passages, but only when conditions were benign enough to ensure that the glue wasn't contaminated by sea spray as it was drying.
While in Puerto Rico, I added a patch that will hopefully stop the ingress of seawater. We like a dry dinghy, especially when we're transporting groceries or our backpacks, and while it's easy to find an air leak using soapy water in a spray bottle, finding the source of a water leak is usually more difficult.
As I see her at the dinghy dock nestled among all those younger, newer, prettier inflatables, I wonder whether she is embarrassed by her age and multitude of scars and patches, or whether she is regaling those youngsters with of the tales of her adventures and her sea stories. I hope it's the latter. Since they are all tethered to the dock next to her, they are certainly a captive audience - unlike mine.