11 Best Improvements to Nine of Cups

When we bought Nine of Cups in February 2000, we bought her because (1) she was a blue water boat and (2) it was love at first sight, but she'd really only done coastal sailing, so she wasn't equipped for ocean passages. As our experience and confidence grew, we added improvements that would make Cups and us safer, more self-reliant and more energy efficient. Here's our list of the 11 best improvements we've added to Cups over the years. Wind generators

It didn't take us long to realize that taking advantage of the wind to generate energy was as important as filling the sails. We initially bought two Four Winds wind generators and David built stainless steel “goal posts” on the stern to mount them. The salesman sold us some extra gear, like a brake, that we used once or twice and then ignored. After 15 years, we're down to one wind generator. Four Winds has gone out of business and we have cannibalized the second wind gen to keep one functioning and producing. Newer wind gens are certainly more efficient and when our current one finally bites the dust, we'll most probably replace it.

Solar Panels

At the same time we purchased our wind generators, we also purchased and mounted three 80 w solar panels. Though not as efficient as newer models, these solar panels continually produce significant energy. It's nice to watch a movie or use our computers without worrying about starting the engine.

Watermaker

In the USA, obtaining potable, drinkable water at any fuel stop or marina along the coast is easy. In many countries, however, water is either expensive or not drinkable. We've both suffered from some type of “Montezuma's Revenge” over the years and don't relish the thought. Additionally, carrying enough fresh water aboard for an ocean passage takes some planning and significant water tank storage. We purchased our Pur watermaker more than a decade ago, but it's still pumping good water and filling our tanks. Though Pur is now owned by Katadyn, parts are still available. Good investment.

HF Radio/SailMail

Sat phones, as we know them today, were not economically feasible when we first started out. Instead, we purchased an HF radio/SSB and subscribed first to WinLink and later on to SailMail. Having the ability to send and receive weather transmissions and emails while at sea was and is a wonderful way to stay in touch … especially on those long, long trans-ocean passages. With the new sat phone systems available, like the GO, I think we'd consider going that route versus the HF radio, but since we already have the SSB aboard, we'll stick with it.
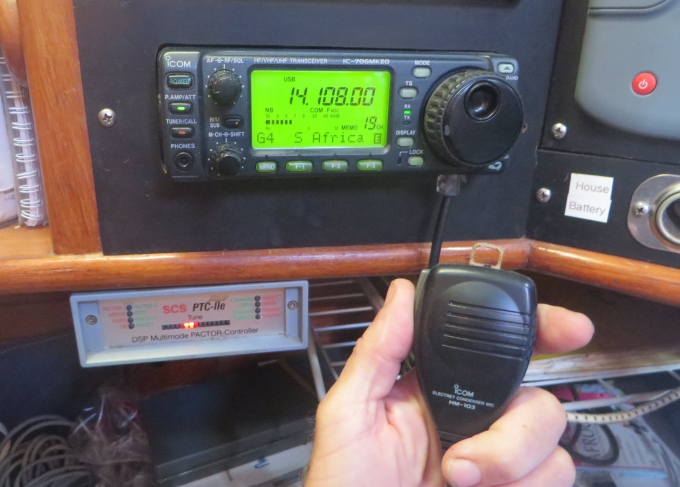
ssb hf radio

Chartplotter

In 2007, we moved our friend's boat from Ushuaia, Argentina to a marina in Uruguay. We were accustomed to plotting our course manually on paper charts which takes up considerable time and space. Noel had a chartplotter aboard and we found it to be absolutely wonderful. When we returned to Cups, we purchased a Raymarine chartplotter and still use it. It's installed at the nav station down below, however, which made it convenient for plotting a course, but very inconvenient to see where we actually were and where we were heading. Since we were traveling around the world, we also found the cost of the Navionics regional marine chart cards at $300-350 each were quite expensive. We purchased an iPad a couple of years ago and then appropriate Navionics chart apps. We now have a portable repeater in the cockpit and the cost of the charts is 20% of the CF cards for the chartplotter. We've also purchased an extra iPad … just in case. Plotting and navigating was never so easy.
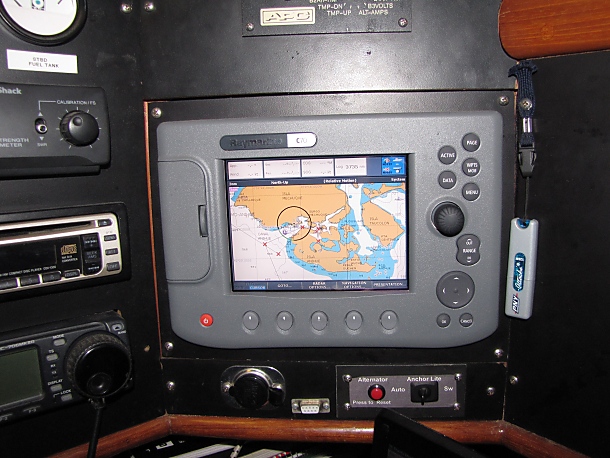
chartplotter

AIS (Automatic Identification System)

The Automatic Identification System (AIS) is an automatic tracking system used on ships for identifying and locating vessels. We use it primarily to see what ships are nearby and to contact them to make sure they see us and avoid running us over. The AIS has saved our bacon many times and also made us more aware of just how much ship traffic is really out there. We have a passive system incorporated into our VHF radio, i.e. we can see the ships, but Nine of Cups sends no identifying signal to them. An active system is on the wish list whereby nearby ships would see us as well.

ais

Cockpit VHF Repeater

We always had a VHF radio aboard for contacting other boats, authorities and marinas, but it was always below at the nav station and we many times missed hails and found it inconvenient to hail others. We used a handheld VHF, but it has a limited range. A few years ago, we bought a Raymarine repeater for the cockpit. It is convenient to use and we can easily hear radio traffic, warnings and listen to weather while we're topside.

vhf receiver in the cockpit

Heavy duty anchor

One form of insurance on a boat is heavy-duty ground tackle. We agreed from the beginning that we needed a big, heavy, solid anchor. We initially bought a Bruce claw and then switched to a Manson Boss over a decade later when we had problems in the hard sandy, grassy bottoms of southern Australia. We still have four anchors aboard for different types of situations, but we rely on the 80# Boss as a primary insurance for keeping Cups put.
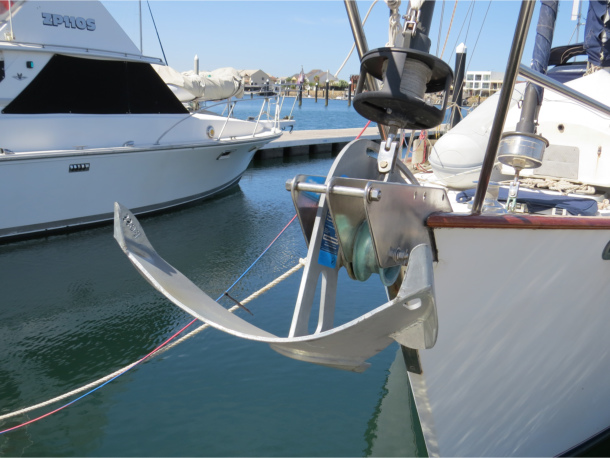
manson boss anchor

Lazy Jacks

As we've aged over the past 15 years, we found it helpful to add conveniences to Cups. We added lazy jacks few years ago and it's been a great help. The lazy jacks “contain” the mainsail when we're taking it down, allowing us to just drop it and tidy up and add the sail ties later. There are lots of different lazy jack and stack-pack options out there, but David devised his own economical approach which works just fine for us.
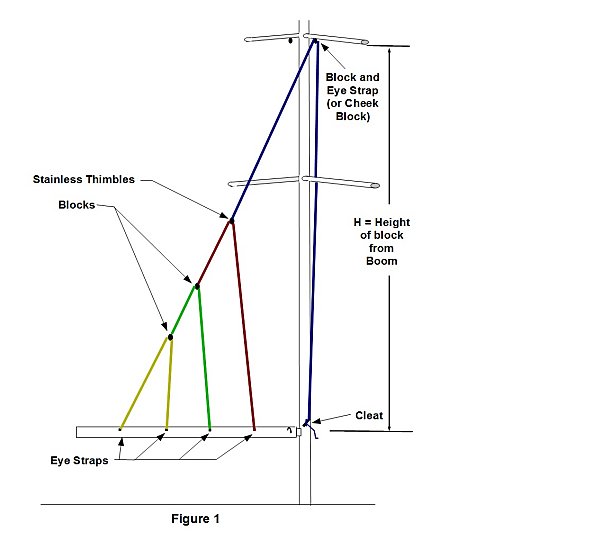
lazy jack

Prop Shaft Generator

David has been working on the prop shaft generator in stages since we left New Zealand in 2011. He discussed the concept initially with our friend Eric Forsyth on Fiona. More discussions were conducted with our Canadian mechanical engineer friend, Claude on Azzar. Calculations were made, parts were fabricated and/or purchased and installed. Finally, when we were leaving Cape Town, Africa, the generator was ready to go. I was a doubting Thomas, I admit, but what a difference it made in our overall energy production. We could go weeks without turning on the engine. Great improvement!!
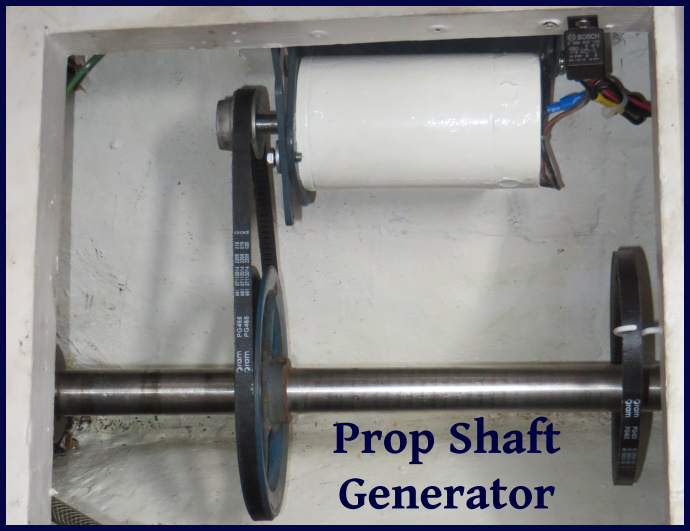
shaft gen


Alternate energy monitor

Having several ways to generate power aboard is great, but it's also good to know just what system … solar, wind or prop shaft … is doing its job and generating the most power. David's Alternate Energy Monitor was a great project to keep the captain amused on an ocean passage, but proved to be an outstanding addition to Cups.

alt energy monitor

What sort of improvements have you made to your boat that you're glad you made? Why?

What's on your wish list?

Celebrating Birthdays

One of the reasons for returning to Las Vegas in August (are you kidding me … the desert in the height of summer???), was to celebrate David's older sister Karen's 75th birthday. It's been giving us food for thought … 75 years old. That's how old your grandmother is or maybe your mother, but not your sister. Her daughter, Jill, our niece, flew up from Florida to help us celebrate … she's in her 50s. Really? When did all this happen? Where did the years go? “When did she grow to be a beauty? When did he grow to be so tall? Wasn't it yesterday that they were small?” Oh, our parents realized it and told us, but who listens to parents? karen and jill

The sibs (David, his brother and two sisters and me) have decided that each birthday should count now. Who knows how long we'll all be around and together and have David's mom with us to top it off? The 5-year birthdays are especially important and any year after age 90 is major cause for celebration.

98 and looking good

Karen chose grilled salmon and veggies for her birthday meal with an ice cream cake (not big enough to accommodate all the candles, I'm afraid) for dessert … and enough wine to keep the spirits high. The celebration was lively with nine of us around the dining room table. Rebecca (our 98-year-old mum) and her friend, Darrell, escaped their assisted living digs and spent the day with us, too. Everyone seemed to enjoy the festivities. Just all being together was a reason to celebrate.

family get together

As we grow older, the togetherness and the family unit seem to be more and more important. We help each other. We cherish the times we spend together and hope for many more. Perhaps it's part of the aging process that we recognize our own mortality and that we want to grasp it all for as long as possible. We get up early each morning … let no minutes escape. Let the hard times and harsh words go with the years. Carpe diem, carpe diem!

The Blue View - Finding DC Electrical Faults

Note: This blog is the condensed version of the article I wrote for Good Old Boat magazine in the June 2016 issue. For the complete version, visit their website at www.GoodOldBoat.com. finding faults

Introduction

The electrical wiring on the typical boat has a tough life. The combination of salt, water, copper wire and electricity inevitably leads to poor connections, faulty circuits and corrosion. With a little time and persistence, some basic tools and a plan of attack, it is usually not that difficult to ferret out and correct those pesky electrical problems.

Test Equipment

Some electrical problems can be found just by observation - a green, corroded terminal or a broken wire, for example, are usually easy to spot. Most electrical faults, however, will require at least a basic inventory of test equipment. The following is a list of test equipment ranging from the most basic to the more specialized.

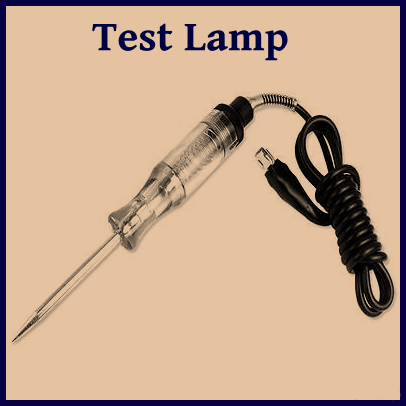
test lamp

Test Lamp

This is the most basic fault-finding tool. Connect one wire to ground and the probe tip to the circuit being tested, and if the bulb lights, there is a voltage present. A test lamp is a quick and easy tool to use and will help find blown fuses, broken wires or defective breakers. They typically cost a few dollars, or you can make your own by soldering wires to a bulb or bulb socket. If you buy one, make sure the test lamp is intended for DC circuits – most test lamps sold at hardware stores are designed for household AC circuits and won't light up when connected to 12 or 24 VDC.

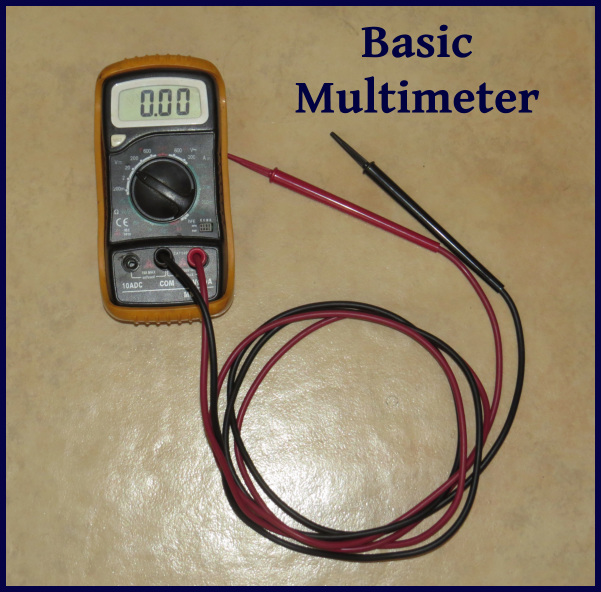
multimeter

Inexpensive Multimeters

For a few dollars more, typically between $10 and $35, you can purchase a basic multimeter, and no boat should be without one. A multimeter allows you not only to determine whether a voltage is present, but to quantify it as well, e.g. is the voltage at the positive power terminal of that flaky VHF 10.5 volts or 12.5 volts? It will also measure DC currents up to about 10 amps, and make resistance measurements.

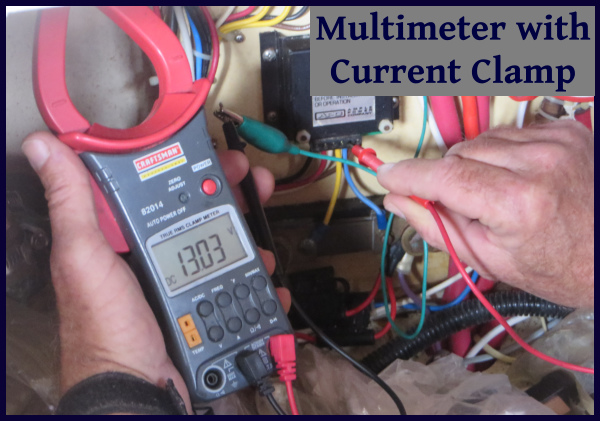
current meter

High End Multimeters

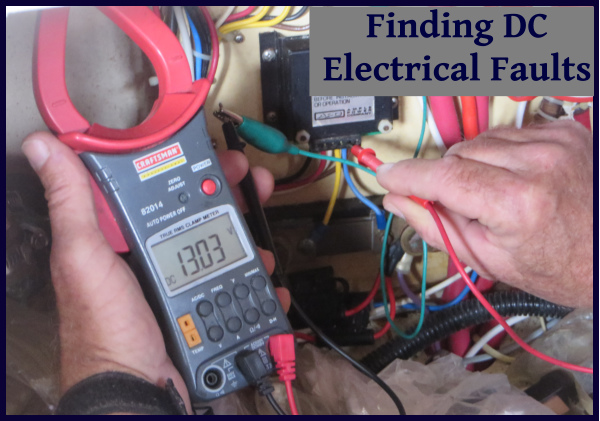
The next step up is a multimeter with a DC current clamp. An inexpensive multimeter can measure small DC currents, but the multimeter must be in series with the circuit to do so. For example, if you want to measure the amount of current your refrigerator compressor is drawing, you must remove one of the power wires, then connect one lead of the meter to the wire and the other lead to the terminal. If the current is more than 10 amps, the internal fuse of the meter will blow. To measure the same current using a multimeter with a current clamp, all that is necessary is to clamp the current probes over one of the power wires and set the meter to measure DC current. The current clamp is very easy to use and will typically measure currents exceeding 400 amps – more than adequate for the circuits on a typical boat. The price for a multimeter with a DC current clamp ranges from about $40 to $250

Jumper Wires

I keep a cache of jumper wires of various lengths, each terminated with alligator clips. The shortest is about 6” long, while the longest is about 30'.

Finding and Correcting Faults

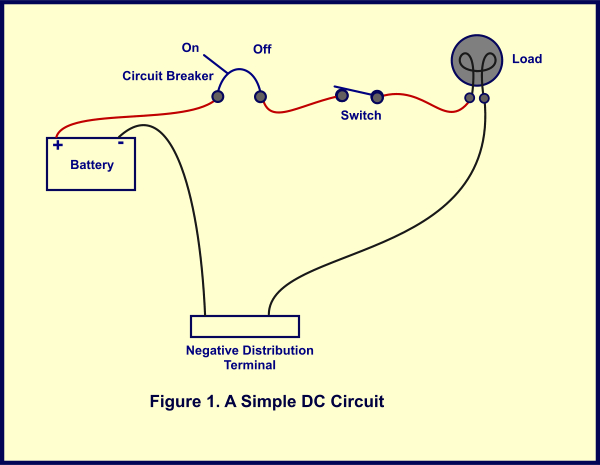
figure 1

A basic DC circuit aboard a boat is shown in Figure 1. A wire leads from the battery's positive terminal, through some sort of circuit protection device, like a fuse or breaker, through a switch, and then on to the load, whether it be a lamp or a windlass. A return wire is used to complete the circuit from the load back to the negative distribution terminal, and then to the negative terminal of the battery.

In a normal circuit in good condition, when the circuit breaker is turned on and the switch is closed, current flows to the load and the lamp lights up.

If the lamp doesn't light or the windlass doesn't turn, I have a number of steps that I follow to determine the cause of the problem. Before diving in, however, I first think about any clues. Was something recently changed? A new circuit added or modified? Do some parts of the circuit work while others don't. I remember more than one instance where I modified a circuit to add some new gear and in the process, inadvertently disconnected something else. Often the newly introduced problem didn't become apparent until weeks later.

Next, I do a check for obvious problems. Is the breaker on? Are there any fuses in the circuit, and if so, are they blown? Are any of the connections corroded or questionable? Do the terminal blocks and splices look good?

figure 2

If I haven't discovered the problem by now, I get out my trusty multimeter and jumper wires, and start checking voltages. A very likely place for the fault to occur is in the load itself … the bilge pump has pumped its last drop of water, the LED light has emitted its last photon or the windlass has hoisted its last foot of chain. I set the multimeter to DC volts and to the appropriate range. Once all the switches and breakers in the circuit are in the “On” position, I measure the voltage across the load as shown in Figure 2. If I measure a voltage close to the battery voltage, then the problem lies in the load.

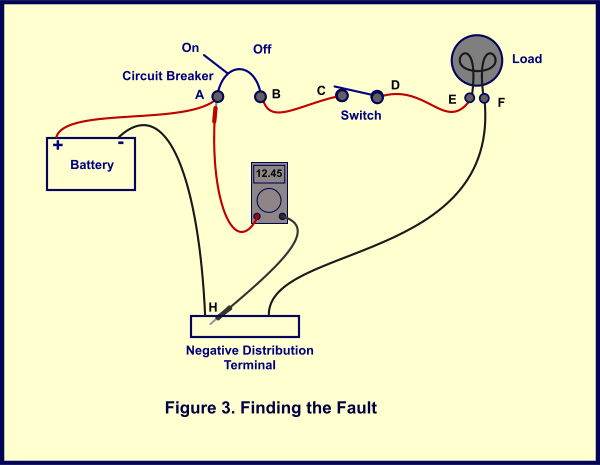
figure 3

If the problem lies elsewhere, I methodically work my way through the circuit until I find it. Figure 3 illustrates the same DC circuit with several test points added. My plan of attack is to check the voltage at each point until I find the fault.

Using jumpers as necessary, I attach the negative lead of the multimeter to the negative distribution terminal, (if your boat doesn't have one, connect the negative lead directly to the negative terminal of the house battery) and starting with Point A, check each voltage in the circuit. If I see a voltage close to the battery voltage at Point A, but not Point B, I know there is a problem with the breaker. If I see the correct voltage at Point B, but not Point C, I know the fault lies in the wiring between the breaker and the switch. I continue working my way through the circuit until I find the problem. The only point I shouldn't see a voltage is at Point G. If there is a voltage there, I know there is a break in the return wire.

Additional Tips

In a perfect world, the fault would be readily apparent. The switch is defective and there is no voltage at Point D, for example, or there is a voltage at Point D and not Point E, indicating a broken wire between the two. Many times, however, the problem is more difficult to figure out. Here are some additional tips that might help.

  • There are many times when I can't access a particular point to measure the voltage. I sometimes use sewing needles to pierce the wire to make contact with the conductor, then connect it to the multimeter with a jumper wire. When I'm done making the measurement, I use silicone caulk to seal the hole.
  • Many times a problem won't be apparent unless there is a substantial current flowing through the circuit. A windlass, for example, has a very high current draw. If the breaker or foot switch has dirty contacts, voltage measurements taken while the windlass is idle may all appear normal. The same measurements taken while the the windlass is energized may show a large difference in voltage. The same is true for any device with a large current draw – a refrigerator compressor, starter motor, autopilot drive, etc. Make sure you make the voltage measurements while the load device is energized. This may require the assistance of a helper on occasion.
  • I don't look for just the presence or absence of a voltage. If I see 12.45 VDC at one point, and only 11.20VDC at the next, I know there is a significant voltage drop between the two points. The usual culprits are corroded terminals or wires, or dirty switch contacts. If it is a new installation, another possibility is that the conductors that are too small.

Good hunting!