
On a passage from French Polynesia to the Cook Islands a couple of years ago, nothing major had broken, the weather was benign, and neither of us were seasick. Something I had wanted to do for a long time was to coachwhip the wheel, and this seemed like a good opportunity to work on it.
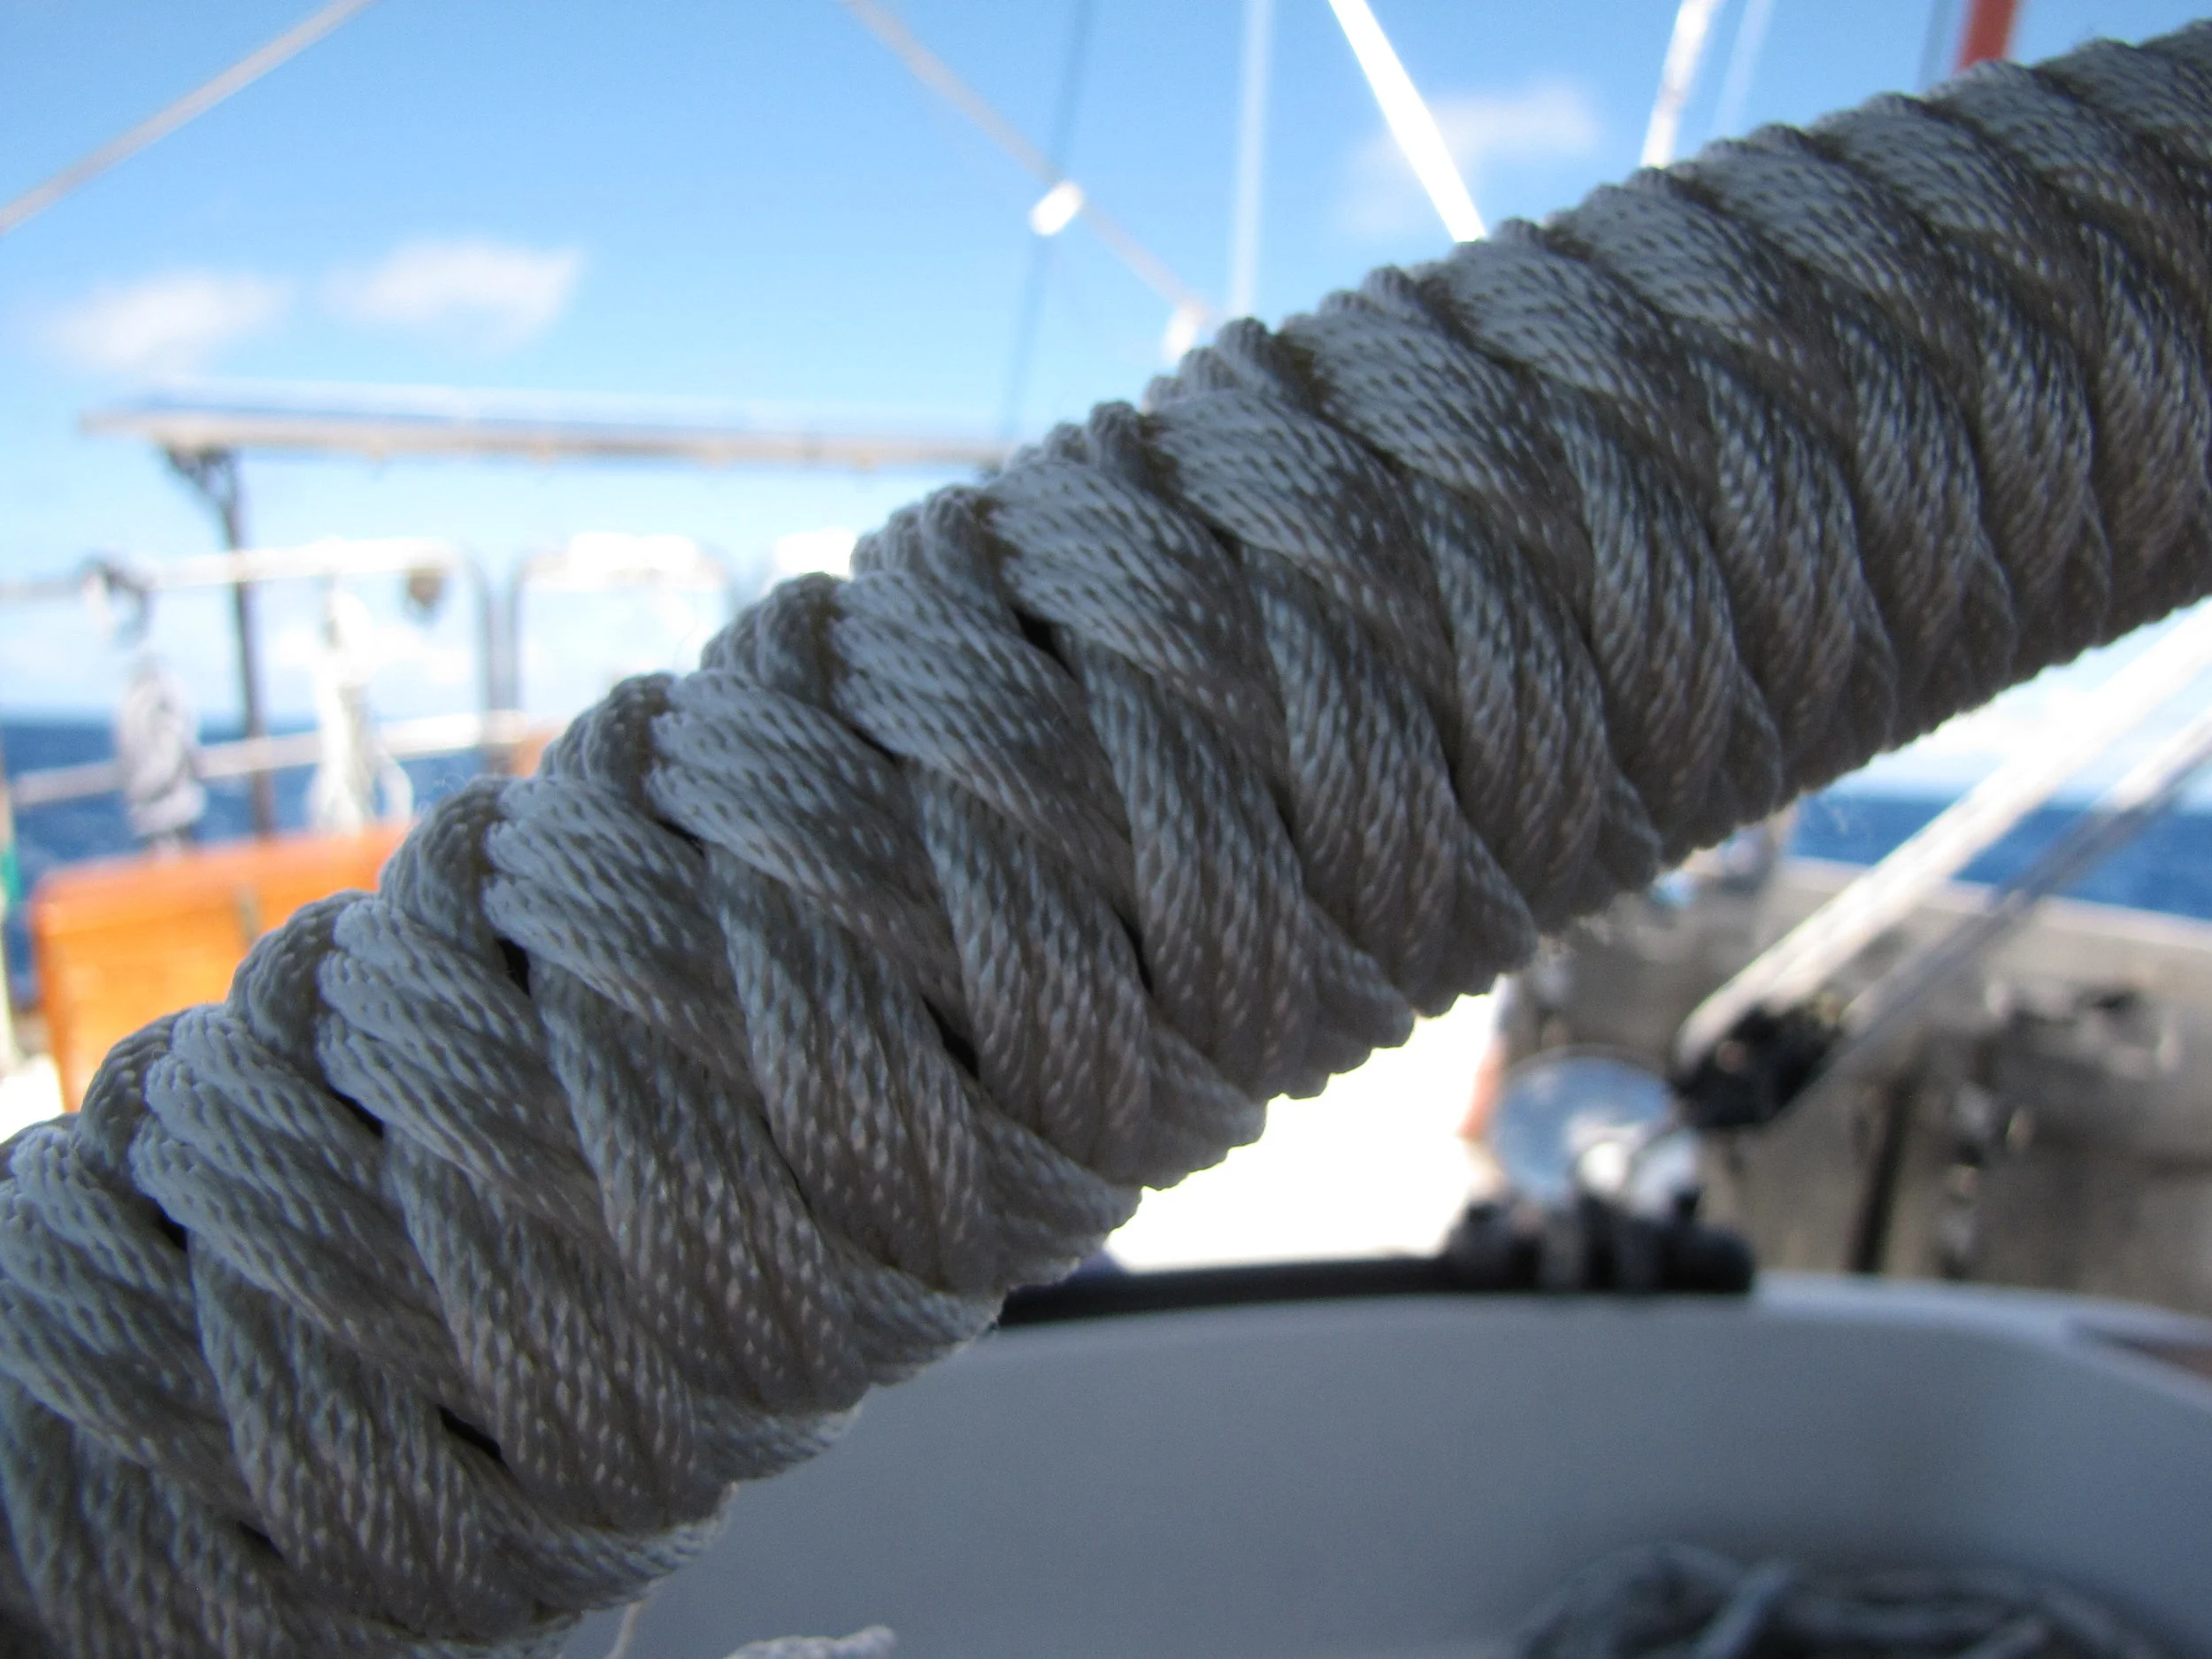
Coachwhipping is a very traditional decorative ropework that results in a beautiful herringbone pattern. While a four strand coachwhipping is the most common, I found that it left diamond shaped gaps between the strands when I first tried it on the wheel. I decided to use a six triple-strand pattern, and the results were outstanding.
After a bit of practice I found it wasn't all that difficult. The hard part was keeping all those strands straight. I practiced using a wooden deck brush handle and a six single-strand pattern. I started with six lengths of line each about 24 inches long. I initially used different colors to reduce confusion while I became comfortable with the plaiting process. I used a hot glue gun to temporarily tack each line in place equidistant around the wood, then seized them with a another short piece of line (Photo 1). I used a constrictor knot to seize the ends. If you aren't familiar with it, I have added a website reference at the end of the article.
In the following description, I refer to the lines on the left as blue with specks (Bl/Sp), white with specks (Wh/Sp) and Red, and the lines on the right are referred to as blue, white and black. To begin the pattern, take the red line behind the wood and under the black, over the white and under the blue as in Photo 2. Then pass the black behind the wood, under the Wh/Sp, over the Bl/Sp and under the red as in Photo 3. Continue alternating, first a left hand strand then a right hand strand behind the wood to the opposite side, then under one, over one and under one, and across the front of the wood back to its own side again. Photos 4-7 show how the pattern should look after each strand is routed. At this point, you will have completed one cycle with each strand. Draw each strand up tight and arrange each so that the design is tight and uniform. Then repeat until you have three or four complete cycles and seize the bundle of lines. I repeated the exercise with all white line as shown in Photo 8 to insure I would like the final pattern.

This pattern has a nice appearance, but a six triple-strand pattern is much more elegant. The process is exactly the same, except that instead of one strand, I substituted a bundle of three strands. The wheel on Cups has six spokes. I would coachwhip the six sections, each one beginning and ending halfway between the spokes. After a bit of trial and error, I found that using 1/8” line each strand needed to be slightly more than four times the length of the wheel section. Since the distance between spokes was 19 inches, the length I needed for each strand was 78 inches, and the amount of line needed for the entire coachwhipping was 78 inches x 18 strands x 6 sections or just over 700 feet of line. In addition, I wanted to finish each section with a Turk's head covering the raw ends where the sections met, so I added enough line for these and in total I needed 800 feet. I had been planning this project for some time, and had the line on hand.
I began by cutting the 18 strands for the first section. I marked the beginning and end point on the wheel and then used a hot glue gun to tack each strand in place. Just as I had done with the practice broomstick, I seized them with a small piece of line. I next gathered the strands into sets of three, and taped the loose ends together. To help keep the sets of strands from tangling, I coiled all but a short length of each set and held them in place with rubber bands

I did the plaiting the same way as I did for the practice section. It takes a bit more patience and effort to keep all the lines organized and to work out the twists and kinks, but it was not significantly more difficult than the six single-strand version. Photo 9 shows the nearly completed first section. Once the end of the first section was reached, the bundle was seized with a constrictor knot, and using needle nosed pliers, I went back through the section working out any twists and drawing all the strands tight until the entire section was uniform and tight. Then I used the hot glue gun to tack each strand in place, adjusted the constrictor knot, and cut each strand as short as possible. Photo 10 shows the first section being seized in place, and Photo 11 shows the completed first section.
I started the second section and each subsequent section in exactly the same way, butting the next 18 strands up against the strands of the prior section. I needed 2-3 hours to complete the first section, but I was much more efficient by the last section and I was able to complete it in less than an hour.
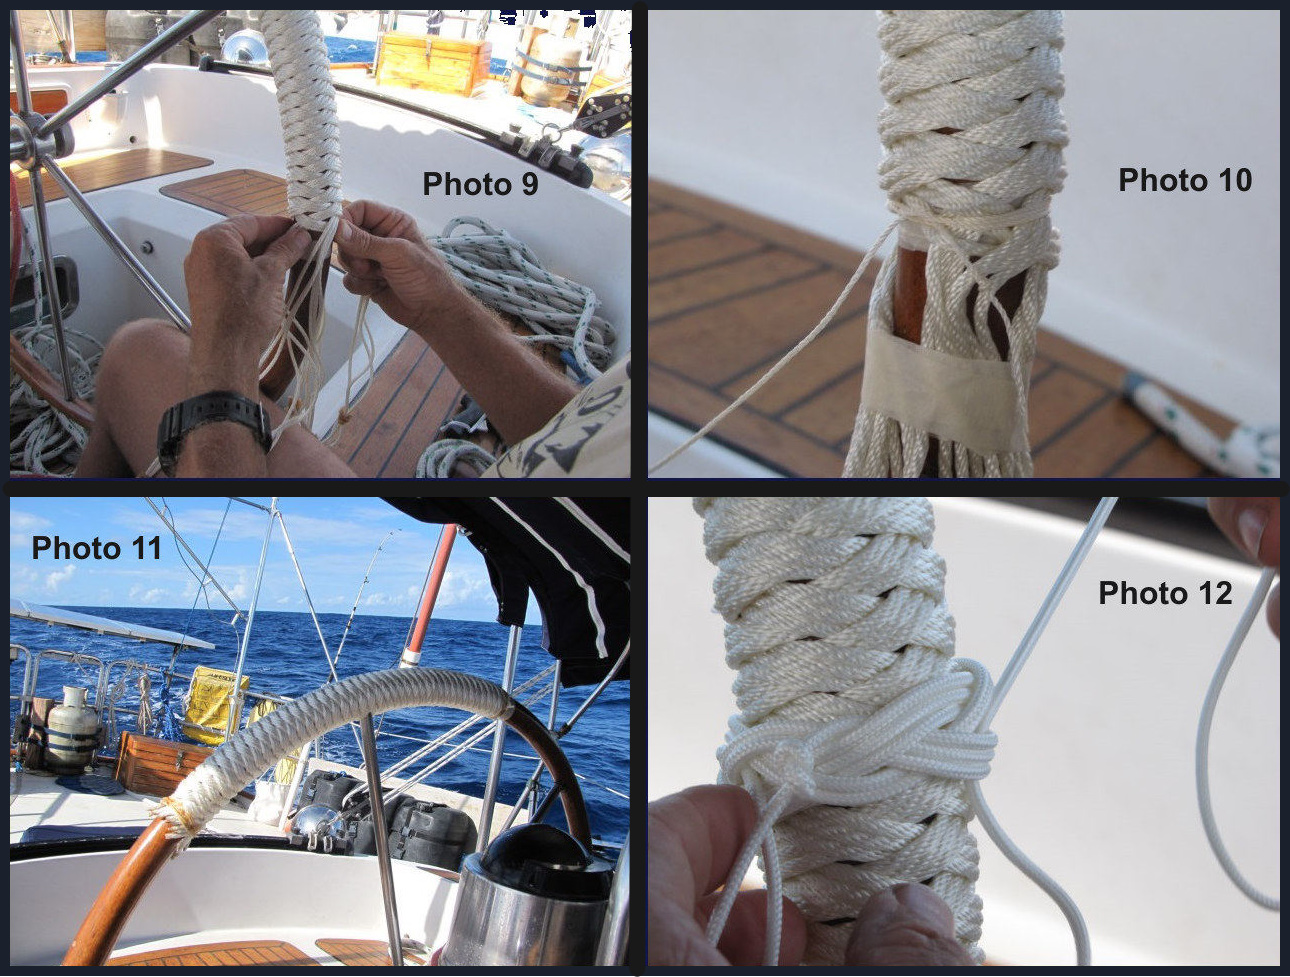
Once all the sections were complete, I finished the ends of each section by covering the loose ends with Turk's Heads. I have provided a reference at the end of the article for making a Turk's head if you need it. Photo 12 shows one of my Turk's head in process.
The overall time to complete the project was about 24 hours, including the practice time and learning curve. It was a good task for a long passage since I could do 1 or 2 sections each day.
