The Blue View - Making a Mast Boot

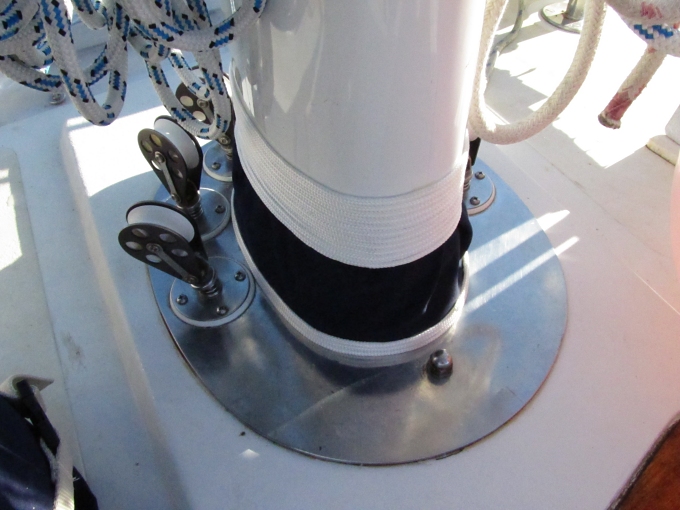
finished mast boot  

Over the years I have tried several methods to create a watertight mast boot, including duct tape, mast boot tape and Spartite. The results were what you'd expect. The duct tape worked well for a few months, the mast boot tape worked for a bit longer and the Spartite worked quite well for a long time. The biggest problem with Spartite is that it is expensive. When we pulled the mast for refitting a few years ago, we couldn't reuse the old Spartite mast boot, and I was hoping to find a less costly alternative.

At the suggestion of a local rigger, I decided to try a one-part waterproofing compound that’s marketed for roof and gutter repairs. This is a thick, rubbery substance about the consistency of honey that can be brushed on. It will adhere to metal and painted surfaces and, once it dries, remains flexible and is UV-resistant. I thought it was worth a try.

The first step was to create a mold to support the waterproofing compound until it could set. I used my ever-present duct tape to make the mold, but any wide, adhesive-backed tape would work. I started the mold by making a wrap around the deck collar and continuing to make wraps upward until I had a cone-shaped mold reaching from the deck collar to the mast. Next I put a wrap of masking tape around the mast 1 to 2 inches above the top of the mold and applied masking tape to the deck below the mast collar.


making the mold


I found the waterproofing compound at a local building supply store. The product itself is not hard to find, but it is difficult to find in a small quantity. For Nine of Cups, I needed less than a quart, and the usual quantity available was in 1- and 5-gallon size containers. If you can't find it at the local building supply place, try an RV supply store. You can also do a search online for roof repair products. I've found various products ranging in price from $18 to $35 a quart.

Using disposable chip brushes, I applied three thick coats following the manufacturer’s re-coat schedule. For the product I used, I was able to apply a new coat after eight hours of drying time, so I applied two coats the first day and the last coat on the second day. After it had dried beyond the tacky stage, I carefully removed the masking tape, using a razor blade as necessary. I then let the waterproofing compound cure for a couple of days.

Since the waterproofing is UV-resistant, the mast boot was now functionally complete, but it didn’t look finished. I opted to make a cover from Sunbrella, using a small piece left over from our bimini project.

The shape of the cover is a bit odd. After a bit of trial and error, I came up with a simple formula that can be used to make the pattern.


cover pattern


First I measured the circumference of the mast, c1, and the circumference of the mast collar, c2. I estimated how high on the mast I wanted the cover to reach and put a pencil mark on the mast at that point. Then I measured the distance from the base of the mast collar to the pencil mark on the mast which is “ht” in the formula. You can calculate the two radii, r1 and r2, using the formulas below.

r1 = (c1*ht)/(c2-c1)

r2 = r1 + ht

For example, on Cups the mast has a circumference of 26 inches and the mast collar has a circumference of 31 inches. The distance from the bottom of the mast collar to the top of the cover is 7 inches. Plugging these values into the formulas:

r1 = (26*7)/(31-26) = 182/5 = 36.4 inches

r2 = 36.4 + 7 = 43.4 inches

Before marking and cutting the fabric, I made a template from paper to make sure the pattern was correct. Once I was convinced the template was accurate, I used it to draw the pattern onto the fabric. I added an extra inch to one end of the pattern to allow for an overlap, then added 1/2 inch to the entire outline to allow for a finished edge. Next I folded the 1/2 inch of material along the outline and hand-stitched it. The last step in the fabrication process was to hand-stitch mating pieces of Velcro onto the ends of the fabric where it overlaps.


paper template


I installed the cover by wrapping it tightly around the mast and collar and pressing the Velcro strips together. I added a whipping with 1/8-inch white nylon line to the top to give it a finished look. I used a hot melt glue gun to attach one end of the small line to the cover about 1/2 inch from the top, then made 12 wraps of line tightly and neatly around the mast working upward. I put a small dab of glue on each revolution and secured the end to the mast and the wrap just below it with another dab of glue. Originally, I also put a whipping on the bottom of the cover, which you can see in the photo of the finished mast boot. I found that this had a tendency to trap water, however, which led to mold growth, and I later removed it.

This mast boot has been in place for years. It has been exposed to heavy seas and cold temperatures in the southern New Zealand and Tasmanian waters as well as the more tropical temperatures of Vanuatu and Fiji. So far it has shown no sign of leaking. I did find that the Velcro began to lose its grip after a couple of years and, using a curved needle, I have now hand stitched the Sunbrella in place.

This is a condensed version of an article I wrote for Good Old Boat magazine, which appeared in the May 2013 issue. For the full article which has more details (and much more professional illustrations), do an article search on the Good Old Boat website and enter keywords “mast boot”.
The Blue View - The Ubiquitous Bungee Cord

bungee pans  

I must have a hundred uses for bungee cords aboard Nine of Cups, but my appreciation for them was slow to evolve. When we first moved aboard, I bought a bag of various sized bungee cords, each pre-constructed with hooks on the ends. Quite frankly, I didn't use them very much. It always seemed they were too long or too short for the particular application I had in mind, and if they were left unhooked for even a short period of time, they soon disappeared overboard.

I discovered that you could buy locking hooks that could be attached to the ends of any length bungee cord. The locking hooks stayed in place when the bungee wasn't under tension, so the bungee cord didn't get swept overboard, and it could be made to any length I needed. The downside was that the hooks are somewhat expensive and are a bear to assemble.


bowline


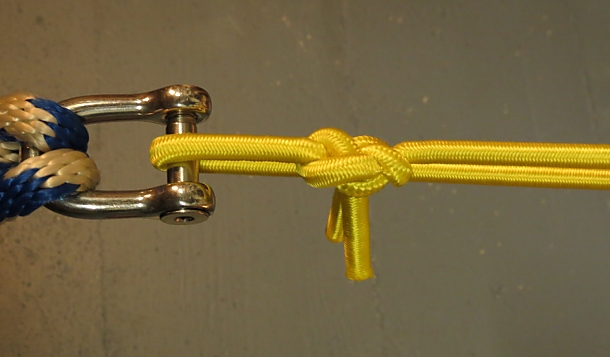
Then one day I realized that while many knots will not stay secure, there are several knots that do work well with bungee cord. I use two in particular: the common bowline works well to form a loop in the end of a bungee cord, and the Ashley Bend (see directions for tying this knot here) does a fine job of tying the two ends of a bungee cord together. If I want a hook on the end, I can attach a carabiner with a bowline. If, once it is tied, I pull the knot as tight as I can, it stays in place quite well. Quite the revelation, and it only took me about 4 years to discover it. (More evidence that anyone with even the meanest of intelligence can do this.)

I now carry two spools of bungee cord aboard, one 1/4” diameter and one 3/8” diameter. These two sizes handle most any application. When I need a bungee cord, I cut the necessary length from the spool, burn the ends with a lighter, and tie whatever knot is called for. It couldn't be simpler.


ashley bend


I use bungee cords for a myriad of applications. Here are some of them:

  • Securing floorboards. The floorboards aboard the typical boat are removable to gain access to the bilge. We use this area to store spare parts, canned goods and heavy tools. If the boat were to be knocked down or, heaven forbid, rolled or pitch-poled, the floorboards as well as anything stored underneath could inflict some serious damage to the boat and crew. Thus, it is important to secure them in place. Bungee cords work well for this application (see a previous post on the subject of securing floorboards).
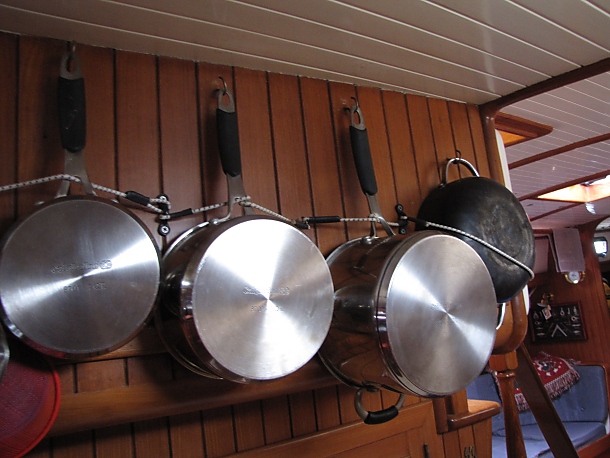
  • Securing our pots and pans. We hang several pots and pans from hooks in the galley. When we are in a quiet port, they stay nicely in their places. When we are underway, however, the motion of the boat soon has them swinging and banging against the bulkhead and each other. I attached an eye pad on one side of each pan and a cup hook on the other. Using short lengths of bungee with a bowline tied in the ends, each pan is securely and quickly contained, yet easily accessed when needed.
  • Securing halyards. We really dislike the sound of our halyards slapping against the mast and spreaders, especially down below. While is is not at all unpleasant to hear halyards clanging against a mast on someone else's boat as we walk through a marina, it is annoying onboard Cups. The sound seems to get magnified below deck, especially in the evening when we are trying to get to sleep. To prevent the clanging, we use bungee cords. For some of the halyards, we use a bungee cord permanently attached to a shroud with a bowline that has a carabiner attached to the halyard end. In other cases, we have a loop made up using an Ashley bend. The loop is attached to the mast pulpit, and the main halyard shackle clips to the loop and is tensioned.
  • Fishing line shock-cord. When we fish, we usually troll with a lure attached to a steel leader, which is attached to 200 feet of 1/4” polyester line with a strength of 500 pounds. The line is wrapped around a winch in the reverse direction, then secured to a cleat with a few feet of slack in between. When a fish hits the lure, the line spins the winch, alerting us to the fact we have a fish. When the slack is taken up, the winch stops spinning and the line goes taut. We soon found that we needed to add some shock cord to the system or the sudden tension on the line would often either break the hook or jerk it out of the fish's mouth. I now tie two eyes in the line about 10 feet apart, between the winch and the stern rail and attach a length of bungee between the two eyes. The elasticity of the bungee prevents the sudden jerk and we catch far more fish.
  • Lee cloths. Lee cloths are rectangular pieces of heavy cloth that keep us from falling out of our berths when the boat is heeled or rolling. On Cups, one side is attached to the berth and the other side is attached to cleats in the ceiling. Once we are in the berth with the lee cloths attached and tight, it is quite snug and comfy. The problem we had was figuring out a quick way to attach and detach the lee cloth from the ceiling. If we used hooks or carabiners with lines, it was difficult to get enough tension in the lee cloth to feel secure. If we used lines with knots, we could get enough tension, but it usually took a couple of minutes to get everything just right and the same amount of time to extricate ourselves when it was time to get up. This wasn't usually a problem unless there was some emergency topsides requiring the immediate assistance of the off watch. What we now use are several bungees with a bowline in one end and a carabiner attached to the other end. To setup the lee cloth, each of the bungees is attached to a cleat in the ceiling with the bowline, and the two or three bungees that are closest to the feet are attached to the lee cloth with the carabiners. When the person off watch climbs into the berth to get some sleep, it is an easy matter to clip the remaining bungee cords to the lee cloth. If an emergency arises, it takes only seconds to disconnect the lee cloth.

There are a few other bungee cord applications that we have tried or thought about that either didn't or probably won't work quite as well:

  • Bungee jumping from the spreaders
  • Giant slingshot that allows Marcie to send parts and tools up to David while he is up the mast
  • Giant slingshot for rotten fruit wars with other cruisers
  • Small slingshot for shooting dried peas at birds perched on the masthead – or at David to amuse Marcie while he is up the mast

The Blue View - Replacing Lifelines with Dyneema Line

finished lifelines  

Nine of Cups will soon be celebrating her 28th birthday and has been our home for the last 13 years now. When we moved aboard, she was in pretty good fit, but one thing that needed replacement was the lifelines.

The lifelines on a sailboat act like a fence around the perimeter of the deck. When the boat is pitching and rolling, it gives the sailor something to grab onto and hopefully prevent him or her from being tossed overboard. We replaced the lifelines in the first year we owned Nine of Cups. That time we used stainless 7x7 vinyl coated wire, which looked great for a few years but began showing rust spots after about four years. In year four, we replaced them again using uncoated 7x7 wire which lasted about 5 years.

The next time we investigated using one of the new fiber technologies for our lifelines. These new fibers have a number of properties which make them good candidates for lifelines: high strength, low weight, high resistance to chafe, resistance to flex fatigue, good resistance to UV and very low stretch properties. In addition, they are easy to splice, which means I can make them myself and not have to order premade sections with swage fittings. Before making the decision, however, we needed to do a bit more research. They are called lifelines for good reason, and before we trusted our lives to them, we needed more than the manufacturers' assurance that they would live up to expectations.

After spending hours perusing the various nautical discussion boards (where someone asks a question and then 24 “experts” with varying amounts of actual knowledge provide conflicting answers, all stated with authority, and then argue amongst themselves), we found one very good paper by US Sailing, the national governing body of sailing in the U.S. Their conclusion after considerable research was that, with a few caveats, the new Ultra-High Molecular Weight Polyethylene (UHMWPE) fibers were acceptable for use as lifelines. These UHMWPE fibers have the brand names Dyneema® and Spectra® (referred to below as Dyneema® ).

We decided to use either Amsteel (Samson) or V-12 Vectran (New England Ropes). Both are 12 strand single braid lines with extremely low stretch, high strength and easy splicing characteristics. In addition, both can be ordered in grey, which looks remarkably like steel wire once in place. Both of these lines have the same or higher strength as the equivalent sized wire. The final decision was based on price and availability, and the Amsteel won out.


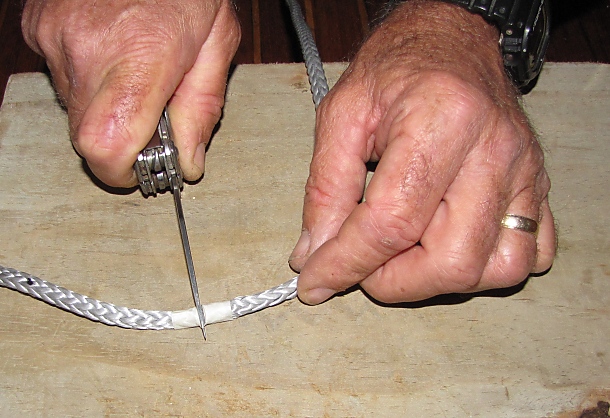
cutting dynema


The project turned out to be quite straightforward and easy to complete. I used about 180 feet of line and the entire project took about 15 hours.

If you are thinking about changing to one of the new UHMWPE fibers, I have a few observations based on our experience.

While the line has a UV resistant coating, it is still susceptible to degradation. Testing has shown that the line will retain 60% of its tensile strength after 5 years of exposure. This loss of strength can be compensated for by using the next larger size line. For example, if 1/4” lifelines are in place, replacing them with 5/16” Dyneema will still retain the equivalent strength for at least five years.


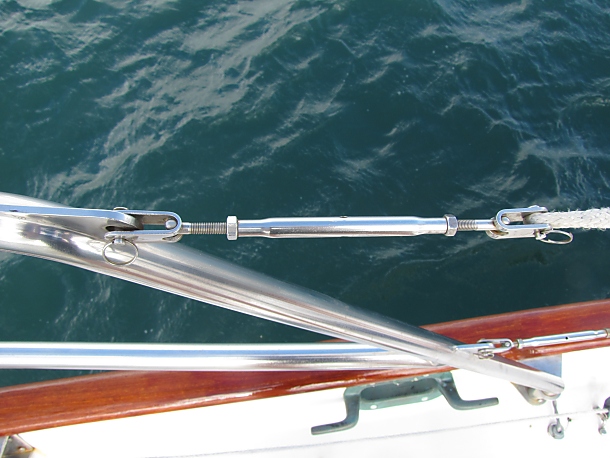
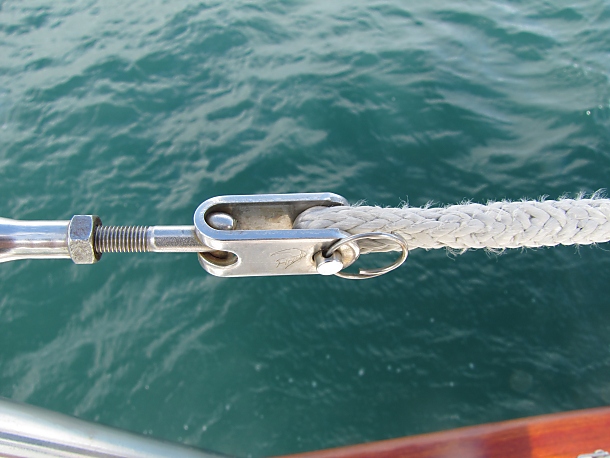
turnbuckles


The line has very little stretch, but does exhibit creep. This means over time, the line will slowly get longer. We used turnbuckles in each section so that they could be tightened periodically as needed. Alternatively, one end can be lashed in place, and the lashing shortened occasionally.

The line is chafe resistant, but not totally impervious to chafing. We check ours frequently.

It is quite easy to splice eyes in the ends of the Dyneema. Both Samson and New England Rope have illustrated techniques for eye splices on their websites.

The lifelines should be tensioned so that an 11 pound (5kg) weight hung from the middle of the lifeline does not deflect it more than 2 inches (5 cm).

Our Dyneema lifelines have now been in place for about 4 years, and we are still quite happy with them. The line has a comfortable feel to it and, of course, never rusts. Marcie prefers it to wire lifelines for hanging clothes out to dry on laundry day. It will be time to replace them again in a year or so, and I intend to use Dyneema again.

This is a condensed version of an article that was published in Good Old Boat Magazine in March 2013. The full article goes into more detail on the how-tos of making the lifelines. If you would like a copy of the full article, let us know and we will happily email a copy to you.