The Blue View - Prop Shaft Generator pt. 1
/
installed shaft generator
When we are anchored for any period of time, our solar panels and wind generator pretty much keep up with our power needs. On a passage, however, our requirements are higher. The additional electronics – auto pilot, nav instruments, AIS, radar, etc. - all require power, and we usually have to run the engine an hour or more each day to keep the batteries charged. There are a number of reasons why we dislike doing this. On a long passage, the amount of fuel required just to charge the batteries starts adding up. If we are on a significant heel, we have to alter course or reduce sail before and after running the engine. Using the engine at low RPMs and with a light load is hard on the engine. And in addition, it is very annoying to disrupt that perfect broad reach on a warm, starry night by having to crank on the engine.

shaft generator monitor
Several of our cruising friends have had good success with propeller shaft generators, and adding one to Nine of Cups has been on my to-do list for several years now. If we could generate another 2-3 amps while we were sailing, we probably wouldn't have to run the engine at all. When we were in Durban a few months ago, I decided to take on the project.
What does a prop shaft generator do? We have a fixed blade prop, and when we are sailing, the water moving against the prop causes the prop shaft to rotate. (We actually have a prop shaft brake which prevents the shaft from rotating when the engine is off, but it can be disabled). By adding a pulley to the shaft, mounting a generator or alternator next to it, and connecting the two with a belt, we should be able to utilize the rotation of the shaft to generate power as we sail. That's the theory, anyway. The rest is just details, right?
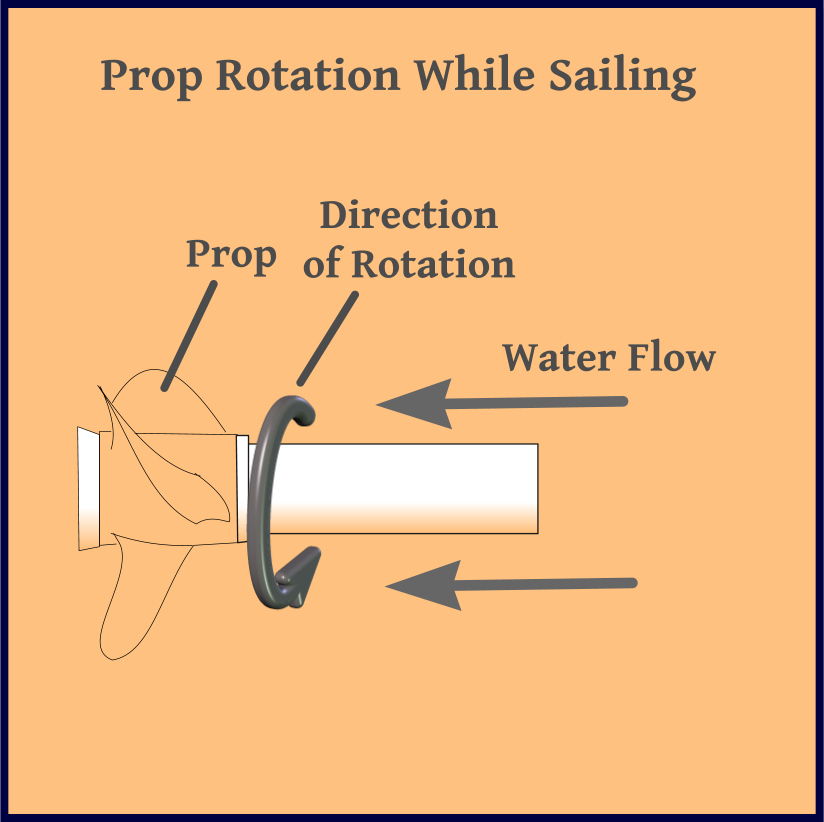
shaft generator rotation
One the more important details is which generator to use and I've found several options. There are three types of generators/alternators that can be used for this application, and each has its own advantages and disadvantages.
Brush-type DC Motor. The most basic DC motor, which has been around since he late 1800s, has a rotating coil mounted inside several permanent magnets attached to the outer housing. If a battery is connected to a 12 volt DC motor, it will spin. Conversely, if the rotor of a brush-type DC motor is spun, it will produce a DC voltage. If the motor is big enough and it spins fast enough, it can charge a battery. The advantages are that it is inexpensive and it is simple to implement electrically. It has several disadvantages, however: since it has brushes, the maintenance requirements are higher; it generates electromagnetic interference (EMI), which may be a problem with an HF radio; the maximum allowable RPMs for this type motor is usually less than an alternator; and is more difficult to keep cool.
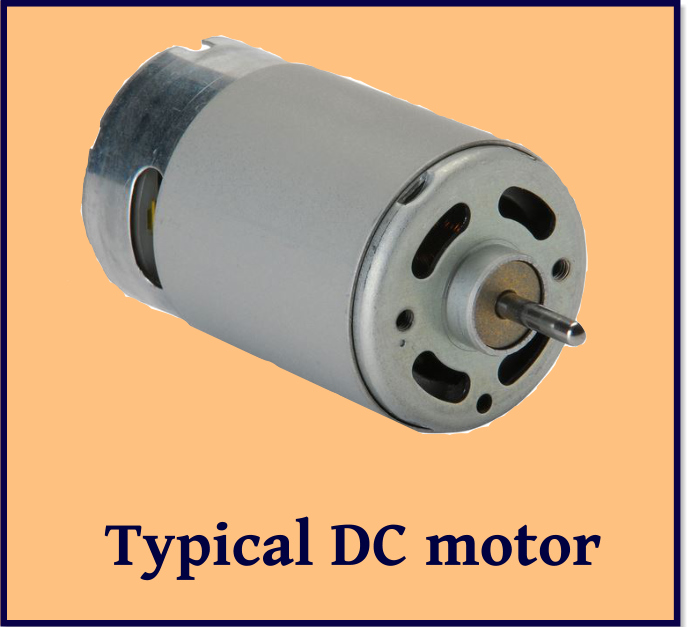
dc motor
Brushless DC Motor. This type motor has permanent magnets attached to the rotor and windings that are attached to the housing. Since the windings don't rotate, the need for brushes is eliminated. The advantages of a brushless DC motor are: it requires less maintenance than a DC motor with brushes; generates little or no EMI; and is more efficient. On the other hand, the disadvantages are: it is more expensive; it generates a three phase AC output which requires a diode bridge to convert to DC; and the maximum allowable RPMs are usually less than an alternator.
Alternator. A typical automotive or marine alternator is also a candidate for a prop shaft generator. It overcomes some of the issues of a DC motor: since it is meant to be coupled directly to an engine pulley, the maximum allowable RPMs are quite high; they are made by the million, so the cost is quite low; the output is easily regulated by varying the field current; they are very efficient; and are self-cooling. The disadvantages are: the output is three phase AC, and must be converted to DC; and they are meant to run at high RPMs, so unless the windings are rewound with finer wire, the output at low RPMs is quite small. The biggest disadvantage, however, is that an alternator requires a field current of typically 3-5 amps. Unless the RPMs are quite high, the output will be negligible. In fact, the net amperage might even be negative if the RPMs of the shaft aren't high enough.

alternator
So which alternative did I choose? Actually, I found a hybrid of sorts that was a nice compromise. A company in the U.S. that makes components for wind turbines, WindBlue Power, buys standard automotive alternators and morphs them into brushless DC motors. They rewind the windings with finer wire so the output is higher at low RPMS; they replace the field coil with a permanent magnet, eliminating the need for the 3-5 amps of field current; and they remove the internal rectifying diodes – which, as will be discussed later, is another important issue. The resulting generator overcomes most of the shortcomings of a standard brushless DC motor for this application.
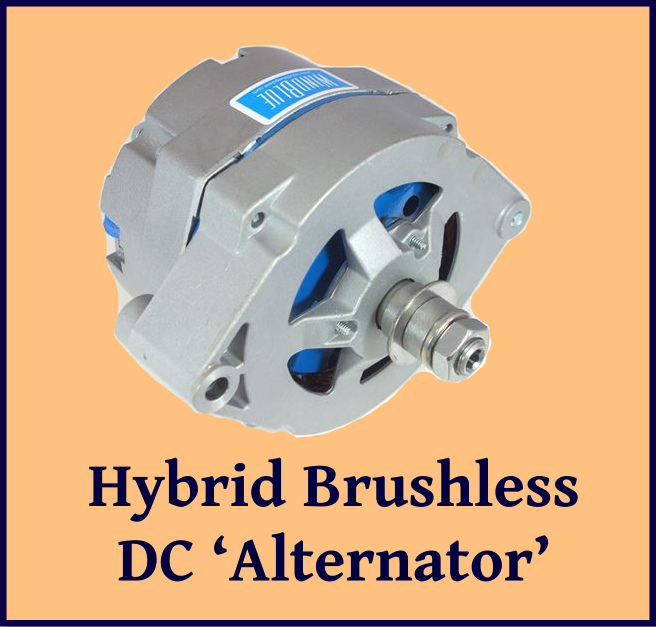
wind blue model
I'll talk about the design in more detail in next week's Blue View.