The Blue View - When It All Goes Wrong

Most of our passage from Puerto Rico to St. Augustine was idyllic – a nice broad reach with 15-20 knots of wind, a kindly following sea, warm sunny weather, a 0.5 to 2 knot favorable current, and a full moon to sail by at night. The prop shaft generator and solar panels were producing more power than we needed and nothing major had broken. We couldn't have asked for a more perfect passage – at least for the first six days. dipstick

Marcie's blog yesterday talked about how things can quickly change. And when things start going wrong, usually it happens just as the wind picks up, at night and in the middle of the shipping channels – and usually the problems come in multiples. Our first problem was a transmission leak. Without our engine, we could have beat our way to the St. Augustine inlet, but with wind on the nose and the gulf stream current pushing us NE, this would have taken awhile. Then once we arrived, we would have needed a tow to make our way through the narrow, dog-legged inlet – an expensive option. A much better option would be to figure out the transmission problem.

One possibility was the heat exchanger. It is about the size of a half empty roll of paper towels. Sea water is passed through the heat exchanger, and the transmission oil is cooled by pumping it through a coil of tubing that is immersed in the water. Over time, the inner tubing deteriorates and eventually begins leaking. Since the oil is under pressure, it will leak out into the sea water. Usually, once the engine is shut down, sea water will leak back into the tubing, filling the transmission. I wasn't getting seawater into the transmission, but I thought the heat exchanger might still be the culprit. I try to change the heat exchangers every three years, but this one had been in place more than four years and was overdue.

heat exchanger

I had a spare, and it took only a few minutes to dig it out. To remove and replace the old one, I had to first remove a shelf in the aft part of the engine room that holds a bin of miscellaneous engine spares as well as my compressor. The rest of the R & R process took about an hour, and all together, the whole thing took maybe 90 minutes for the entire procedure. It went well and without a hitch – always a bad sign.

cracked fitting

We topped up the transmission oil and started up the engine. I didn't see anything leaking, so we motored for an hour, then I checked the oil level again. Yikes! It was down another quart. We have three hydraulic hoses connected to the transmission – two that go to the heat exchanger and one that operates the prop shaft brake. With the shelf out I had a better view of the hoses, and I saw a small collection of oil on the hose for the prop brake. I removed it, and sure enough, there was a crack in the underside of one of the fittings.

plug

We could do without the hose if I could figure out a way to plug the hole it was screwed into on the transmission. I rooted around in my various parts bins and finally found a brass hose barb adapter with the right size male thread. Using a bolt, nut and copious amounts of Permatex Gasket Maker (the type impervious to transmission and engine oil), I made a plug for the hole that would withstand the pressure. I screwed it into place, topped up the oil, and we motored for another hour. When I checked the oil level again, the good news was that the oil level seemed to be holding. The bad news was that the engine room was awash in seawater. While I was trying to figure out where it was coming from, the high water bilge alarm went off.

hi water alarm

There is an old adage that there is no better bilge pump than a panicked sailor with a bucket. While we weren't quite at the panic level, it was obvious we needed to handle the problem. I closed all the seacocks that could possibly be feeding water into the engine room then we turned on both electric bilge pumps, Marcie began pumping the manual bilge pump, and I worked at bailing out the engine room. Even so, we were barely keeping up with the water ingress. Where the hell was all that water coming from?

Then I spotted the culprit. The prop shaft seal, which is located well aft of the engine room, has a vent hose that should be led up above the water line. I had routed it to the top of the engine room and secured it in place with cable ties. Apparently, when I removed the shelf, I inadvertently pulled it loose from the cable ties. It stayed in place for awhile, but the vibration from the engine caused it to slide down and the end eventually came to rest on the engine room floor – well below the waterline. It was a quick fix to put it back where it belonged, and this time I made sure it could never come loose again.

It took another half hour to pump out all the water and clear the engine room. After checking everything one last time, we were on our way. We checked the transmission oil every hour for several hours, and it was no longer losing oil.

What I took away from all this was that while it was nice to be able to find and repair the transmission leak problem, I am most embarrassed that I didn't properly secure the vent line, causing an emergency situation.

Looking at the bright side, we did get to test the high water bilge alarm and all three bilge pumps, which, happily, all worked.

The Blue View - Patching the Dinghy

the dinghy 
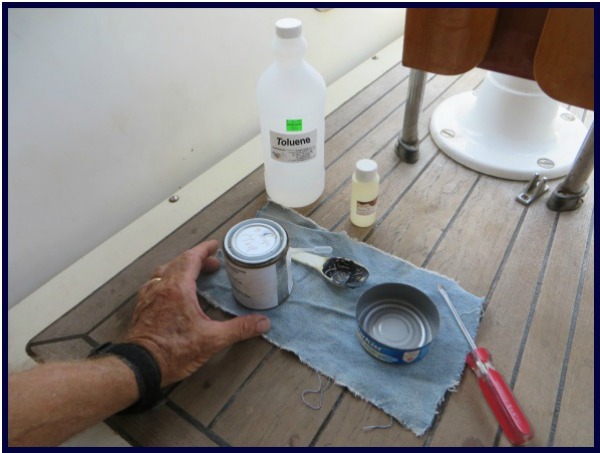
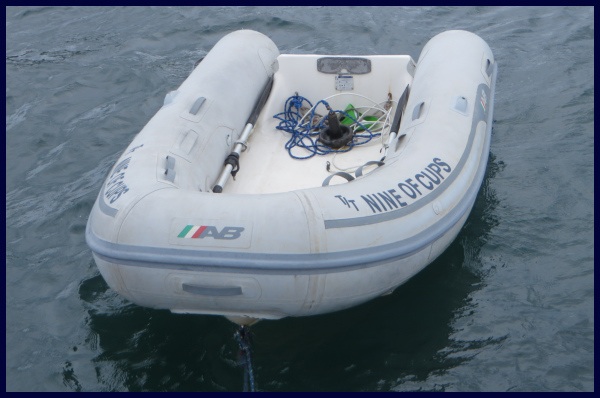
Our venerable dinghy is well into her ninth year aboard Nine of Cups. She's seen a lot of nice soft sand beaches, but she's also seen her share of barnacle encrusted, concrete jetties, rocky shores and coral reefs. On several occasions, she's gotten roughed up by an amorous fisherman's panga as well. Maybe it's her full-bodied figure or her soft sides that attract these rough characters, or maybe she just likes 'bad boys', but they always seem drawn to her and vice versa. Nine years of the sun's UV rays have also taken their toll. She's made of hypalon material, which is more resistant to UV damage than PVC, but not impervious to the sun's effects.

Nine years of living aboard Cups probably makes her about 80 years old in dinghy years. With a little luck, she has a few more years left in her, but no one is going to mistake her for a young, perky gal. Her color is faded, she's had some transom gel coat repairs and her bottom has been repaired and repainted a few times. She also has a dozen or so patches now – some to keep the air in the pontoons and some to keep the water outside the dinghy.

lots of patches

Hypalon material is more difficult to patch than PVC material. Since both our current dinghy and her predecessor were made of hypalon, I've probably applied 20-25 patches by now, most of which are still stuck. I think I may be starting to get the hang of it.

We used to buy those patch kits sold by the chandleries. They came with a small amount of two part adhesive and several small patches, and were outrageously expensive. Even worse, we found that these had a shelf life of only 6-12 months. More than once we bought one of these kits, only to discover that the adhesive and/or accelerator had dried up or evaporated in its unopened container when we needed it. Plus, on the occasions we got a really big tear, the patches weren't large enough to cover the hole.

Then I found several online suppliers that provide gear for river rafting companies, many of whom use hypalon boats. I could buy the hypalon patch material by the foot, and they had some great two part adhesives. Even better, both the material and the adhesive were much more reasonably priced. I found that the adhesive goop itself had a good shelf life – years instead of months, and the accelerator was just MEKP, a chemical available at most boatyards and chandleries. It only lasts a year or so, but it's easy to find and inexpensive to replace.

getting ready

On to the patching process … I cut the patch so that it will extend at least an inch beyond the chafed area or hole. I'll be seeing this patch for a long time, so I want it to look nice – or as nice as a dinghy patch can look. I use a pen and straightedge to mark the sides of the patch. The corners should be rounded, so I use a bottle cap or something similar as a template to make the radii uniform, then carefully cut it out. I position the patch and mark the outline on the dinghy.

I use toluene to clean the area to be patched, then lightly sand the area with 220 grit sandpaper. The objective is to scuff the surface – not sand through it. If the area to be patched is more than just a pinhole leak, I deflate the pontoon. (If it's a cut I'm repairing, the pontoon will already be deflated). If the hole is really large, I stitch it together first with whipping thread and needle.

adding the mekp

The glue is a two-part adhesive, and the mixing ratio of the two parts varies with the brand. The particular adhesive I'm currently using requires adding enough MEKP to equal 4% of the adhesive. If my math is correct, this equates to 15 drops of MEKP per tablespoon of adhesive, and this ratio seems to work. I measure and decant the amount of adhesive I'll need (I save old tuna cans for this purpose), then use an eyedropper to add the appropriate amount of MEKP. I use a small craft stick to thoroughly mix it.  The pot life of the adhesive after it is mixed is short – it starts getting thick after 10-15 minutes, so there isn't time to dawdle before applying it.

One or two thin coats are applied with a brush and allowed to dry completely, then a final coat is applied and allowed to dry until it is barely tacky. If I rush it and don't wait long enough, which is my tendency, the patch will not stick well or take forever to cure. Depending on the adhesive and the ambient temperature, it might take 2-4 hours to dry completely and another ¾ to 1-1/2 hours to get to the 'barely tacky' stage. A fresh batch of adhesive, a clean can and a new brush will be needed for each coat.

dinghy repair

The adhesive is black, and will be quite apparent if it is smeared outside the patch. On the other hand the patch will not adhere anywhere there is not a good coverage of adhesive, so when I'm painting it on, I try hard to get the adhesive right up to and not beyond the outline of the patch.

patch

The back of the patch must also be painted with adhesive. I tape some waxed paper to the dinghy near the area to be patched and set the patch on it - I want the adhesive on the patch to dry at the same rate as the adhesive on the dinghy. If it's windy out, I use some double-sided tape on the under side of the patch to keep it from blowing away.

Once the adhesive has been applied and cured the correct length of time, I carefully position the patch and stick it on. This is contact adhesive, which means that the patch cannot be re-positioned once the two surfaces come into contact with each other, so this step takes some care. I use my fingers to press it down thoroughly, and follow up by using an epoxy roller to work out any bubbles and ensure the patch is bonded.

applying the patch

I use a rag dampened with a small amount of toluene to clean up any unwanted glue, then use alcohol sparingly to remove the pen marks. The patched area should be allowed to cure at least 24 hours before re-inflating or returning the dinghy to the water.

Since we will be without a dinghy for a couple of days, it takes a little planning if we aren't in a marina. I've patched the dinghy on passages, but only when conditions were benign enough to ensure that the  glue wasn't contaminated by sea spray as it was drying.

While in Puerto Rico, I added a patch that will hopefully stop the ingress of seawater. We like a dry dinghy, especially when we're transporting groceries or our backpacks, and while it's easy to find an air leak using soapy water in a spray bottle, finding the source of a water leak is usually more difficult.

As I see her at the dinghy dock nestled among all those younger, newer, prettier inflatables, I wonder whether she is embarrassed by her age and multitude of scars and patches, or whether she is regaling those youngsters with of the tales of her adventures and her sea stories. I hope it's the latter. Since they are all tethered to the dock next to her, they are certainly a captive audience -  unlike mine.

The Blue View - A Couple of Screws Loose

On passages, one of my morning rituals is to do a deck 'walk-around'. My morning watch starts at 0900, and after my morning cuppa, I take a walk around the boat, tossing the night's catch of flying fish overboard and checking for any potential problems. Any lines chafing? Are the dinghy and anchor still lashed and secure? How do the sails look – any issues? The stays and shrouds and other parts of the standing rigging are looking good? … and so on. On one morning's walk-around during our Trini-Puerto Rico passage I found two screws lying in the port side scuppers. Not a good sign and something that required immediate investigation. I had visions of the radar module coming loose from its mounting and self-destructing or the whisker pole coming apart and folding in half – after ripping a large hole in the yankee.

loose screws

I remember talking to an avid racer who said that during a close race, one of his crew mates would sometimes use a slingshot to fire a screw or two into the mainsail of the boat they were trying to beat. The screws would drop to the deck, making enough noise to be noticed. At the very least, the crew would be distracted while trying to figure out where the screw came from and whether they were about to lose the rig. I'm not sure if it was BS or not, and even if it wasn't, I can't imagine the ploy working more than once, but it was a good story. At any rate, there were no boats within sight, so unless the screws I just found came from a drone, they were most certainly from Nine of Cups.

There were a few clues. The screws were just aft of midships in the port scuppers. This eliminated anything further aft, since it was very unlikely they rolled uphill from the place on deck that they landed. They were 5/16” diameter screws, eliminating stanchion screws. They were also coated in Tef-Gel, a substance I use to prevent galling and corrosion when I attach a stainless screw to aluminum – like the mast and boom. So, the most likely places to check were the mast, forward end of the boom, inboard end of the whisker pole, and the furlers. That's still a lot of possibilities.

I had removed the forestay in Trini so that Cups would fit on the Travelift, and this required partially disassembling the jib furler. I thought maybe I had neglected to tighten everything when I reattached the forestay – but everything looked good there. I checked all the screws on the boom and the lower part of the mast – all present and accounted for.

camera

In the old days, the next step would be to lie on the foredeck with the binoculars and try to spot any missing screws further up the mast. Now, with digital cameras and great zoom lenses, it is much easier. I sit on the deck, zoom in and focus on a fitting, then shoot half a dozen photos. Next I review the photos, zooming in as much as possible to try to locate the screw-less hole. I spent a half hour or so carefully checking the possibilities, but still couldn't spot any missing screws.

screws in place

As I was pondering where to check next, I grabbed the staysail furler to re-position myself. There, just below my hand, and not two feet from where I had been sitting for the last half hour, was the furler collar with an empty screw hole. I checked the other side of the collar, and sure enough, the second of three screws was missing. The third screw was partially unscrewed, but still in place. Had it come out, the result wouldn't have been catastrophic, but we wouldn't have been able to bring in the staysail when it was time. It took but a few minutes to put the screws back in place and tighten, and add a note in the log sheets to remove them, re-coat with Tef-Gel and tighten back in place once we arrived in Puerto Rico.

found it

easy fix

Later, as I was pondering how these three screws could have come loose, it occurred to me that last December, when we were getting ready to haul-out in Trini, I had loosened them in the event we had to remove the inner stay in order to fit into the Travelift at Power Boats. This is sometimes necessary, and we once tied up a haul-out facility for an hour or so while I worked on removing a seized screw - because I hadn't prepped the furler ahead of time. Not only had I forgotten I had loosened them, I had neglected to add it to my to-do list at the time. They weren't loose enough to notice during all my pre-passage checks, but were loose enough to work their way free. My bad.

I will make a note to add this to our splash checklist – if I can just remember where I put the damn list.