PV - Easy-to-Make Fender Covers
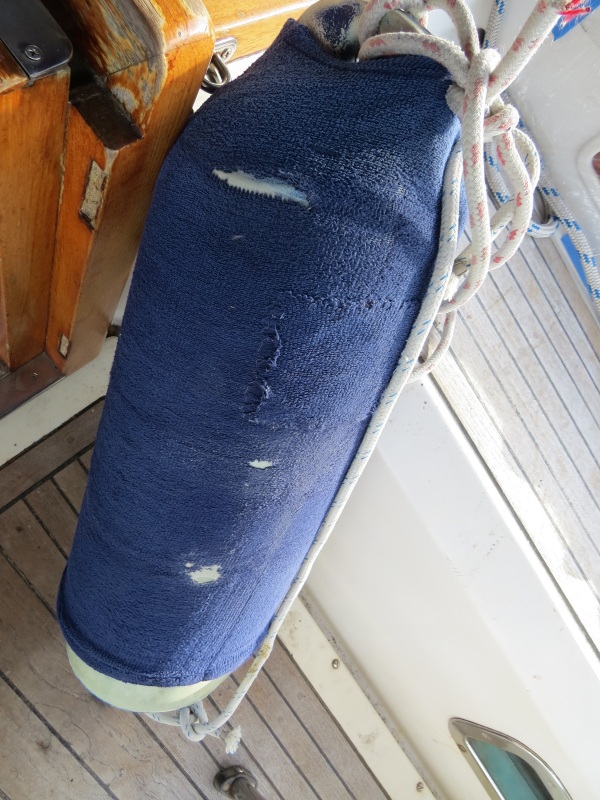
/Yes, PV … that's Pink View. I know you were expecting the Captain today, but he's up to his eyeballs in alligators, I mean alternators, so you'll have to settle for me instead. That said, this is the how-to blog on making fender covers that I promised the other day. Fenders act as “bumpers” to keep Nine of Cups off the dock and prevent her hull from being scratched and chafed by whatever sticks out from the dock, like cement or wood pilings. Covering them is partly cosmetic … it looks better ... and partly to keep the fenders from rubbing and scuffing the hull. There are pros and cons to using them, but we find them quite useful. Our last fender covers, or fender boots as they are sometimes called, were purchased in Australia and they never fit quite right and were looking pretty ratty. I'd repaired a couple of chafe spots in the past, but their current condition was beyond repair. It was time for something new.
I saw some in West Marine on-line … ~$40 for the size that would fit our fenders and we needed three of them. Yikes! I looked for a pattern on line and found some how-to directions, but none seemed all that cheap nor reasonable until David happened upon a sailing thread that mentioned using sweat pants as fender covers. Brilliant!
Here's how …
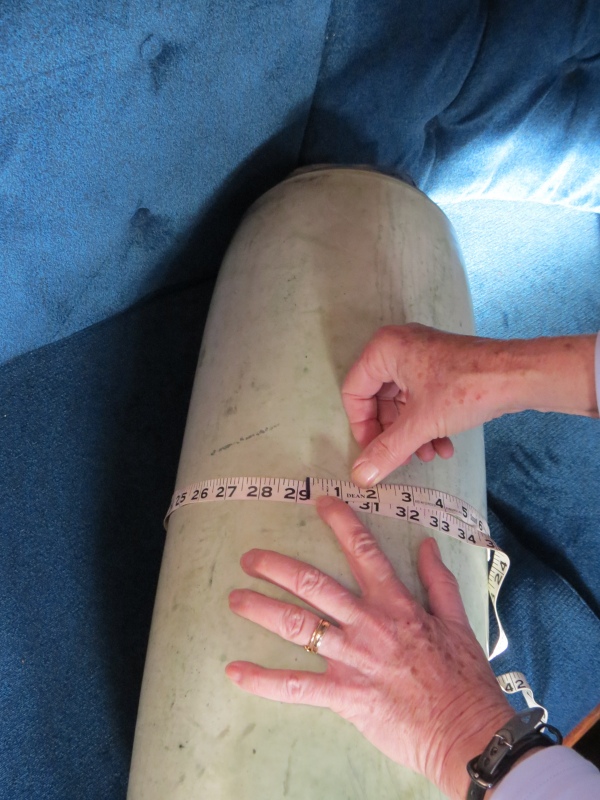
- Measure the circumference and length of the fender to be covered.
- Purchase sweat pants in your choice of color(s) at a thrift shop or discount store, e.g. WalMart, with the following criteria:
* Be sure the pants are elasticized on the leg cuffs
*Measure the width of the pant leg and multiply x2. That number should equal the circumference of the fender. For instance, the circumference of the largest fender was about 29”. We chose size 3XL sweat pants for it and a 2XL was large enough for two slightly smaller fenders. Remember the pants have a bit of stretch and the final fit needs to be snug.
*Measure the length up to the crotch of the sweat pants to be sure the “leg” is long enough.
*You can make two fender covers from each pair of sweat pants.
- Stuff a fender into a pant leg bringing the elastic end as far as it will go, but keeping the attachment ring on the end exposed. It should be a snug fit.
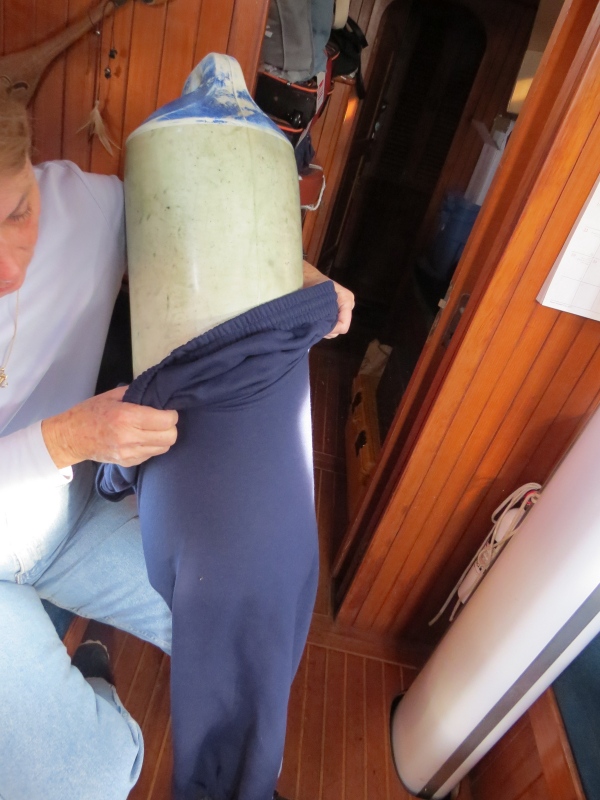
- Measure the length allowing for a 1” seam at the cut edge and mark accordingly. Remove the fender and make the cut.
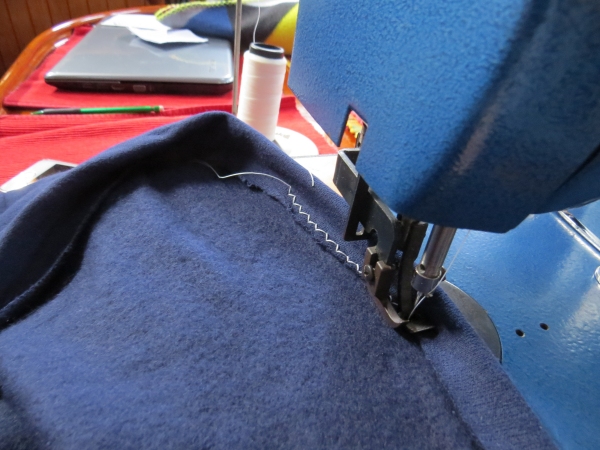
- Stitch along the top edge, leaving a 1” tube through which you can draw a small length of line.
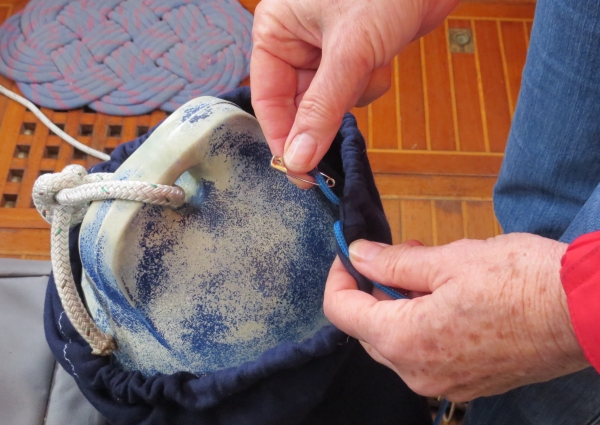
- Make a small cut in the tube and insert a piece of line attached to a safety pin (or paper clip) and work the line through the tube, drawing it through as you go until it meets the other end of the line. Seize the end(s) of the line with a lighter to keep it from unraveling.
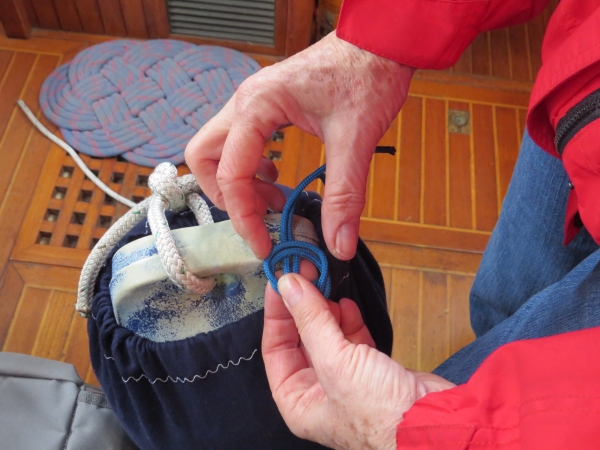
- Slip the cover back onto the fender drawing it up snug and tight from one end to the other. The elastic cuff will keep one end in place.
- Cinch the drawn line tight on the other end. Tie a knot and tuck it inside the fender cover.
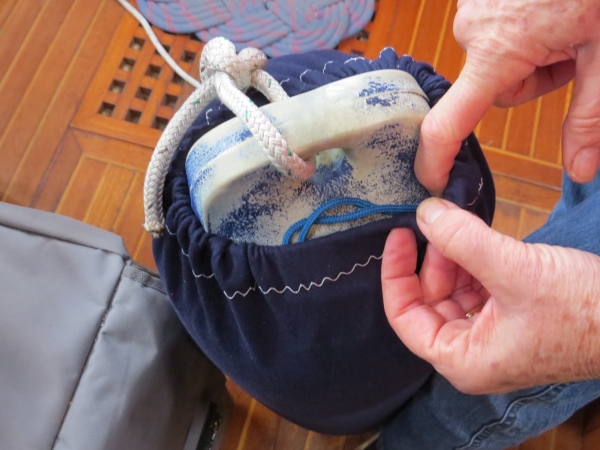
- Attach lines to the attachment rings as you usually would and make fast to the boat.
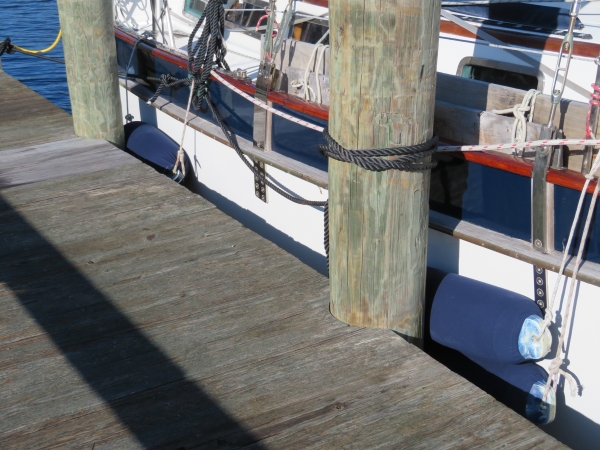
Voila! A fender cover that looks great and protects the hull. The only maintenance required is periodic laundering. Hint: If you don't drag your fenders in the water, you won't have to wash them as frequently.
Total cost: ~$4.00/fender cover
Sweatpants at WalMart - $7.36/pr + local tax (makes two fender covers)
A bit of thread, about 18” of small line and 20 minutes of my time.
We Pink View girls are very budget-conscious and handy to have around.
 Now that our big blizzard has passed, there is a prediction of sub-freezing temperatures for the next several days here in Chesapeake, VA, and we were starting to worry about the river freezing. There is no current, it's not very brackish, and we've already seen some skim ice. Will it freeze solid? If so, will the ice damage Nine of Cups? What happens when a barge goes by – will it push the ice into Cups? I remember well, the story of Shackleton's expedition, and how his ship was crushed after becoming trapped in the ice.

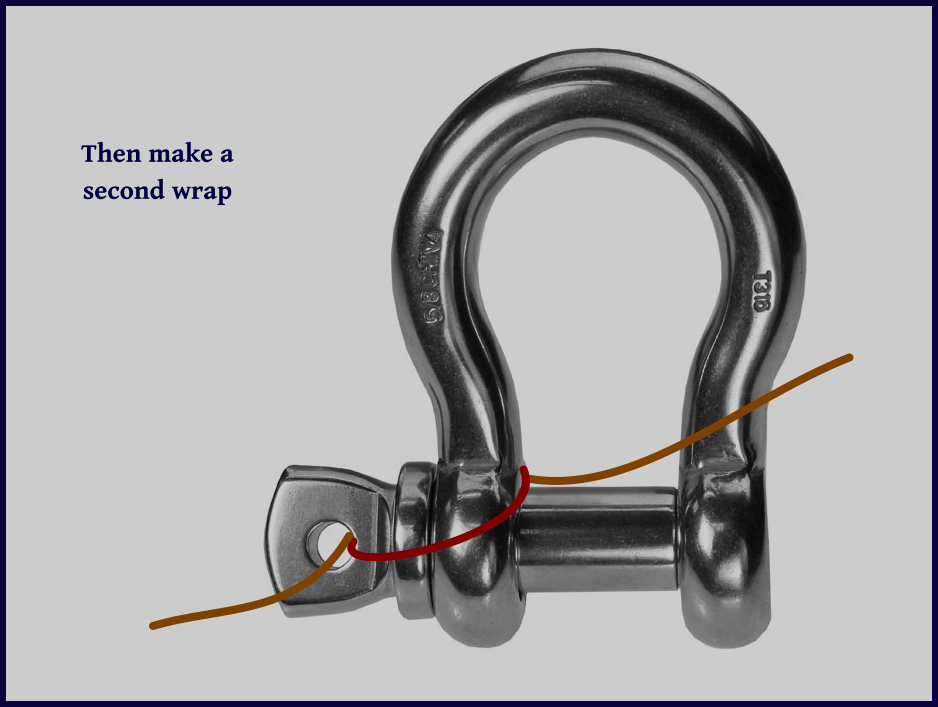
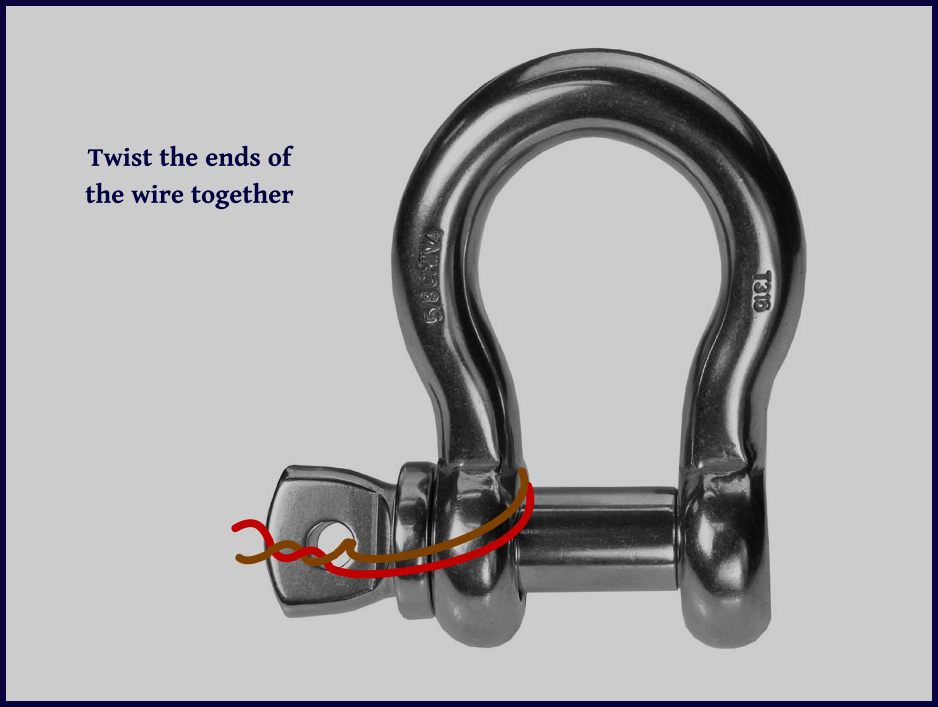
 The topic of this week’s Blue View is how to seize a shackle. (Okay – maybe I took a few liberties with my very bad, very rusty Latin). Seizing a shackle prevents the shackle pin from working loose, and on Nine of Cups, we seize most of our shackles. Any shackle that will be in place any length of time, any that are hard to get to or inspect, and any that would result in injury or catastrophic damage if they came loose, are routinely seized.