Installation...
 It was a beautiful, warm, sunny morning with a forecast for more sun. I was wearing a t-shirt for the first time this season. We borrowed the marina courtesy van again and went to pick up the new mattress. By the time we loaded the mattress into the van, it was raining in torrents and the temp had dropped nearly 20 degrees. Then came severe thunderstorms, heavy hail and tornado warnings. Tornado warnings, in Tasmania? This is not a usual occurrence here and it even surprised the locals.
Between heavy rain, light rain and wind gusts, we managed to unload the mattress, wrestle it down the dock, heave it up over the lifelines onto the boat and wrap and lash it in a heavy tarp and plastic under the bimini. We knew in advance there was no way the new mattress at 54” width would scrunch up enough to fit through the 32” companionway. It had to be modified on the dock … when it wasn't raining.
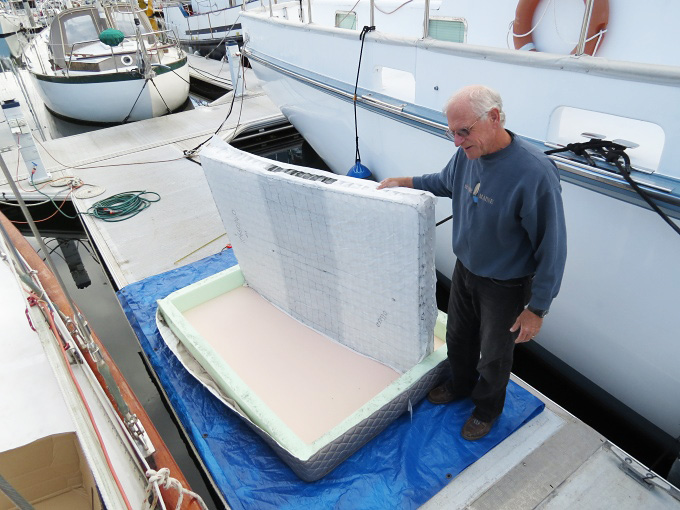 Another presumably sunny day and we were up before daylight. David spent a couple of hours making a pattern for the mattress modifications while it was still dark. As soon as dawn broke and it appeared we'd have sun, we laid out a tarp on the dock and wrestled the mattress out from under the bimini and onto the tarp. Now the surgical procedure began and Doctor David was up to the challenge. We just bought an expensive, beautiful mattress and now we were ripping it apart. Hmm.
The dissection began. First, we removed the bamboo fabric pillow top from the mattress. We used seam rippers to break the stitches, but it was slow going. This sucker was really put together well. People walking down the dock were curious and asked questions. The weather toyed with us...first sunny, then overcast. Every once in awhile we'd feel a few sprinkles. We couldn't work any faster, so we just said a few prayers, kept our noses to the grindstone and continued at our task. Once the pillow top was detached, we put it down below on the boat … out of the way and the weather.
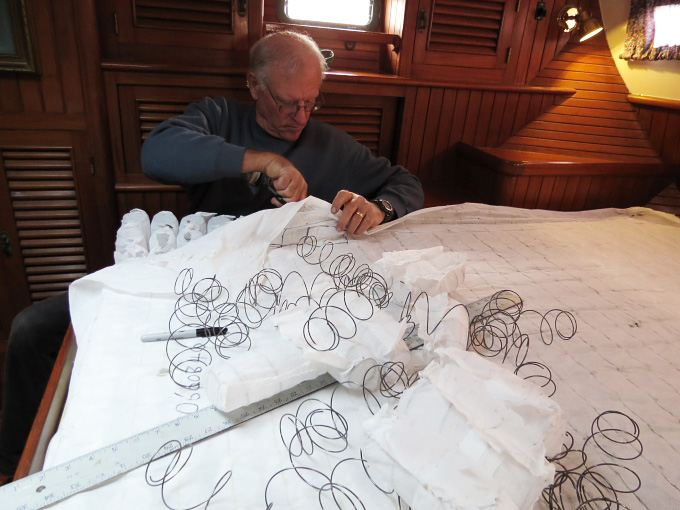 The pocket coil springs are encased in individual polyester fabric “pockets” corralled by two steel rod border wires that run around the circumference of the package and keep everything in place. David removed about 400 metal clips which kept the rods in place and then snipped the rods with our heavy duty bolt cutter with the intent of re-bending them and re-using them on the modified mattress.
He then began the tedious chore of removing individual pocket springs to adapt the mattress to our particular berth area. Straightening, then re-bending the steel rods was a lengthy, frustrating process. We used hundreds of cable ties to keep the rods in place. Adding the 3” foam sections on all sides of the mattress as an edge guard was like working on a jigsaw puzzle, requiring patience and time.
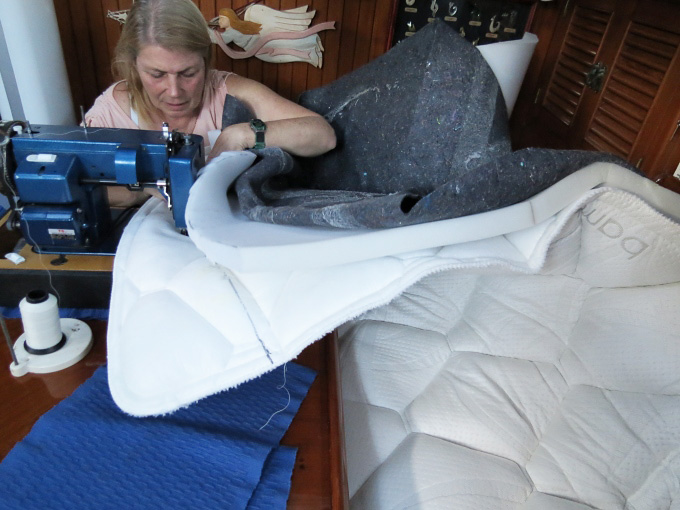 Lest you were thinking that the first mate was sitting idle while David was freeing springs, I began the modification of the queen-size mattress cover we purchased with the bed. This is not the usual cover you buy to protect your mattress, but rather a heavy-duty zippered outer mattress cover that replaces the usual ticking. The mattress company uses it on some of its models, but not the one we bought. They were, however, willing to sell us one separately and my intent was to modify it to fit the new mattress.
First came the chore of removing the zipper, all 280 linear inches of it. It unzips all the way around making it easy to get access or enclose the springs and foam inside, but making it a bear to sew. I used David's paper pattern to trace and then cut the bottom. The top waited until we had the mattress finished and in place. There were too many angles and chamfered corners where the mattress conformed to the hull and we wanted to get it right the first time around.
 Working down below has its advantages when it comes to weather. It is very disadvantageous, however, when trying to maneuver and turn over large objects in place, not to mention working around and tripping over the old mattress, disassembled new mattress, sewing machine, tools, extension cords, fabric and foam that had taken over every flat surface and floor area on the boat. We placed the foam and pillow top back over the springs, glued them and the foam in place and began measuring the cover which would conceal all the surgery and hopefully be a presentable-looking and comfortable mattress once again.
We were both all scrunched up in the aft berth area stretching, pinning, measuring, marking. It was quite the process. The sewing machine was all set up and rearing to go. I'd sew, then do a fitting. Sew, then do a fitting. The odd-angled corners were a challenge, but grappling with the mattress to get the cover on, then off again during the fitting process ended up being the hardest part of the whole procedure. At last, a final fit, some double stitching and it was done. It looked great!
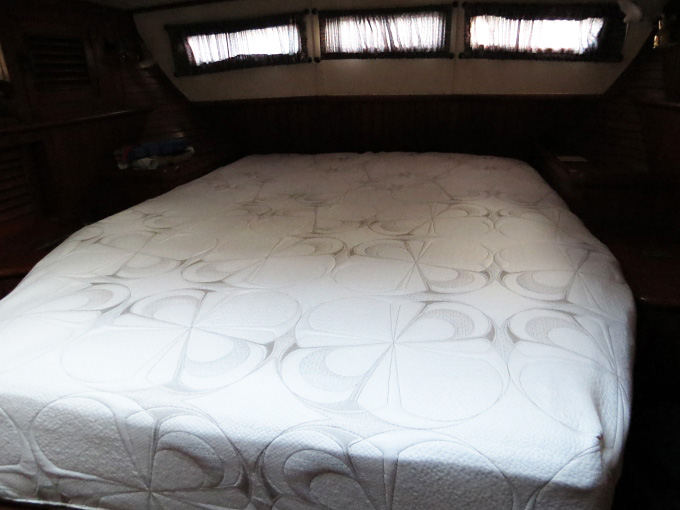 The final test...a night's sleep on this Franken-mattress. Oh my, it was comfy as we snuggled in, and the “modicum” of effort was soon forgotten. We woke rested ... with a slight hangover from the glue fumes. The comfort will stay; the fumes will go. Life is good.
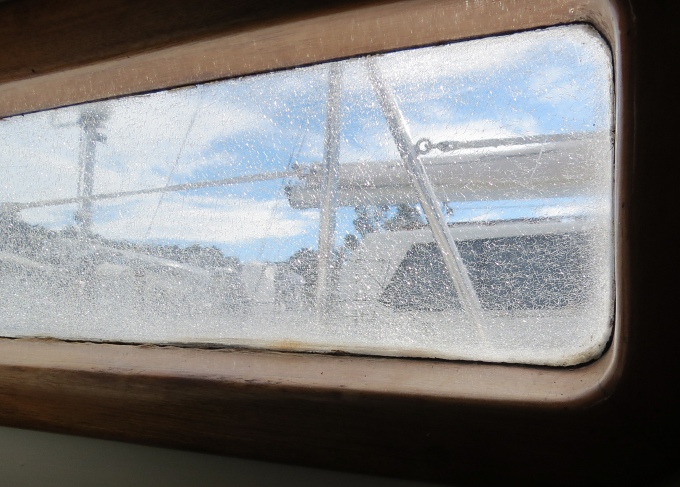 Here is a typical scenario on Nine of Cups. We were noticing that the portlights were becoming crazed and they needed replacing. David found a good deal in Hobart for 1 /4” (6mm) acrylic and bought what he needed to replace all four portlights.
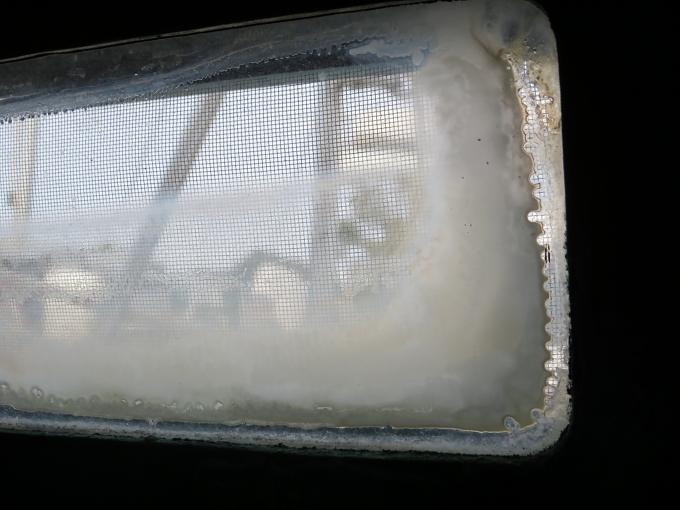 As he was replacing them, he complained that the portholes were especially stained and cloudy looking. And they really were, now that I looked at them more closely. Perhaps, as long as he was replacing portlights, he'd replace the portholes, too. There are 12 portholes...a bit more of a project.
 When he started replacing the porthole acrylic, he really hated the look of the bronze frames in which they were mounted. They were all verdigrised and corroded. It just seemed like the right time to clean those up, too. He bought some hydrochloric acid (known here as spirits of salts) and set to work taking them apart, soaking, cleaning and polishing them.
 Some of the screws were so corroded, they broke off and needed to be drilled out and replaced. And you'll never guess what next? The screens seemed to be in bad shape, too. We'd already seen a mozzie or two. Well, let's replace the screens and clean up those bronze frames, too. You get the picture. I might add, these chores were NOT on any list. Not the A list, nor the B list ... not even the C list.
 You can see how easy it is to get bogged down with tasks and have no fun at all. Ah, but that's where I come in. I take my role as the Nine of Cups official social coordinator very seriously. Hence, the reason we can blog about botanical gardens, wildlife sanctuaries and Bruny Island as well as new mattresses, haul-outs, repaired dodgers and new portlights.


