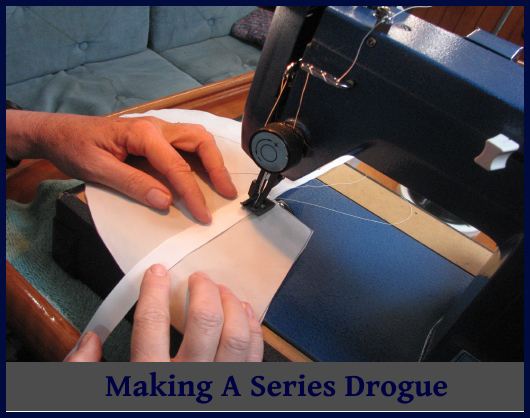
In the last Blue View, I talked about why we liked the idea of a series drogue and why we think it is as good as any other method for handling major storm conditions. I also discussed why we felt it is far superior to any alternative tactic we know of when the waves are breaking. In this blog, I'll talk about how to make your own series drogue. The design and construction details of a series drogue were published as part of a publicly funded study completed by the U.S. Coast Guard and Don Jordan, and are freely available to the public. I used this as my guide when we made ours along with lots of practical advice from our friends at Sailrite.
The illustration gives an overview of the construction. The cones are the same size for any boat – larger boats simply add more line length and increase the number of cones. As the number of cones increases, the initial line size must also increase to handle the added load.
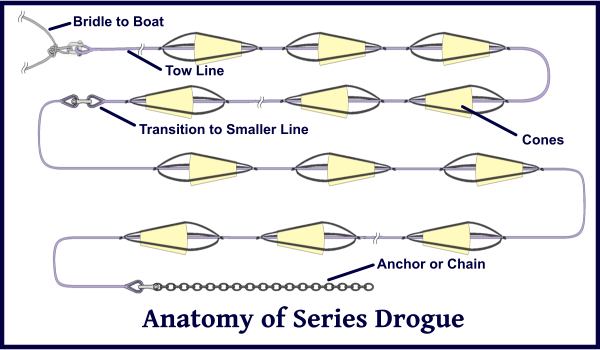
The bridle performs two functions. It splits the load, distributing it between two strong points on the transom, and it provides a turning moment to keep the boat stern-to to the waves. Each leg of the bridle should be 2.5 times the transom width, plus an allowance for the splice and for attachment to the boat.
The following table provides a quick summary of line sizes and the number of cones needed for different size boats. Use the gross tonnage for your vessel and then add 10%. The total load on the boat is shown in the second column. The third column in the table shows the load on the attachment points on each side of the transom. The line lengths shown in the fourth column is the length for the towing line. These lengths also include 5 feet at each end for splicing. A double braid line should be used rather than a three strand, which has a tendency to unlay as it is towed. The line sizes specified in the table are based on average strengths for double braid nylon line from several manufacturers. Check the breaking strength of the line you purchase.
|
|
|
|
|
|
|
|
Monohull
Displacement
(lbs)
|
Load
(lbs)
|
Load at
Attachment
Points (lbs)
|
Line Length
Required
(ft)
|
Line Size
(inches)
|
No. of
Cones
|
Weight at end of line
(lbs)
|
|
10,000
|
8000
|
5600
|
250
|
5/8”
|
100
|
15
|
|
15,000
|
12000
|
8400
|
260
|
3/4”
|
110
|
15
|
|
20,000
|
14000
|
9800
|
150/150
|
3/4”,5/8”
|
120
|
15
|
|
25,000
|
17000
|
11900
|
155/155
|
1”,5/8”
|
130
|
25
|
|
30,000
|
20000
|
14000
|
165/165
|
1”,5/8”
|
140
|
25
|
|
35,000
|
23000
|
16100
|
170/170
|
1”,5/8”
|
150
|
25
|
|
40,000
|
25000
|
17500
|
125/125/125
|
1”,3/4”,5/8”
|
160
|
30
|
|
45,000
|
28000
|
19600
|
130/130/130
|
1-1/8,3/4”,5/8”
|
170
|
40
|
|
50,000
|
30000
|
21000
|
135/135/135
|
1-1/8,3/4”,5/8”
|
180
|
50
|
For example, Nine of Cups has a gross tonnage of 18 tons, so we used 40,000 lbs as our displacement when designing the drogue. We needed to make and attach 160 cones to three lines, each 125 feet long. This seemed daunting at first, but it proceeded quickly once we got into the project. We set goals for ourselves to complete a given milestone each evening, e.g. draw and cut out 25 cones or cut 100 strips of nylon tape.
A 1-1/2 ounce ripstop nylon material was recommended for the cones. We used an old mainsail, which was much heavier than necessary. The emphasis is on the word ‘old’ in the last sentence. This sail had been retired for about four years and stowed on the forward bunk. Before we spent a lot of man-hours making all those cones, we wanted to be sure the sailcloth had not deteriorated and lost too much of its strength. To test the material, we made up a dozen cones, attached them to a line and, during one passage, dragged them for 24 hours. Our speed varied between 4 and 6 knots. The cones held up fine, but we did learn a few things about the construction and stitching.
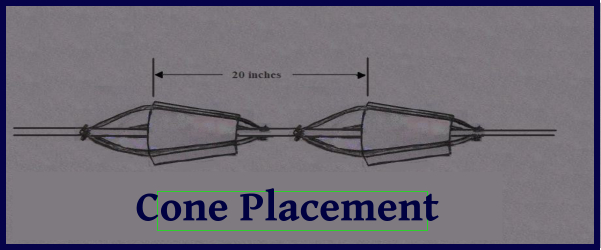
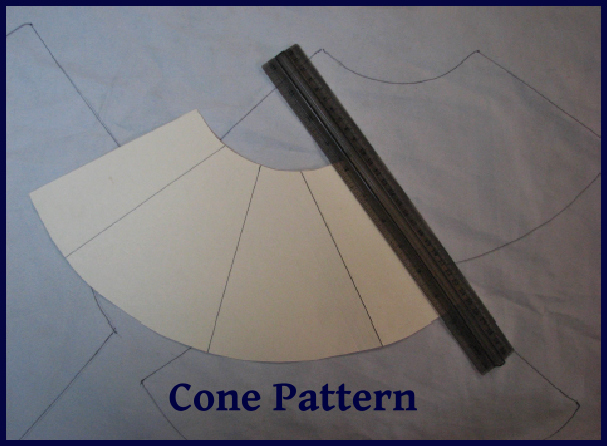
The illustrations below show the recommended size and placement of the cones. We made a pattern out of cardboard to mark the outline of each cone for cutting. We also used the pattern to mark each cone to aid in aligning the nylon tape for sewing. We first tried cutting each cone using a hot knife, but found this to be too slow. We switched to a pair of electric scissors and then used a butane lighter to seal the edges.
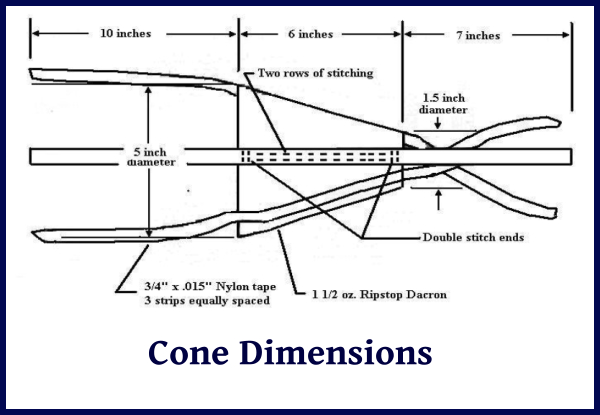
The next step was to cut and mark each length of nylon tape. We placed pieces of masking tape on a flat surface to serve as a template for measuring, cutting and marking each strip of nylon. These strips were then sewn to the cones. One thing we discovered with our test run was that it was important to double stitch the tape at each end.
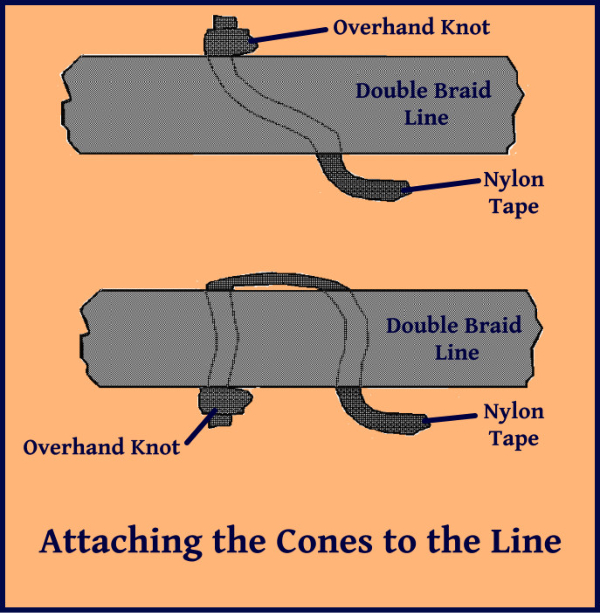
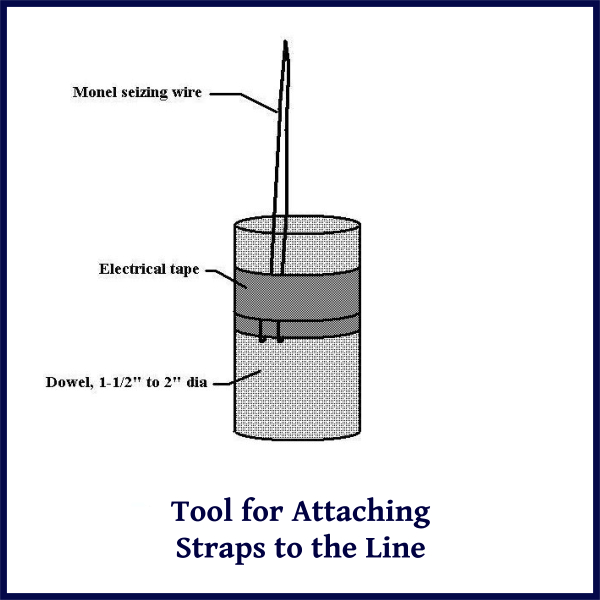
Each piece of cone material was then folded in half and double stitched together. The last step was to turn each cone right side out so that the seam was on the inside. It probably doesn’t matter, but we sewed each cone so that the tape was on the outside of the finished cone. We next began attaching each cone to the line. The first step was to mark the line at 20 inch intervals, leaving 5 feet or so at each end for splicing. Each cone was threaded onto the line, then the end of each strip of tape from the cone (six per cone) was pulled through the line and tied with an overhand knot using either the single or double pass method. We already had a splicing wand that worked well for this process, but you can make a tool using seizing wire bent into a loop and taped to a wooden handle.
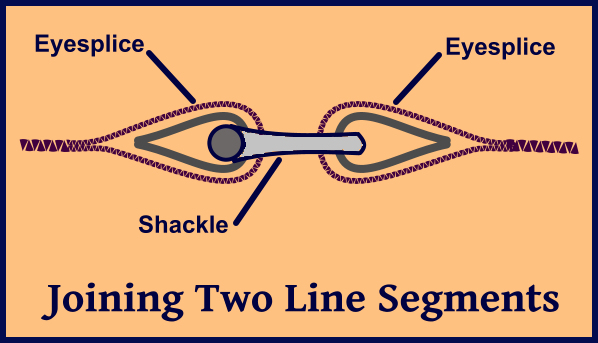
The next issue was the attachment of the line segments, towing line, bridle and anchor. A proper splice is stronger than any knot. The line we bought, however, was manufactured in South America and we found it was almost impossible to splice eyes into it, unlike the line we were used to that was made in the U.S. Instead of splicing eyes into each end, we resorted to using knots to attach the line segments together. Ideally, we would have spliced heavy metal thimbles in the ends of the lines and attached them together with heavy duty shackles. For the weight at the end of the line, we used a 20 foot length of 3/8” chain. We attached it with a shackle to a standing bowline at the end of the line.
An important aspect of the overall system is the attachment points on the boat. These must, of course, be strong enough to withstand the load. The bridle splits the total load between the two corners of the transom, making the load at each attachment point no more than 70% of the total load. Most cleats and sheet winches, however, are not designed to withstand stresses of this magnitude. The ideal alternative is to make attachment points similar to chain plates by bolting stainless straps to each corner of the transom. These should be through bolted and utilize backing plates. Use heavy shackles to attach each tow line.
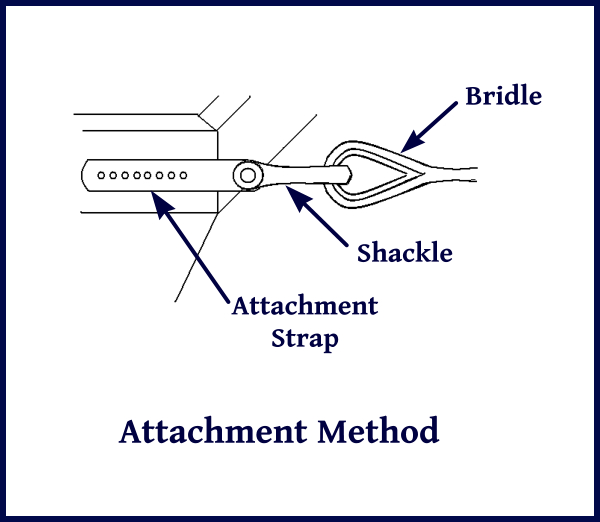
The following table lists conservative size straps and shackles for several boat sizes. If cleats are used, make sure they are rated for the load and are bolted through the deck with substantial backing plates.
|
Load at attachment
point (lbs)
|
Strap Size (Inches)
|
Bolts
|
Shackle Size
|
|
10,000
|
¼ x 2.25 x 14-3/8 inch
|
4 each
|
½ Inch
|
|
14,000
|
¼ x 2.25 x 18-3/8 inch
|
6 each
|
5/8 Inch
|
|
18,000
|
3/8 x 2.25 x 22-3/8 inch
|
8 each
|
¾ Inch
|
|
22,000
|
3/8 x 2.5 x 26-3/8 inch
|
10 each
|
¾ Inch
|
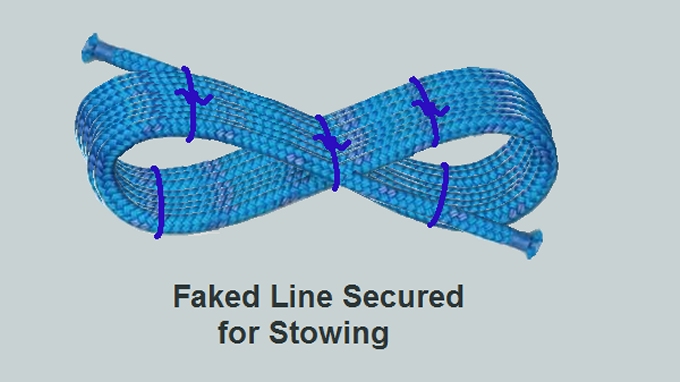
Chafe may be an issue as well. We actually used dyneema for the bridle which is more chafe resistant than nylon, and enabled us to use a smaller diameter line. The last issue is the stowage of the drogue. The total weight of our drogue system was too much to handle, so we separated the line segments and only connected them together when we needed to deploy it. We stow each segment the way we stow our spare rope anchor rode using figure-eight flakes.
Now that the drogue is all designed and built, how do we deploy it? How do we get it back aboard again? I'll cover that in the last installment of this 3-part series next week.



