Growing old-er...aren't we all?

One of the first things we did when we arrived in Las Vegas last January was to visit David's mum. She's 98 years old, lives in a pleasant, assisted living complex and remains very, very independent. She's got it all together and has a wonderful sense of humor. I wonder how I'll be doing at age 98 … if I'm still around. Though her age amazes me, it's really her attitude that astounds. She's feisty, persistent and strong, but in the nicest possible way. Everyone loves her. She recently began teaching an art class to other folks where she lives. She was elected Vice President of the Residents' Committee and has all sorts of ideas that she's hoping to implement that will allow residents more control of their lives … everything from menus to meal hours to entertainment.

new home smile

What brought up this topic is that we've recently noticed that some people tend to treat us differently than in the past. I look in the mirror and, yeah, there are always a few more lines and wrinkles. If it weren't for Miss Clairol, I'd be gray. Gravity has taken its toll on my body … some parts sag instead of being perky. David looks the same to me as he did 30+ years ago, although I guess his hair is white now and a bit sparse on top. But still I wonder exactly when we started looking like we were feeble and stupid? How come some folks insist on calling us “hon” and “sweetie”? I really hate that familiarity from strangers. It should be reserved for family and children. Did we treat older people this way when we were younger? Did we automatically assume that anyone over age 60 was senile and incapable of intelligent thought or decisions or providing sound advice from years of experience?

Living full-time with my mum a couple of years ago was a real eye opener. She struggled to maintain her independence in subtle ways and I failed to recognize it. I thought it was sheer stubbornness (that seems to run in the family). She knew she couldn't drive, but refused to sell her car. She preferred to do things herself although it took her forever. She'd chastise me when I automatically helped her without being asked. “I can do this myself!”, she'd shout. She insisted that she manage her own finances although she frequently made errors or forgot to pay bills. She decided which clothes she'd wear even if I thought they were unsuitable for the occasion (and trust me, sometime they were). No matter, she was scrappy and spunky to the very end.

As David and I grow older, I hope we are able to maintain our independence and personal dignity as Rebecca has. We don't want someone else making all our decisions for us. We certainly don't want to be dependent on others. If we live long enough, our bodies will fail us to a certain extent and that we must accept. Yes, we'll need help with day-to-day stuff perhaps, but I hope we can maintain our sense of humor and adventure and our desire to learn.

We were listening to the local cruisers' radio net the other morning. It's quite an active community here and the local cruisers all listen at 0800. Cruisers take turns being the controller (aka host). The net provides weather forecasts, news of interest, local happenings and activities, "treasures of the bilge", etc. Anyhow, one fellow got on the radio and asked if anyone could help him move his dinghy. David offered to help and we walked down to his boat, Jolly Friends, after the net to see what he needed.
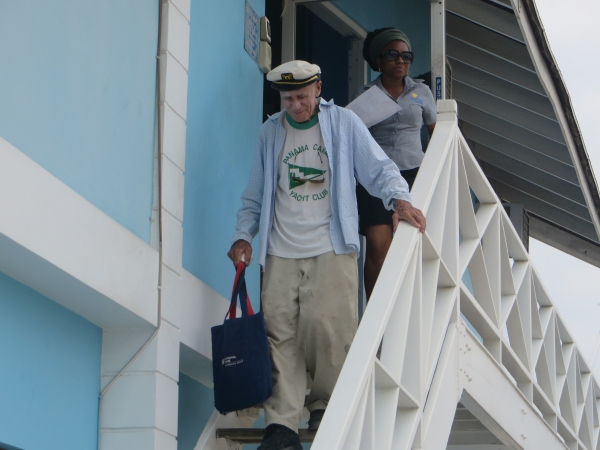
older_Vern coming own stairs

Down the ladder came a fellow who was obviously a few years older than we are. He looked a bit frail and weathered, but maneuvered the ladder quite well. Vern, we found out, is 91! He lives on his boat and still sails. He has a younger fellow aboard, Ken (in his 40s), who helps him out sometime. He thinks it's the sailing and staying active that accounts for his longevity. “If I sat at home and watched television like some of my friends, I'd be dead in a month!”

vern and ken

Not sure what it is, but Vern is an inspiration to us all. He proves that there's hope for us sexagenerians. We've got at least another 25 years left to sail. Whoopee!

Watch out you young whippersnappers, we're sticking around. And don't call me hon!

Anti-fouling Our Big-bottomed Girl

I never appreciate how big Nine of Cups is until I start painting her bottom. With a modified full keel, our 45' (14m) girl has a big, big bottom … a lot of area to cover with anti-fouling paint. Painting the bottom has become my job … mostly because it seems I do little else aboard plus I can't screw it up very much. It's pretty mindless work … right up my alley. We typically haul-out every 12-18 months. Our last haul-out was in Mandurah, Australia in May 2014, so we're overdue. Before that, it was Kettering, Tasmania in November 2012 … only proving the point that cruising is doing boat work in exotic places. That said, we were surprised and pleased by the condition of Cups' hull when we hauled out this time. After a pressure-washing, the hull was pretty clean and still looked blue which means our last bottom job lasted quite a long time.

haul out in trinidad


There are several reasons to anti-foul Cups on a regular basis. The paint retards the growth of organisms on the hull. Growth on the hull and prop reduces speed and also may transport harmful marine life from one area to another, infecting new areas with marine pests such as mud snails and fanworms. We've seen first hand how quickly these pests can propagate and take over.

fanworms

We tend to use whatever anti-fouling paint is locally available. Even inexpensive antifouling paint is expensive. We expect to pay ~US$1000 for 15-20 liters … enough for 2-3 coats. Estimating the amount of antifouling paint you need is relatively easy. There are all sorts of formulae on line. Sometimes the 20-liter (5 gallon) bucket is cheaper and we opt for it. This time we chose Jotun, a Spanish product. Jotun describes it as “a one component acrylic, hydrolysing antifouling coating based on ion exchange technology .” There you have it … all you need to know. In English, basically, it's very toxic stuff, using copper-based additives as a biocide.

5 gallon bucket of jotun

The prepping is not difficult. David usually wet sands the waterline areas and I lightly sand other areas that require it and which can be reached without using the scaffolding (it's a height thing!). The hull is rinsed with fresh water and allowed to dry thoroughly overnight. The waterline is masked so we don't slop over onto the topsides.

masking

We alternate bottom paint colors between blue and black, sometimes red. We tried green once … it was a mistake. I'm applying dark red this time around, mostly because that's what was available. The purpose of alternating colors is to 1) be able to see where you've painted and more importantly 2) once she's in the water, to see where the paint is wearing off. If we can see lots of blue under red, we know it's definitely time for another anti-fouling job. We use ablative or self-polishing paint which means the paint sloughs off over time due to interaction with the water. When it sloughs, the algae, barnacles and sea critters hopefully slough off with it or do not adhere to it in the first place because of the biocides in the paint. A tie-coat was recommended which helps the new paint adhere to the old and I applied that first.

grey over blue

I wear a protective suit, gloves and a respirator to apply it. It is not a becoming look … think Pillsbury Dough Boy in baby blue. Painting the large, open areas of the hull is quick and easy. I use a roller and it goes pretty quickly. It's the tight areas around the prop and the very bottom of the keel that are more challenging only because you have to scrunch down and use a brush to get at them. I learned the hard way that without a respirator, the fumes can just about knock you out.

painting attire

The whole job is usually accomplished in two days. This time, however, it stretched to three days. The heat is fatiguing and I took breaks every hour or so to cool down and drink water. The tie coat was applied in the morning. After a 2-hour dry time wait, I applied the first coat of red anti-fouling.

first coat almost done

David joined me in order to get as much done as possible, but the two coats was all we could manage. On Day 2, we applied the second coat of red early in the morning. It requires a 6-hour dry time and then the afternoon showers began. On Day 3, the boat stands were moved so we could paint the unpainted areas under the stand pads and applied a third and final coat. Typically whatever paint is left over is applied to the leading edges until all the paint is used up. We called it a good job done, said hallelujah and disposed of all the used supplies. Cups was ready to go back into the water.

removing boat stands

Since the bottom paint is always one of the very last jobs to do on the boat, I love looking at Nine of Cups when the job is finished. She looks all clean and shiny and ready to go … until next year!

cups looking fine

The Blue View - Replacing a Seacock

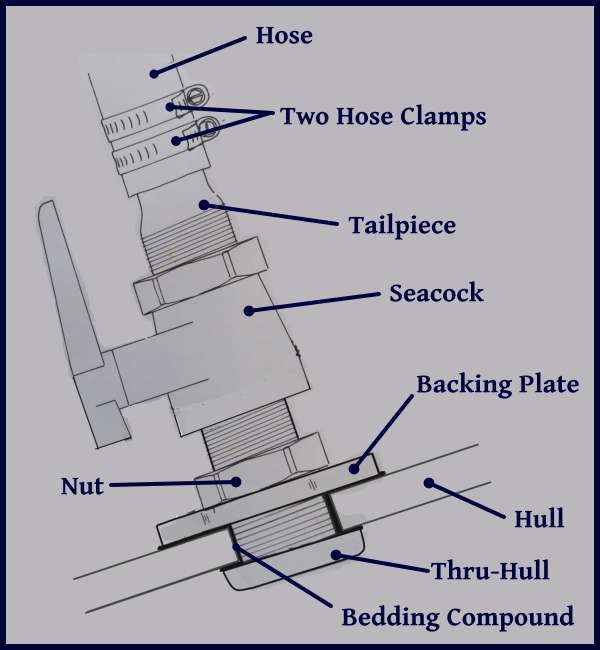
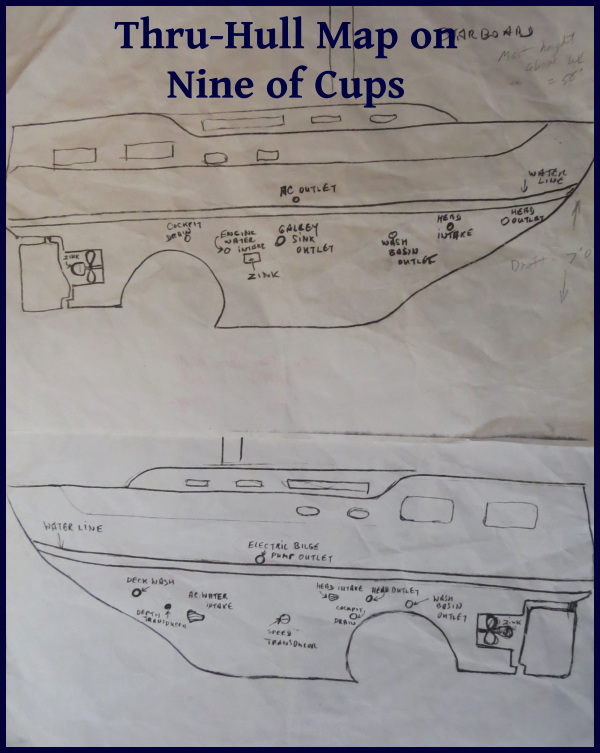
seacock sketch Nine of Cups has 16 thru-hulls – holes in her bottom. A couple of these are for depth and speed transducers, but 14 are used to allow water into or out of the boat. For example, one is used as an engine cooling water intake, another is connected to the galley sink drain, another serves as the water intake for our desalinator, and so on. Since it could be a real disaster if a hose connected to one of these thru-hulls broke or came loose, each of the 14 thru-hulls is fitted with a shut-off valve - or seacock in sailor's parlance. As part of our annual haul-out chores, we check, lube and exercise each seacock, and examine all the hoses and hose clamps.
thruhull map

This process is more easily done with two people. In our case, Marcie is outside the boat equipped with a q-tip taped to the end of a screwdriver and a pot of either vaseline jelly or a silicone based lubricant, while I am on the inside of the boat. We start with the most forward thru-hull on the starboard side, and I work the seacock half a dozen times or so to limber it up, then close it and tap the hull a few times. That's Marcie's cue to grease the ball valve with a dab of lubricant, after which she taps on the hull. We repeat this three times for each seacock, then move on to the next seacock. While she is greasing, I examine each seacock and thru-hull for corrosion, make sure the bonding wire is still attached and intact, then check each hose for signs of deterioration and each hose clamp to make sure none have broken or begun rusting.

The whole operation takes about a half an hour or so, and is well worth doing. There are always a few seacocks that are quite stiff, but which are soon operating smoothly again after working and lubing them. Invariably, I discover a few hose clamps or a hose that looks questionable, and it goes on the list for replacement before we splash again. And every few years, I find a seacock that has totally frozen up and which will also need replacement before going back in the water.

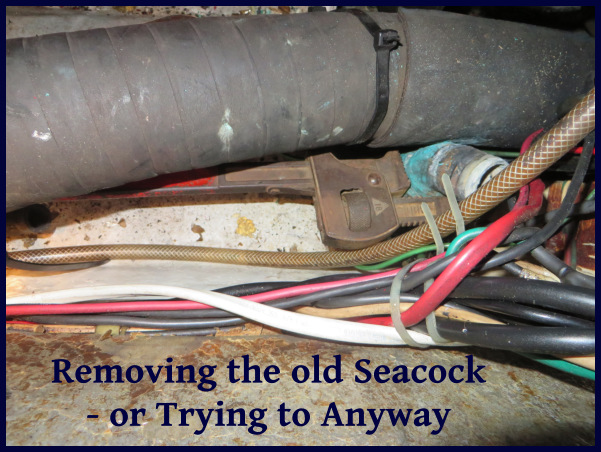
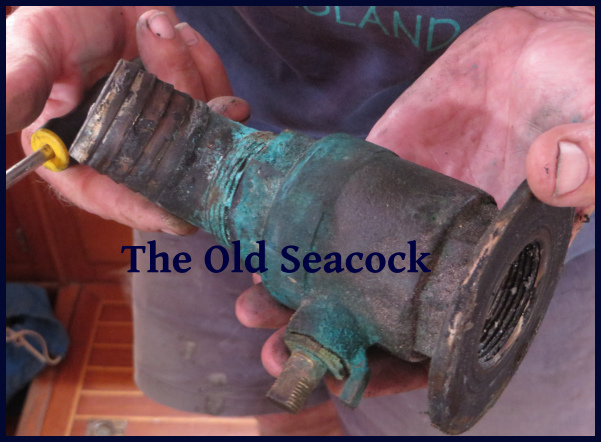
This time, the seacock for the port cockpit drain was seized. It has been with Cups since she was built, and after 30 years, it finally seized up. This particular one is located behind and below the engine, right next to the large engine exhaust hose – probably the most difficult-to-access seacock on the boat.

removing the seacock

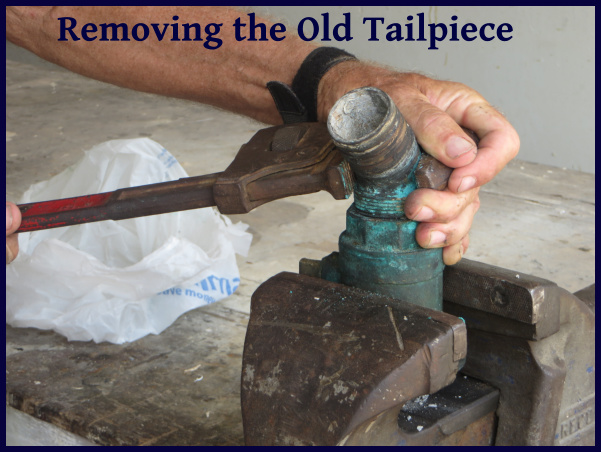
The usual steps involved in removing a seacock are to remove the hose clamps and hose from the tailpiece, then, using the biggest pipe wrench that will fit into the space, unscrew the seacock from the thru-hull. These parts are made of heavy bronze, and were sealed with a copious amount of bedding compound 30 years ago, making them somewhat stubborn. I got my biggest pipe wrench out, wriggled my way down to the seacock, then spent the next hour pushing, pulling, grunting, sweating and cursing trying to get the damn thing to budge. After several new cuts and abrasions, a few bruised knuckles and absolutely no movement of the seacock, I went to find Raymond, the boatyard mechanic.

removed seacock

Raymond is a big, strong guy, and his helper is even younger and stronger. I was sure that between the two of them, the seacock would give it up, but after half an hour of concerted effort on their part, it still wouldn't move. We had a brief conference and decided that the only way to get it out would be to grind off the bottom of the thru-hull, and push it up and out of the hull. I was quite apprehensive – it would take some finesse and care to accomplish this without damaging the hull – but Raymond assured me he could do it. Sure enough, after another twenty minutes or so, the thru-hull and attached seacock were free with no collateral damage at all.

removing the tailpiece

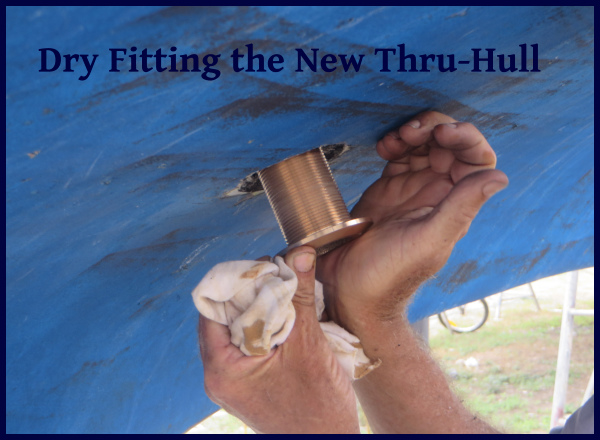
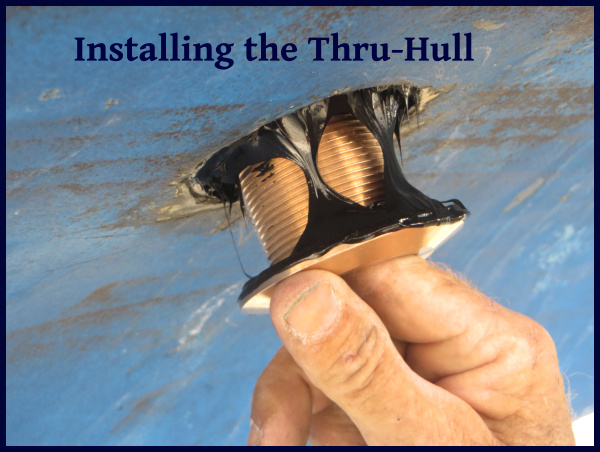
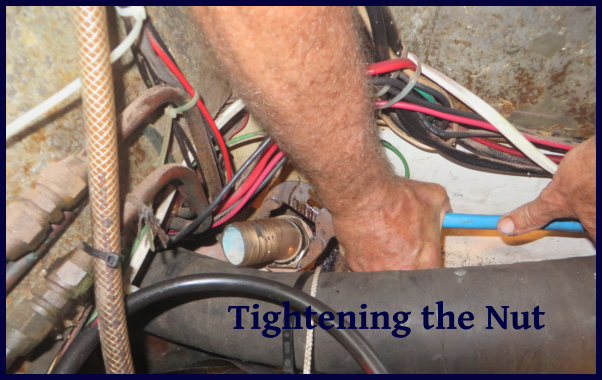
Installing the new parts was much easier. The new thru-hull was pushed into the hole from beneath, and a backing plate was installed and the nut screwed into place on the inside of the hull. I did a dry fit first to make sure everything fit, then took it all apart, applied bedding compound to the hole, under the backing plate and onto the threads, then reassembled everything. I tightened the nut moderately tight, making sure bedding compound was oozing out from under the backing plate and around the end of the thru-hull, then let it sit overnight. The next day, I tightened the nut as much as possible. This ensures that not all the bedding compound gets squished out from the mating surfaces.

dry fit

installing

tightening

Next, I applied bedding compound to the threads on the tailpiece and screwed it into the seacock. Then the sea cock was screwed onto the thru-hull, again, after a light application of bedding compound to the threads. It was tightened down, making sure it was oriented so that the handle could be operated. Finally, a new hose and two new hose clamps were fitted into place.

All done, and just in time for a beer while I admired the finished job. All that's left is to check it when we splash to make sure there are no leaks. With any luck, it will last another 30 years, which is just about how long I want to wait before I have to repeat the job.