The Blue View - Fuses and Circuit Breakers

Sooner or later, if you own your boat any length of time, you will have to deal with replacing or adding a DC electrical circuit. Perhaps you are upgrading an older piece of gear and the wiring is corroded or inadequate, maybe you are adding some new electronics, or maybe you are replacing a previous owner's amateurish handiwork that is now causing problems. Whatever the reason, it is not difficult to do the job correctly, with results that are professional looking, safe and reliable. a shipshape installationPlanning the installation

If you are upgrading an older piece of electrical gear, you may only need to replace the old wiring with new. If the amperage requirements of the new gear is no more than the old, if it was wired correctly to begin with, and the circuit it is connected to is not overloaded, it should be fine. Otherwise, you will need to find a new circuit for your power connection. So how do you go about finding the best place to connect the new wiring?

figure 1

Figure 1 shows a simplified DC electrical schematic for a typical sailboat. It has two house batteries in parallel and one starter battery. The switches allow either battery bank to be disconnected or to be re-routed. For example, if the starter battery died, it is an easy matter to start the engine using the house battery bank. The breaker panel has one sub-main breaker and several branch breakers, only a few of which are shown in the figure.
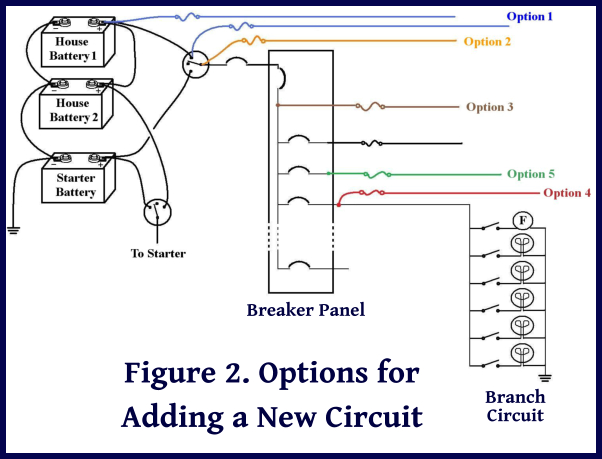
figure 2

Figure 2 shows several options for connecting your new electrical gear to the house batteries. Option 1, shown in blue, connects the new circuit directly to the battery. This is allowable for certain equipment that should be powered all the time, such as battery chargers, safety equipment (bilge pumps, alarms, etc.), and electronic equipment requiring continuous power for its memory. As long as there is a fuse or circuit breaker in the circuit and it is placed no more than 7” (178mm) from the battery or the switch, this method is acceptable. ( Note: if the conductor is enclosed in a sheath or enclosure, the fuse can be located up to 72” (182cm) from the battery terminal or within 40” (102cm) of the switch.)

The second option is to connect the new circuit to the battery switch as shown in orange in Figure 2. This is acceptable, again, as long as the fuse is within 7” (178mm) of the switch, or within 40” (101cm) of the switch if the conductor is contained in a sheath or enclosure. This option is better than the first for most equipment because the circuit can be switched off using the battery switch.

In the third option, the brown wiring in Figure 2, the new circuit is connected downstream of a circuit breaker. Depending on the type of equipment being connected and the conductor size, a fuse may or may not be required.

You can also connect the new circuit to an existing branch circuit as shown in red in Figure 2, which in some cases, may be the best option. As in the third option, a fuse may or may not be necessary depending on what you are installing. If you are adding a new reading light to the starboard settee, it makes perfect sense to connect it to the “Stb Cabin Lights” breaker. On the other hand, it would be illogical to connect the wiring for a new chart plotter to that same branch circuit. Before deciding on this fourth option, you should calculate the existing load on the branch circuit and make sure the new equipment will not overload the circuit. If the existing load plus the amperage requirements of the new circuit are less than the breaker size, it is probably safe to add the new circuit. In some cases, it might be possible to increase the breaker size, but this is unwise without carefully evaluating the conductor sizes and loads in an existing branch circuit. (The last few blogs discussed the processes for calculating loads and wire sizes).

One other option for connecting the new circuit is the green wiring shown in Figure 2. If you have a spare breaker, the circuit can be wired as a new branch circuit. This would be the best option if you are installing some new gear like an autopilot, refrigeration unit, or radar. The fuse may not be necessary if the breaker is sized correctly.

The two key things to remember are:

  1. Don't overload the circuit. If you are installing new gear, make sure the added load combined with the existing load doesn't draw more than the circuit can handle.
  2. Don't make the wire the weak link in the circuit. Be sure the wire you are adding to a circuit can carry the maximum current the breaker is rated for. If you connect a 20 AWG wire to a circuit with a 20 amp breaker and the wire shorts out, the red-hot wire with its smoking insulation will become the circuit fuse before the breaker trips. A better way is to add a small fuse between the breaker and the small wire.

Want to know how to install a fuse? Stay tuned to next week's blog.
Spring Planting

Spring comes early to Las Vegas … at least we're hoping it does. We've noticed the trees budding and leafing out as we take our morning walks. The temps are a bit warmer and each day is minutes longer. We're getting itchy for a change and what better way to exploit our itch than to plant a garden. We surveyed all the local places for plant availability and price. We were opting for seedlings versus seeds. Walmart had all the regular flowers and veggies. Lowes and Home Depot were a bit more expansive in their offerings and the prices were good. The local Star Nursery has slightly higher prices, but the variety, quality and knowledgeable clerks sometimes make up for the price difference. We spread the wealth and bought stuff at each place.

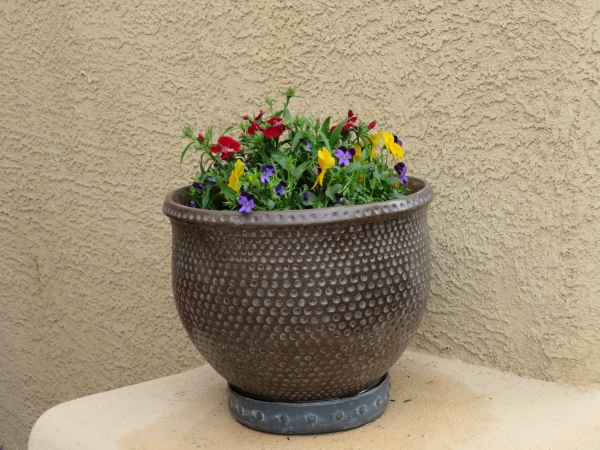
We started with a large ceramic planter for the front entryway. It gets direct sun and lots of it. David ran a soaker from the sprinkler system to the big new pot. We bought bright purple and yellow violas, pansies and dianthus, all of which like full sun, and filled the planter.

big pot of flowers in las vegas nevada

Next, we chose three lavender plants for the side entry which we've just discovered has sprinkler heads. David fixed the ones that were broken and exposed those that were buried. After rock removal and a bit of soil work, the lavenders are in and looking fine.

lavender on the side of the house

Mary is working on the new backyard raised planters. She's keen on different varieties of peppers and tomatoes and likes to experiment with new things like kale and artichoke. Herbs are key on her grow list and she chose lemon balm, lemon thyme, basil, cilantro, mint … the list goes on. We'll be a well-herbed family and she plans to use them in her summer menus.

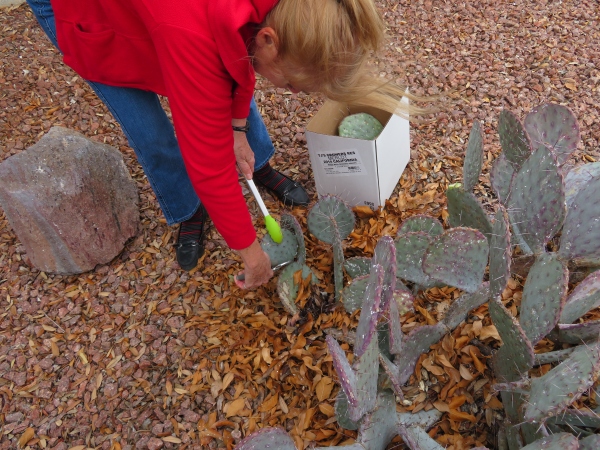
I took to the internet to figure out how to prune cacti and succulents. The universal answer … carefully! Armed with pruning sheers and long tongs, I trimmed back our prickly pear, removing several decayed and errant pads. I doubt it had ever been pruned. The aloe and yucca were also trimmed back and the front yard is looking much improved.

pruning prickly pears

There's still much to be done in the landscaping department. David wants to build a deck with more planters. We'd like to add a couple of trees and some shrubs and perhaps some border plants along the back wall. There's no rush. Las Vegas has four planting seasons and we'll do a little bit each time we visit. In the meantime, it was great being outdoors and initiating the rites of Spring.

Let's hope Mother Nature doesn't decide to do winter again!

Henderson Bird Viewing Preserve

henderson bird preserve nevada

Instead of our usual morning walk around the golf course, we drove four miles to the Henderson Bird Viewing Preserve to enjoy some early morning peace, quiet and bird-watching. As I've said before, we're not “twitchers”, i.e. avid bird watchers, but we do enjoy watching and identifying birds in beautiful settings.

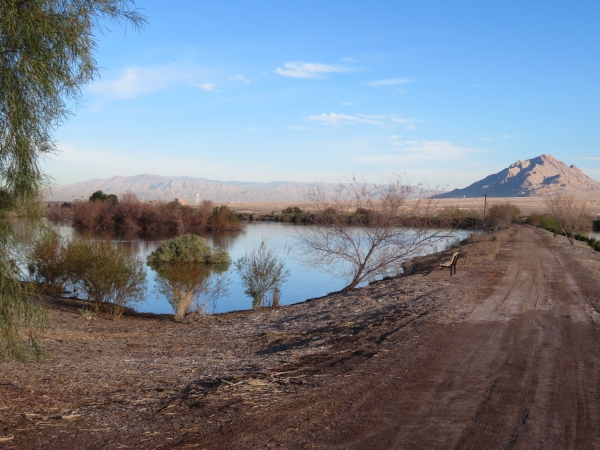
Located at its Water Reclamation facility, the City of Henderson has done a great job with the bird viewing preserve for nearly 20 years. Over 140 acres of land including nine ponds provide lots of safe area and nesting for residents as well as welcome rest stops for migrants and visitors. It's one of our favorite places to visit when we're in the area.

henderson preserve nevada

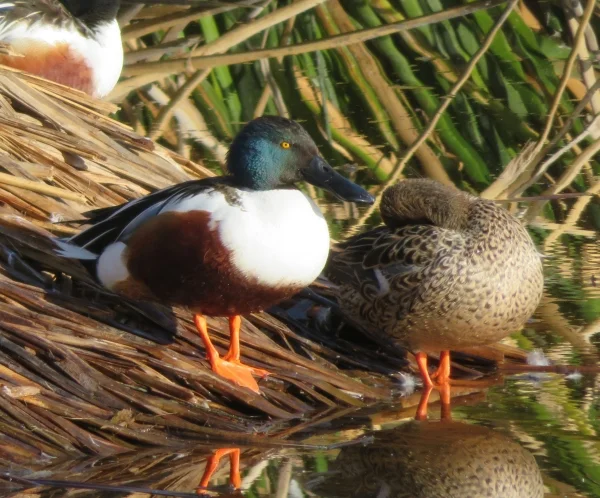
We've never spent much time at the preserve during the winter months, so we weren't sure what to expect. We were waiting at the gate when it opened at 7 am and spent over two hours walking the maze of paths around the ponds. We certainly got our 10,000 steps in without any difficulty. Of the nearly 300 species identified on the preserve's checklist, we saw only a few and most of them were waterfowl. That said, the species we saw were relatively new to us (or our memories have failed us once again). The northern shovelers were in great abundance.

northern shoveler henderson preserve nevada

...and I don't remember seeing (or ever hearing about) buffleheads before. It's a great name though.

bufflehead henderson preserve nevada

While ducks, coots, Canada geese and grebes swam peacefully on the ponds, falcons and hawks soared overhead looking for breakfast. The wary desert cottontails hid inconspicuously in the bramble and the smaller birds took refuge in the reeds and grasses along the shore. We saw one coyote prowling just outside the preserve's fence … watch out bunnies.

henderson preserve nevada

I got a kick out of the Quail Crossing sign with all the Gambel's quail milling around … obviously not jaywalkers.

quail crossing henderson preserve nevada

The place was nearly empty during our entire visit other than a few photographers trying to catch the morning's “magic light”. Hopefully, serene, beautiful places like this will continue being supported and funded by local governments and organizations, providing a great place for walks and birders and a safe haven for our avian friends. We look forward to returning on our next visit to Las Vegas.

henderson preserve nevada