

Blue View – Project 2: Installing Solar Panels On Blue, Part 2
/
A lot of morning dew on Blue's topsides
In Part 1 of this project, I cut the holes for the wiring and figured out how I was going to mount the solar panels to the top of our 2015 Ford Transit. In Part 2, I'll discuss the specifics of how I actually attached them.
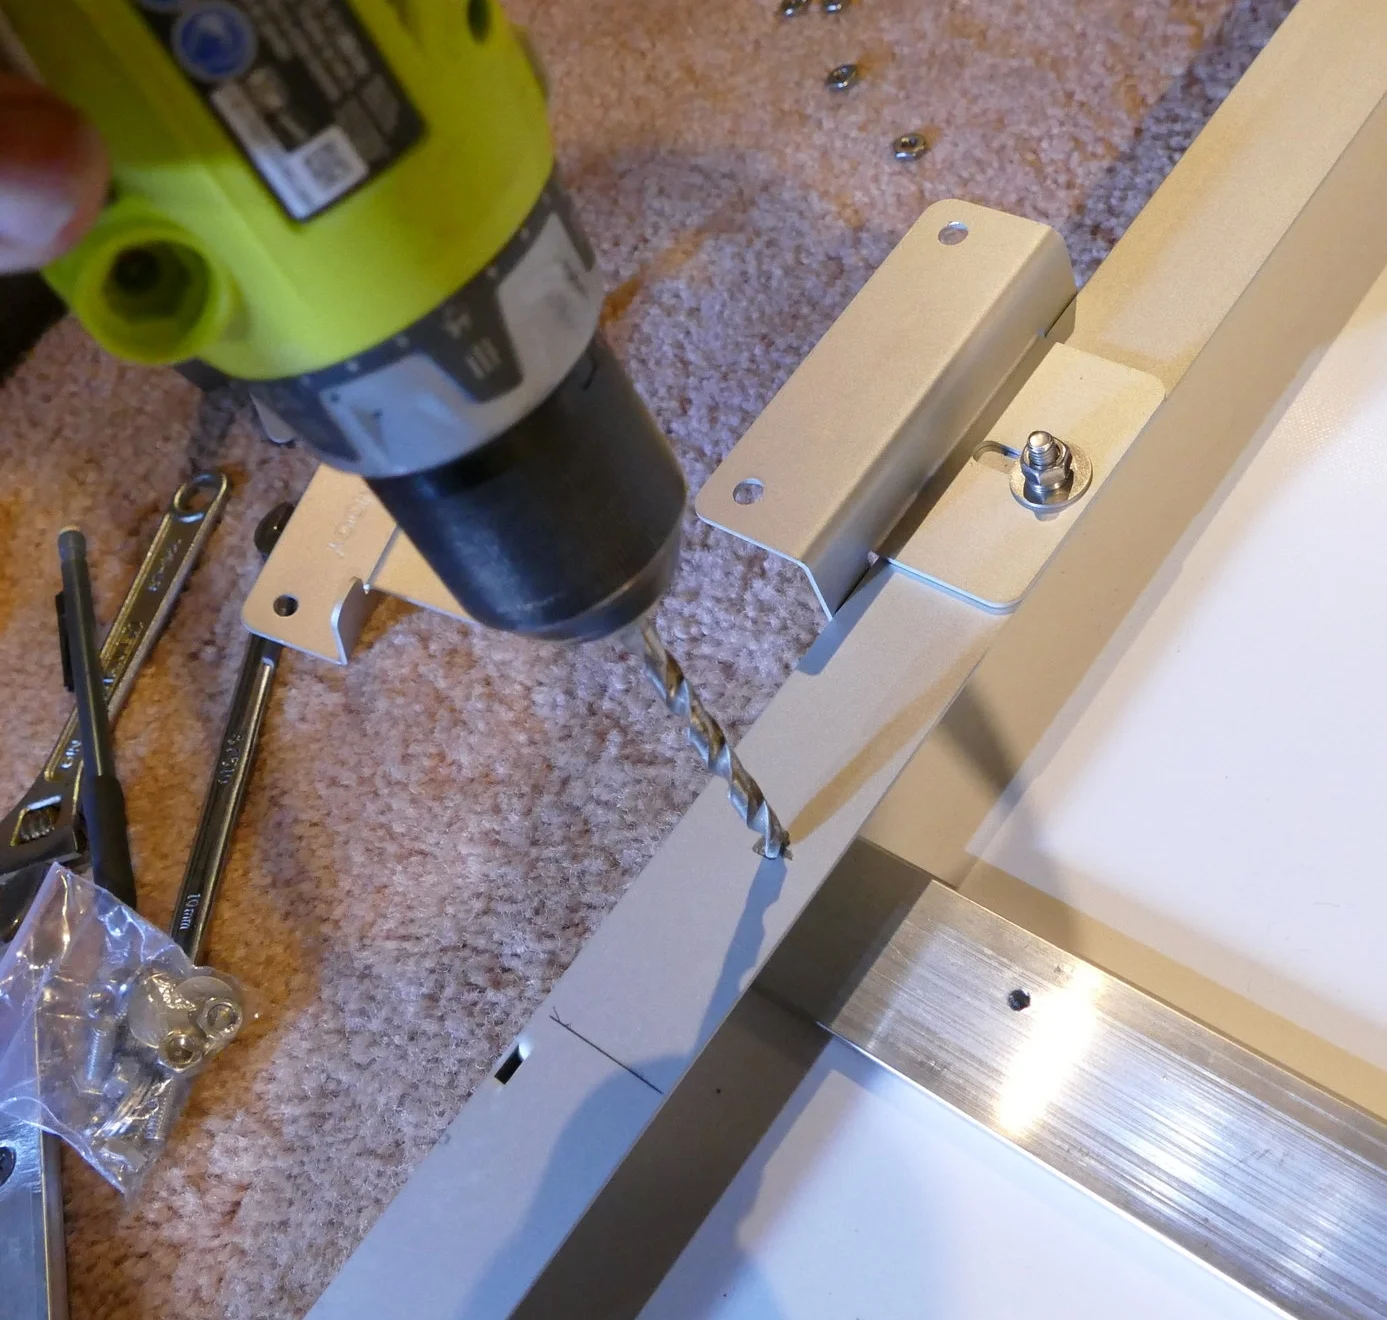
I started with twelve solar panel mounting brackets. These brackets attach to the solar panels and provide the needed spacing between the panels and the roof for cooling purposes. I used 6 brackets per panel, three on each side.


I also used 9 sections of aluminum flat stock, 1-1//2” wide x 8” long x 1/4” thick. I drilled, tapped and countersunk these for 10-24 flathead machine screws. I then threaded 1-1/2” x 10-24 screws into all but one of the the tapped holes in each aluminum section (this will be explained later) and tightened them up.

Once each piece of aluminum was attached to the roof with VHB tape and a screw through the roof, the machine screws would be used to attach the solar panel mounting brackets to the aluminum. Three sections of the aluminum were used on each outboard side of the solar panels, and three were used between the two panels. Since the mounting brackets were each just under 4” long and the aluminum sections were 8” long, each of the aluminum sections located on the centerline of the van between the two solar panels could be used to attach one mounting bracket from each of the solar panels. This allowed me to get the solar panels closer together.

On the underside of the roof, I measured the location that each section of aluminum would be sitting. Using 3M spray-on contact cement, I bonded a 1”x2” stringer to the underside of the roof to reinforce the sheet metal. The stringers extended between each roof bow.
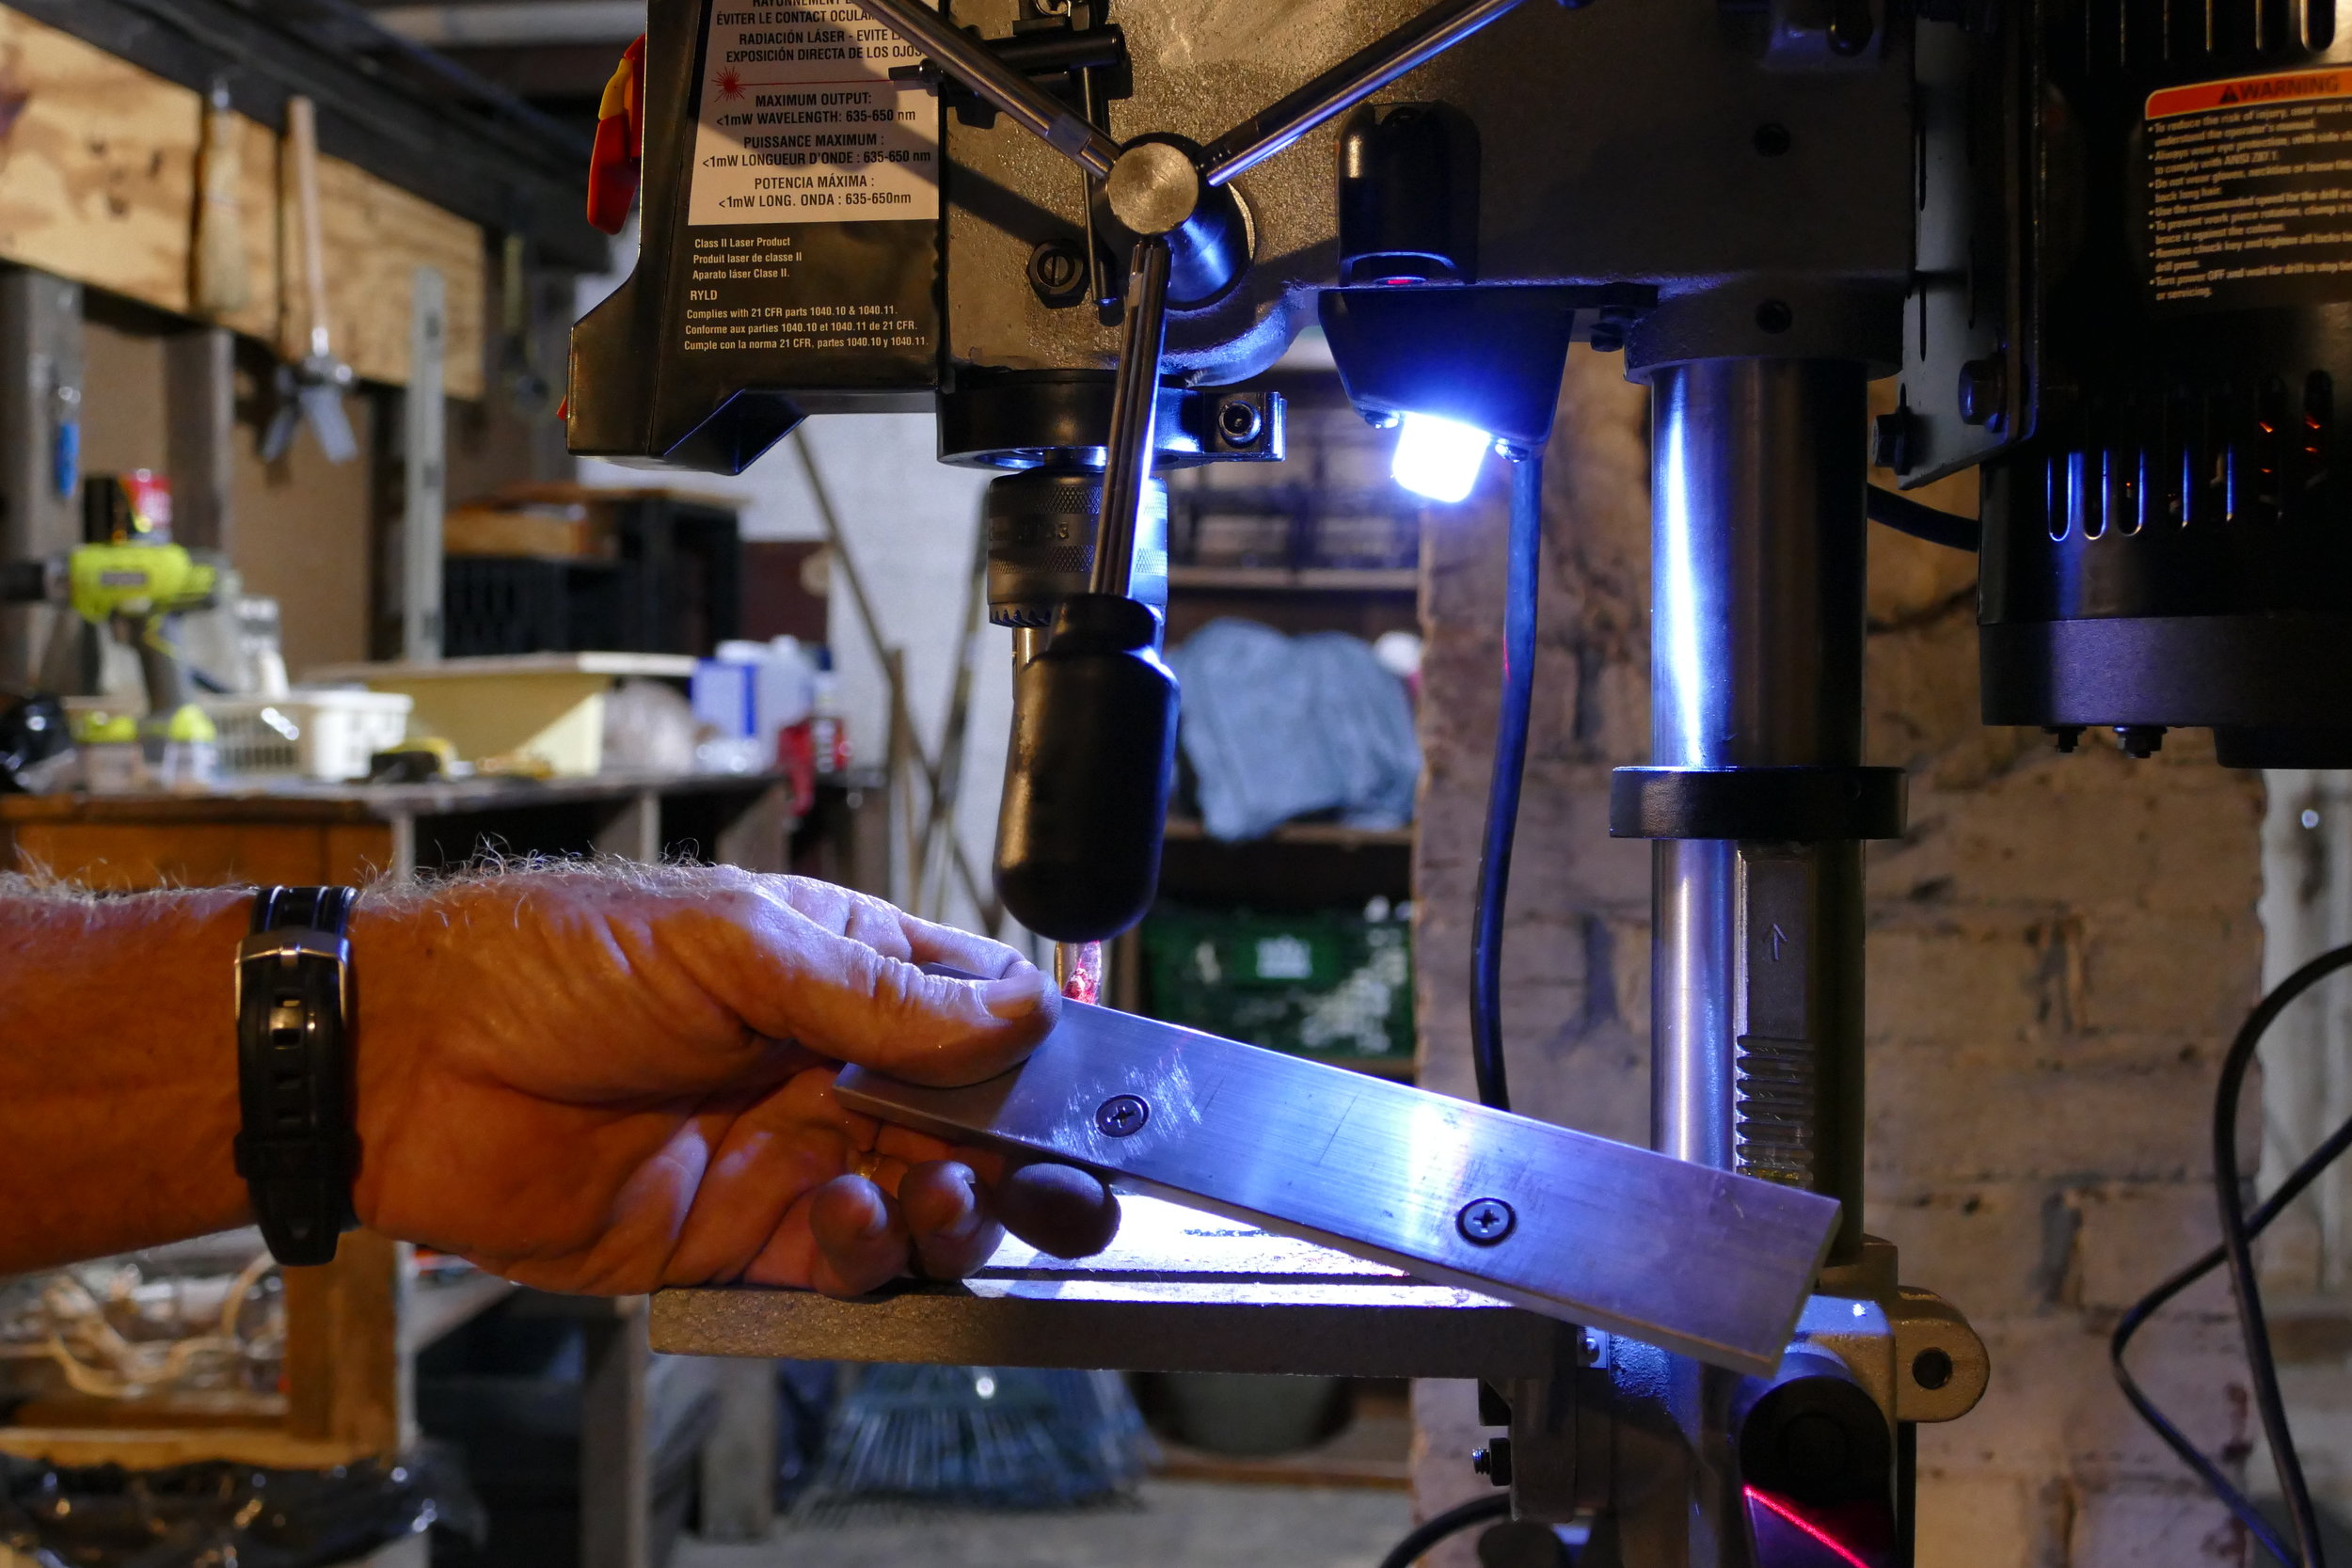
The trick was how to get everything aligned. This is the process I used. I attached the brackets to the solar panels. This required drilling a few holes in the solar panel frames. Next, I attached the aluminum flat stock to the brackets and then stuck lengths of the VHB tape to the underside of the flat stock.
When drilling through the solar panel frame, use a piece of metal to prevent the bit from damaging the underside of the panel.
Then I moved the scaffolding to the starboard side of the van (and man, was I getting tired of moving that damn scaffolding), and removed the starboard side solar panel so I could access the aluminum sections in the center of the roof. I lifted the inboard side of the port solar panel, removed the backing from the tape and stuck the aluminum sections down. Then I repeated the process of drilling through the unused holes in the aluminum sections and threaded screws into them. After the screws were tightened down, I coated the edges of the aluminum sections with lap sealant
In the home stretch now, I put the starboard panel back up on the roof, positioning it so that the brackets were seated on the 10-24 machine screws. Once it was in the correct place, I lifted the outboard side, removed the backing to the tape and stuck the aluminum sections down. Then I drilled the holes and screwed the three 10-24 machine screws into the unused holes as before. While the side of the panel was still propped up, I coated the sides of each aluminum section with lap sealant.
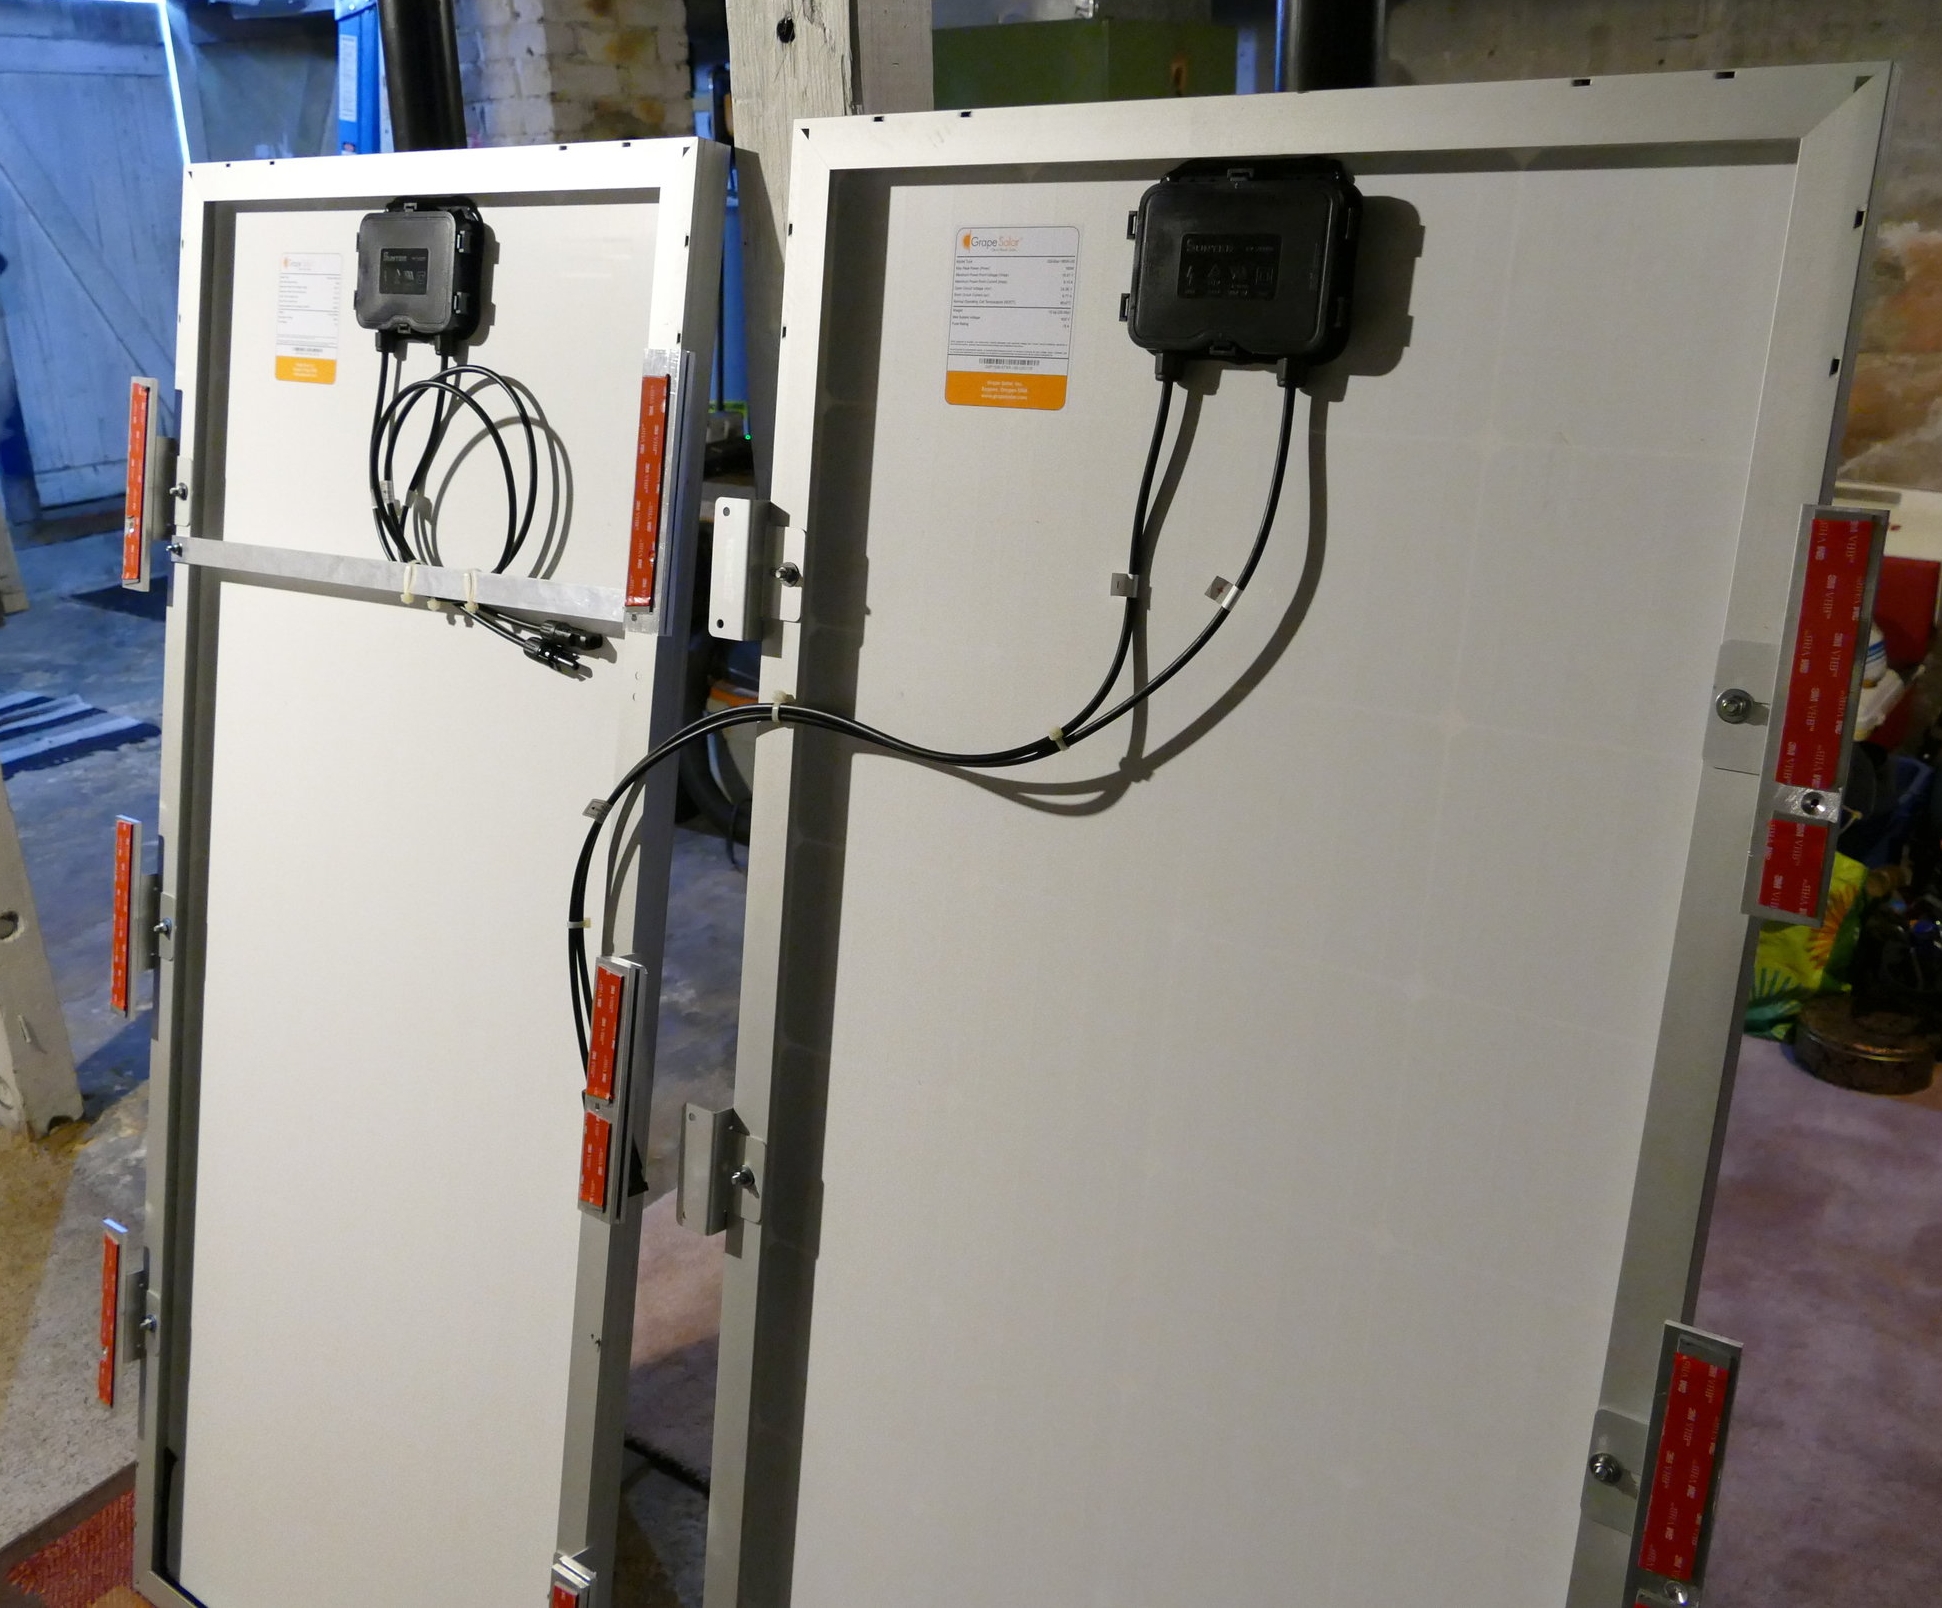
Returning to the port side, I propped the outboard side of the panel up enough to reach under it and make all the electrical connections. Each parallel adapter has a 'Y' connection on one end and a single connector on the other end. One adapter connects the two positive cables from the solar panels together and then to the positive cable going into the van, while the other adapter does the same for the negative cables.
Once all the electrical connections were made, I sealed the aluminum sections with lap sealant and lowered the port panel back into place. The next step was to put a a drop of Locktite Threadlock, then a flat washer, lock washer and nut on all the machine screws and tighten them all down. The final step was to cover each screw and nut with lap sealant to make sure no moisture could work its way down the screw threads.

The only difficult part of the project was getting the solar panels onto the roof and positioned without dropping them or scratching the van's paint. I used large flats of cardboard cut from the solar panel packaging to keep the sharp edges of the panels away from the paint when possible. The VHB tape, before removing the backing, also allowed me to move the panels around without scratching the paint once they were on the roof.
I think that if I had two sets of scaffolding, one on each side of the van, I could have cut the project time considerably. I must have moved it from one side to the other at least a dozen times.

I used all stainless hardware for the project, to help prevent corrosion. If I was doing this project on Nine of Cups, I would have taken additional precautions to prevent the stainless hardware from galling the aluminum, like adding nylon washers between the stainless washers and the aluminum surfaces and using Tef-Gel or another anti-seizing compound on the screw threads. I'm hoping that Blue's environment will be less conducive to galvanic corrosion than a sailboat's. All the lap sealant I covered everything with ought to help as well. I'll check it in a year or so and see how it's doing.
Since the house batteries and the charge controller haven't been installed yet, the wires from the solar panels are, for the time being, coiled up and secured below.
Here are the Amazon links for the parts and supplies I used. If you use the links below to buy something, it costs you no more but we get a few shekels commission which helps support this website.