

Masking Through Our Road Trip
/Though we’re very excited about our upcoming road trip, we’re still concerned about the coronavirus, especially after seeing a significant uptick in positive cases since the state re-openings have begun. We can’t totally avoid other people and we never know who is cautious and who isn’t, so the onus is on us to protect ourselves. We will continue to wear our masks in public places as we travel.
The price of disposable masks has risen exorbitantly since they came into such great demand. Plus it seems that reusable masks, like ones we could wash then use again, would make much more sense than constantly disposing of them. Yankee parsimonious attitudes die hard. And David’s sister, Mary, brought up a good point: If you feel you need to wear a mask, at least make them fun!
So I searched on line for some neat looking masks and there are lots of them, but buying several of them for each of us seemed a bit extravagant. I can think of so many better ways to spend my money… wine, going to thrift shops, ice cream. So… when all else fails, do it yourself.
Patterns and instructions were easy to find on-line. I ended up with a pattern from Instructables.com which seemed easy and functional. Now to find the fabric and supplies.
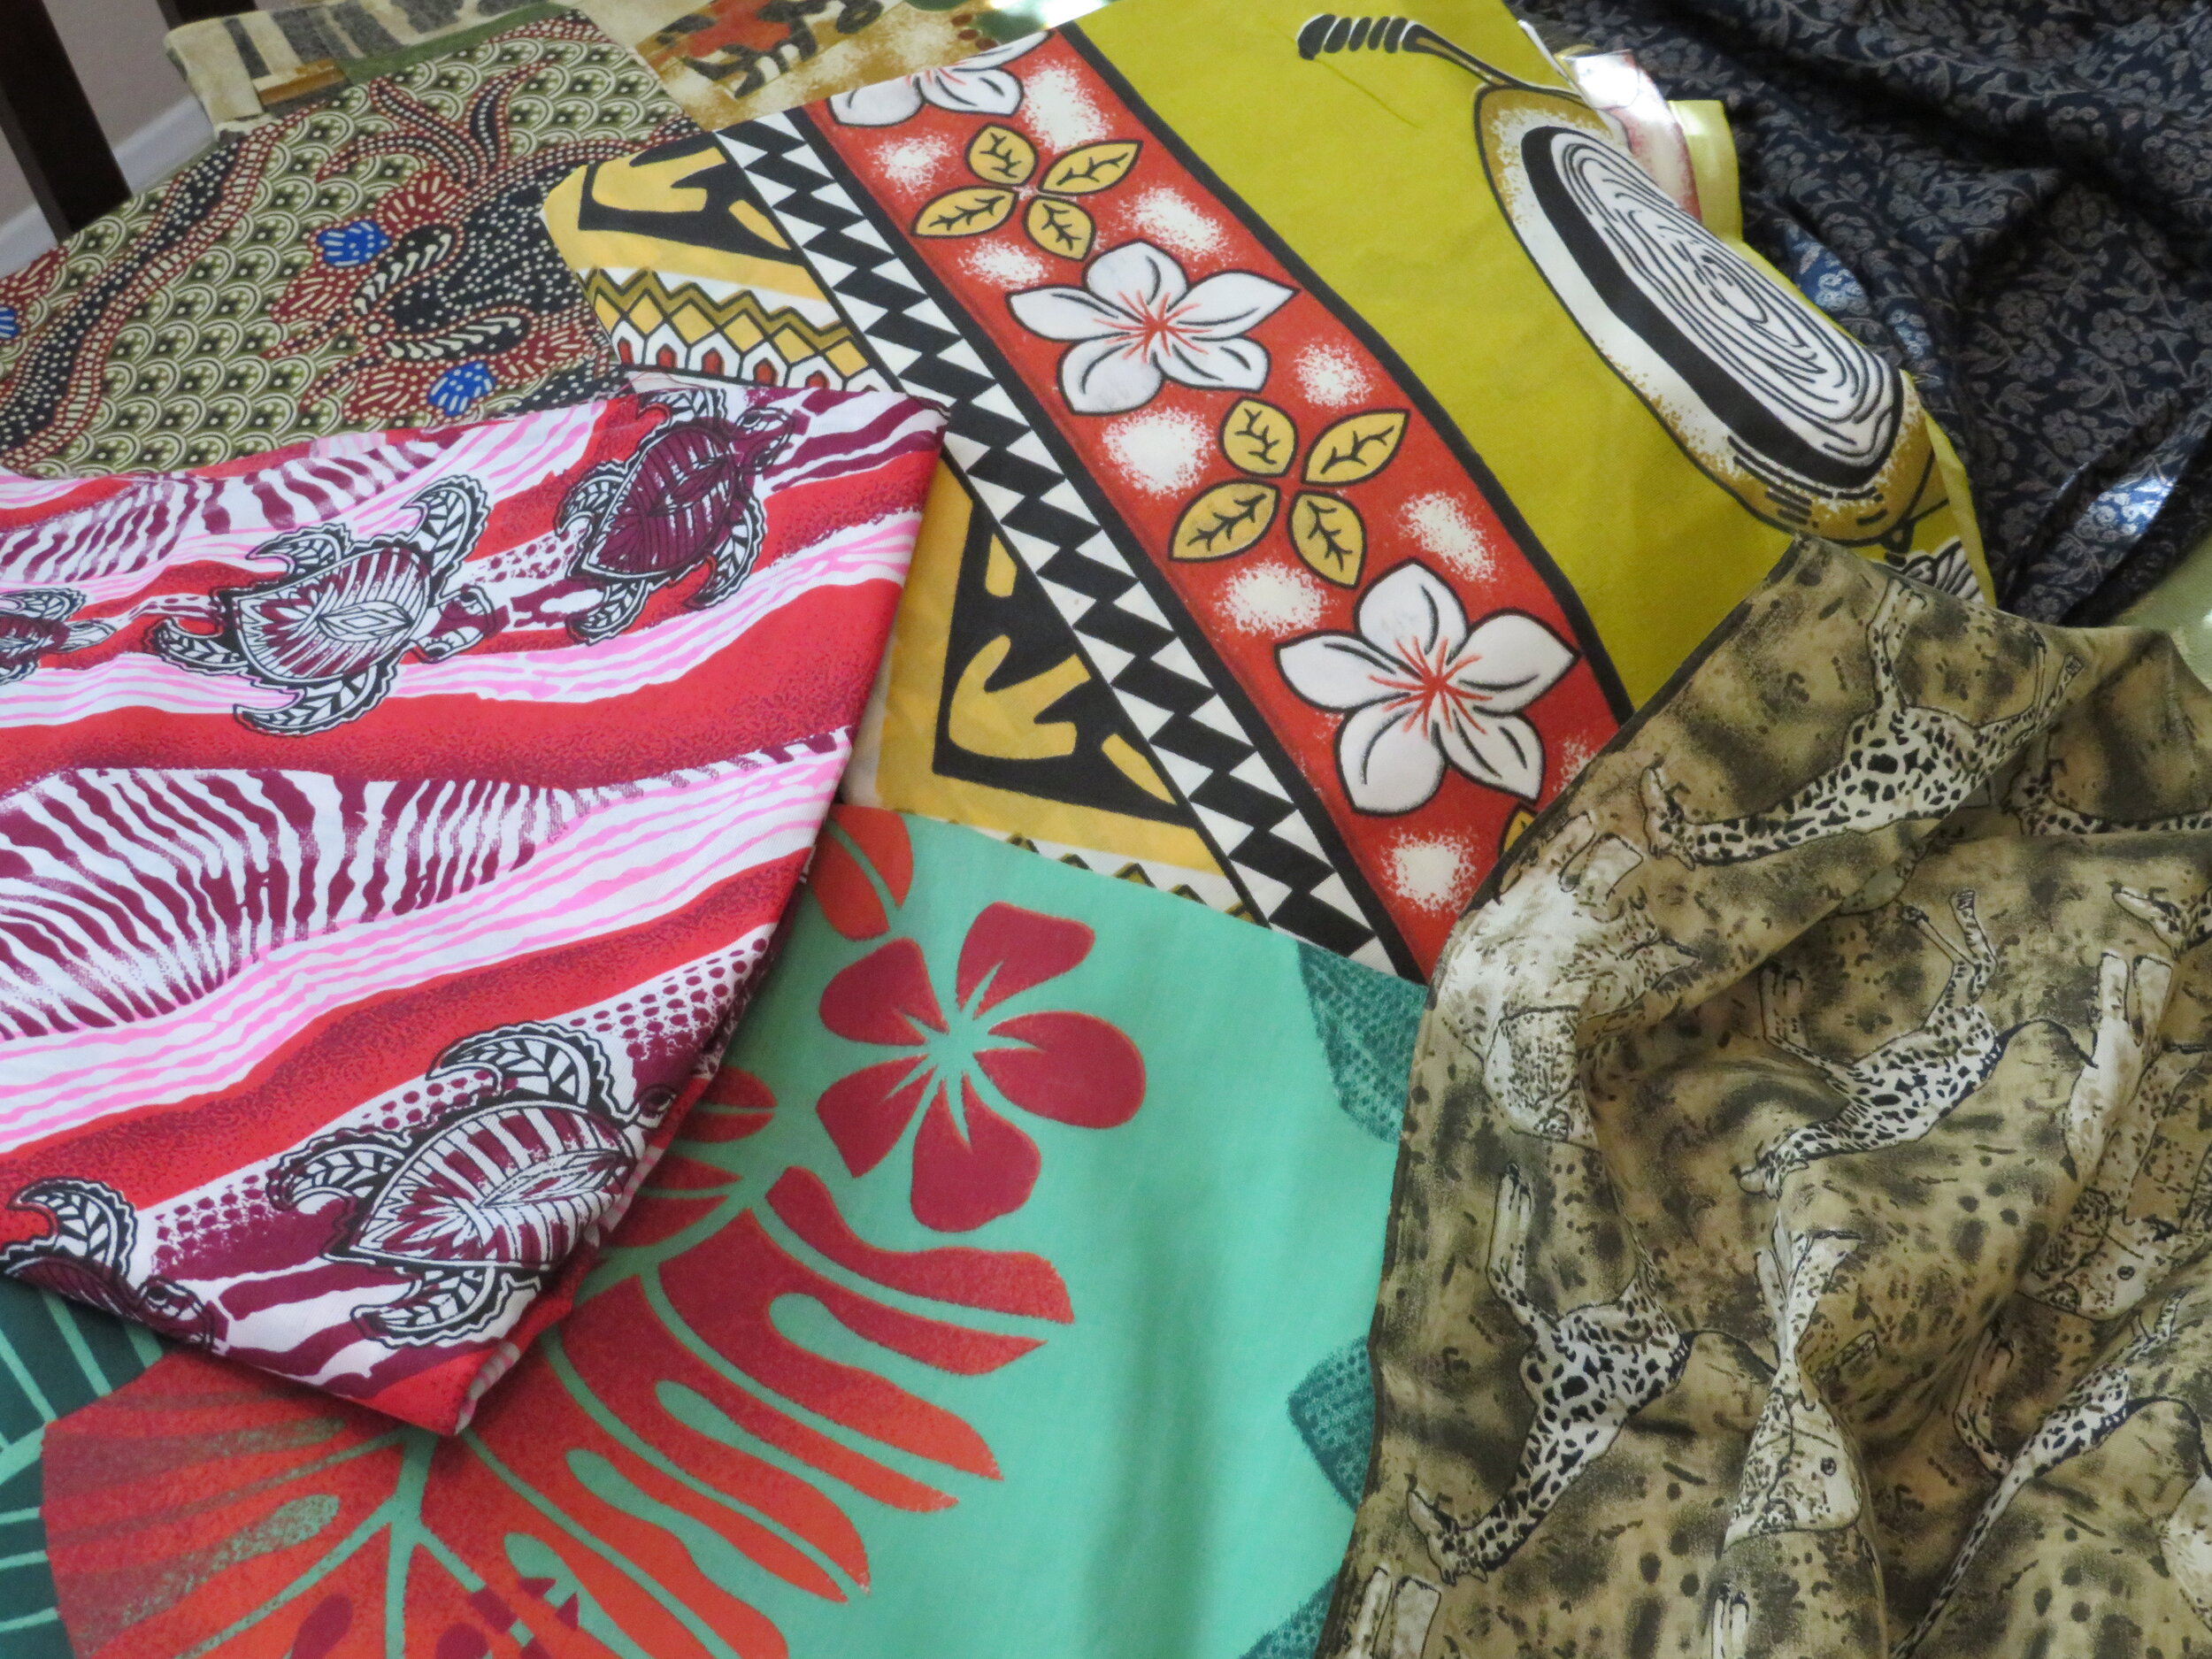
An ‘around the world’ collection of fabric
Backtrack a little…
As we sailed around the world, I made it a habit of buying a meter or two of fabric representative of the different native cultures we experienced. My intention was to make a ‘round the world quilt’ someday… as if that would magically happen any time soon. We have toted that fabric around for many years now and it finally found a home tucked away in a tub in our house’s community closet.
When I decided to make masks, I thought of all that lovely, unused fabric sitting there. What better way to use some of it than to make reusable, washable masks for our trip. We’d have a piece of South Africa and Namibia and New Zealand and Fiji with us as we traveled.
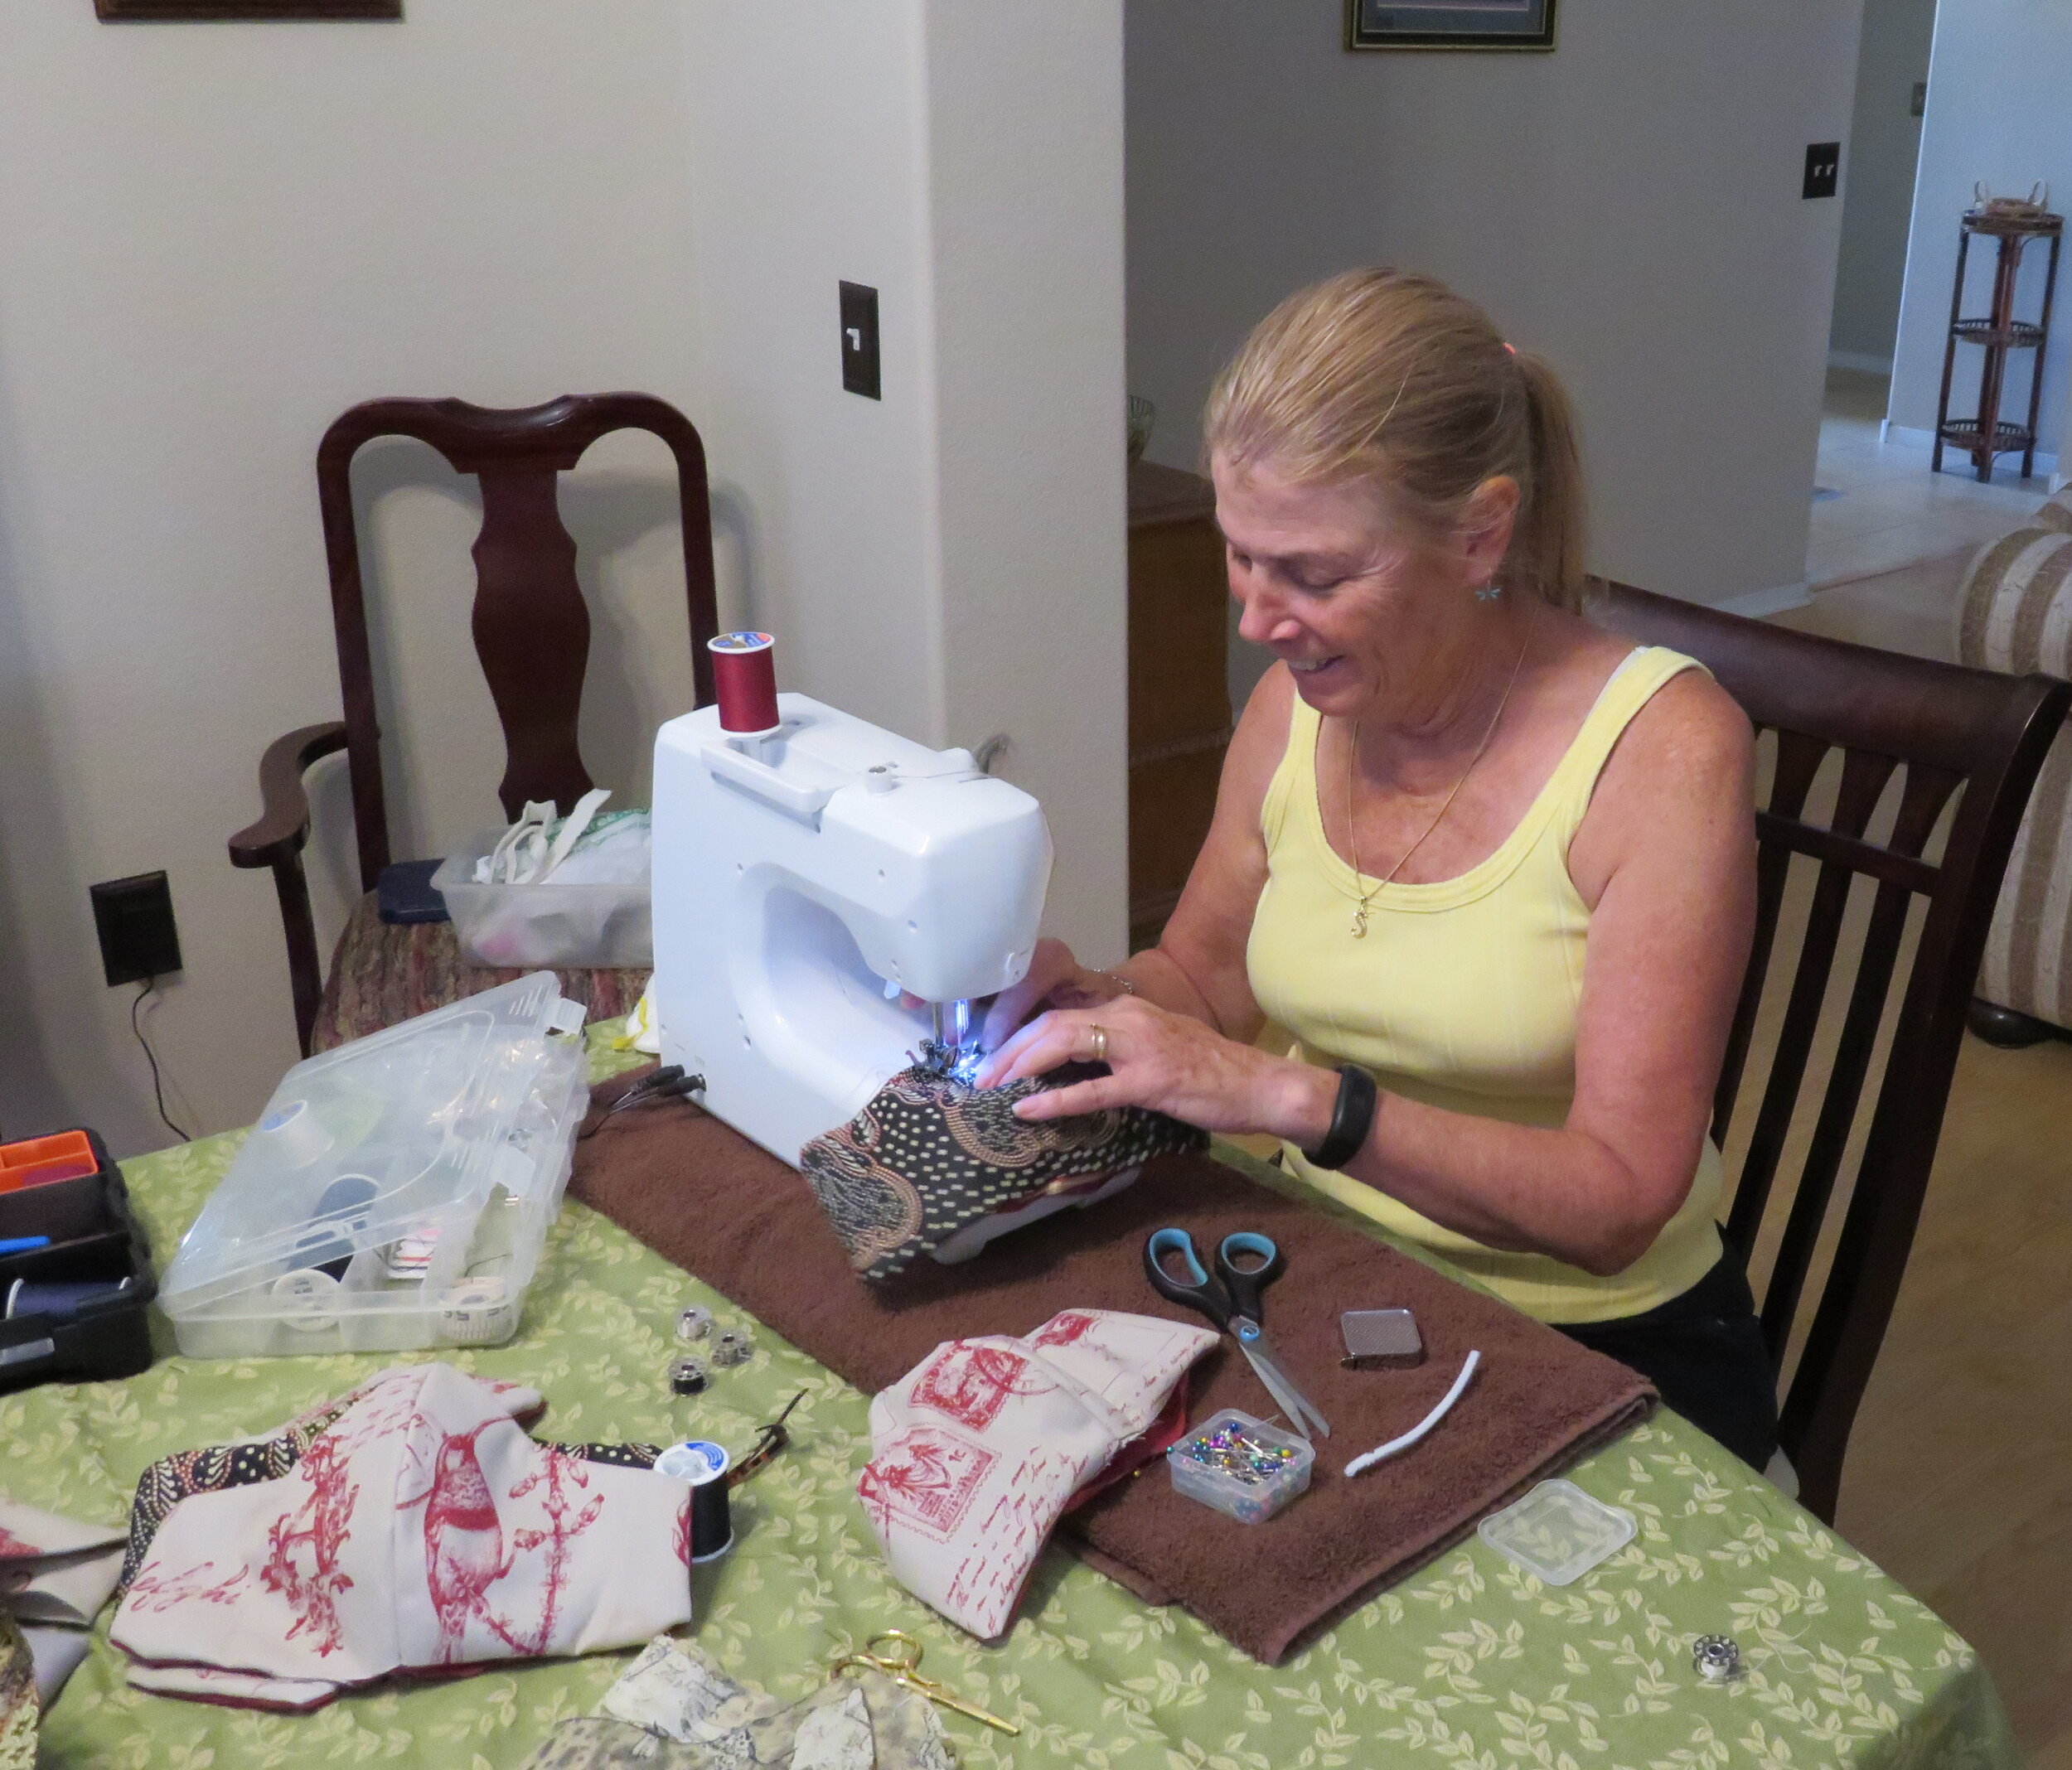
I commandeered the dining room table for mask production.
I commandeered the dining room table, dragged out the sewing machine and set to work. Other than elastic for the ear loops (easily ordered on Amazon), I had all the other supplies needed… fabric, thread and Mary supplied pipe cleaners for the bendable nose bridges. I didn’t exactly agree with all the directions and modified as necessary, but for the most part… it was easy...peasy.
In a nutshell, here are the steps. I’ve included the step-by-step instructions at the end of the blog.


Finished product… inside and out… looks like this!
I ended up with 16 masks… several to take with David and me on our trip and a few to share. I mean how many other folks are going to sport a shweshwe fabric mask? I even turned a singleton cloverleaf-patterned cotton napkin into a mask for our favorite 92-year-old Irishman!
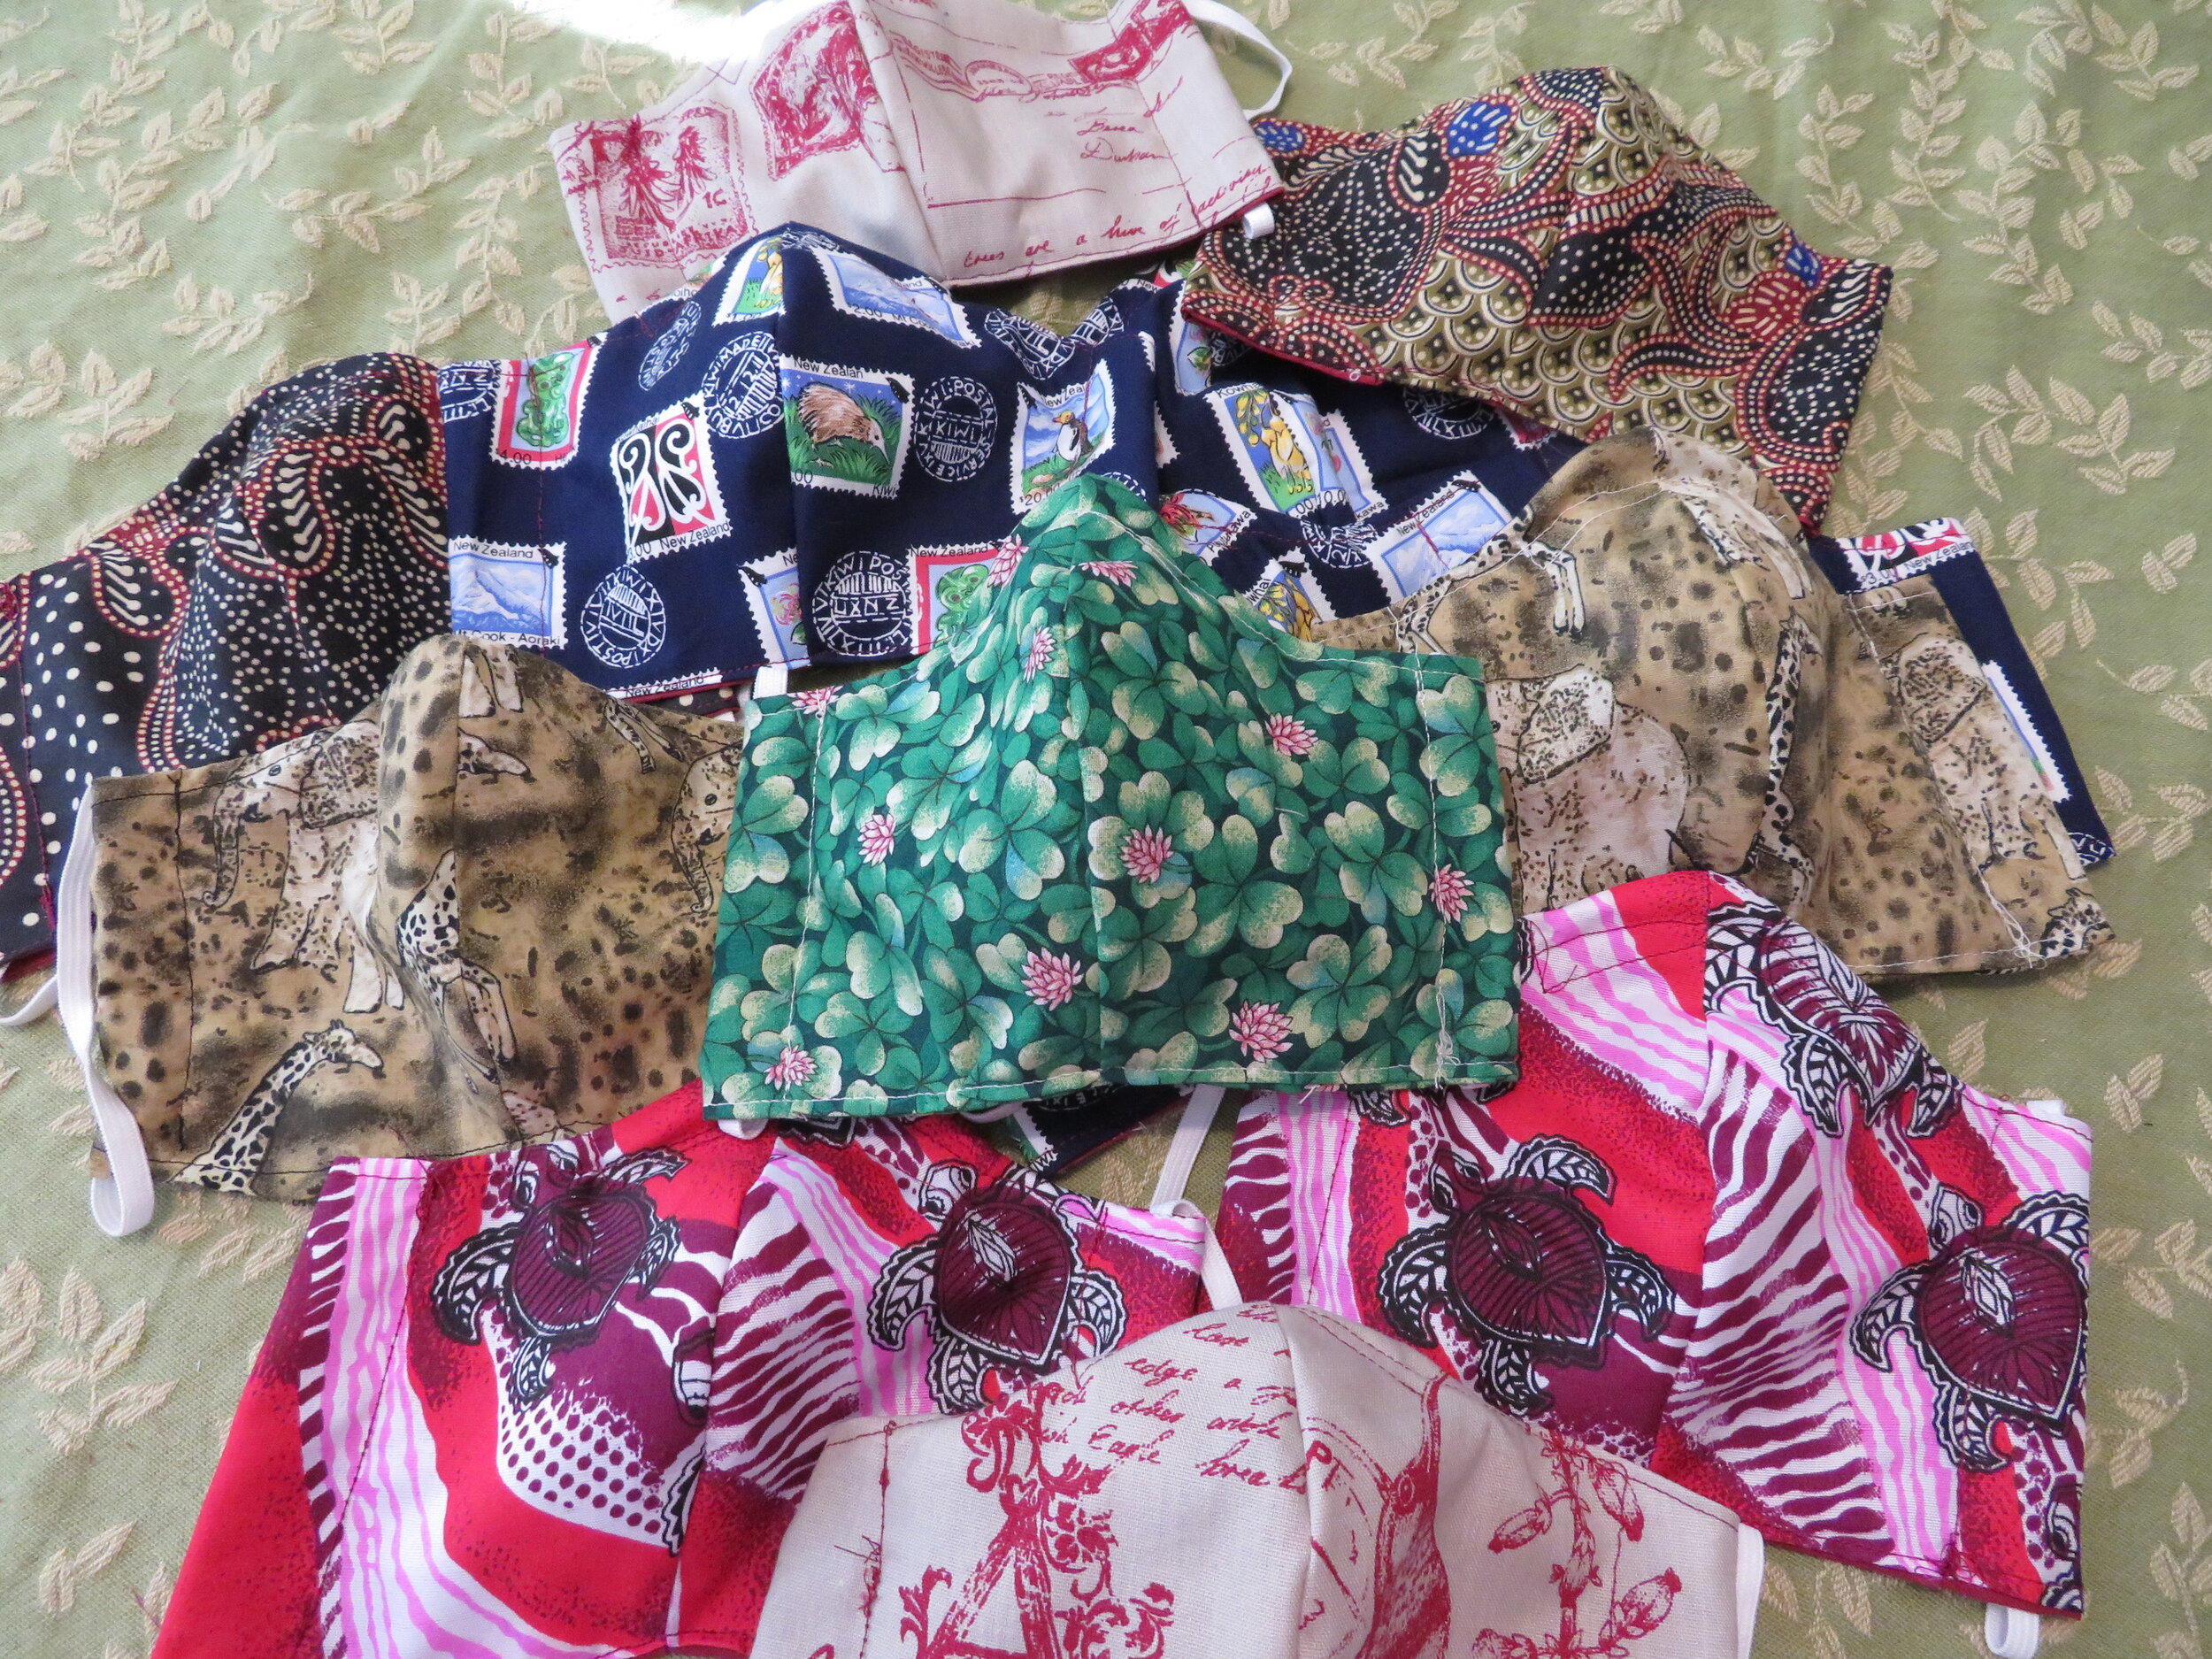
Our around the world coronavirus mask collection. Can you guess where the different fabrics are from?
Now… back to the task at hand… finishing up Blue and packing. Including today when I rise at 0500 … lift-off is in 2 days… that’s about 48 hours from now, not that I’m counting.
DIY Face Mask
Get mask instructions, patterns and more options from instructables.com.
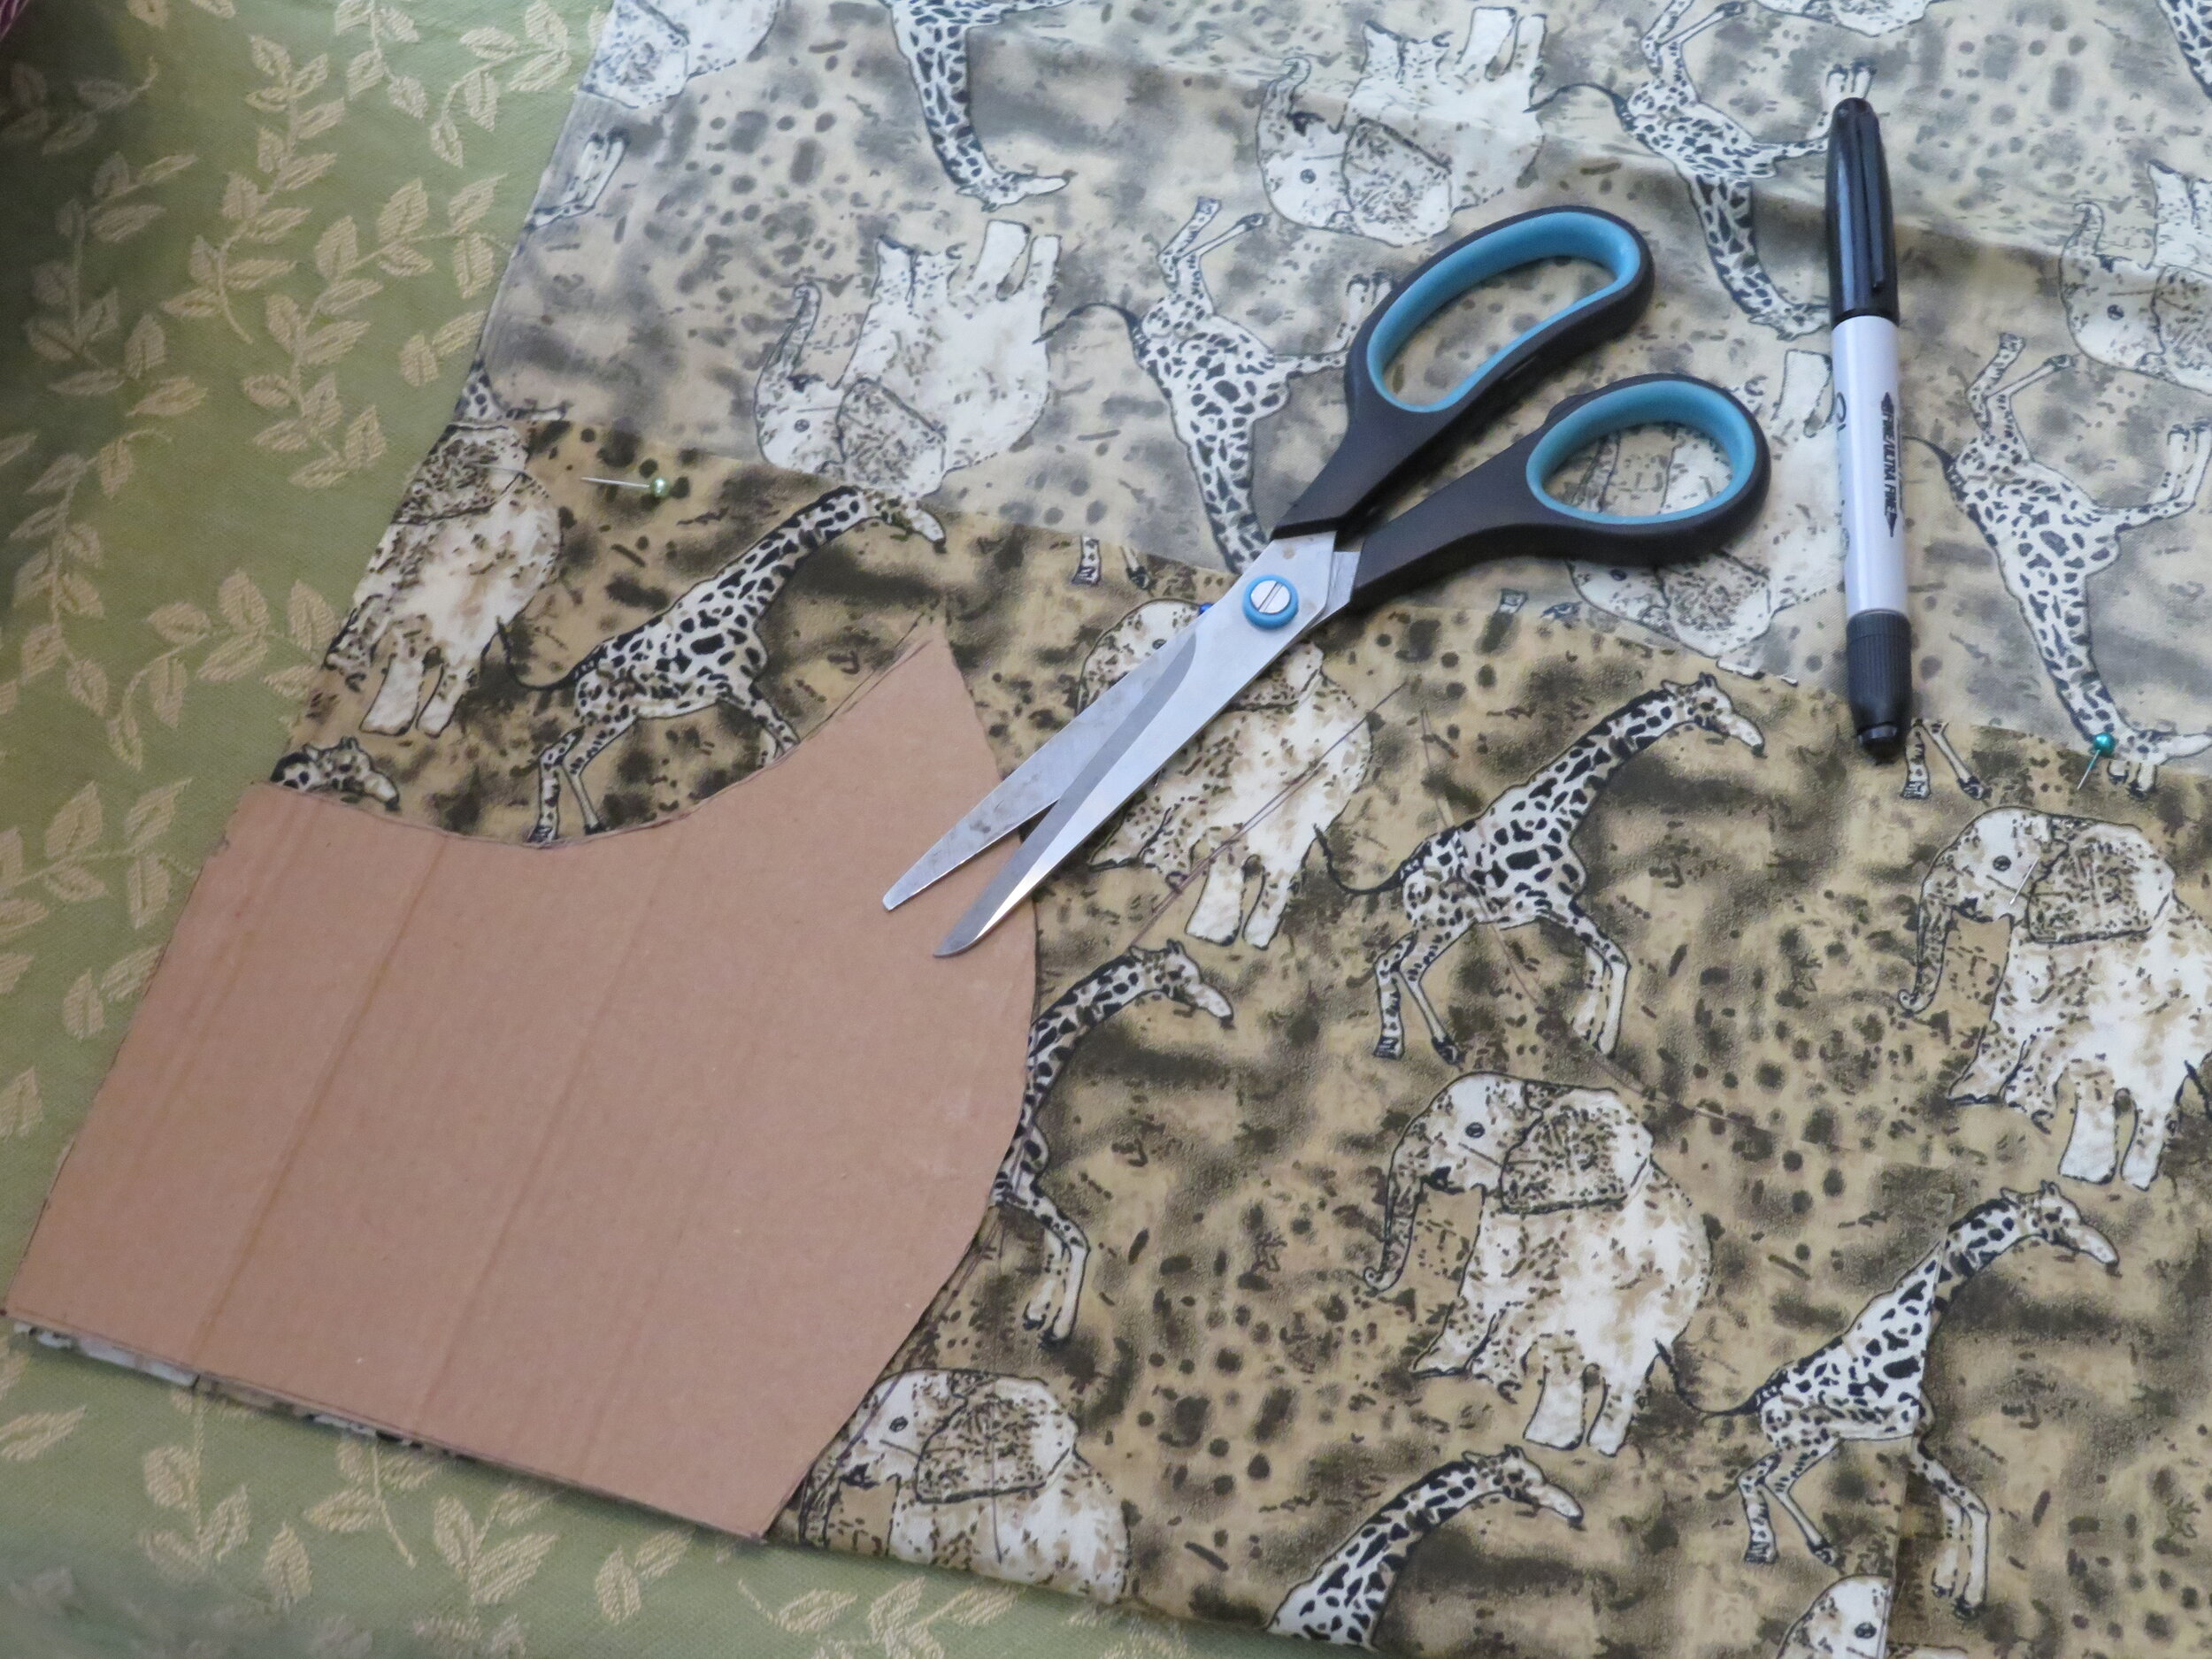
1. Trace mask shape on cardboard to use as a pattern. Note that I modified the mask shape from the original pattern as it was too ‘pointy’ on the bridge of the nose. I rounded it out a bit for a better mask fit.
2. Cut 4 pieces of fabric… 2 for the outside that shows and 2 for inner lining. Note that if you use a patterned fabric, make sure the pattern is right side up on both sides of the mask as well as inside.
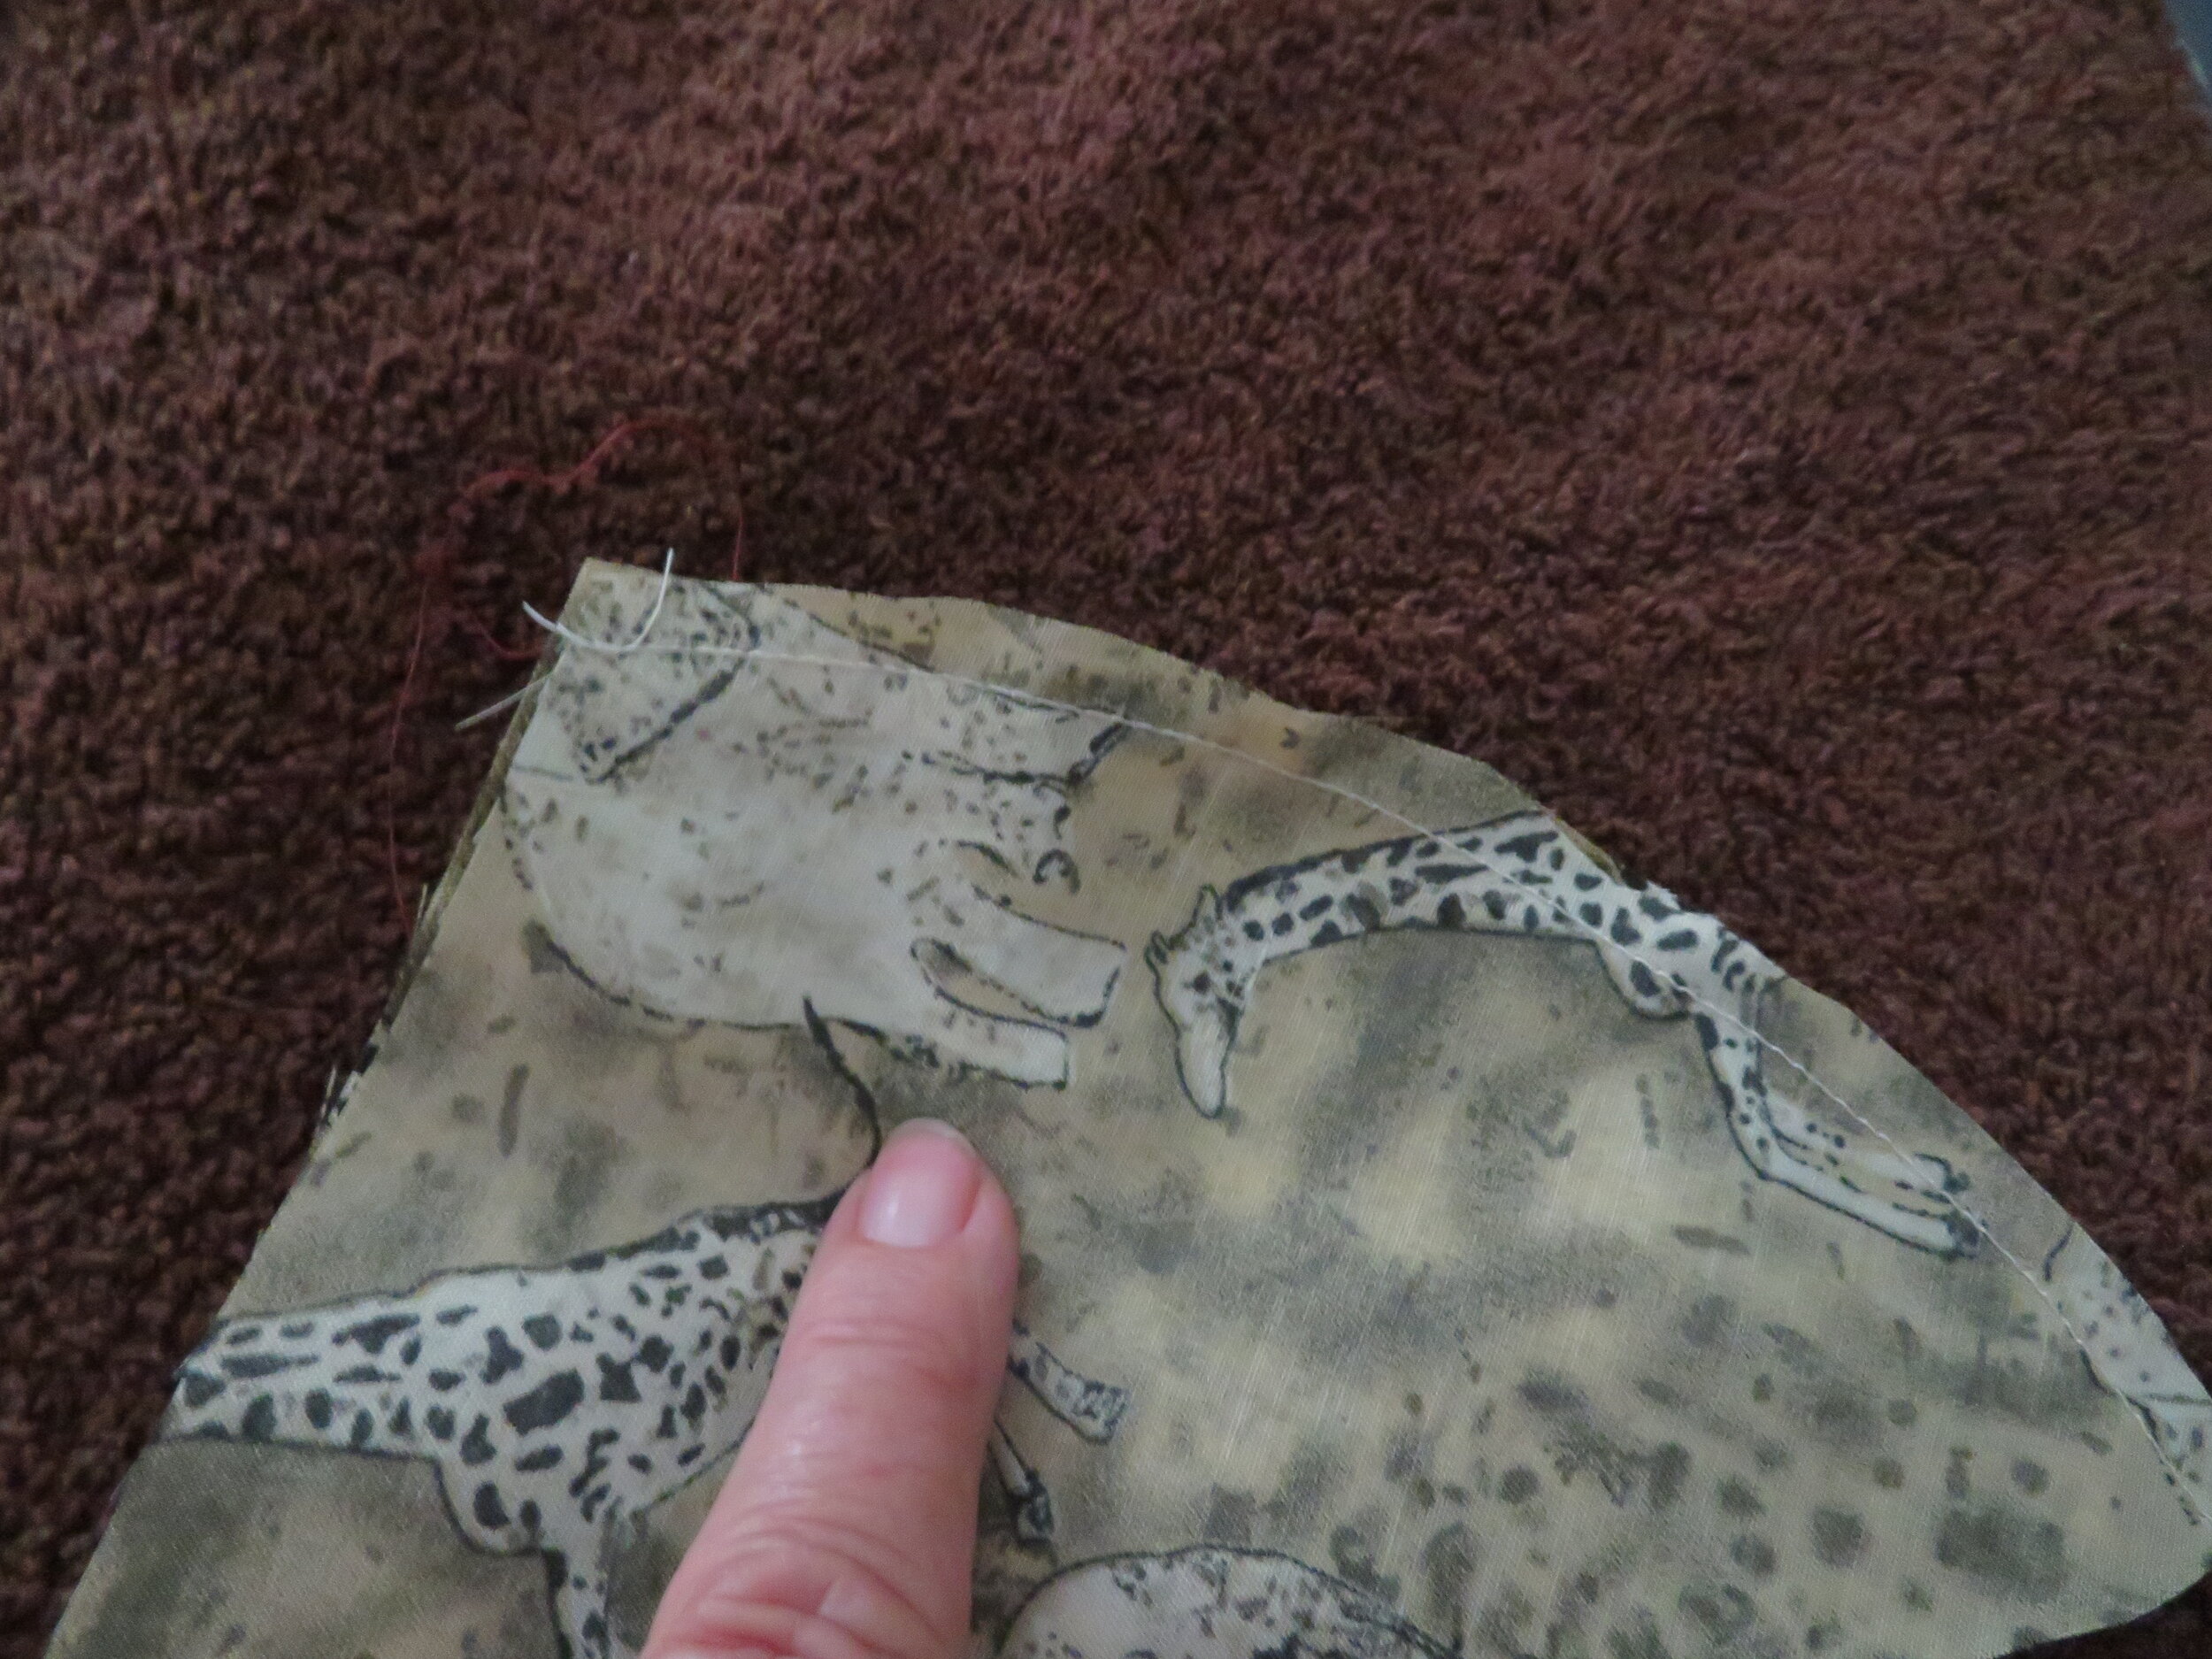
3. Place one pair, right sides together and stitch the round side. Do the same for both layers. When you open the layers now, you will notice it already has the “muzzle” shape.
4. Pin right sides of outer and lining layers facing each other. Sew all the way around the edge, except for a 2-3" gap on the bottom edge. The gap is the ‘turning hole’. Turn right side out and press.
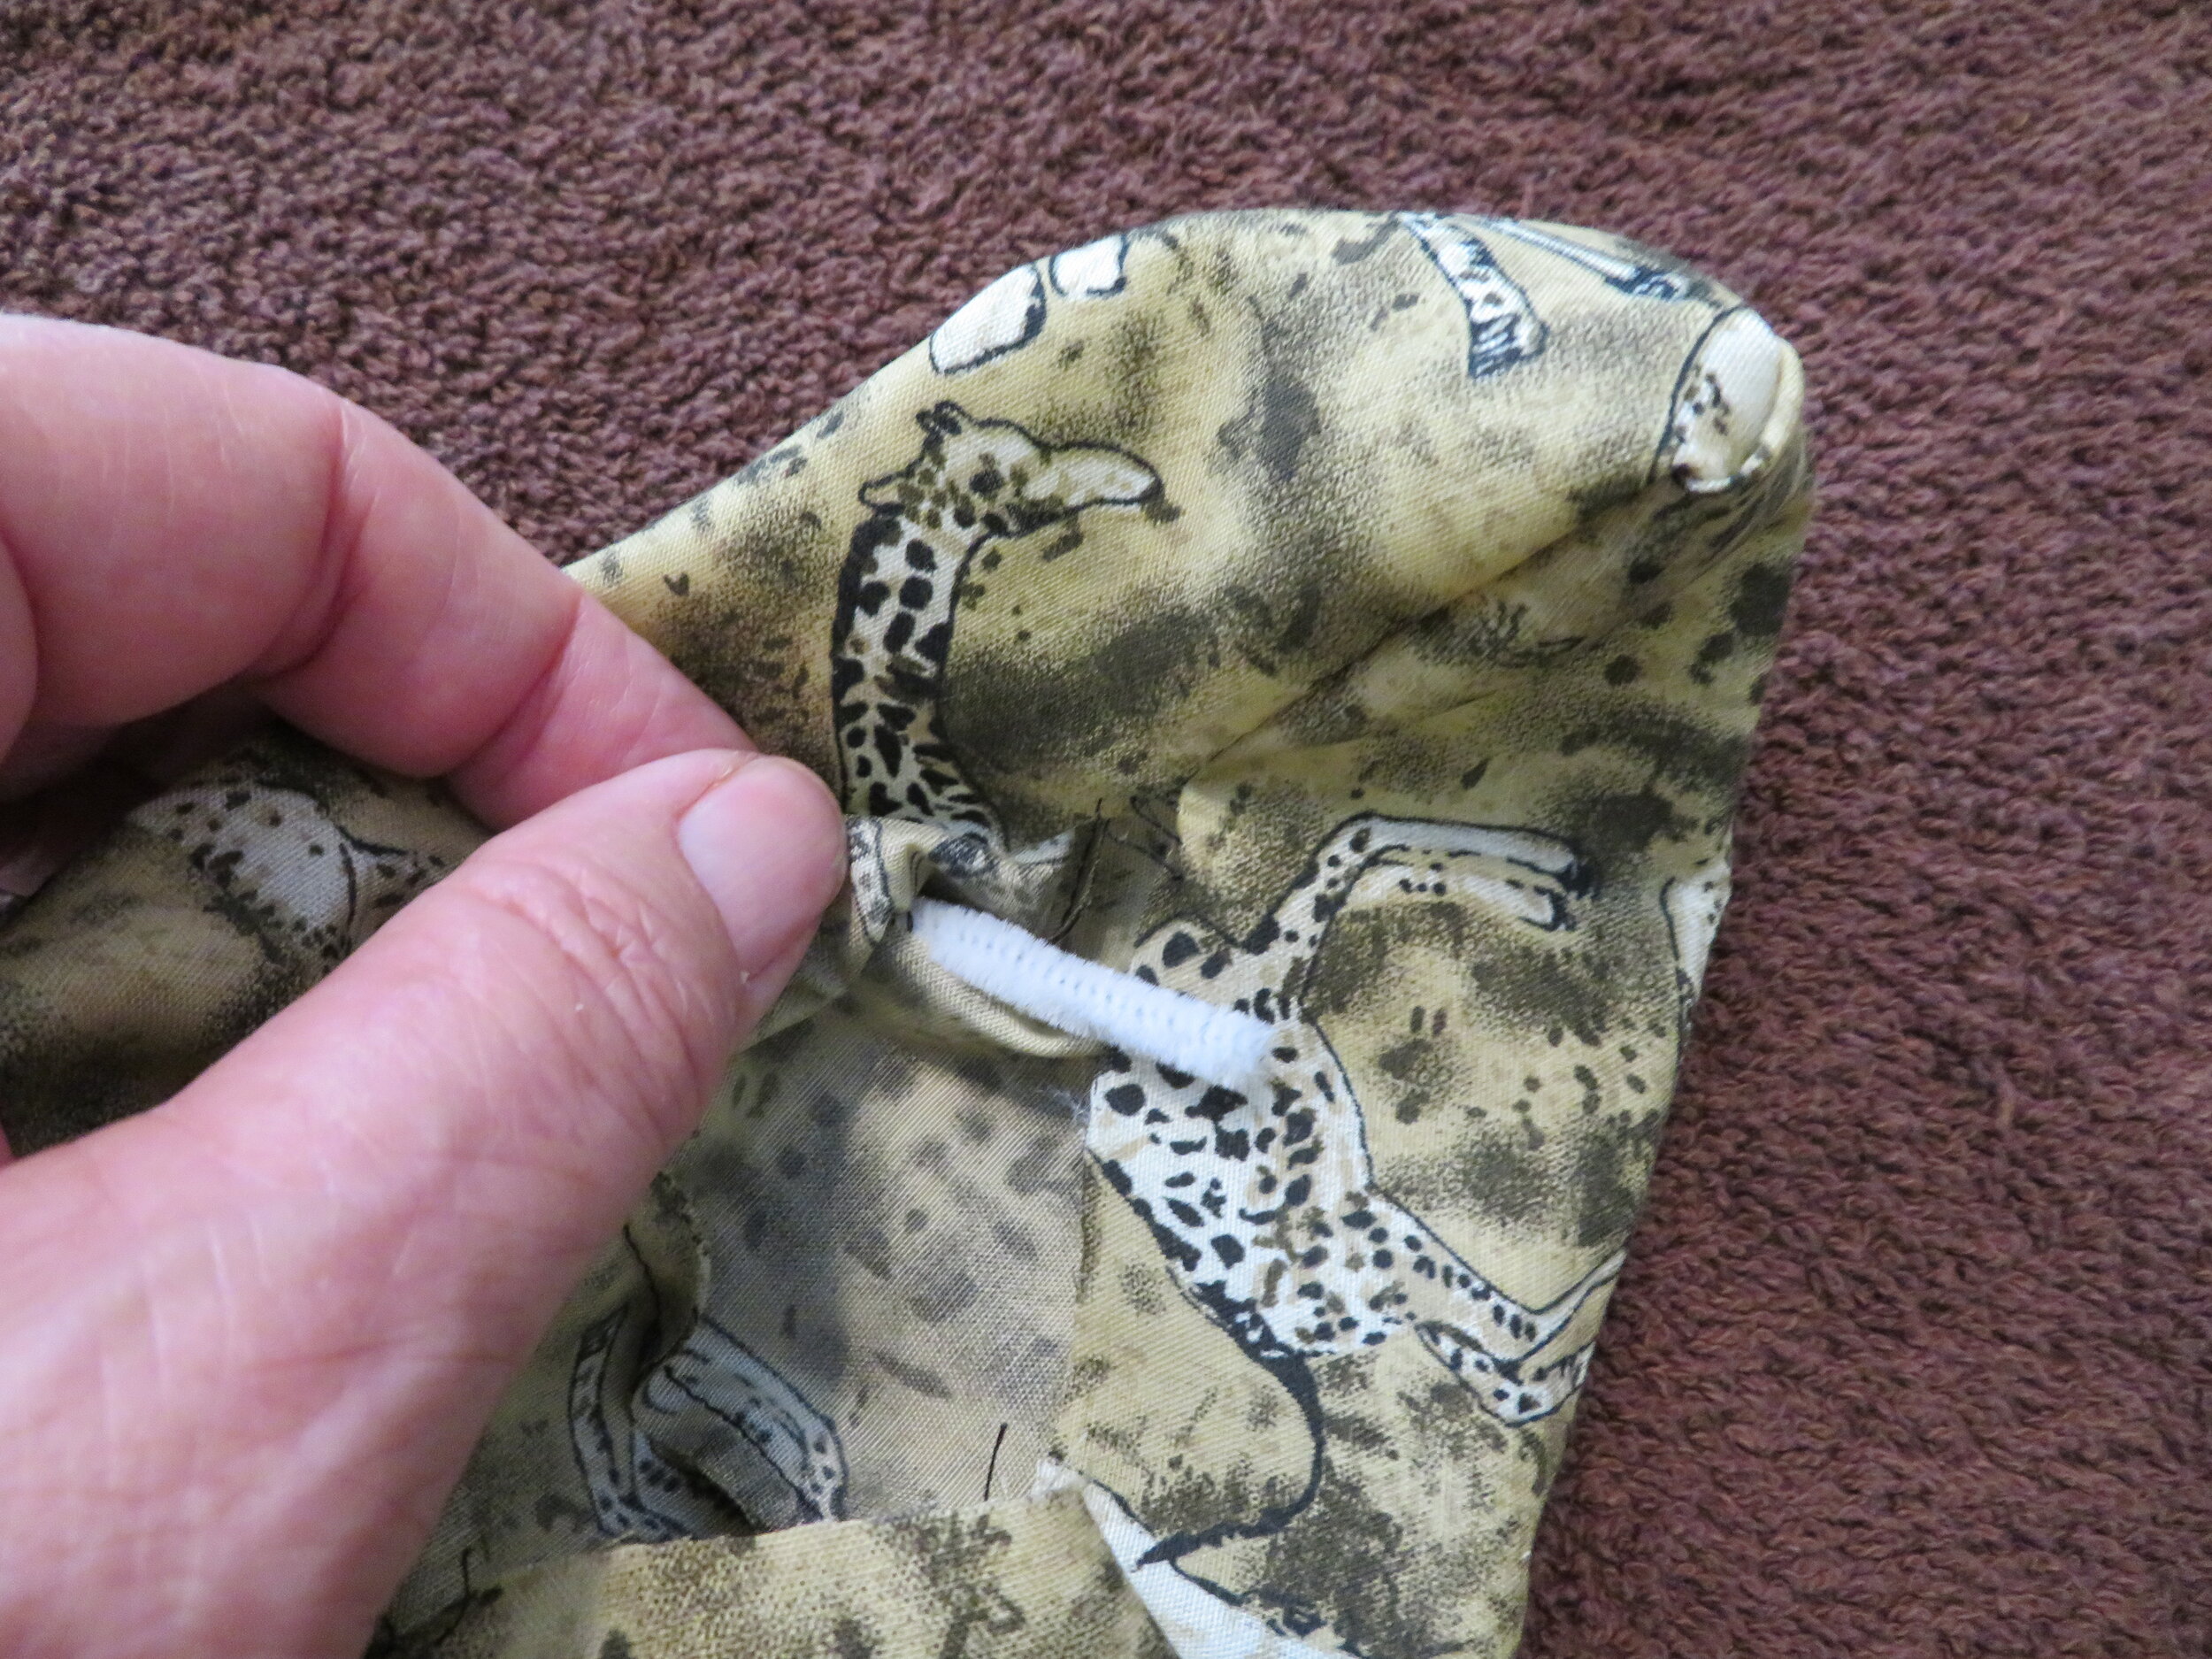
5. Sew a wire channel, 1/2" down from the top edge and 2" to each side of the center seam. This will accommodate the wire over your nose bridge.
6. Slide a 3-4” piece of wire (or pipe cleaner) through the turning hole and into the wire channel. Stitch the ends of the channel closed so it won't move around when washed.
7. Top stitch 1/8" around the entire mask, closing up the turning hole as you do. Be careful of the wire. You can skip that section of top stitching if there isn't enough room to go above the wire. I just sewed close to and under the wire, pushing it up as close to the seam edge as possible, then continued sewing around the edges.
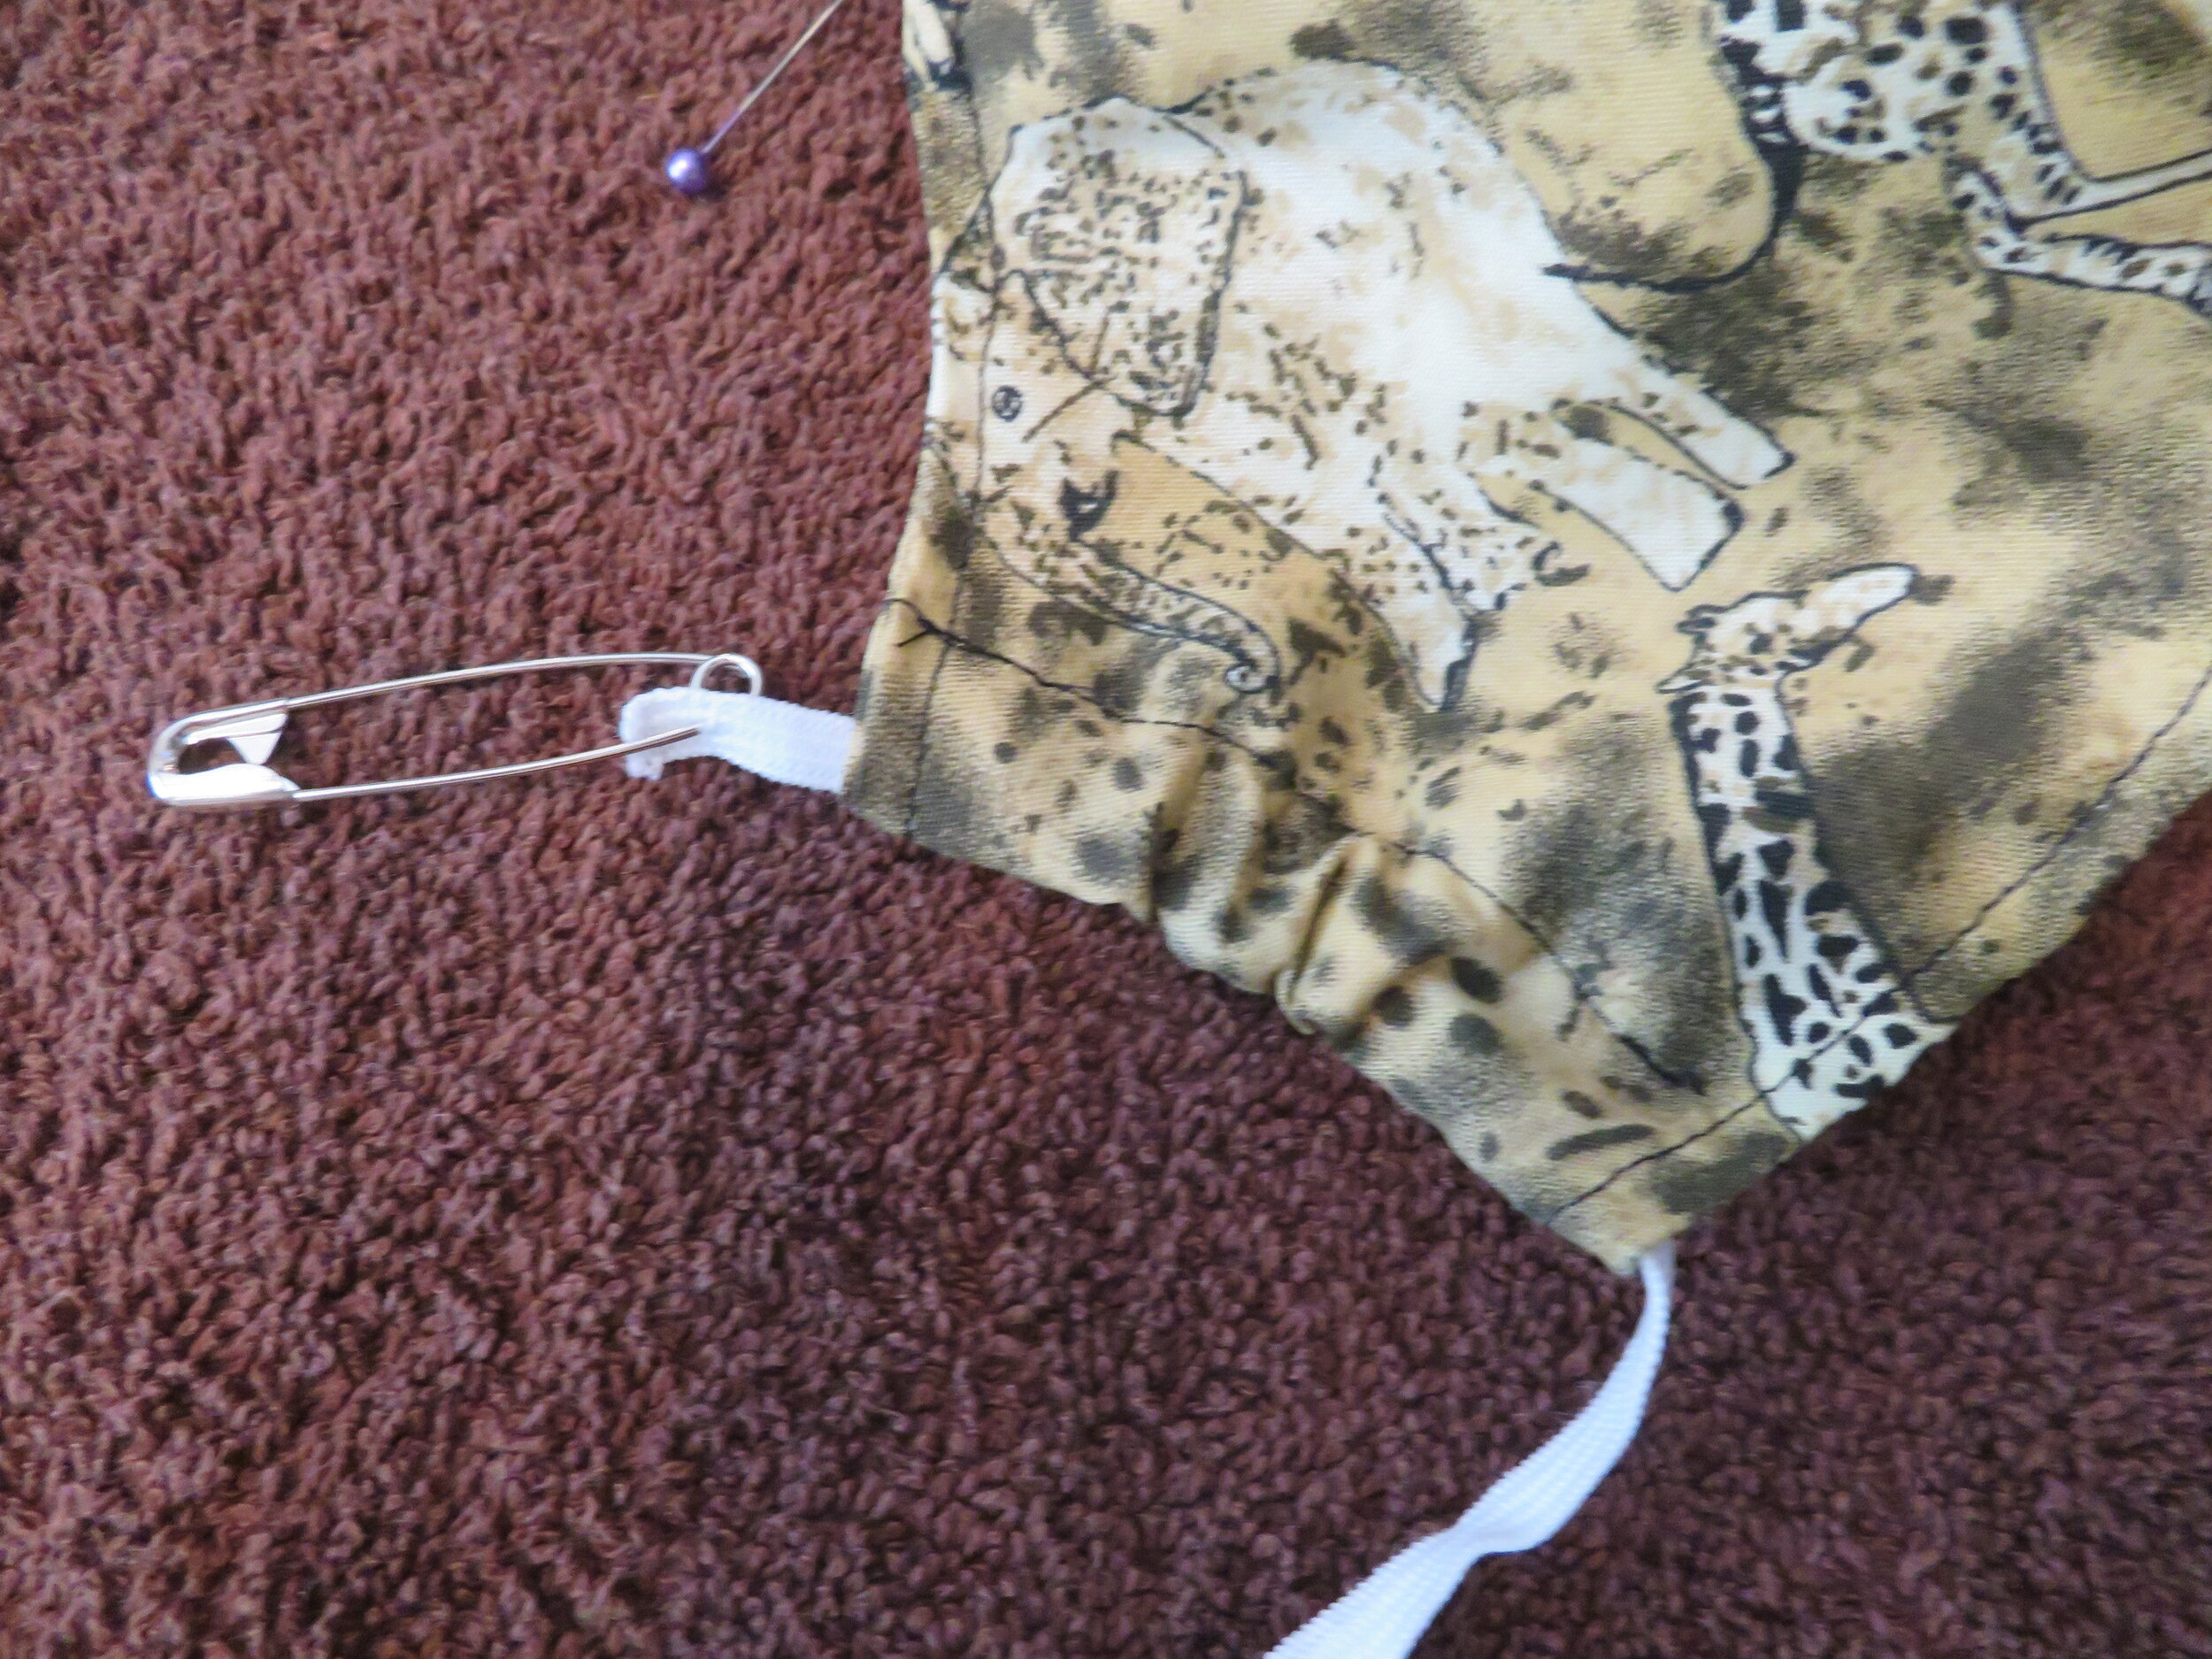
8. Lay mask with lining side up and fold 1" of each end of the mask toward the center. Pin and sew, making the elastic channels.
9. Cut a piece of 1/4” elastic or elastic cord … about 11” length… but you can measure your head first to decide appropriate length. Draw the elastic through the elastic channel. Note: You can use a safety pin to draw the elastic through the channel.
10. Fit mask to your head and tie a knot as needed. It should fit snugly, but not pull on your ears. If desired, you can make the elastic go around the back of the head. You can tuck the knotted ends back into the elastic channel to hide them.
11. Bend the wire to fit snugly over the bridge of your nose.