

Carving Signs with a Router
/Last week I talked about creating custom templates for carving signs. We made two versions of a template: a full size version, which we used to trace the image onto the piece of wood we plan to carve, and another template that was 2x full scale that was printed onto several sheets of paper (in our example, it required 14 sheets of paper to print the entire template). The 2x full scale template is used for carving signs when utilizing a router pantograph for wood carving.


Using a Hand Router
A pantograph-connected router isn’t necessary to carve a sign. Virtually any type of router, be it a fixed base, plunge or trim router can do a reasonable job at carving a sign. All it takes is a little practice, good lighting and a steady hand.


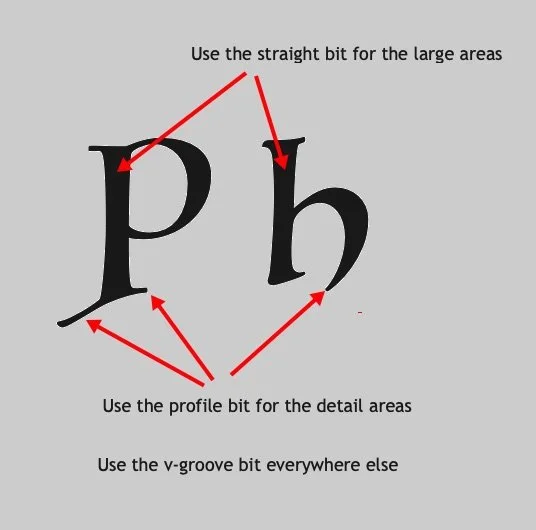
I use three bits with my router for carving signs – a ¼” straight bit, a 60° v-groove bit and a 15° profile bit. I use the v-groove bit for the majority of the carving, while the straight bit is used for carving large, flat areas, and the profile bit is used for the fine detail work - like the small tails and embellishments of a script font.


I usually make a couple of passes around the outline of the letter or symbol first, using the v-groove bit - leaving the detail areas for later. Then I switch bits and carve out the large areas with the straight bit. Finally, I switch to the profile bit to get the fine detail areas. The decision of when to switch bits is quite subjective, and I’m not always consistent. Sometimes I’ll carve the entire letter using the v-groove, and sometimes I’ll switch to the others as soon as the outline is completed. Figure out what works best for you.
Setting the cutting depth is also subjective. Depending on the size of the letters, I set the router to either a 1/8” or ¼” depth. I made a simple depth guide to use when setting the depth.
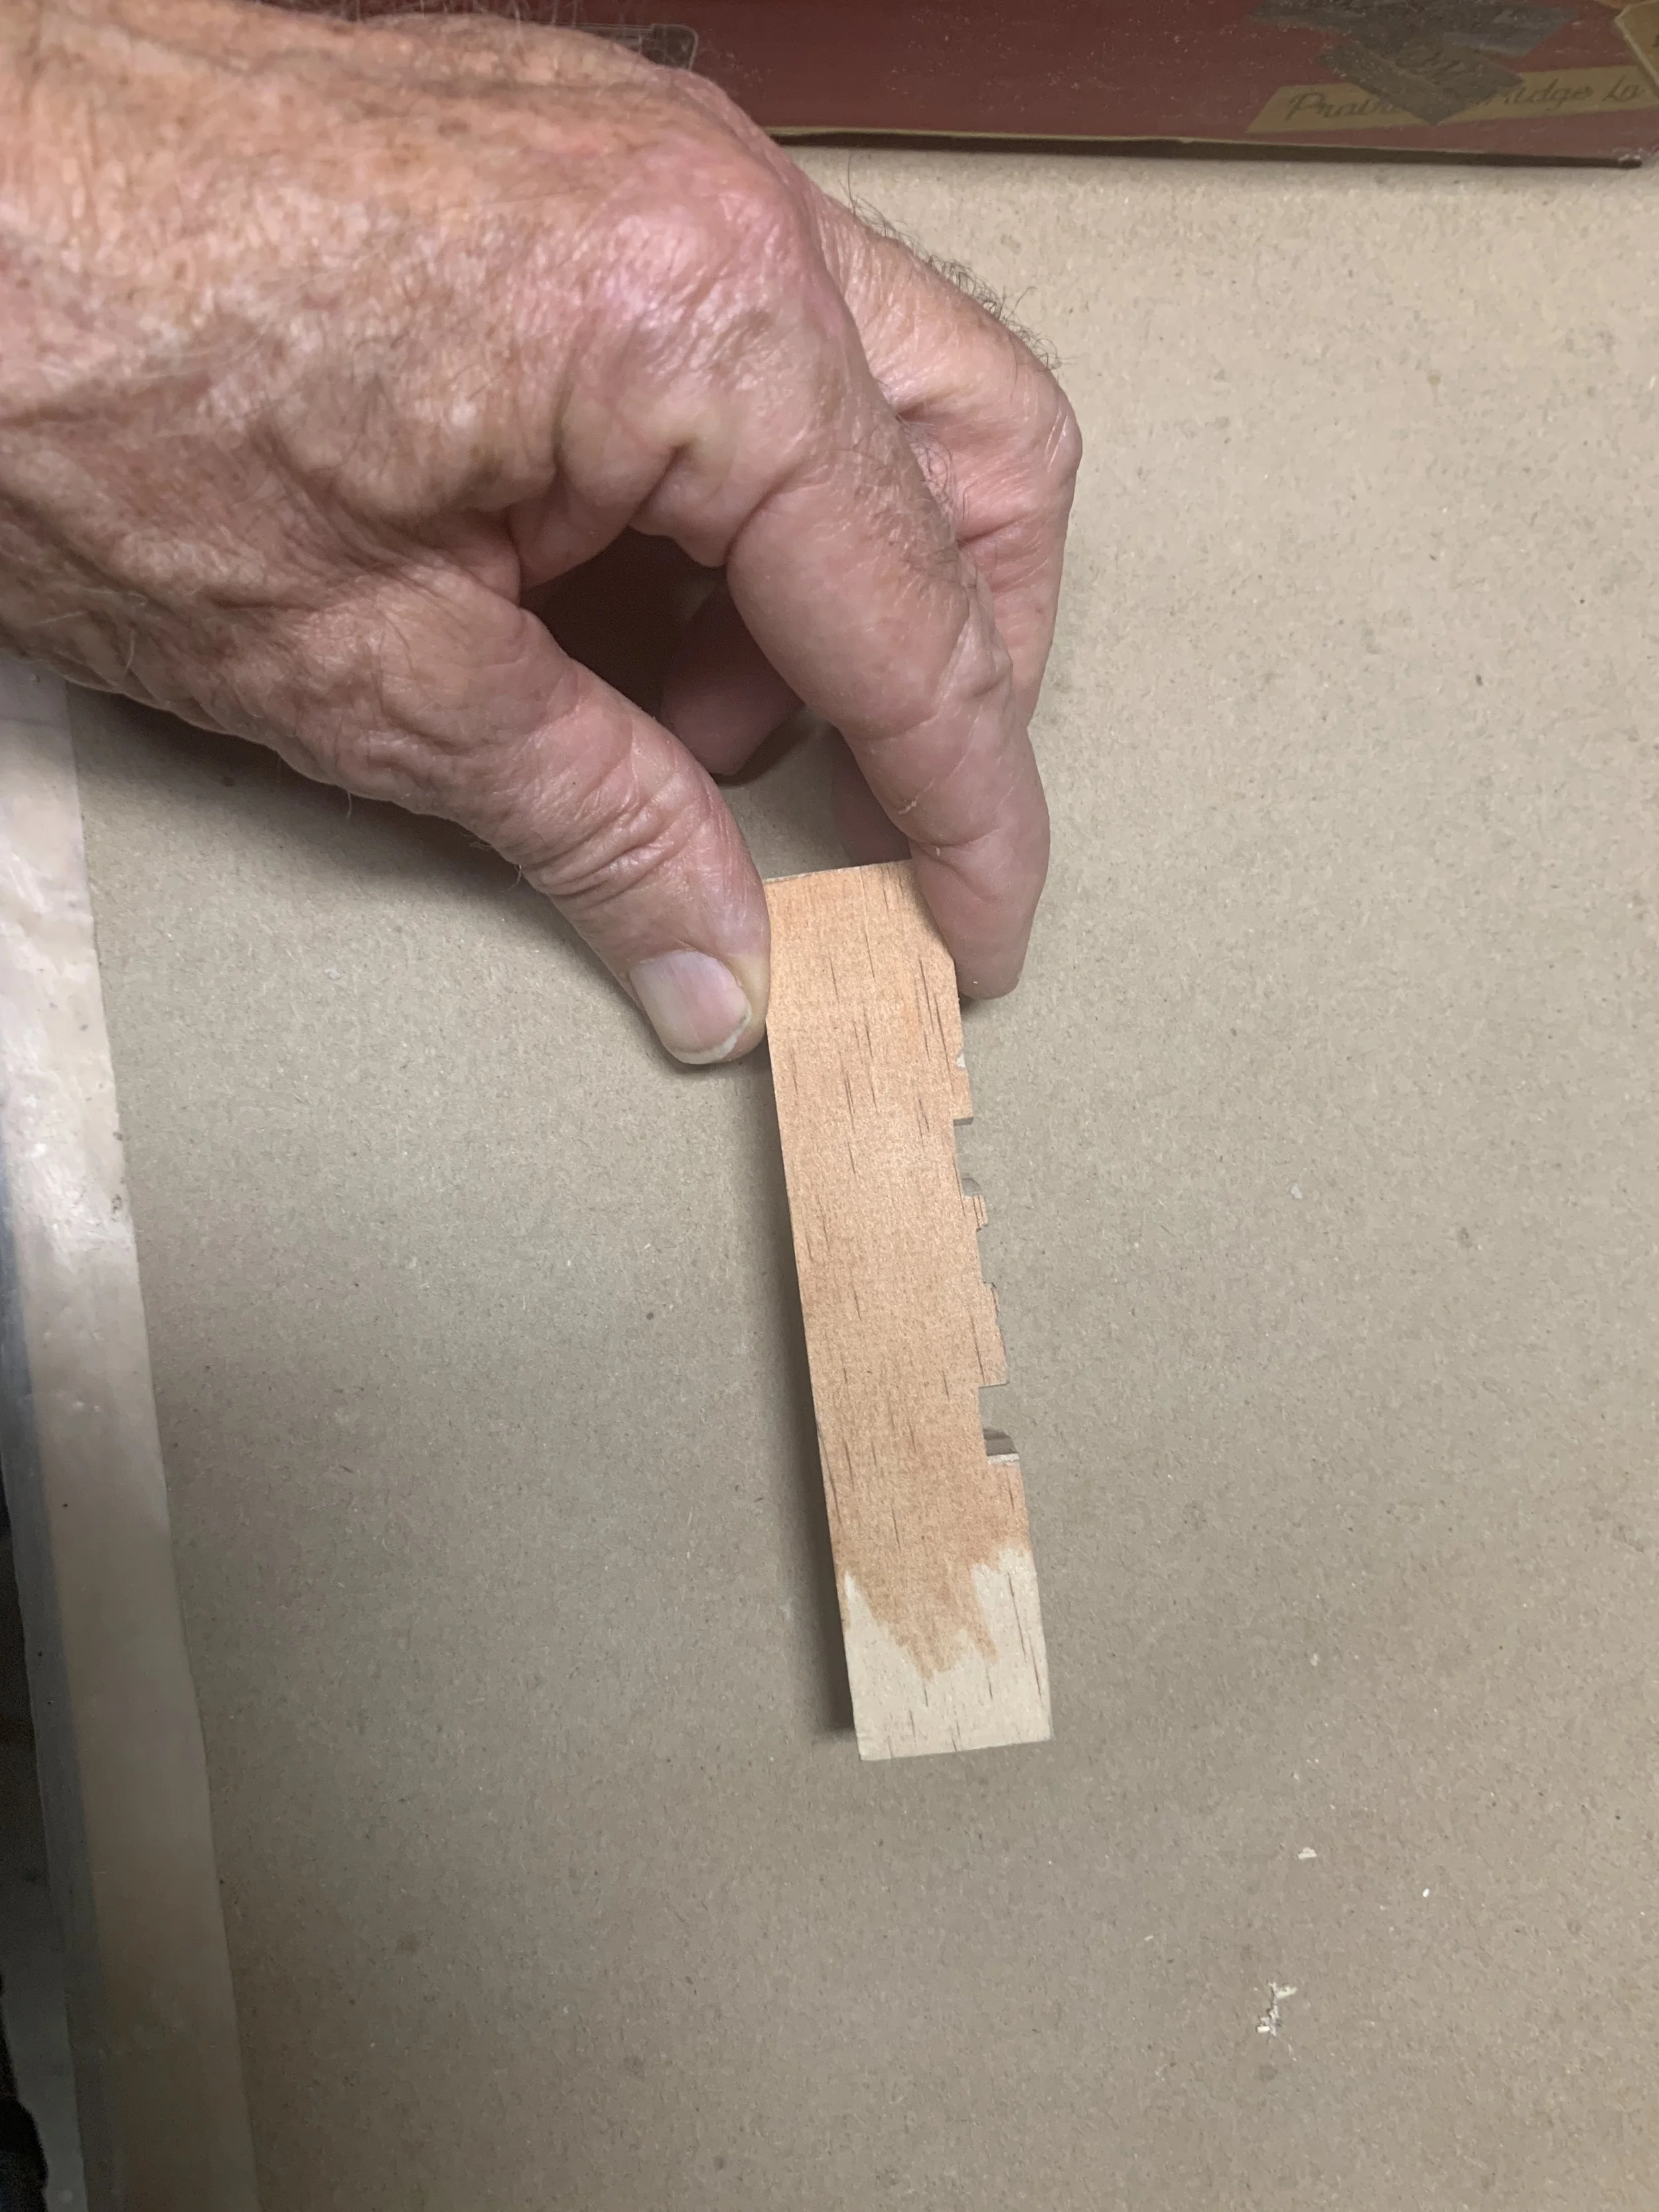
A quick depth guide
One important thing to remember is that, as you switch between them, the cutting depth of the three different bits has to match exactly. Since the three bits I use are the same length, this isn’t usually a problem, as long as each bit is seated fully into the router and the height adjustment isn’t changed. A problem I have with my fixed base router, however, is that when the router bit is seated fully into the router, the bit doesn’t extend far enough to carve even a 1/8” groove, and if I don’t seat each bit fully, it is quite time consuming trying to get the cutting depths the same between bit changes. A fix I figured out for this was to cut a ½” length of a #12 machine screw, and drop it into the collet before seating the router bit. Seems to work well.


Using a trim router
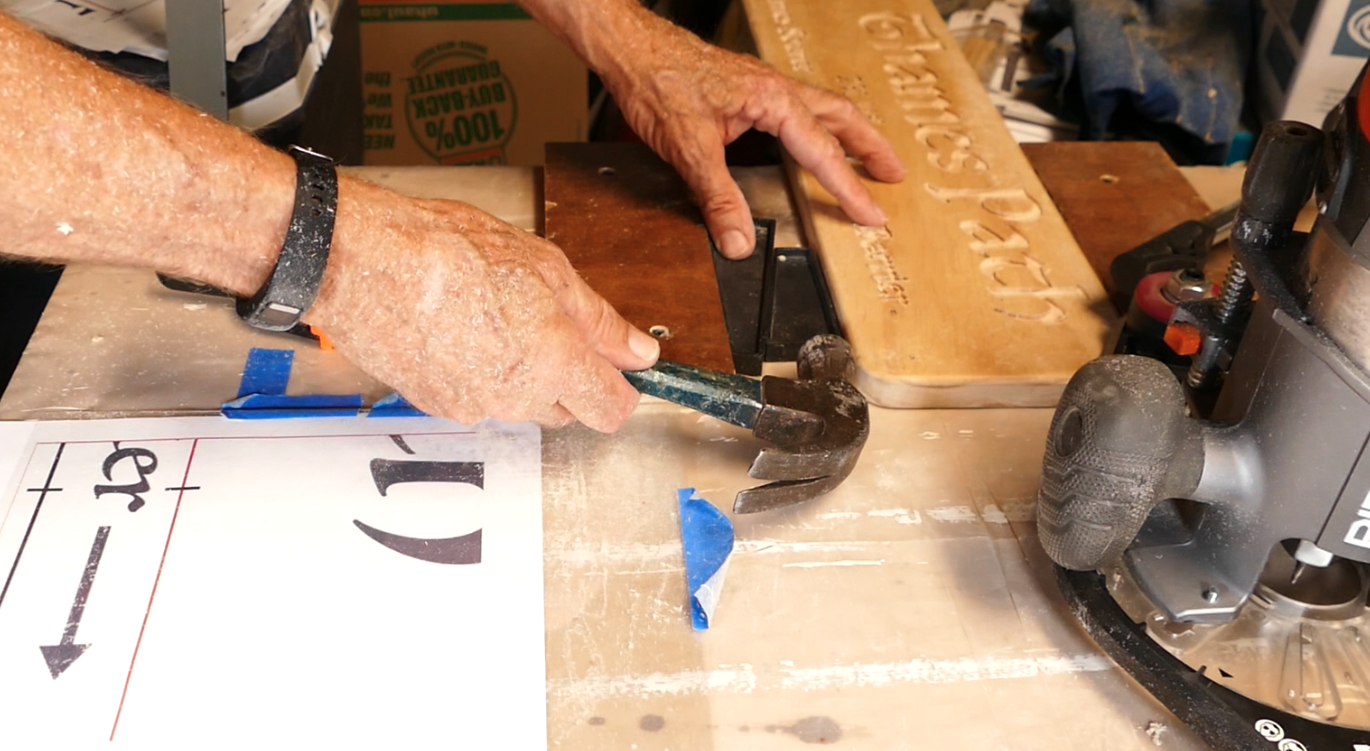
Once all the letters and graphics are carved, I go over each one with a Dremel type rotary tool using a burr bit to clean the edges. Be careful with this step - it’s easy to slip and gouge the wood.


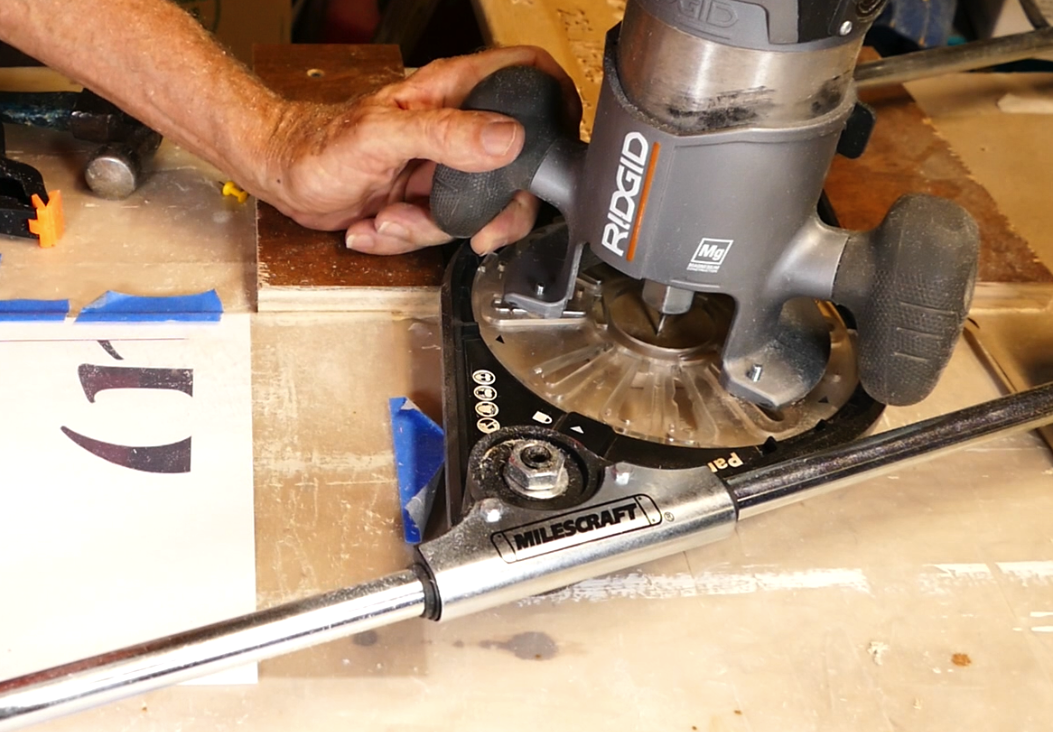
Using a Router Pantograph
No matter how careful I try to be when using a hand router, my results are never perfect. It’s hard, for me at least, to follow the outlines exactly. One reason is that the sawdust that is generated has a tendency to obscure the traced lines on the wood and coat my glasses, even when I use a vacuum. Another reason is that my hand is not as steady as it once was (although, to be honest, I don’t think I ever was that good at it, even when I was younger). A router pantograph is the next step up from using a hand router, and is much more accurate. For one thing, the template that is used is twice full-scale, making it easier to trace the outline of the letters. Visibility is better as well, as the stylus is well away from the sawdust being generated. And a third reason is that the router movement is much smoother and easier to control using the arms on the stylus than guiding a hand router.
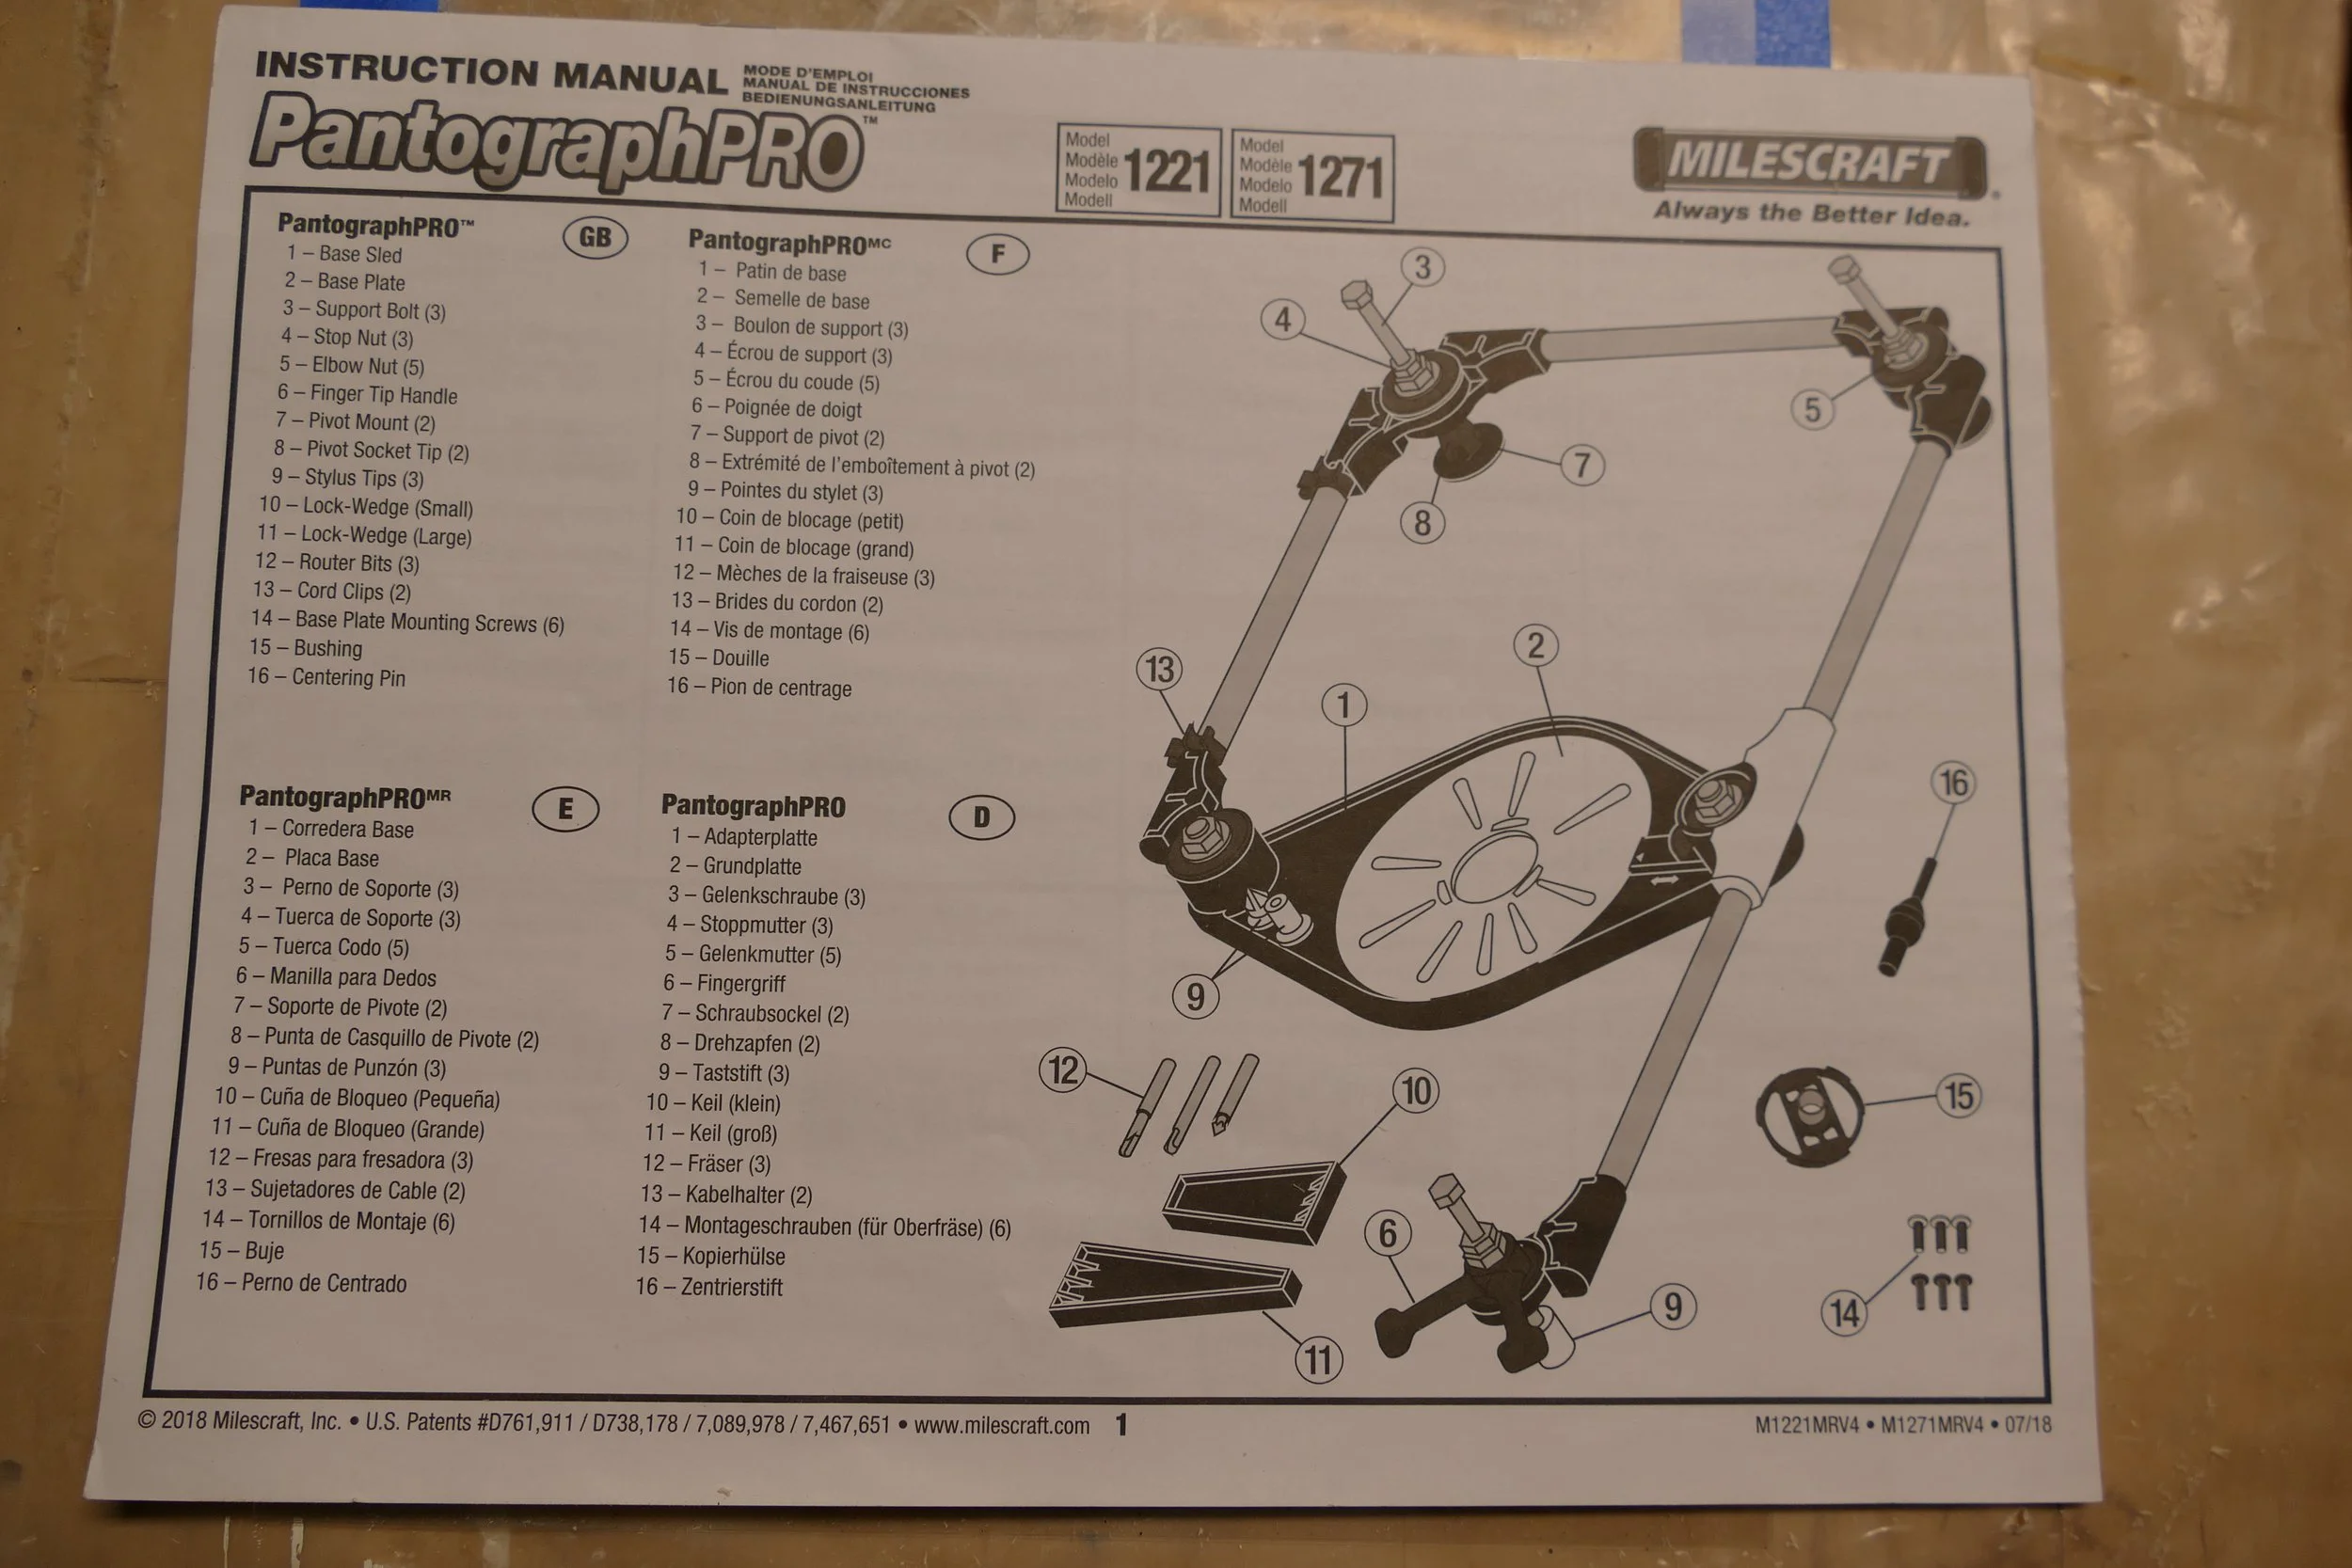
I use the Milescraft Pantograph Pro. Setting it up is somewhat complicated the first time, but between the written instructions and the online video provided by the company, getting it up and running is not difficult.
The op manual was quite comlete

The Milescraft router pantograph
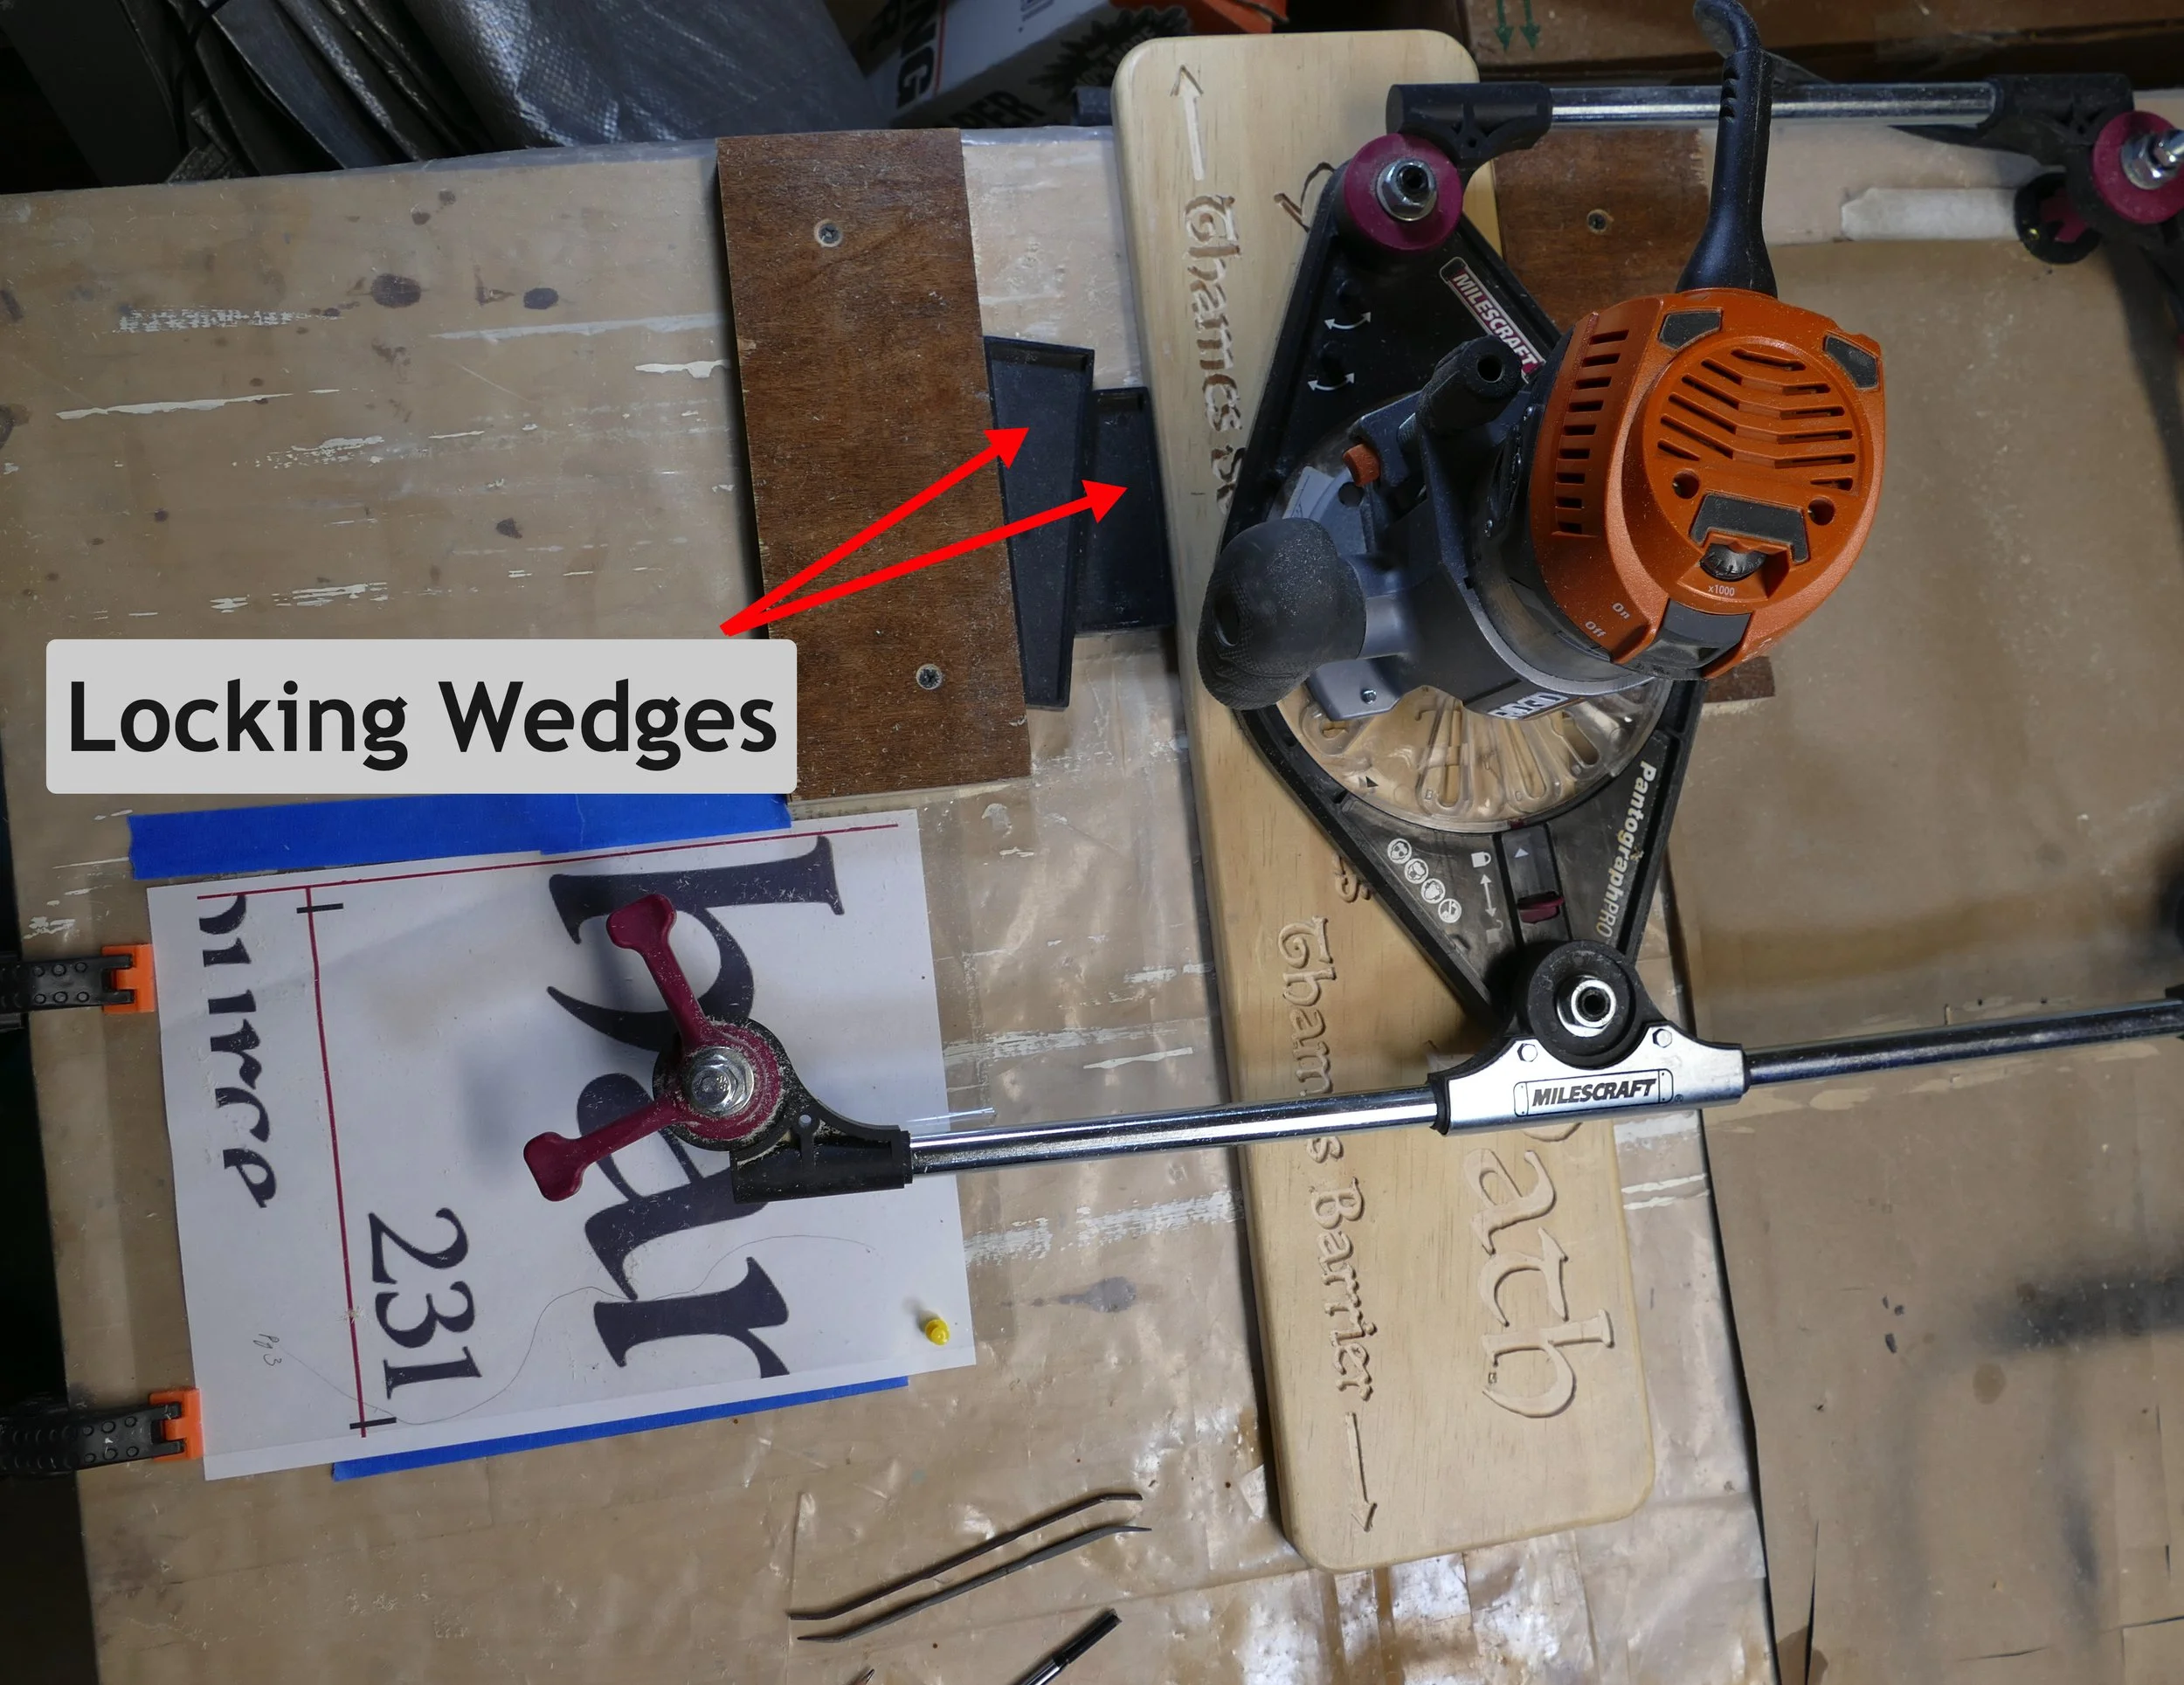
I use the same bits as with the hand held router – 1 ¼” straight bit, a 60° v-groove bit and a profile bit, and the cutting depths are set the same. The piece of wood is locked down using the two wedges, and after the first sheet of the template is positioned, I lift the router up off the wood and start it. I carefully lower the router onto the wood, and using the v-groove bit, I trace the outer edge of the letter or graphic with the stylus. Just as with the hand held router, I switch router bits as desired for the wider areas and the fine detail. Once the letter(s) on the template sheet is/are completed, I remove the template sheet and replace it with the second page, and so on.
As with the hand held router, go over each letter with a Dremel type rotary tool using a burr bit to clean the edges.
Aligning the Template
Accurately positioning the wood and aligning the template is a process in itself. Here’s how:
Load the v-groove bit into the router.
Place the new template in the clear plastic envelope.

3. If the piece of wood is locked in place, free it by loosening the wedges.

Unlocking the wood
4. Find a feature on the template and the corresponding point on the image that was traced on the wood. In this case, I’m using the tip of the arrow.

5. Position the router bit over the tip of the arrow and let it rest on the wood. If the wood is a hardwood, press down slightly on the router so that the bit bites into the wood.
6. As you move the router using the handles on the stylus, it will move the wood with it. Move the stylus to align it near the tip of the arrow on the paper template. You probably won’t be able to get it exactly aligned in this step, but get it as close as possible.
7. Lift the router off the piece of wood, and lock the wood in place using the wedges.
8. Place the router bit back onto the tip of the arrow.
9. Move the paper template until the tip of the arrow is exactly under the stylus tip.

Move the template until the arrow is under the stylus
10. With a t-square, align the template using the horizontal line as a reference.


11. After double checking that the tip of the arrow is under the stylus point, clamp the template in place.

Clamp the Template in Place
CNC Routing
While my results with a router pantograph are better than using a hand held router, I still haven’t been able to produce the perfect sign. There is always some little slip or error, a long line that’s a bit wobbly, or an arrow point that isn’t as sharp as I would like. My brother assures me that this is good, because everyone knows it was handmade and not made by a machine. I’m not sure I buy into that rationalization, however.
My mistakes are more easily overlooked when I use a script type font which is more forgiving than a serif or display type font. A small goof here and there look like they’re part of the script character. If I was making a lot of signs and/or wanted true perfection, however, the next step would be to invest in a Computer Numeric Control (CNC) machine. The pattern to be routed is digitized and input into the CNC machine, and the machine does the rest. Even a low cost CNC machine has an accuracy of better than 0.01” – much better than anything I could possibly do by hand. The most inexpensive CNC machines cost less than $500, and a reasonably good one will cost between $800-$1000.
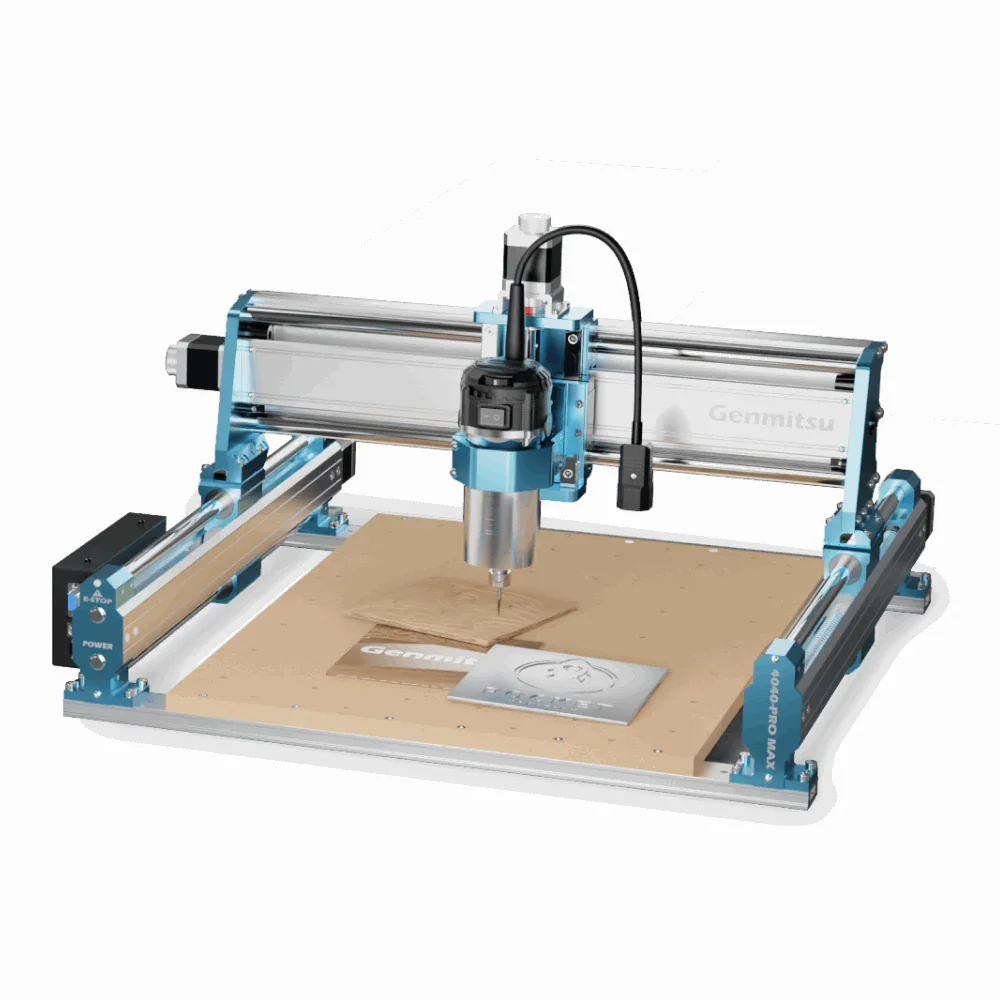
A cnc machine
And if you’re really serious and want to fully expand your options, a 3-in-1 3D printer, laser and CNC machine like this one is the ultimate. My nephew Dan has one and makes everything from custom arcade games to gorgeous guitars.

One of Dan’s creations
If ever I decide I want to make more than the occasional wood carving, I might spring for one of these options. In the meantime, however, I’m adopting my brother’s philosophy of making a few minor errors so everyone knows my work is done by hand.
Next time, I’ll talk about finishing that carved sign. See you then…