

Making and Using Custom Templates for a Router Panograph
/
Last week I talked about carving signs, and how I no longer hand-carve signs like I did when I made the nameboards for our sailboat Nine of Cups back in 2001. I’m now the proud owner of a Milescraft Pantograph Pro, which is much faster than using wood chisels and gouges.
You may recall from that blog, that a router pantograph is a device that has a stylus on one end of a series of interconnected arms, and a router on the other end. As you trace the outline of a drawing or letter with the stylus, the router follows along, carving the sign as it moves.

Milescraft PAntograph Pro - Courtesy Milescraft
The Milescraft pantograph comes with two sets of letter templates – one in a font that is similar to a Comic Sans font and one script font. The letters are printed on individual sheets of paper, so to carve a word onto the sign, the template for the first letter of the word is placed under the stylus, then the wood is aligned and secured in place. The letter is carved by the router as the stylus traces the shape of the letter, after which the template is removed and replaced with the template for the next letter. The wood is moved and realigned, and the process is repeated until the entire word is carved.

One set of Milescraft Templates
If you wish to carve signs using a different font or size than those provided by Milescraft, however, or you want to incorporate any kind of graphic, you will need to create your own custom template. This involves not only designing the paper template, but also providing a method of realigning the wood as each page of the template is completed. Here’s how I do it…
Create a full-size version of the template
I use the Paint S app for my Mac to create the full size template, but if you use a DOS machine, the venerable MS Paint or something similar will work in the PC world. I start by creating a new document that is the size of my piece of wood – in this case 24” x 6”.
Template generated using Paint S
I add the text and any graphics, then save it. Since it is to be printed full size, the template will require several pages. My Paint S app won’t let me do this, so I save the file as a .pdf, then using Adobe Acrobat, select the Poster printer format setting and print it. This divides the printout over several pages.

The Poster Print Option Prints Full-Size over several pages
Trace the template onto the wood
Cut and tape the printout into one, full-scale template. Since I’ll be tracing the letters onto the piece of wood, I try to avoid getting tape on the letters.

Trim the sheets and tape together

Cut the template to actual size
Then I tape the template to the wood, and using graphite paper and a stylus, I trace the outline of the letters onto the wood. If I didn’t have a stylus, a dull #2 pencil would also work.

Use graphite paper and a stylus to trace the pattern onto the wood

Tape the template to the wood

Trace the image onto the wood

The traced image
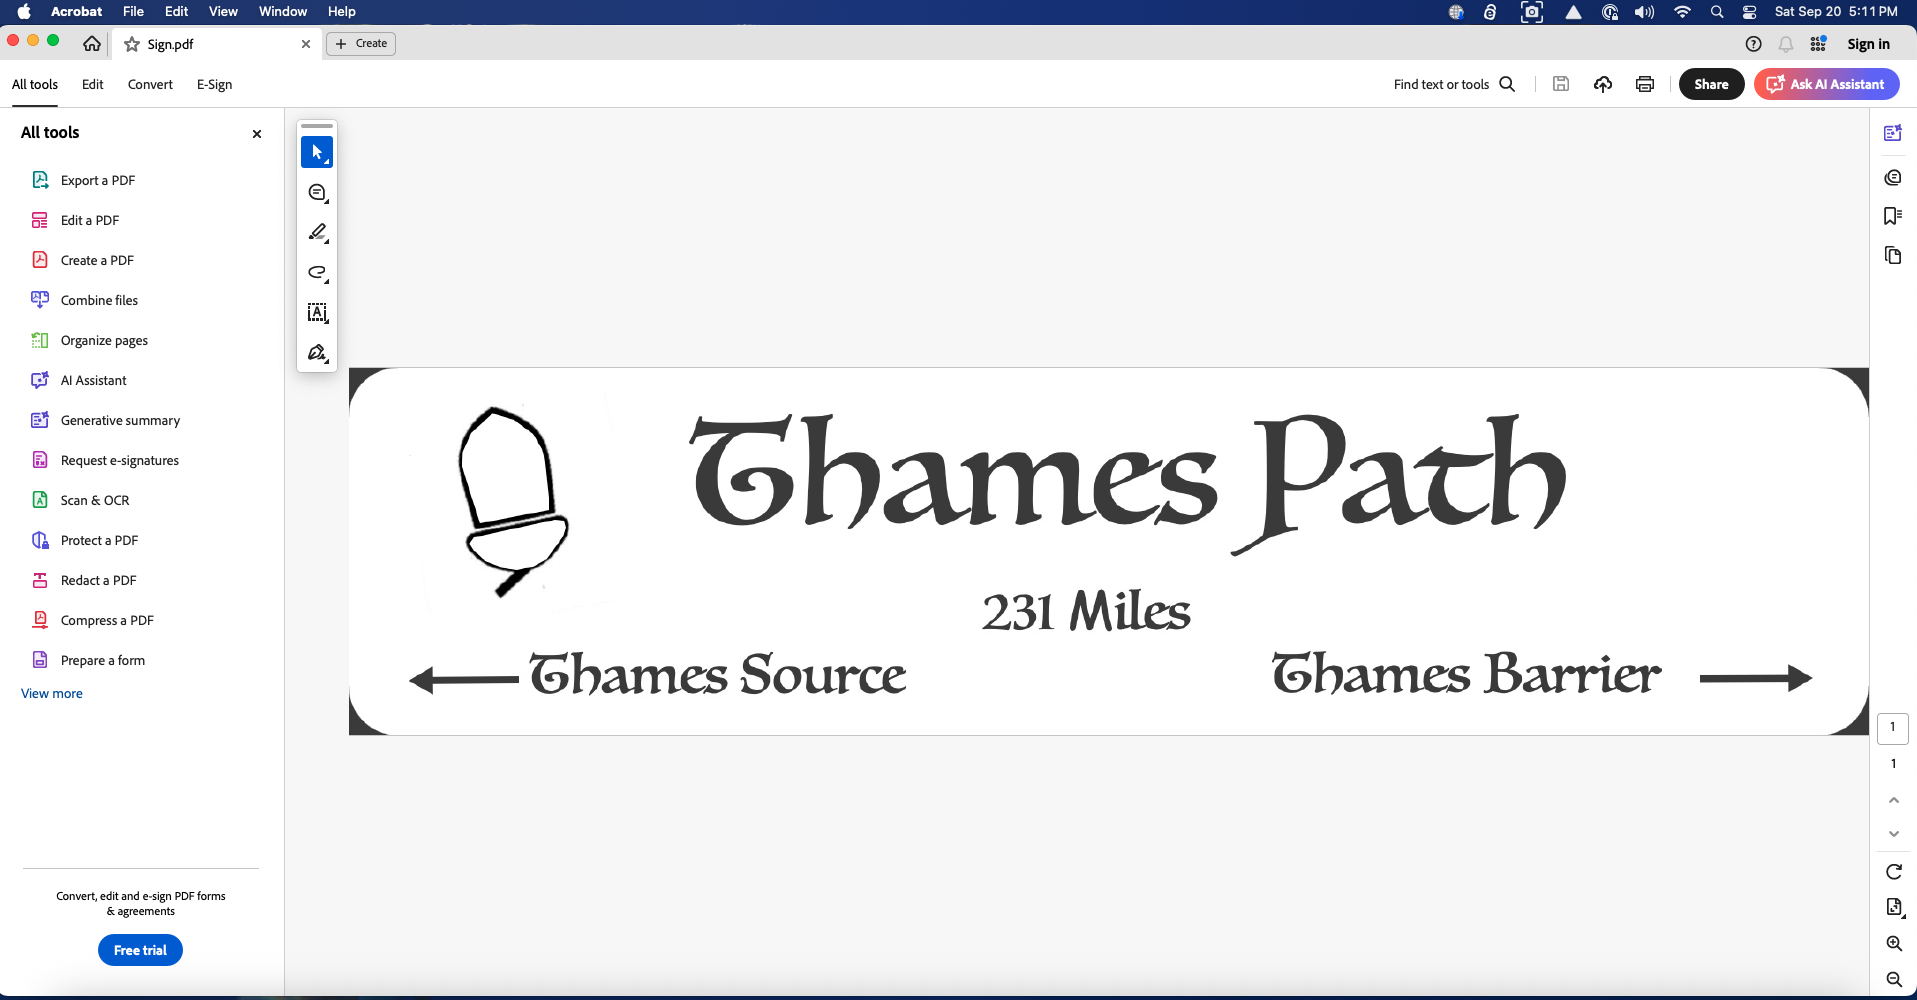
Create a template that is 200% of full-size
If I was carving the sign using hand-carving tools or a hand-held router (i.e. no pantograph), I’d start carving the letters onto the wood at this point, but since I’m using a pantograph, I need another template that is 2x full scale. To do this, I adjust the image size to 200% of original, and save it as a .pdf once again.
It would be nice if we could just print the template in a poster format as we did for the full size template, but there’s an issue with that. As can be seen here, some of the pages have letters that are half on one page and half on another. If a portion of a letter is carved using one template sheet, the next sheet has to be absolutely perfectly aligned in order to continue carving the letter. Even a misalignment of 1/16” will result in an eye-catching, odd looking letter.

Instead, we need to print each individual sheet of the template so that only complete letters are on each page. I’ll start by selecting an area roughly 8”x11” around the sign’s acorn logo for my first page. I copy the selected image using the cmd-C key on a Mac or ctrl-C on a PC.
Then I open a new window, create a blank page with the dimensions 8”x11”, paste the image onto the page using cmd-V or ctrl-V. Center the image, then print it. This is page 1 of the template.


The next page will be the ‘T’. Again, select the area, copy to the clipboard, create a blank page, paste the image and print.

Repeat the process for the remaining sections of the template. Some pages can have more than one letter, as long as none of the letters to be carved bleed over from one page to the next. I ended up with 14 pages.
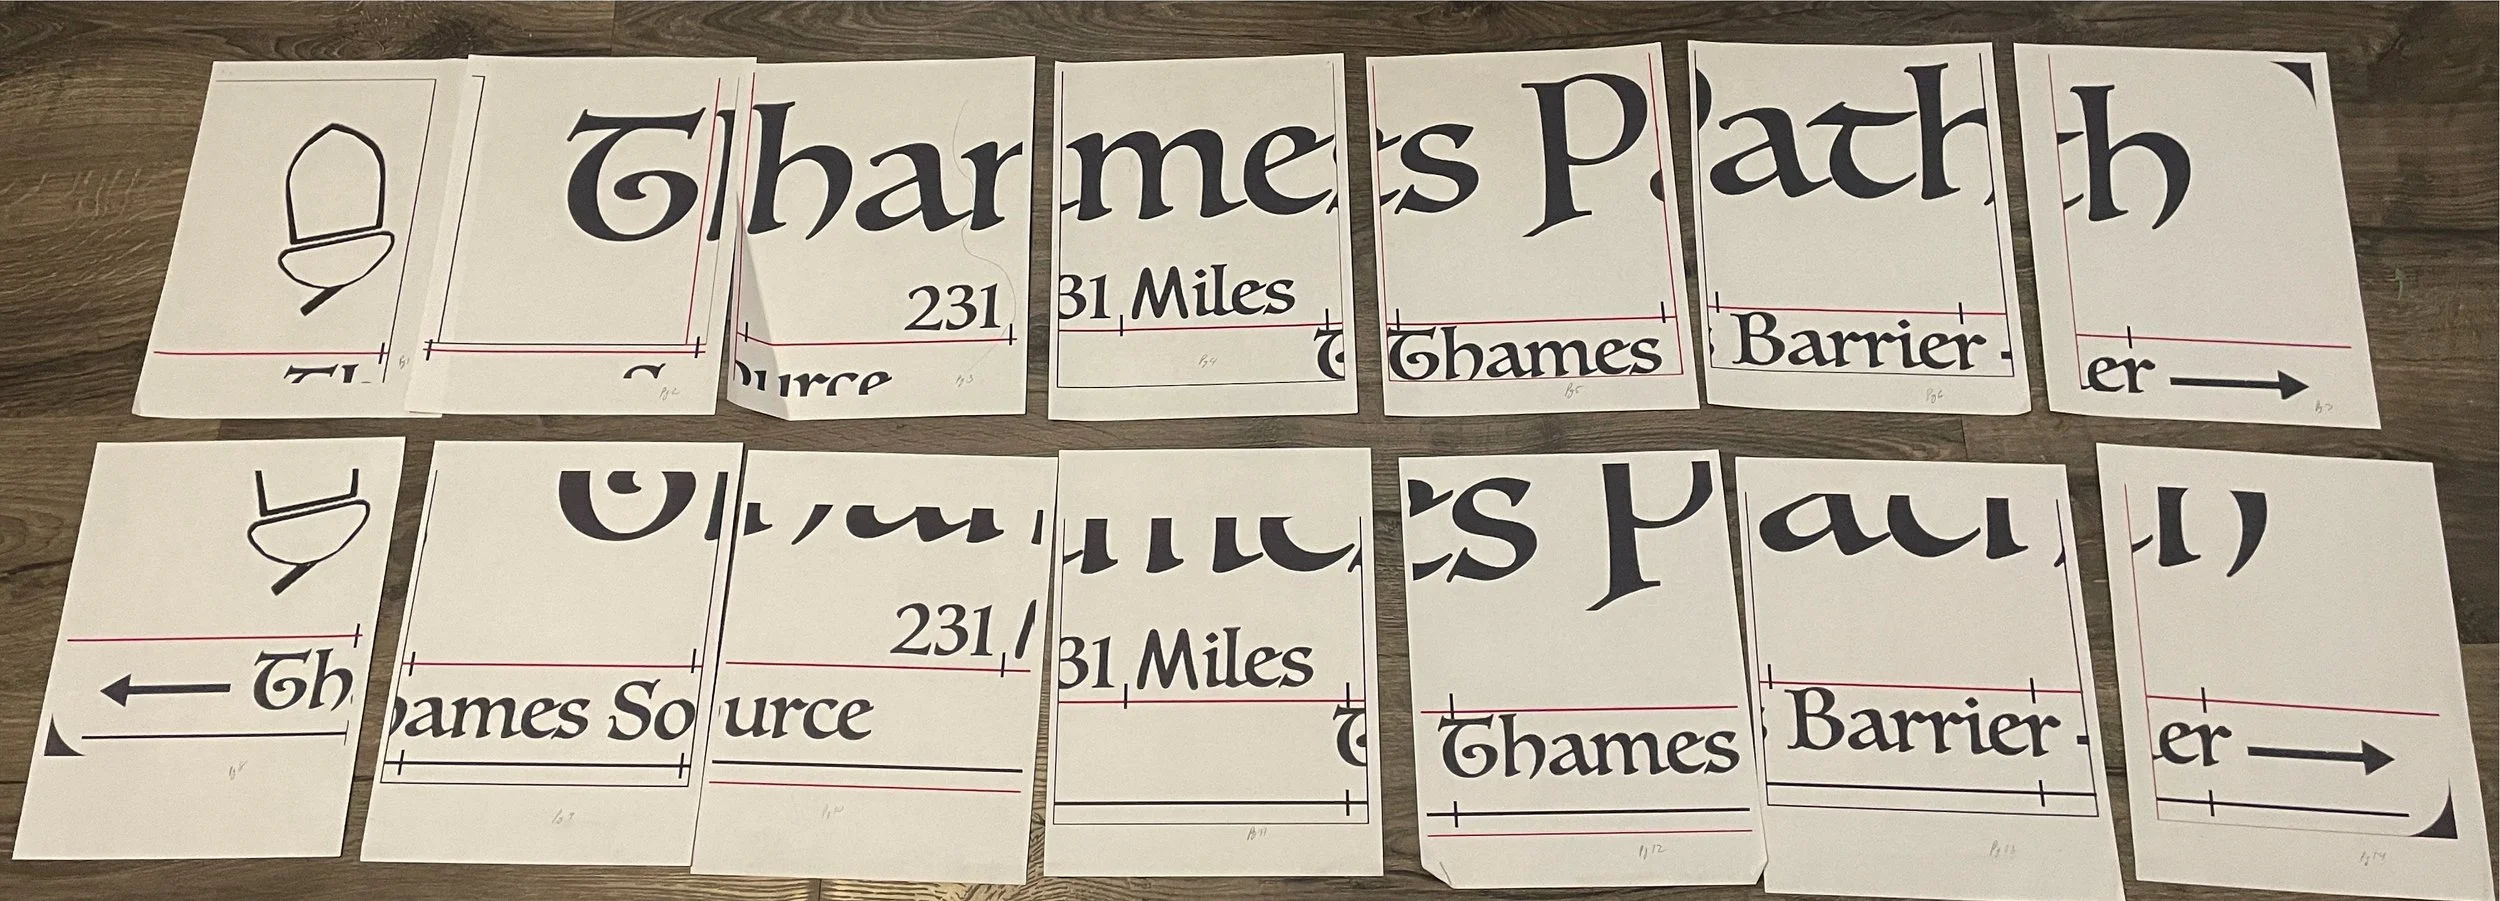
The printout required 14 pages
Carve the sign
I’ll talk about how to carve the sign using the router pantograph and my new custom template in my next blog.
And, if you find yourself confused about this whole process, we have a YouTube that does a better jib of explaining it that you can see here.
See you next time...