

Give Us Our Daily Bread
/
When we lived aboard Nine of Cups, we did a lot of baking—especially during long ocean passages. Any store-bought bread was usually gone within the first few days, so baking our own not only kept us supplied with fresh bread, it also helped pass the hours during those long night watches.
I made French bread, Italian bread, focaccia, croissants, pizza dough, and pretzels, while Marcie specialized in scones, brownies, cakes, and English muffins. I even tried making bagels—but only once. Bagel dough needs to be boiled before it's baked, and even with a gimbaled stove, dipping limp bagel dough in a pot of boiling water on a rolling, pitching sailboat wasn't one of my better ideas.
Provisioning for a long voyage meant stocking dozens of pounds of flour and sugar, a couple of jars of yeast, and extra propane tanks. Bread wasn't just something we ate—it was an important part of preparing for life at sea.
Once we sold Cups and moved ashore, our baking gradually came to an end. Store-bought bread was inexpensive, convenient, and life somehow always seemed too busy to justify making our own.
Then we went trekking in Portugal.
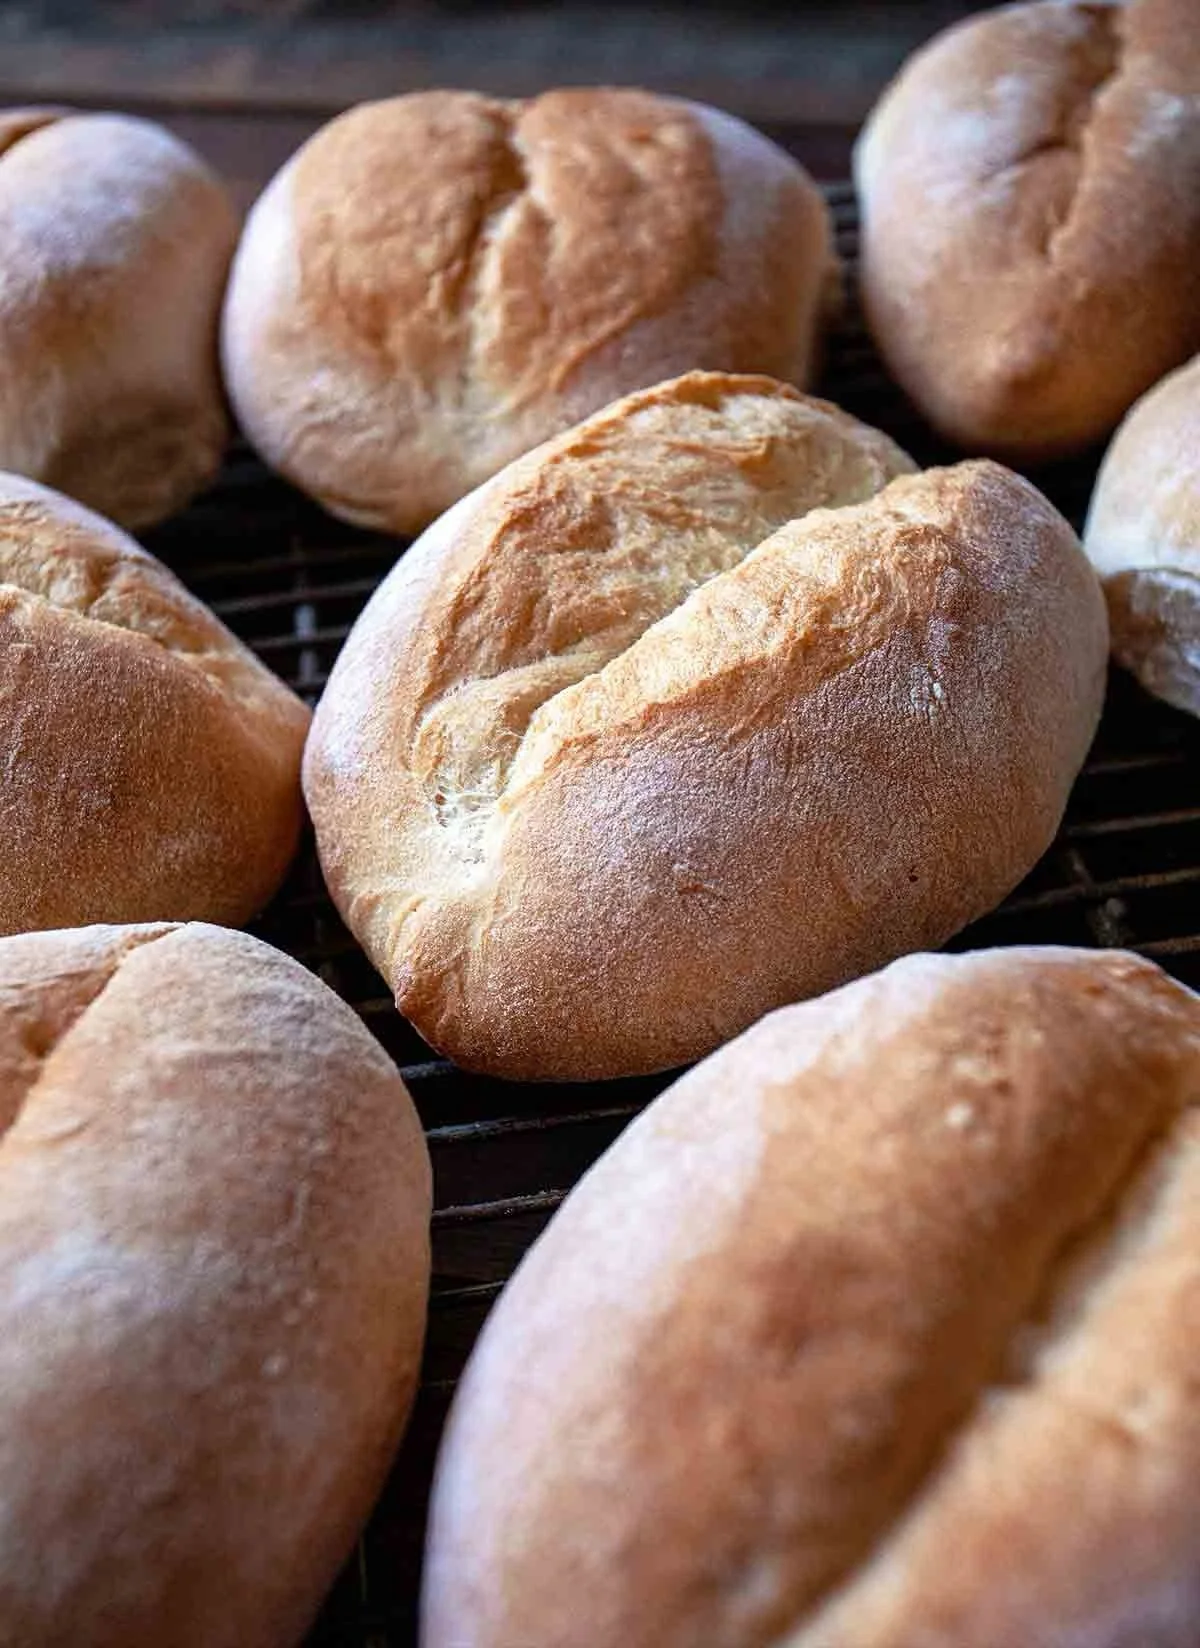
Papo Seco… courtesy of Leite's Culinaria
Bread in Portugal is exceptional—and remarkably inexpensive. A fresh baguette typically costs around 35 cents, an artisanal boule about 75 cents, and papo secos—the ubiquitous light, airy rolls with their crispy crusts—sell for about 15 cents each. Fresh bread was available everywhere, and it was always delicious.
During our hike on the Camino de Santiago, there were many days when we weren't sure if we'd find a restaurant for lunch or dinner. We'd often pick up a couple of baguettes or a handful of papo secos, add some local cheese, and enjoy a simple meal that was every bit as satisfying as anything we could have ordered.
While in Portugal, we also spent a few days visiting our longtime sailing friends, Catherine and Michael Whitby. We'd first met them years ago while cruising, and it was wonderful to reconnect. Catherine bakes her own bread, and after enjoying her outstanding artisanal rye and pumpernickel, I was inspired to dust off my old baking skills.
I've rediscovered a couple of things since returning home.
First, baking in a house that doesn't pitch and roll is dramatically easier than baking on a sailboat. Finding a secure place for dough to rise is no longer an engineering challenge. Second, having an oven with an actual thermostat makes it much easier to bake bread that's neither doughy in the middle nor burned on the outside.
Here in Las Vegas, we try to get out for a morning walk before the desert heat takes over the day. When we return, we settle in with coffee and a couple of slices of toast. Homemade bread has made that simple routine something we genuinely look forward to. It's far better than the supermarket bread we'd become accustomed to, and it's surprisingly easy to make.
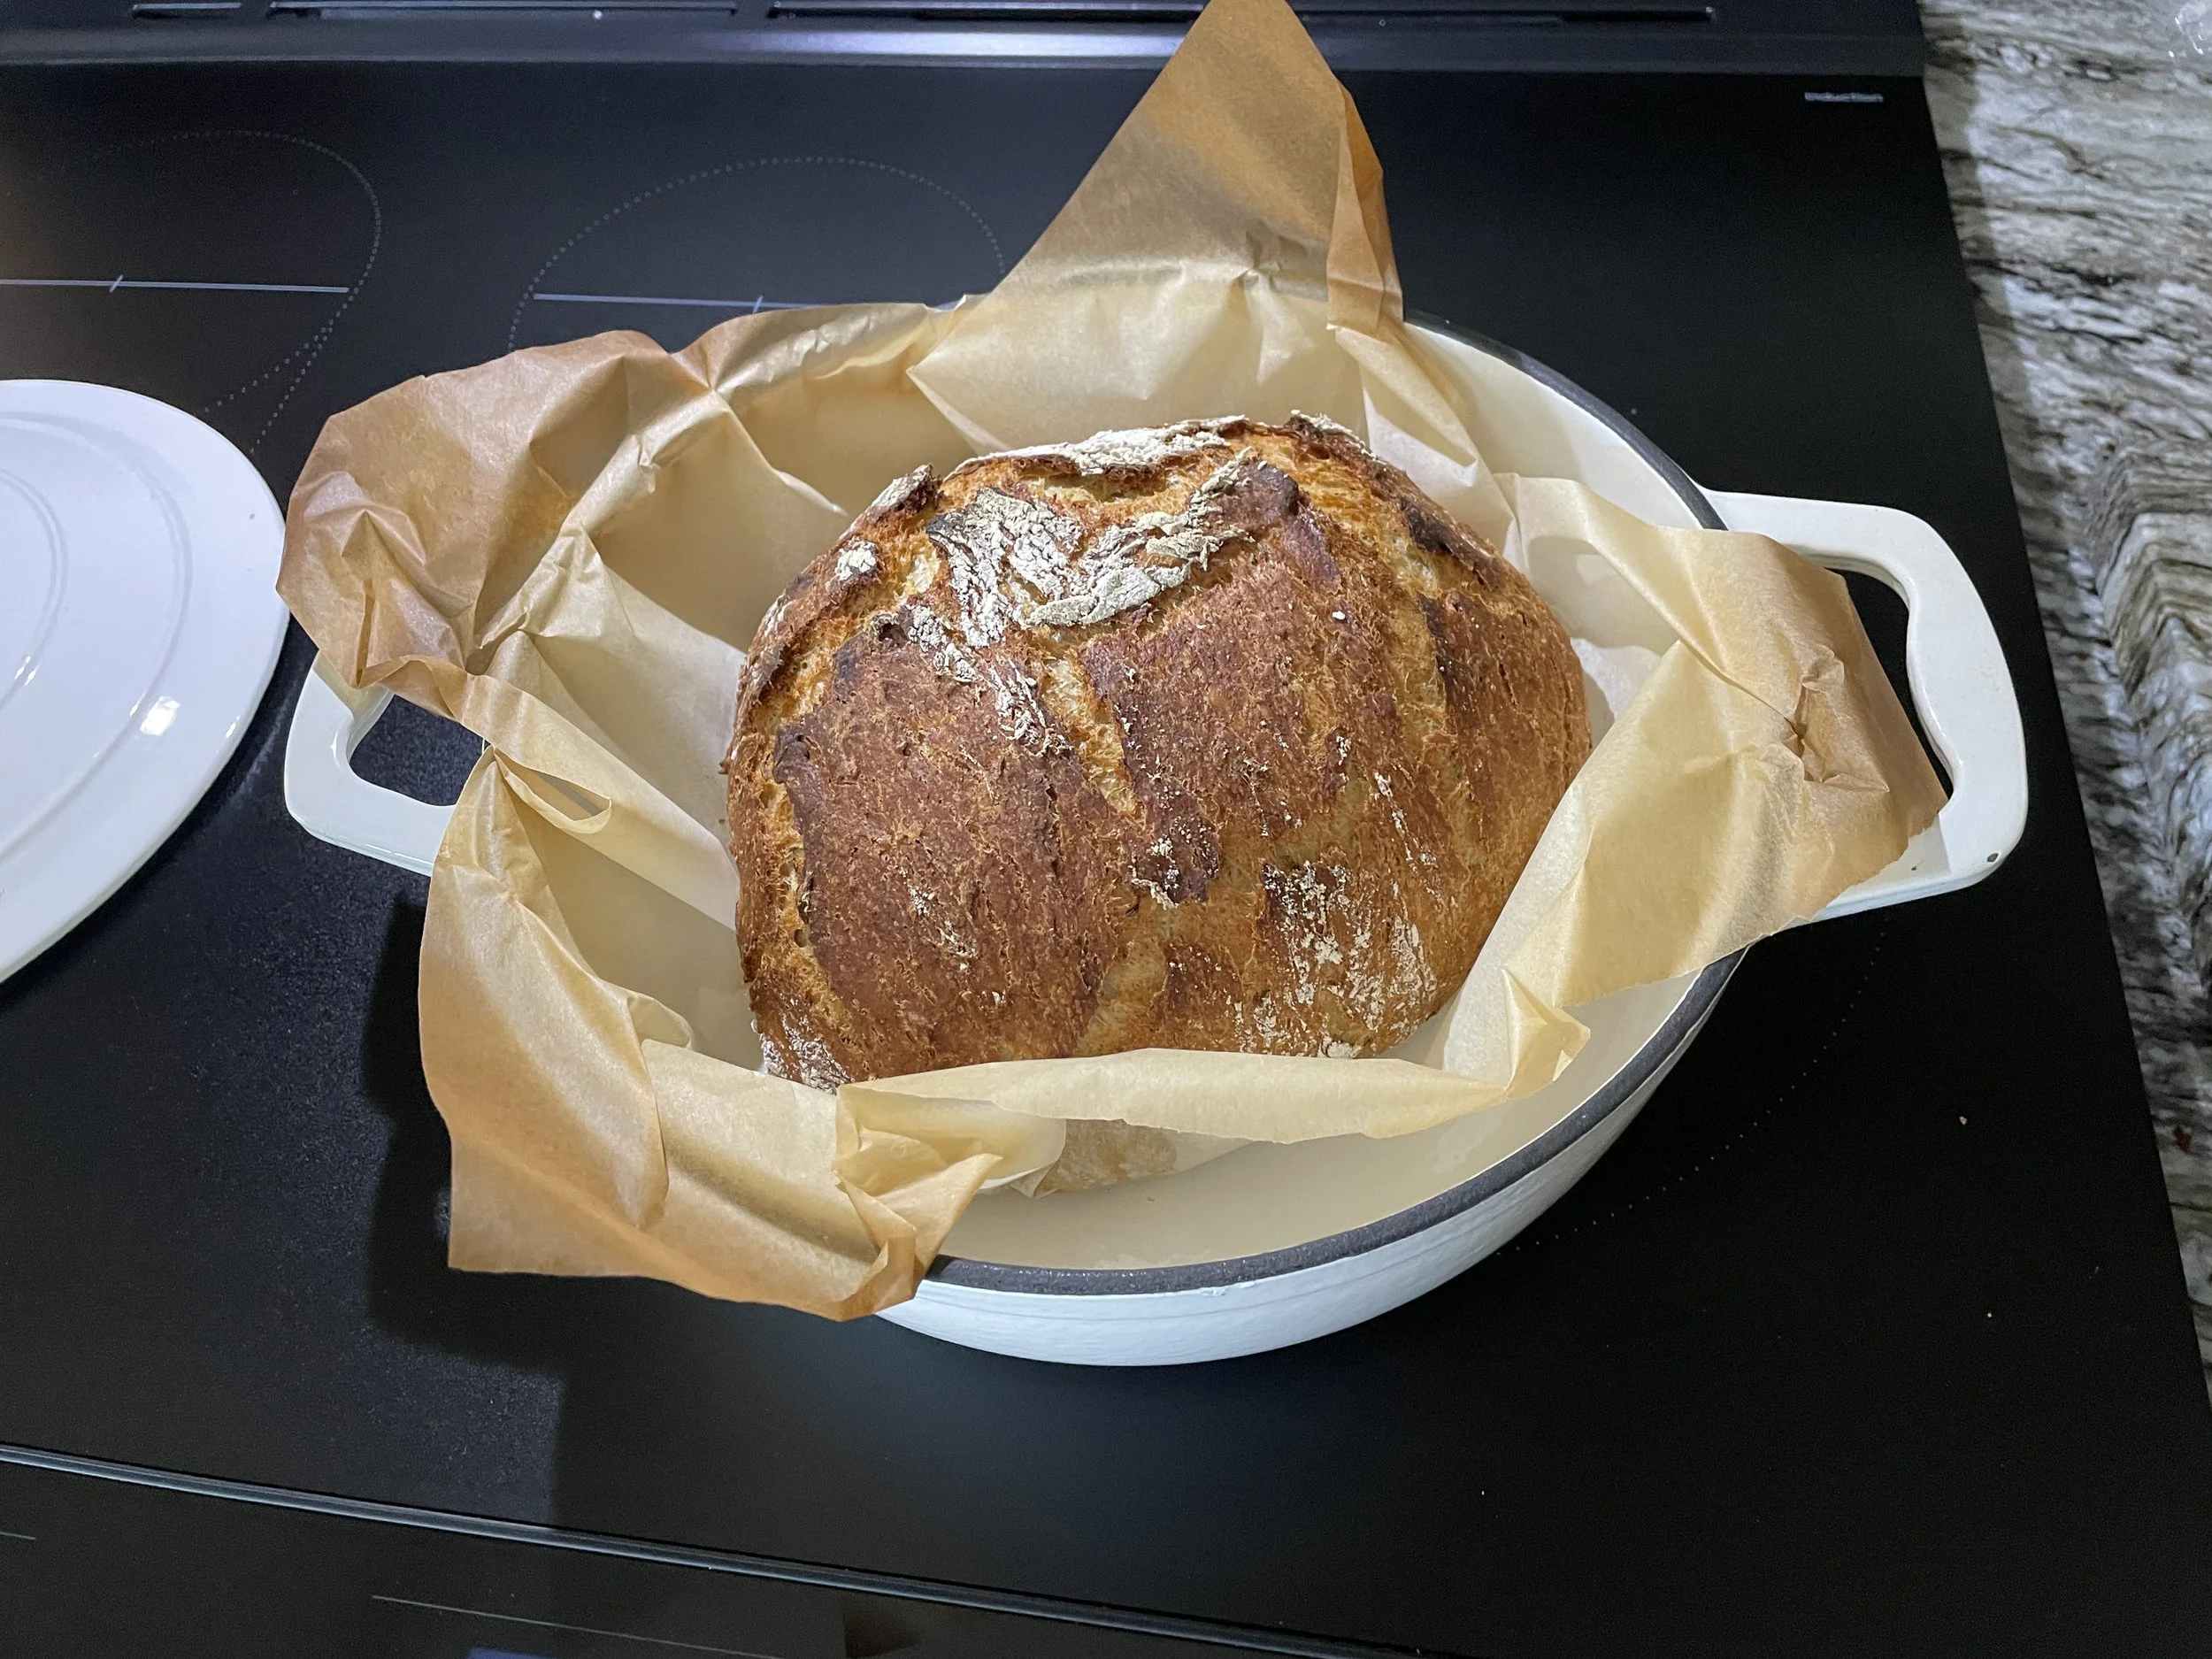
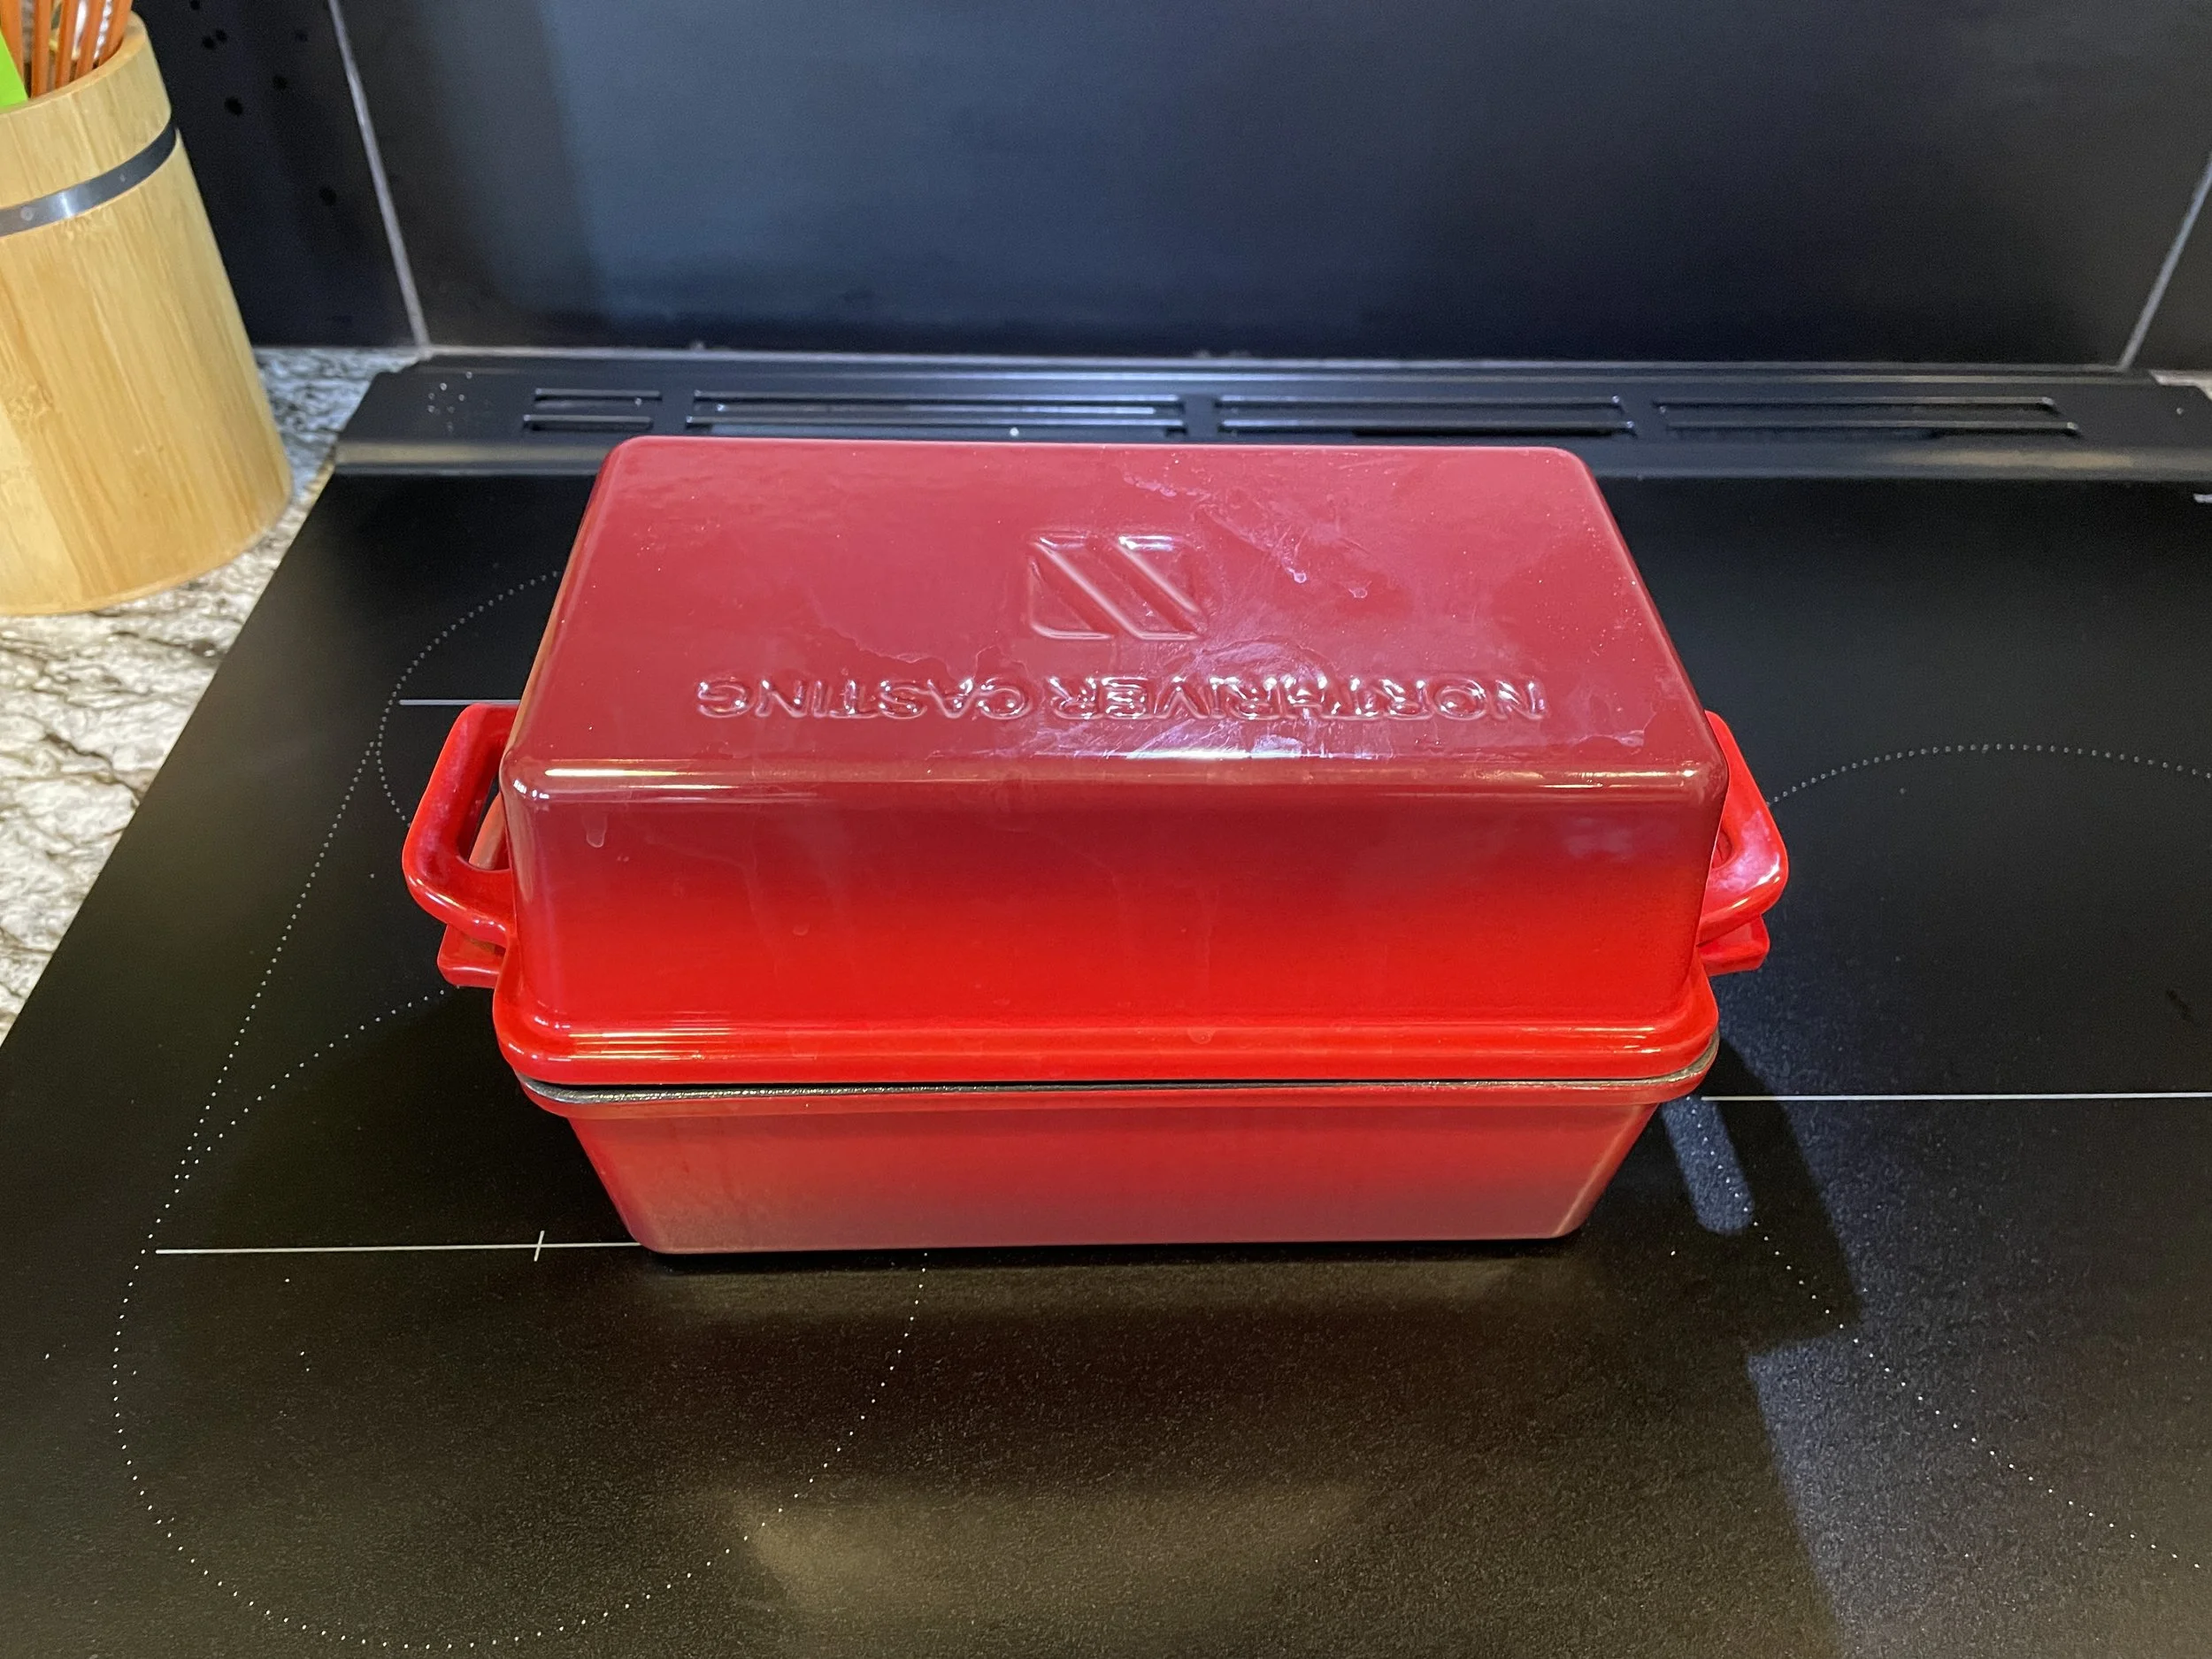
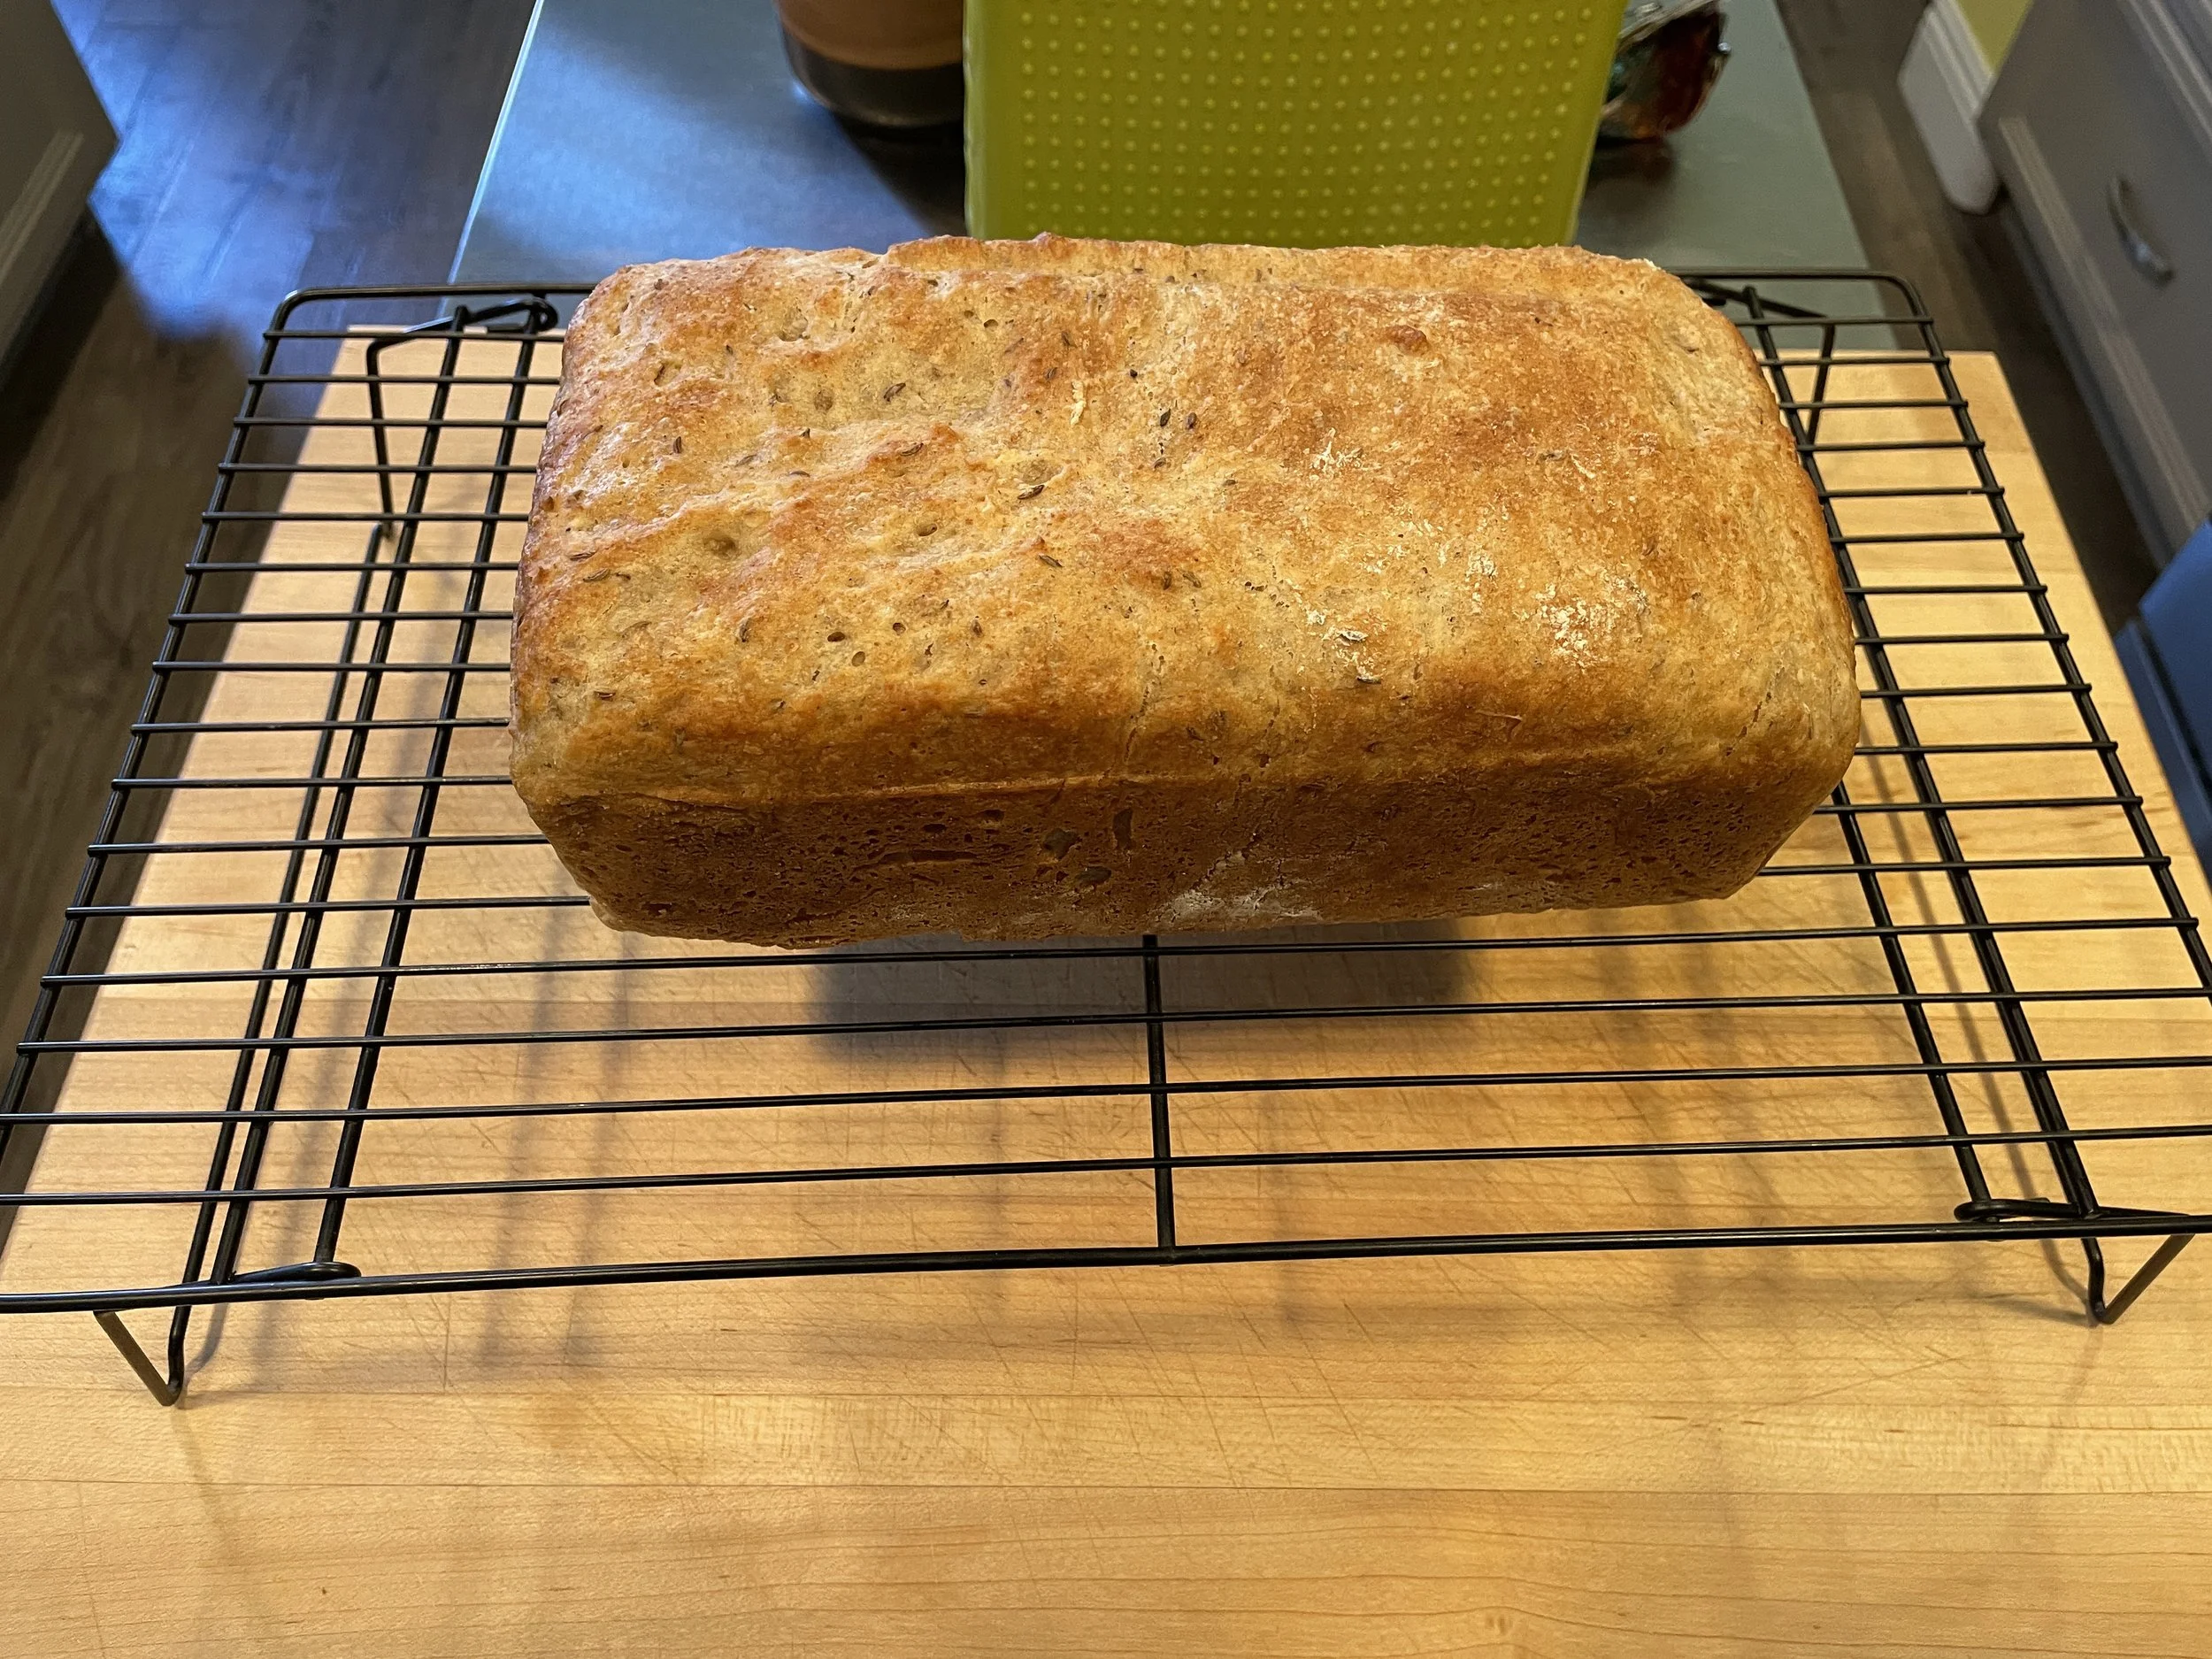
For baking boules, an oven-safe Dutch oven with a lid produces the best results. We already had a ceramic-coated cast-iron one. I also wanted to bake traditional sandwich loaves, and for Father's Day Marcie thoughtfully gave me a Pullman loaf pan with a lid. While a regular loaf pan works just fine—covered with foil if necessary—the Pullman pan produces wonderfully uniform loaves. BTW, I was curious about why it was called a Pullman loaf pan… check the postscript below the recipe to find out why.
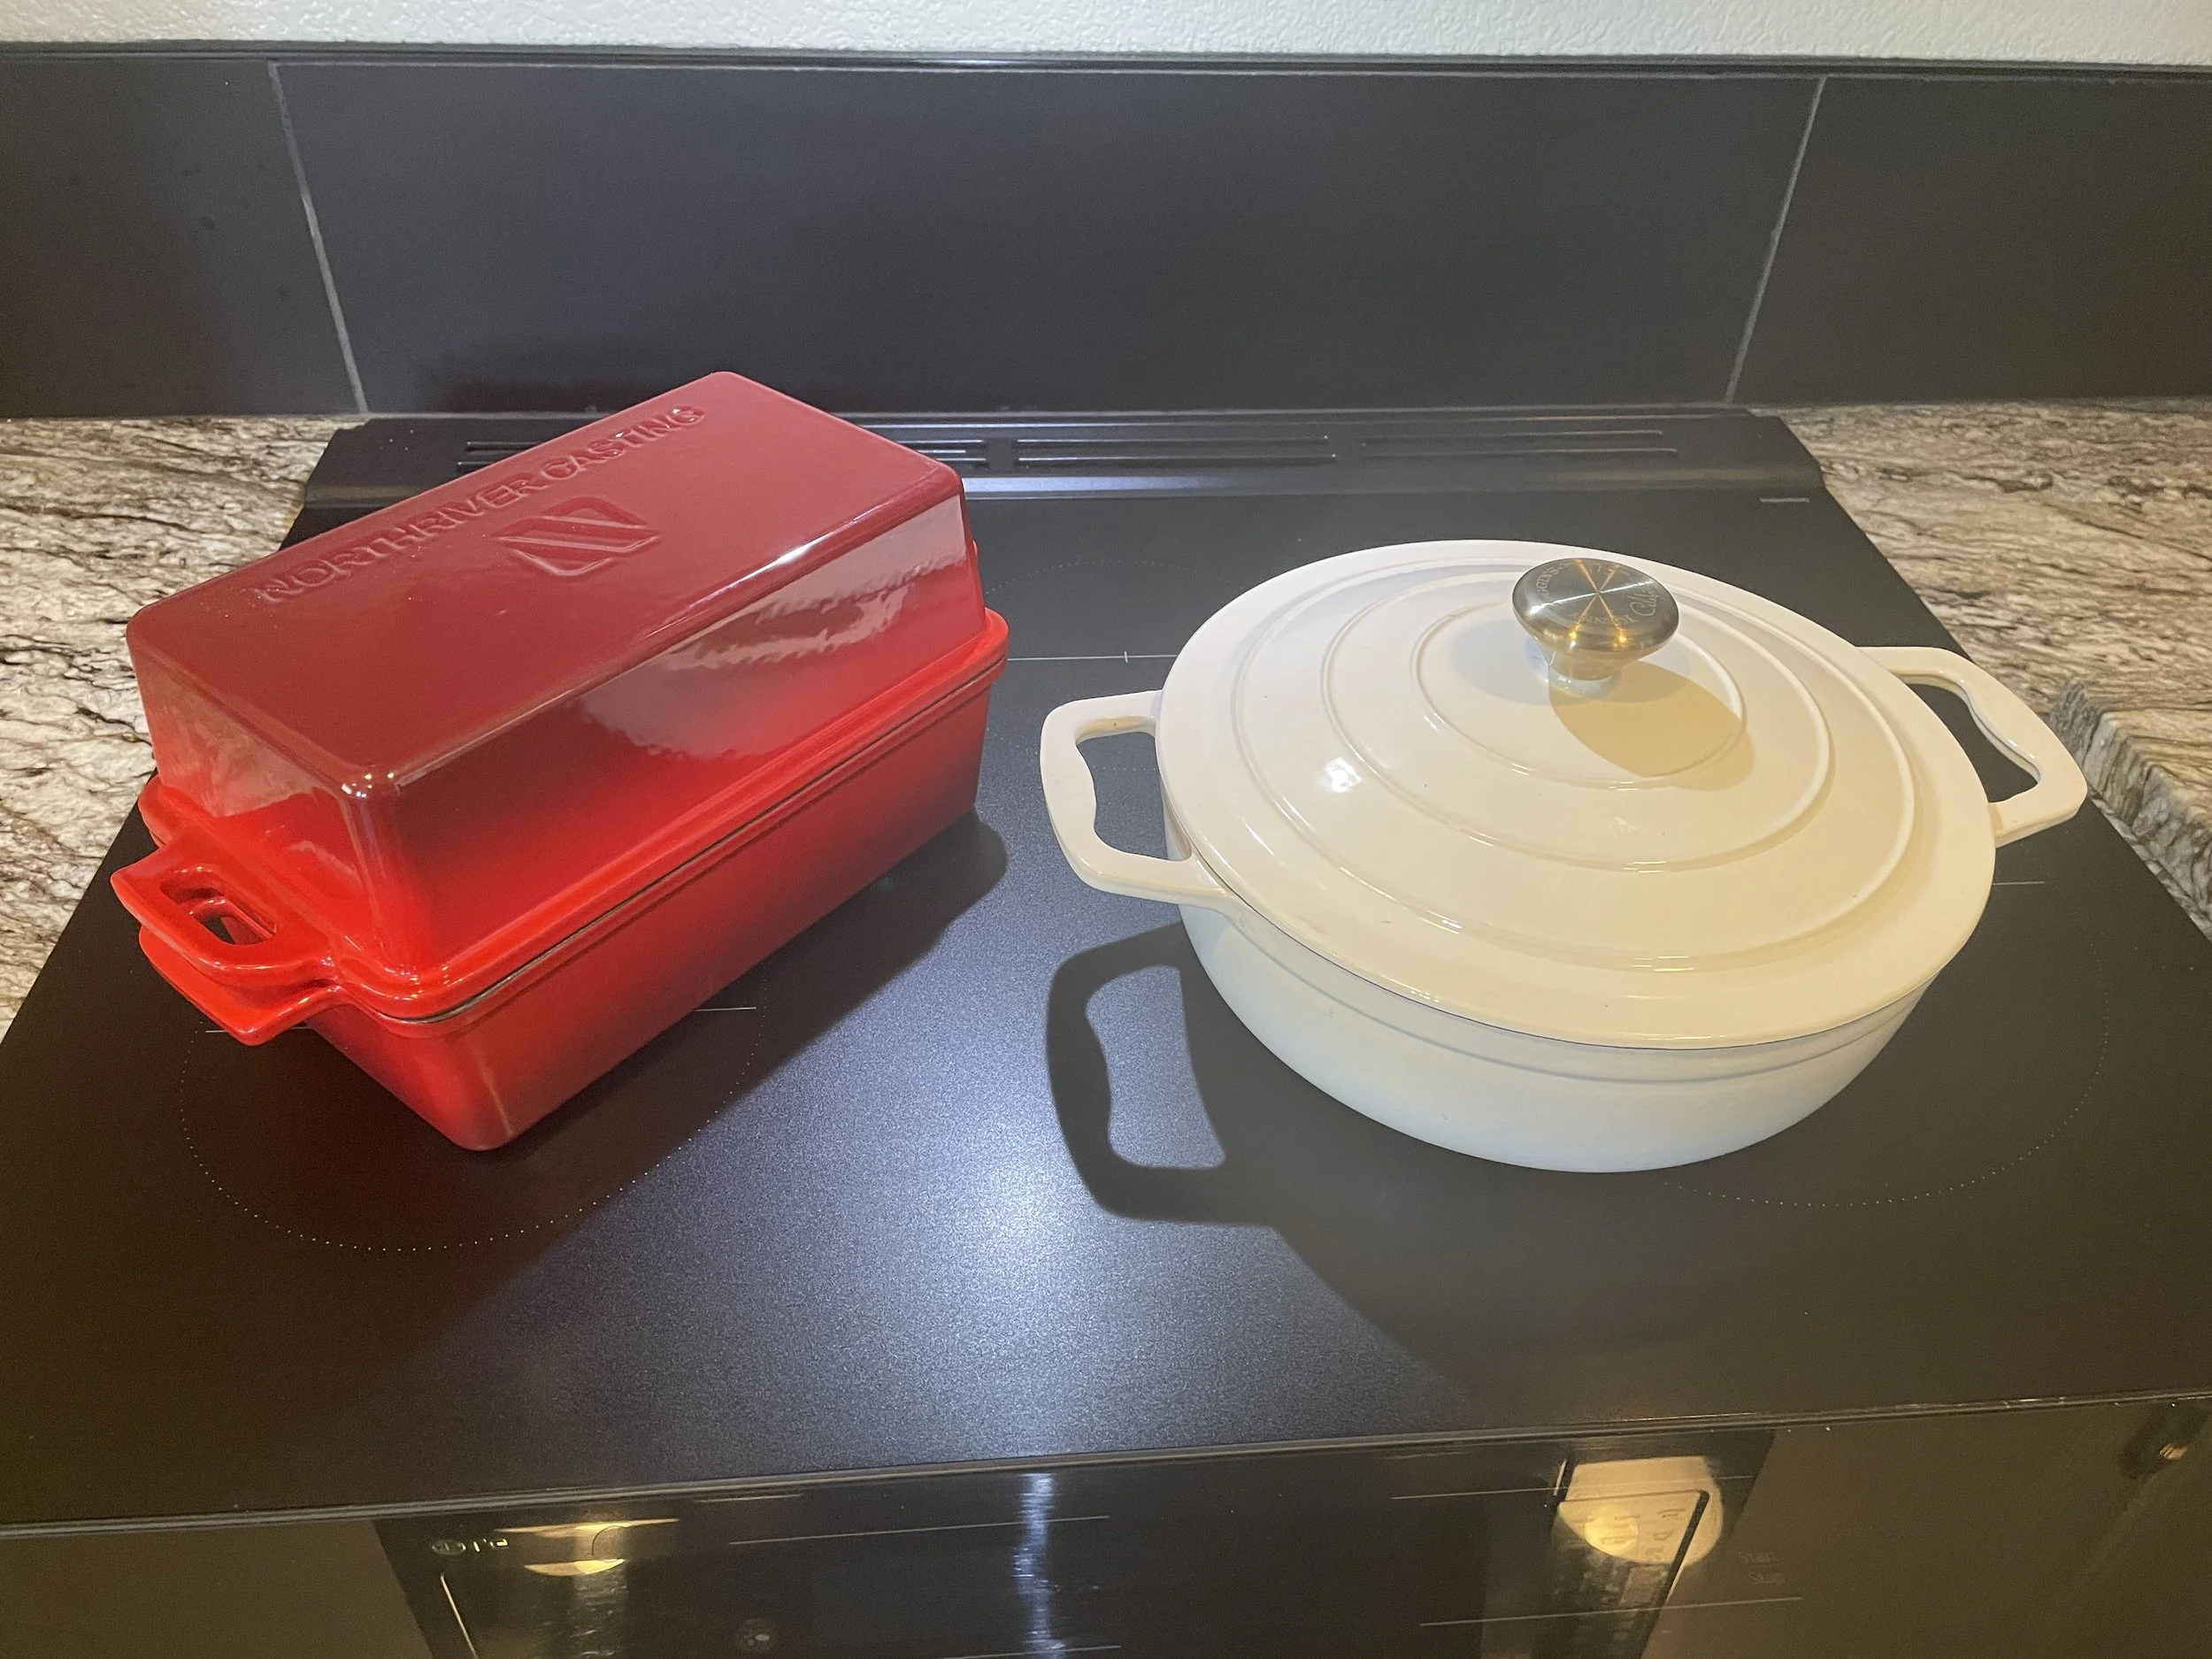
Our Pullman Loaf pan and Dutch Oven
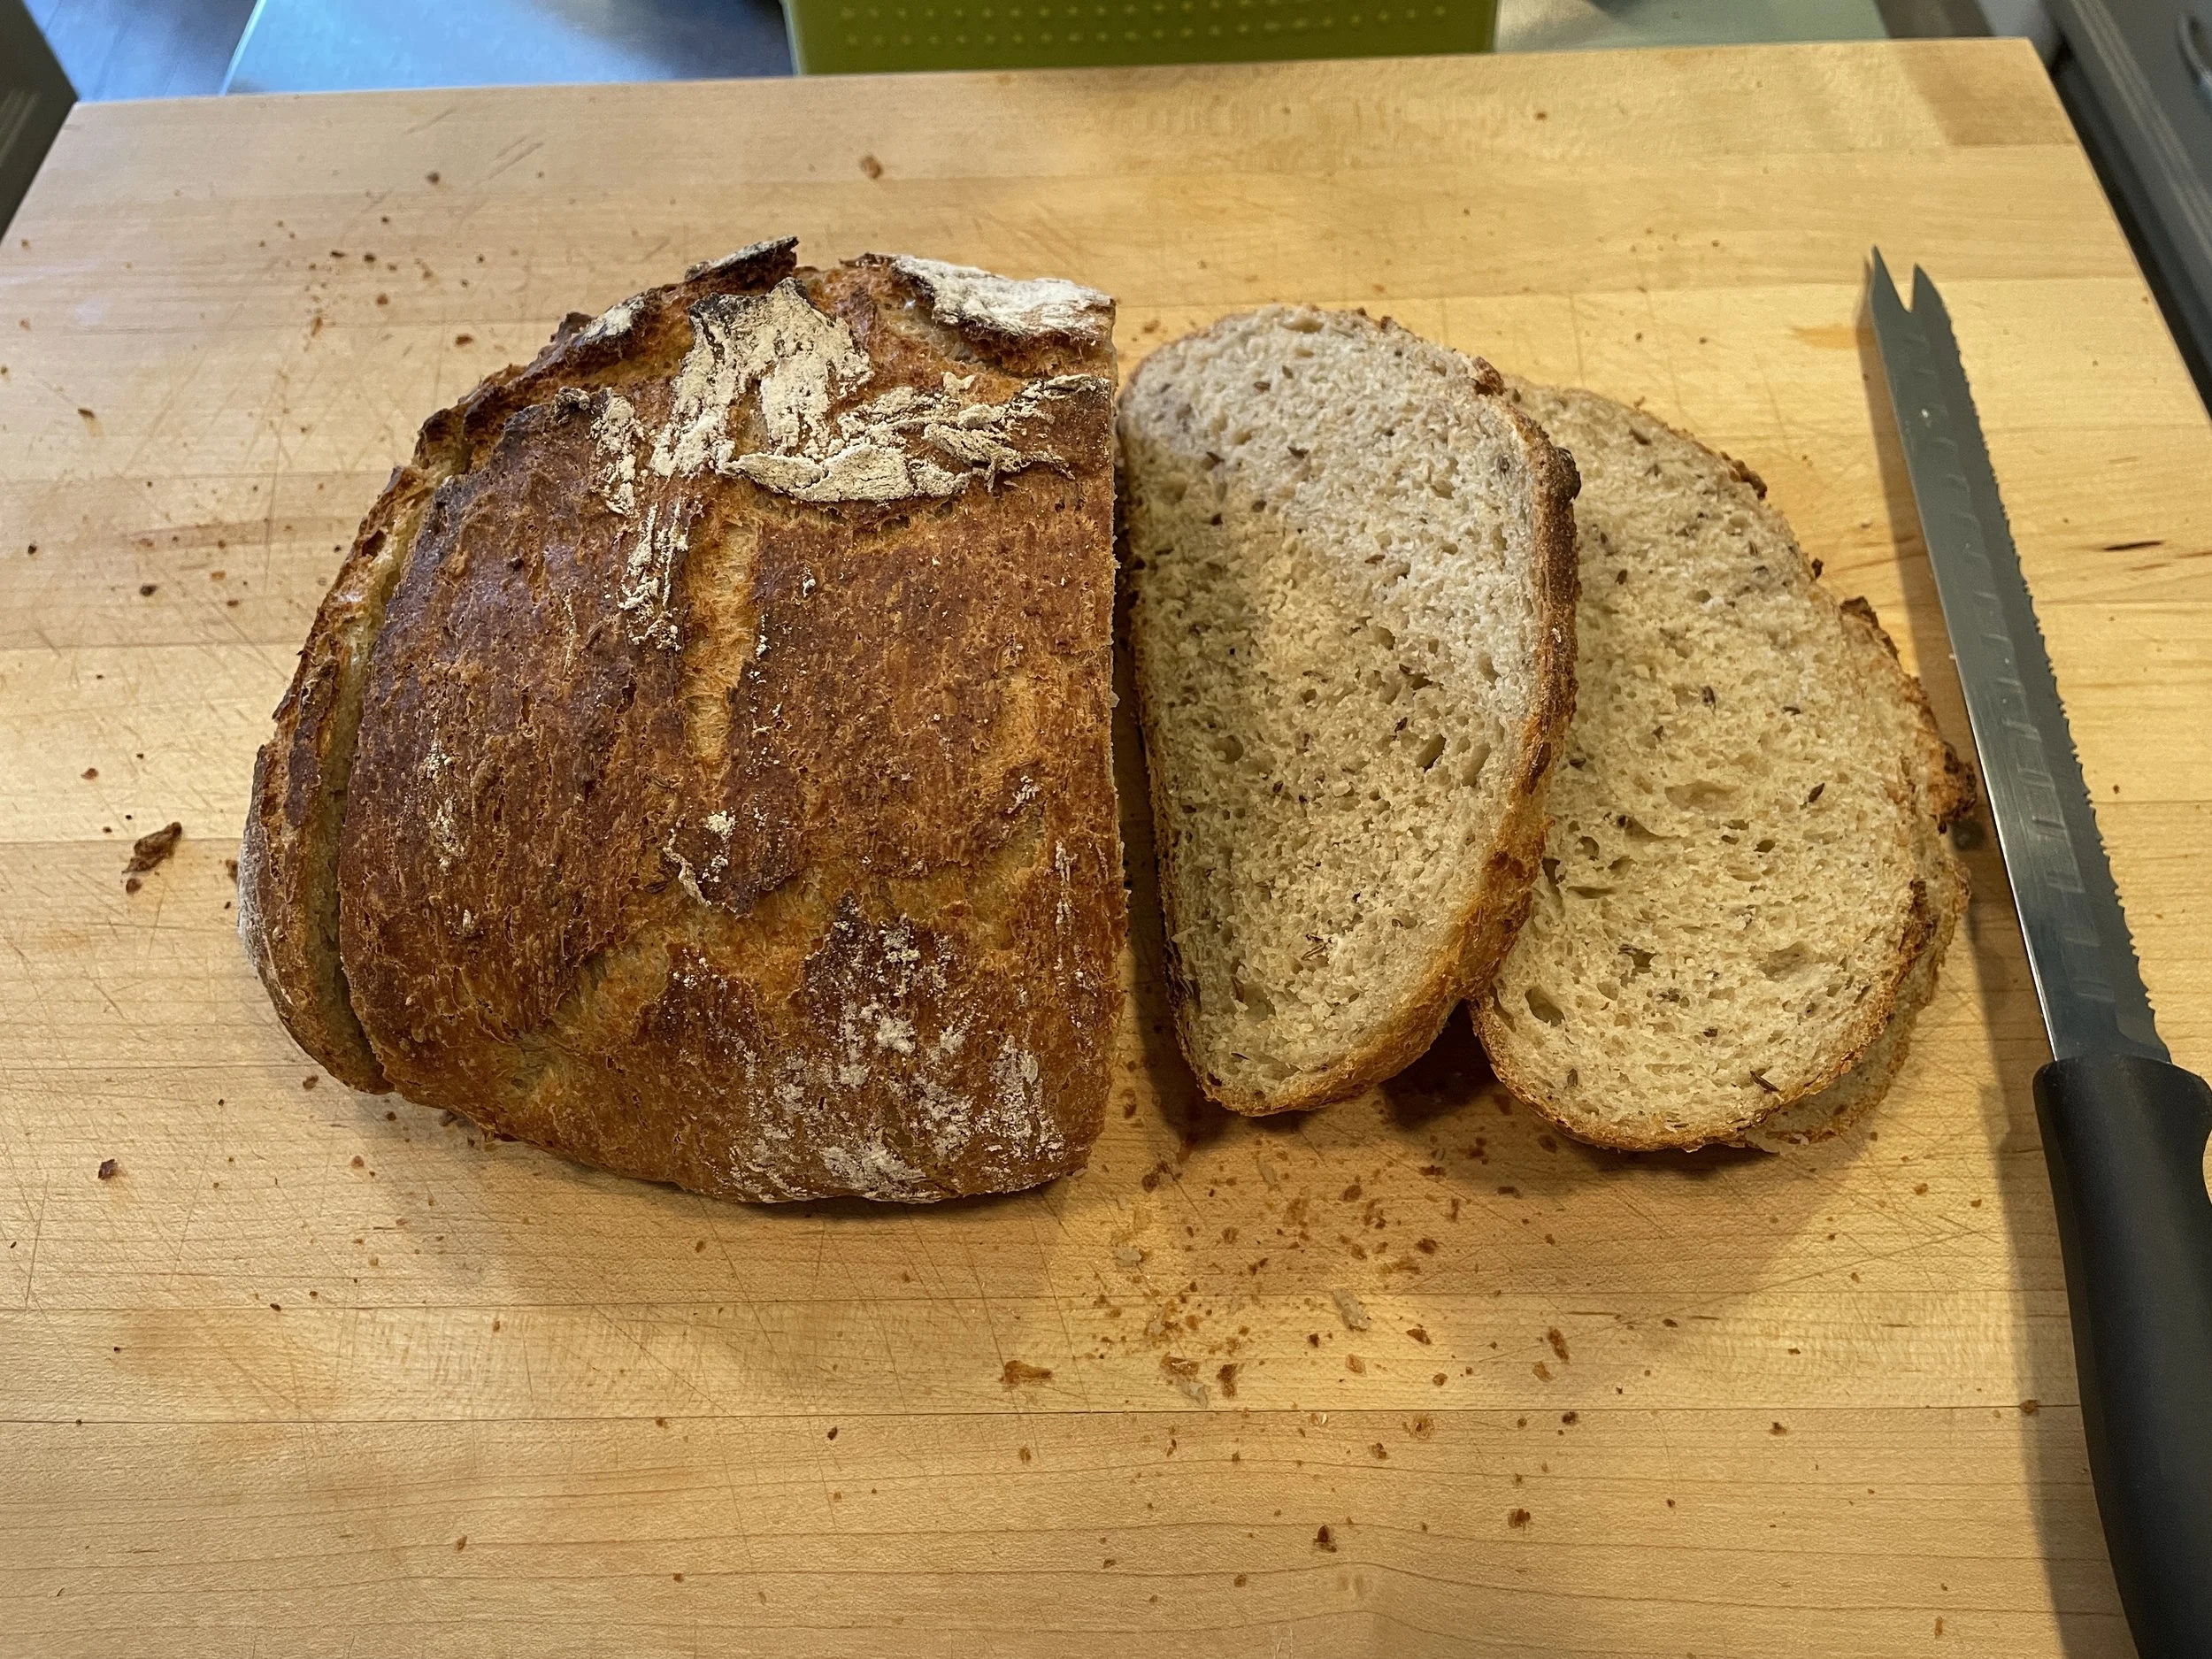
I started with an artisanal rye recipe and have gradually tweaked it until I'm finally happy with the results. My pumpernickel still needs a little work, and I'm just beginning to experiment with a sourdough rye that I'm optimistic will become another favorite.
If you'd like to try it yourself, here's my recipe for an easy, no-knead, crusty rye bread that's become our new daily bread.
Artisanal Rye Bread
Prep Time: 5 mins
Rise Time: 2 to 2-1/2 hours
Bake Time : 47 to 60 mins
Ingredients
3 cups (384g) bread flour
1 cup (96g) rye flour
2 tsp instant or rapid rise yeast
2 tsp (10g) cooking salt / kosher salt. (1 tsp if using table salt)
1 Tbs Caraway seeds - optional
1-3/4 cups (395 ml) very warm tap water
2 Tbs (42g) honey
1 Tbs (14g) olive oil
1. Mix: In a large bowl, whisk together the flours, salt, instant yeast, and caraway seeds, if using. In a medium bowl, whisk together the water and the honey until the honey is dissolved. Add the oil, then pour over the dry ingredients. Using a rubber spatula, mix until the liquid is absorbed and the ingredients form a sticky dough ball.
2. Rise: Cover with cling wrap and leave on the counter for 2 - 3 hours until it doubles in volume, it’s wobbly like jelly, and the top is bubbly. If after one hour it doesn’t seem to be rising, move it somewhere warmer. Suggestions: Place in a cool oven and turn on the oven light; Place on a standard heating pad set to the lowest temperature, and with a folded dishtowel under the pan; Place near (but not too near) a radiator or heater; Place under an incandescent lamp (LED lights don’t get hot enough).
3. Optional – refrigerate for later use: At this point, you can either bake immediately (move onto Step 5) or refrigerate for up to 3 days.
4. Warm the refrigerated dough – if you refrigerated the dough per above, leave the bowl on the counter for 45 - 60 minutes while the oven is preheating. Cold dough does not rise as well.
If Using a Dutch Oven:
5. Preheat oven: Put the Dutch oven in the oven with lid on (10”/26cm or larger). Preheat to 450°F/230°C 30 minutes prior to baking.
6. Decant dough: Sprinkle work surface with 1 tbsp flour, scrape dough out of bowl. Sprinkle top with 1/2 tbsp flour.
7. Shape dough: Using a dough scraper or anything of similar shape (cake server, large knife, spatula), fold the sides inwards (about 6 folds) to roughly form a roundish shape. Don’t be too meticulous here – you’re about to deform it, it’s more about deflating the bubbles in the dough and forming a shape you can move.
8. Transfer to paper: Slide a large piece of parchment paper (not wax paper) next to the dough, then flip the dough upside down onto the paper (i.e., seam side down, smooth side up). Slide/push it towards the middle, then reshape it into a round(ish) shape. Don't get too hung up about shape. In fact, lopsided = more ridges = more crunchy bits!
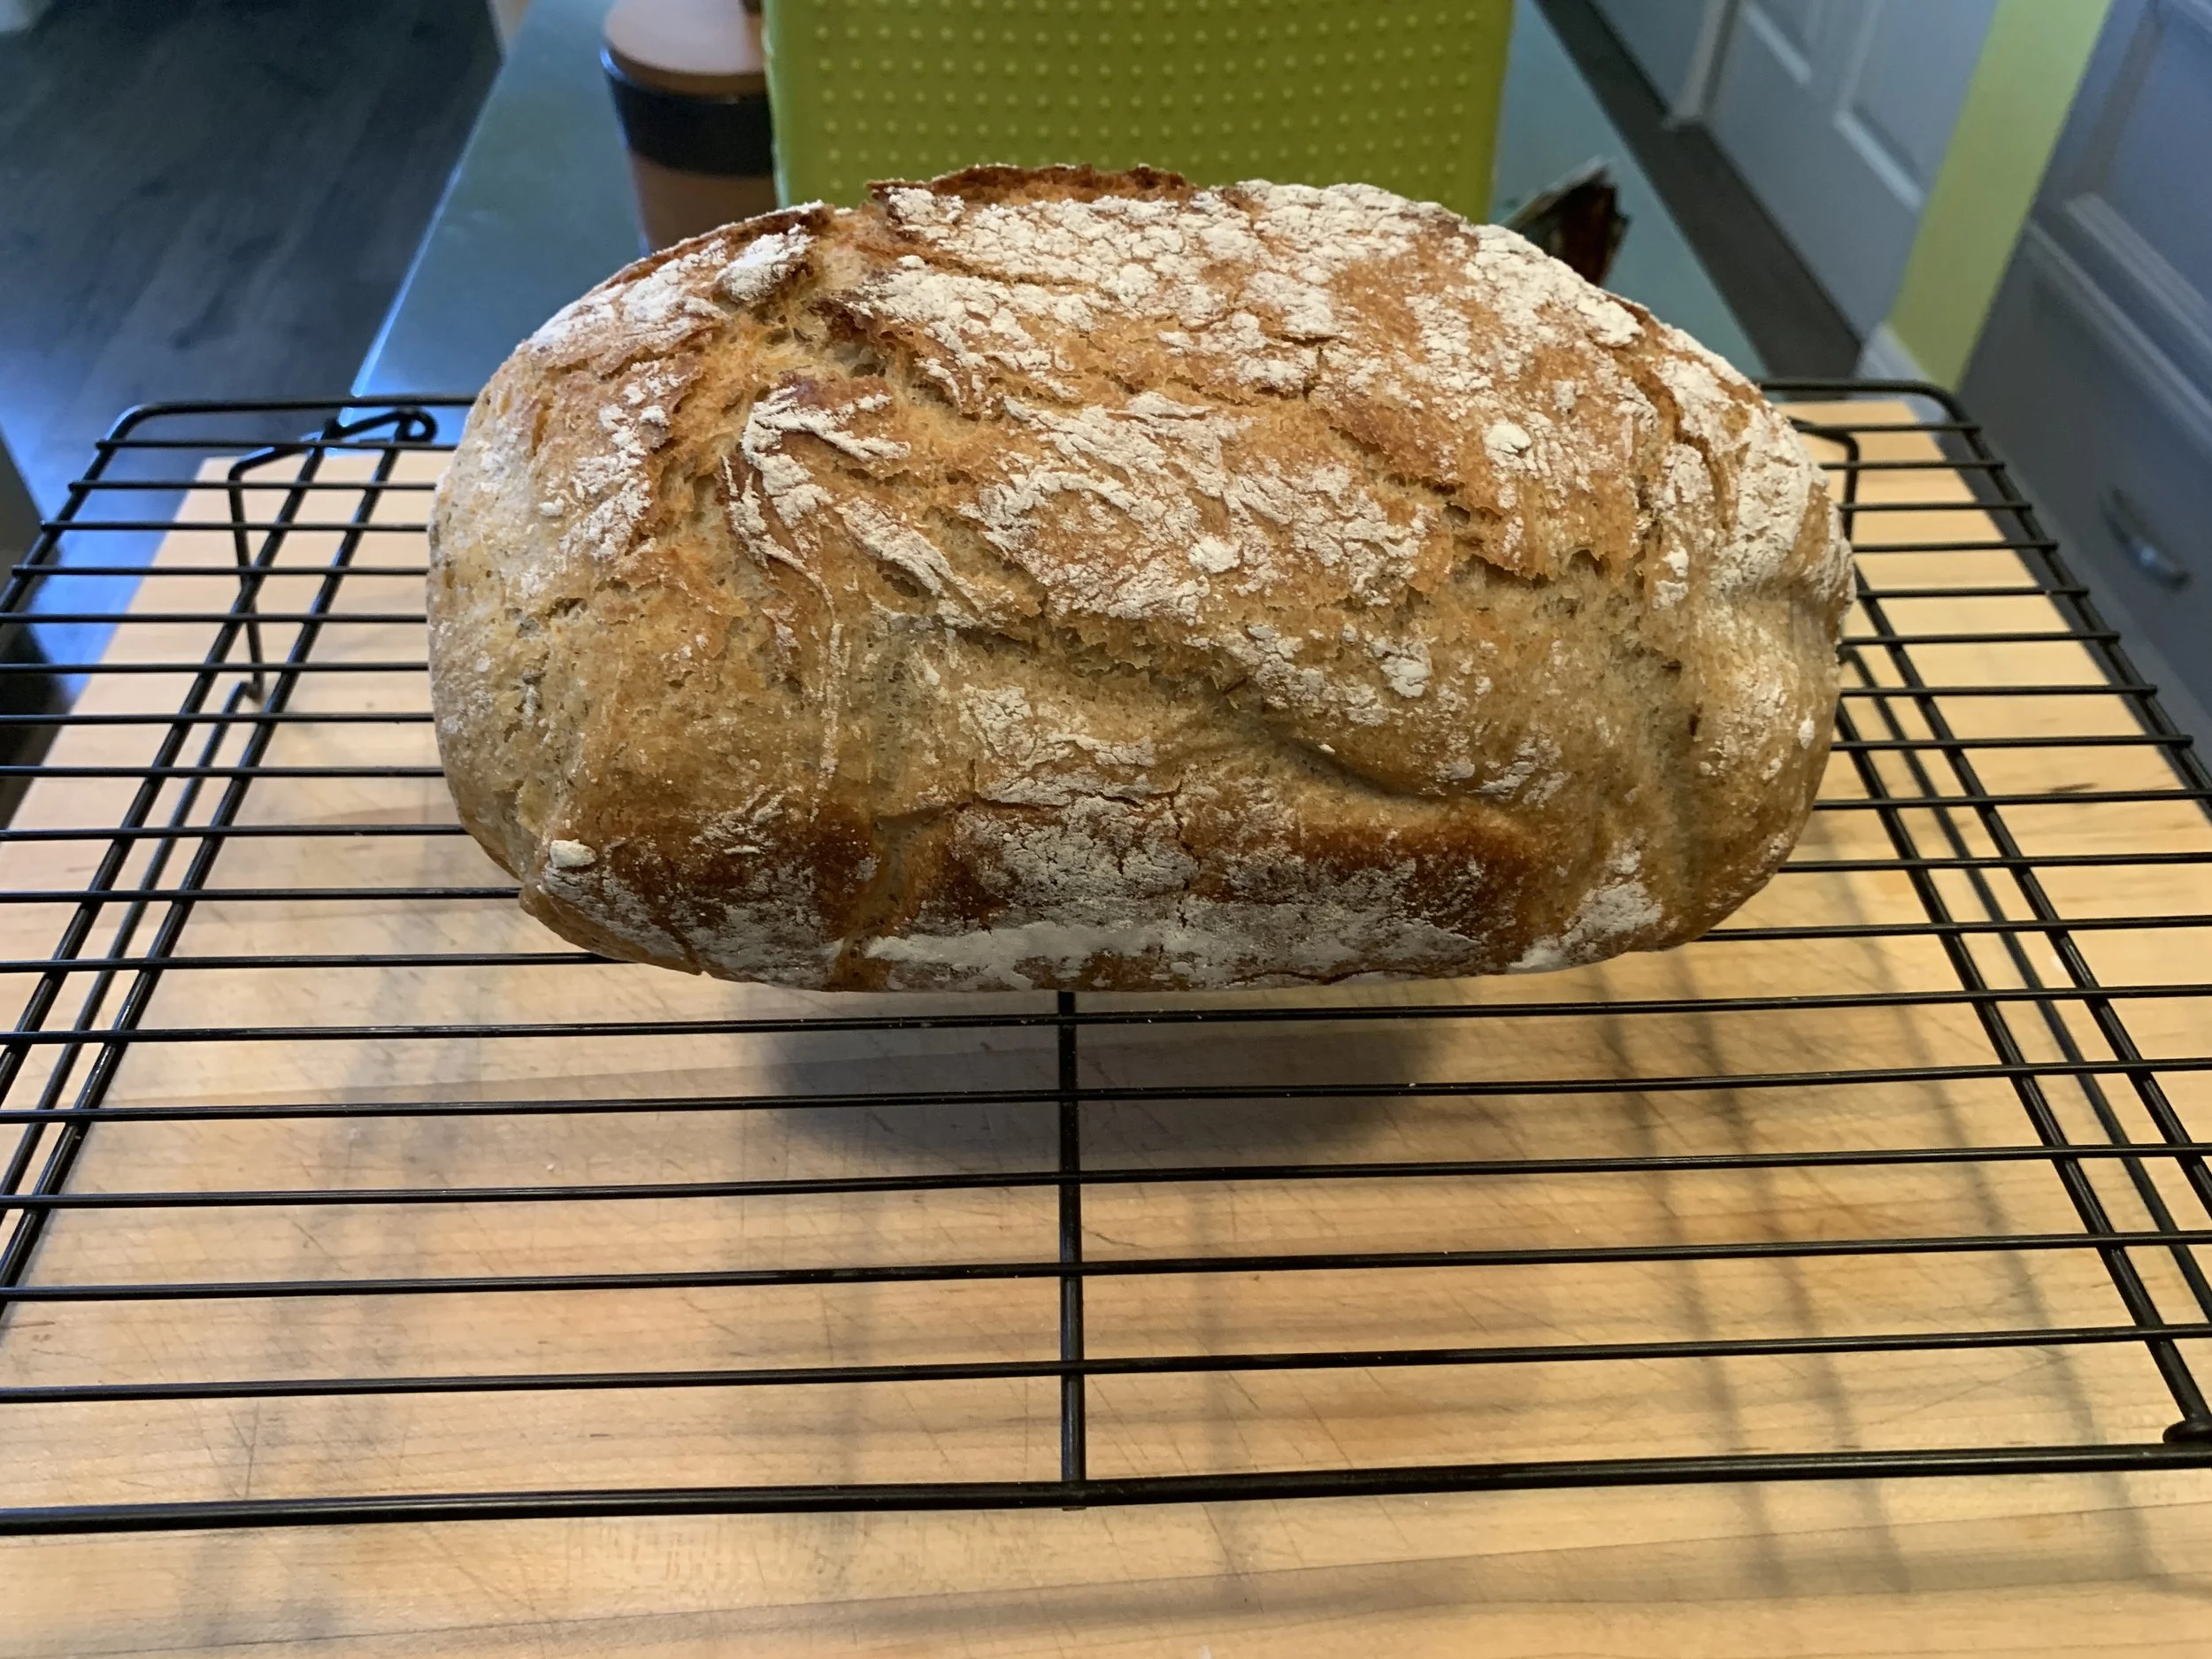
9. Dough in pot: Remove the hot Dutch oven from the oven. Using the parchment paper to lift the dough, place it into the Dutch oven, and place lid on.
10. Bake 35 minutes covered, then 12 minutes uncovered or until deep golden and crispy.
11. Cool on rack for at least 10 minutes before slicing.
If using a Pullman Loaf pan:
5. Second Rise: Place dough in a greased Pullman loaf pan, and let rise until it is 1/2” below the top.
6. Preheat oven: Preheat to to 375°F/190°C. Grease the cover of the loaf pan and place it over the bottom of the loaf pan.
7. Bake for 45 mins, then remove the top and bake an additional 15 minutes.
8. Cool on a rack at least one hour before slicing.
P.S. Why is it called a Pullman loaf pan? From Wikipedia: “The Pullman loaf is named after railway pioneer George Pullman and the iconic Pullman railway dining cars of the 19th and early 20th centuries. Pullman used the rectangular, lidded bread pans in his train kitchens because the resulting square, flat-sided loaves were incredibly space-efficient. Because the dough was baked in a confined container with a sliding lid, the bread could not expand to form a rounded top. This made the loaves perfectly uniform.
Three square loaves took up the same storage footprint as two standard round-topped loaves, maximizing space in compact train galleys. Additionally, the straight edges were ideal for cutting uniform, waste-free slices for sandwiches and toast.”
See you next time…