The Blue View - Replacing the Cockpit Rope Clutches

A rope clutch, when engaged, allows a line to be pulled in one direction, but not the other. When the handle on the top of the clutch is lifted, disengaging it, the line tension is released allowing it to be pulled in either direction. It is a handy invention, especially on a sailboat where there are dozens of lines that need to be controlled, adjusted and secured. One of the most common uses of rope clutches is to allow several lines to share one winch. Each line can be adjusted up or down using the winch, then locked in place with its clutch. replacing the rope clutch

Nine of Cups will be 29 in December 2015, and with each passing year, more of her original equipment reaches its “Use By” date. A case in point is the triple rope clutch in the cockpit that is used to control the main halyard, topping lift and spare halyard. It not only looked its age, it would no longer hold the lines in place once they were unwrapped from the starboard winch. Replacing it was on our to-do list for Durban, and a new Garhauer triple clutch was one of the parts Marcie brought back in her luggage from the States.

the old and the new clutch

Unfortunately, the new clutch had a different footprint than the old one, so the job involved more than merely unbolting the old and screwing down the new. A new teak pad to support the clutch would have to be made and finished, and and all but one of the bolts that secure the clutch to the coachroof would need to be repositioned.

As I learned when rebuilding the engine instrument box, teak is difficult to find and very expensive here in South Africa. I did have a small piece aboard left over from another project that would work for the pad, however. I cut it to size, drilled the necessary holes and sanded it down. I finished it using eight coats of a polyurethane finish I like. It is a New Zealand product called Uroxsys (now marketed in many parts of the world as Awlgrip Awlwood MA).

Our coachroof is constructed of a top and bottom layer of fiberglass laminated to a core of balsa. Screwing the clutch directly into the balsa core would be, at best, a short term solution. Even if the balsa had the initial structural strength to secure the clutch under the load of three heavily tensioned lines, which is doubtful, the lateral forces on the screws combined with any moisture that made its way into the screw holes would continually reduce the holding power of the screws. A much better solution would be to bed the bolts in epoxy.

epoxy graphic

I marked the bolt locations on the coachroof, then drilled oversized holes. The bolts were 1/4” (6mm), so I drilled 1/2” (12mm) holes, double the diameter of the bolts. I also drilled out the old holes that were no longer going to be used with a 5/16” (8mm) bit, only slightly oversized, and then cleaned out all the holes with a vacuum cleaner. I masked both the bottom of the teak pad (I didn't want to accidentally bond the pad to the deck) and the area around the holes. Next, I did a dry fit to make sure everything would go together smoothly later when my hands were all gooey with epoxy, then removed all the parts. The final step of the prep work was to lightly grease each bolt with silicone lubricant to prevent the bolts from bonding with the epoxy.

I keep West System epoxy on hand, and I mixed a small batch (2 full pumps or about 1.6 fl oz) of 105 resin with the equivalent amount of 206 slow hardener. I used a Q-tip to wet out each hole, then mixed 403 filler with the remaining epoxy until it was about the consistency of catsup. Using a small craft stick, I put about 1/2” (12mm) of the thickened epoxy in each new hole, and used all but a small blob of the remaining epoxy to partially fill the old holes.

The next step was to assemble all the parts before the epoxy kicked. I positioned the teak pad and clutch in place, then pressed each screw fully into its hole.

one old bolt and five new

Now the goal was to let the epoxy harden enough to hold the bolts in place, but not to harden beyond the point that it would still bond with additional layers of epoxy. The perfect point is when it is still slightly tacky and can be dented with a fingernail. Since the epoxy in the holes can't be monitored, I kept the mixing pot with the remaining blob of epoxy to check the cure rate. It was fairly hot that day, and it took about 1.5 hours to reach the right hardness. I carefully unscrewed the bolts, then removed the clutch and teak pad and screwed each of the bolts back into their holes. I mixed up another batch of epoxy, again adding 403 filler until it was the right consistency, then filled all the holes. I used a toothpick to probe each hole and release any trapped air bubbles. Then I let the epoxy completely cure for a few days.

I used Sika 291 as a bedding compound, sealant and adhesive between the teak pad and the deck. This raised the teak pad enough that the bolts didn't bottom out in the epoxy when they were tightened down. Alternatively, I could have added a washer under the head of each bolt.

All in all, a lot of work, but I am optimistic it will last another 25-30 years. If so, I'll be in my 90s when it wears out. I just might splurge and hire someone else to do it next time.

Back to Boat Work

Yes, we're back aboard Nine of Cups. Our trip to Swaziland and Kruger Park already seem like a lovely, but distant memory. I keep looking at all of our photos to remind myself it was just a few days ago that we returned. It's easy to forget what you've just experienced once you're immersed in boat work again. As much as we enjoyed our trip, towards the end, getting back to Cups was always on our minds. Our new bimini and dodger were in place and though a few tweaks were necessary for the dodger, we were well satisfied with the final result.

bimini and dodger

I had recovered all the saloon cushions back in Panama in 2009. It was really in need of replacement, but it's a big project and I wasn't game for starting it now. As David mentioned previously, the South African rand is quite soft against the US dollar at present (R11.5:US$1). We took advantage of this by ordering new saloon upholstery before we left. The final cost wasn't significantly more than my cost for just buying the materials. The new saloon upholstery wasn't quite finished when we got back to the boat, but Clyde delivered everything within a couple of days. It adds a whole new elegance to the saloon, I think … and it's new and unstained. Hallelujah!

new saloon uphostery

We returned the car to its downtown Durban location … about a 20 minute walk away. It seemed odd to be in the midst of the noisy hustle-bustle of the city after nearly 10 days of pretty much peace and quiet. It's hot and humid here … except when it rains, then it's hot, humid and wet. The city sidewalks are always crowded and the decibel level of the noise is incredible.

The boat was a wreck when we first unloaded all of our stuff, lugged it below and crammed it into the saloon. We sorted and stowed everything almost immediately and Cups was shipshape (at least below deck) for nearly 14 hours before David got to work on his projects. He wasted no time. His latest effort was installing our back-up autopilot system which required access under the aft bunk in our cabin. The mattress came off. Tools and parts and equipment were everywhere. This is not unusual on Cups or any boat for that matter. Everything is compact and snug. When a project needs doing, everything is affected and is in turmoil until the project is complete.

turmoil in the aft cabin

As for me, I've been writing up a storm, cooking, cleaning, sewing and … dare I say it? … preparing for another inland trip. We just got word from Brennan and Hannah (our oldest son and our daughter-in-law) that they're planning a trip to Africa in early February. We only have them for a few days. They're hiking enthusiasts and want to visit Lesotho (Leh-soo-too), that tiny landlocked country surrounded by South Africa only a few hours drive away. How could we resist that opportunity?

lesotho map

We need to get all of our work done before they arrive so that we can play and then depart Durban on the next weather window after their departure. Always lots to do and lots to look forward to.

The Blue View - Rebuilding the Instrument Box

finished instrument box For the most part, we have been quite pleased with the quality of the tradesmen here in Durban. We have found a good sailmaker, canvas and upholstery man, machinist, and welder. Several friends have also had good experiences with engine mechanics and electrical repairmen.  With the South African rand as soft as it is, the prices here have been very reasonable, especially when compared to the cost of the same things in Australia. Thus, beyond all the needed repairs that are getting done, we are taking advantage of the opportunity by replacing a few things that are nearing or at their expiration date - our old, battered staysail, our patched and re-patched dodger and bimini, and the worn and stained upholstery in the saloon, to name a few.

One item that was in definite need of work was the cockpit teak box that holds the engine instruments. This box was built and installed by the previous owner, and wasn't all that great to look at when new. Now, after 15-20 years of abuse from the wind, rain and sea spray, it was looking pretty sad. I had been meaning to rebuild it myself for quite awhile, but it had never made it to the top of the list.

We also have a beautiful piece of teak on which our cockpit nav instruments are mounted. One of the older instruments mounted on it has died, and the hole it fits in is bigger than anything we can find to replace it. I can't think of a way to patch or cover the old hole that will look good, so I will have to replace it as well.

closeup of instrument box

One afternoon, a young guy named Kyle stopped by. When he gave me his card and mentioned his forte was marine carpentry, I thought I'd see about replacing the instrument box and the teak for the nav instruments. His rate was R250/hour - about $25/hour - which is on the high side of what qualified people charge here. He looked at the instrument box and said he thought all the wood could be salvaged. He could dismantle the box, sand the parts down, seal everything in epoxy, and reassemble it all. Then either he or I could refinish it. He thought the whole thing would take maybe 4-5 hours. $125 was getting close to my threshold of pain, but I thought I'd give him a shot. As to the teak for the instruments, Kyle said teak was expensive and hard to come by, but he could probably find a lighter piece of mahogany for R250-R300 ($25-$30) or so. That sounded good, so Kyle headed off with the teak box.

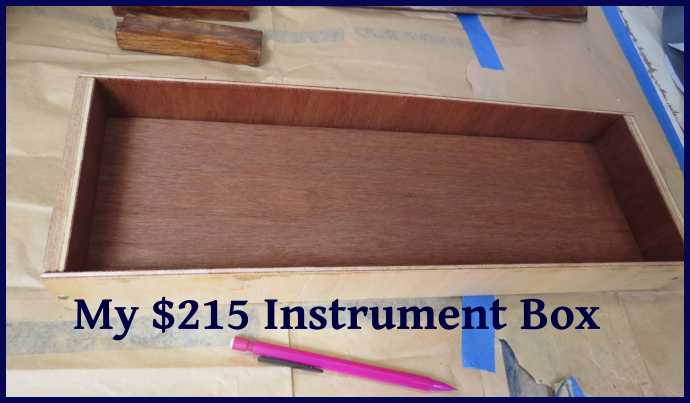
He came back a few days later with an armful of wood. He said he wasn't able to salvage most of the teak box after all, so he bought some marine plywood to replace it. It was only R750 ($75). Ouch! His time estimate was also a little off - he was up to five hours already and was about half done. Another ouch! But the good news was that he was able to find some nice teak, which he was able to buy for only R2800 ($280)!! He showed me a very used piece of teak, complete with several layers of peeling varnish and half a dozen old screw holes. I think, with some effort, it could have been made to work and might have even looked good, and had it been $25, I might have been okay with it. But $280?!

215 dollar instrument box

Obviously, Kyle and I had some communication issues. We parted ways at this point. I paid him for his time and materials on the box ($215), and completed it myself. It actually didn't turn out too badly. And Kyle kept his fine piece of teak.