The Blue View - Replacing the Shaft Seal
/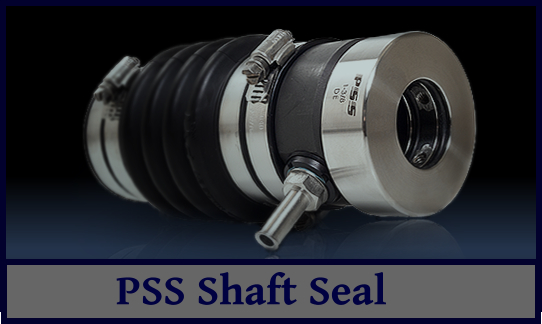 As part of the process of replacing the cutlass bearing, the old shaft seal had to be removed. I installed a 'dripless' shaft seal about 14 years ago, and while I've serviced it regularly over the years, I thought it might be a good time to replace it as well.
If you're not a yachtie or a boater, you may be asking “What the heck is a shaft seal and why do I care anyway”. Or, more likely, you've tuned out by now and decided to wait till Marcie's next blog tomorrow. If you're still with me, however, I'll talk about installing a new shaft seal.
The shaft seal, as its name implies, forms a seal around the propeller shaft as it exits the bottom of the boat through the stern tube. It prevents water gushing into the boat without causing any wear on the shaft while it rotates. Traditionally, this was accomplished by something called a stuffing box, which consisted of a threaded sleeve attached to the stern tube and a large nut. The sleeve was filled with wraps of a packing material – typically woven flax impregnated with wax, grease or lubricants, then the nut was tightened down until the flax was compressed against the shaft, forming a seal.
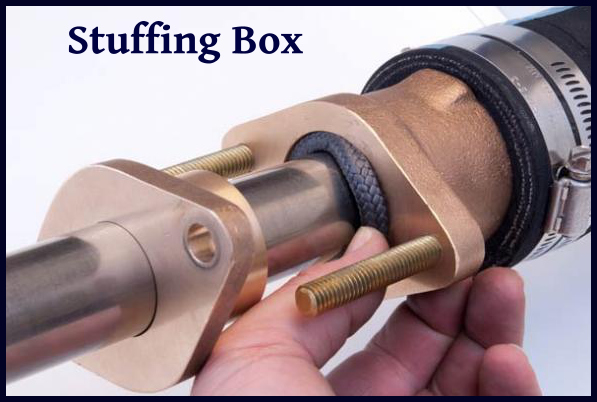
To keep the flax from drying out or overheating, it needed to be lubricated with seawater. The packing nut would be tightened or loosened from time to time to ensure the amount of water the stuffing box was leaking was optimal – on a sailboat this was about 10-15 drops per minute. Over time, the flax would harden and wouldn't seal effectively, so it had to be dug out and replaced every few years. Stuffing boxes are still quite common, but the packing material is now synthetic, rather than flax, and require less maintenance.
Nine of Cups originally had stuffing boxes on both the prop shaft and the rudder. Shortly after we bought her, I replaced the stuffing box with a new 'dripless' shaft seal. There were a few varieties available, and I chose the P.S.S. Shaft Seal made by PYI, Inc. It consists of a stainless steel rotor that attaches to the shaft and a carbon graphite flange that attaches to the stern tube with a bellow.
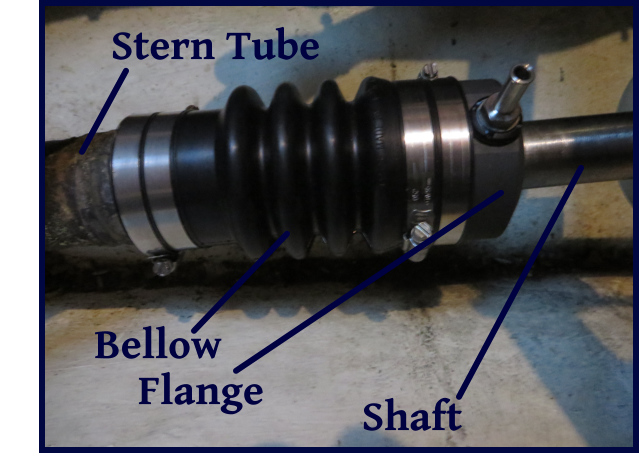
The stainless rotor is held in place with two set screws. I removed these, lubricated the shaft with some dishwashing soap, then slid the rotor off the shaft. The bellow is secured to the stern tube with two hose clamps. I removed these, worked the bellow free of the stern tube and slid it off the shaft as well. Note that we are on the hard... the stern tube will admit an amazing amount of water once the rotor is allowed to slide away from the flange if the boat is in the water.
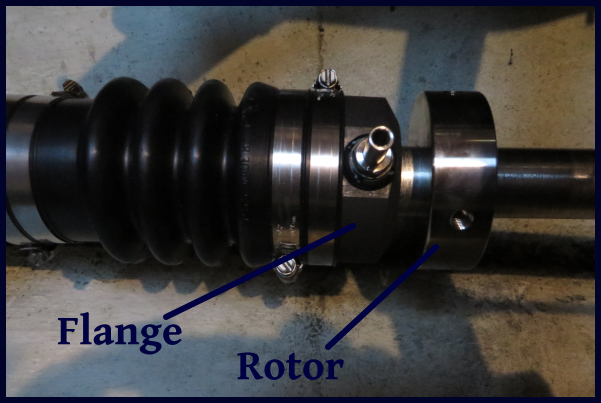
Installing the new shaft seal is straightforward, and complete instructions are provided by the manufacturer. Slide the new bellow-flange assembly in place over the stern tube and secure it with two hose clamps. Lubricate the shaft with dishwashing soap and carefully slide the new rotor into place. The rotor has two o-rings that seal it against the shaft, and some care should be taken to avoid damaging them as it is slid over the end of the shaft. Position the rotor so that it just touches the flange, slide it another inch or so, compressing the bellow, then tighten the set screws.
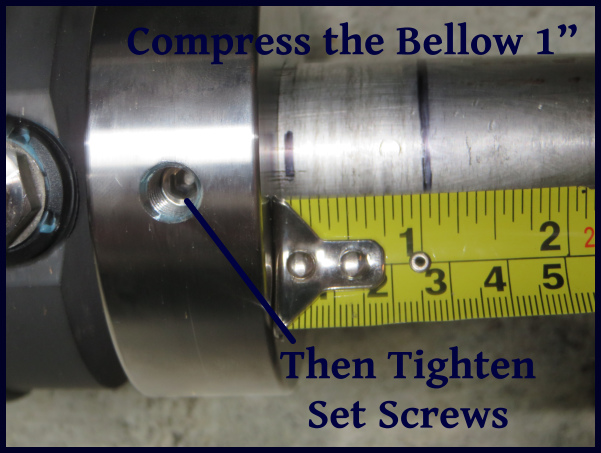
A few years ago, while we were sailing along the south coast of Australia, the rotor slid back along the shaft and we began taking on water. There was an adrenaline-filled hour or so while we figured out the problem and corrected it. A friend, John on Active Transport, had the same problem, and he prevented the possibility of a re-occurrence by mounting a shaft anode on the prop shaft. That seemed like a good idea, so we did the same.
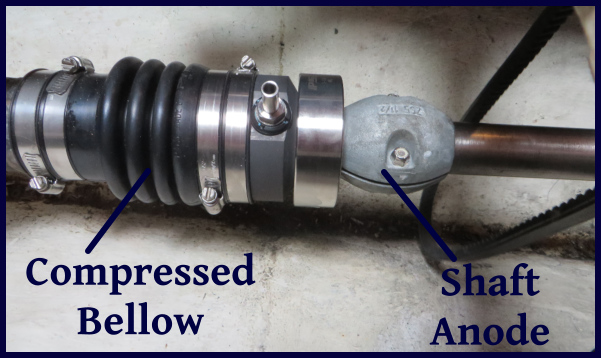
The shaft seal is lubricated and cooled by seawater. To make sure there is no airlock and that water is getting to the bearing, it is important to 'burp' the seal once the boat is back in the water. I do this by compressing the bellow, making sure water flows out.
So there you go … new shaft seal installed. Time to move on to the next project.

