

The Blue View - Sealing a Fuel Tank Hatch
/When we first bought Nine of Cups, we had a lot of trouble with contaminated fuel. Water would make its way into the fuel tanks – either through the fill cap or due to condensation inside the tank - allowing grunge to start growing. This would sit in the bottom of the tank until we had a boisterous passage, when the rolling and pitching of the boat would stir it all up. Before long, our fuel filters would get clogged and the engine, starved for fuel, would quit. This usually happened at the most inopportune time, like when we were wending our way through a tight channel or fighting an ebbing current. I now visually check the fuel filters regularly – daily when we are motoring or the first time we start the engine each day. If the filters start accumulating grunge, I know it's time to inspect the fuel tanks and see what's growing in there. In addition, I clean each fuel tank at least annually, polishing the fuel as necessary (see the Blue View on polishing fuel).

To inspect and polish the fuel, it is important to have inspection hatches on the tanks. All our fuel and water tanks have large, ~15” (380mm) inspection hatches, making it less of a problem to see and reach inside the tank. When it's time to open up a tank and take a look inside, I remove the eight bolts holding the hatch in place and lift it off.
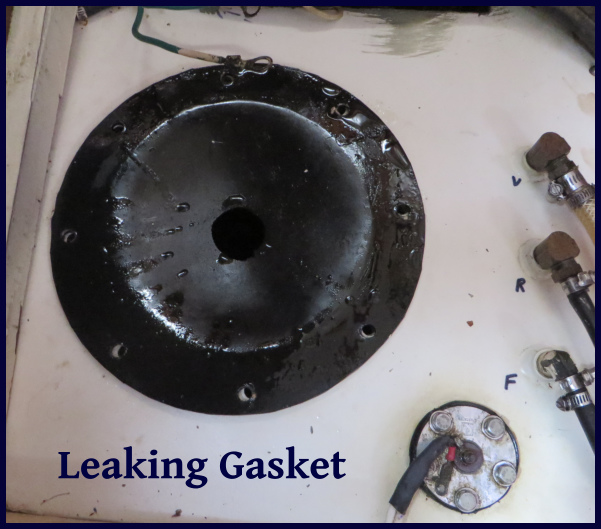
The hatch is sealed with a rubber-like gasket. This works fine on three of our four tanks, but one of our fuel tanks – the one that was fabricated for us in Ecuador - leaks around the hatch. As the hatch is tightened down on this particular tank, the steel around the hatch warps, enough so that it leaks. Actually, it only leaks if we overfill it, or sail on a heel, or do any rolling and pitching – otherwise, it's fine. So one solution to the problem is to only fill it half full and never leave the shelter of a protected marina.
Another solution, and probably the correct one, is to reinforce the hatch and hatch opening so that it doesn't warp. I can't think of a way of doing this that doesn't involve fabricating steel rings, then welding in-situ and/or drilling and tapping holes in the top of the fuel tank.
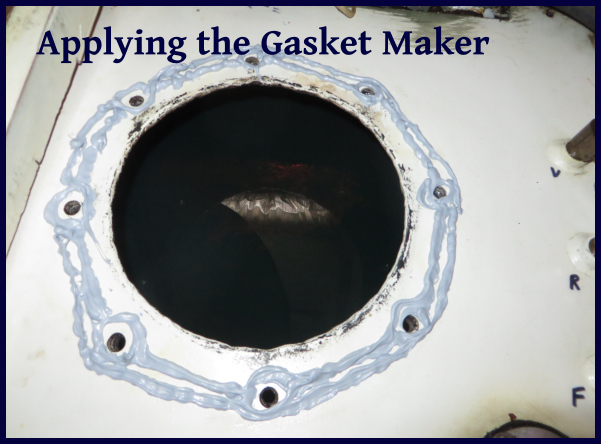
A third solution is to find the right gasket. Before I go to the trouble and expense of fabricating and attaching metal parts, I thought I'd try to find a gasket material that worked. I purchased rubber gasket material in various thicknesses and hardness, cut them to size and gave each one a try. None of these was a success.

When we arrived in Puerto Rico, I bought some Permatex Gasket Maker – a goop in a tube that can be applied and used to form a gasket. It comes in a myriad of different types for different applications, and I got a version that was impervious to fuels. It was easy to apply, and set quickly. Best of all, it seems to have solved the problem. On our passage from Puerto Rico to St. Augustine, we leaked nary a drop.
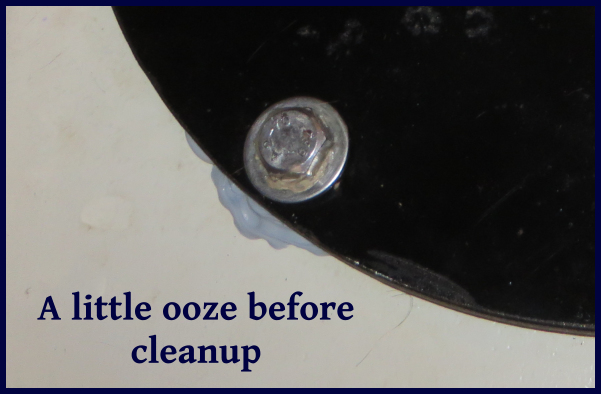
The only downside is that the hatch has to be removed periodically. I suspect I will have to scrape off the old gasket and reapply fresh goop each time, but even so, as long as I have a tube of gasket maker on hand, this shouldn't cause any drama.