The Blue View - An Edible Knot

edible knots  

I've referred to The Ashley Book of Knots in previous Blue View Blogs. Of his 3,854 knots, my very favorite is his knot #169. It is difficult to untie, jams easily and is not very strong. The only thing going for it is that it tastes great.


pretzels ready to eat


Since today is National Pretzel Day, it only seemed fitting to talk about pretzels in today's blog. I like big, soft pretzels right out of the oven, slathered with mustard. I have my own recipe for pretzels, and I've made these on long passages and more than once on a cold, rainy afternoon in a remote anchorage. And of course, I use Ashley's knot #169, the Pretzel Knot to form the pretzels.
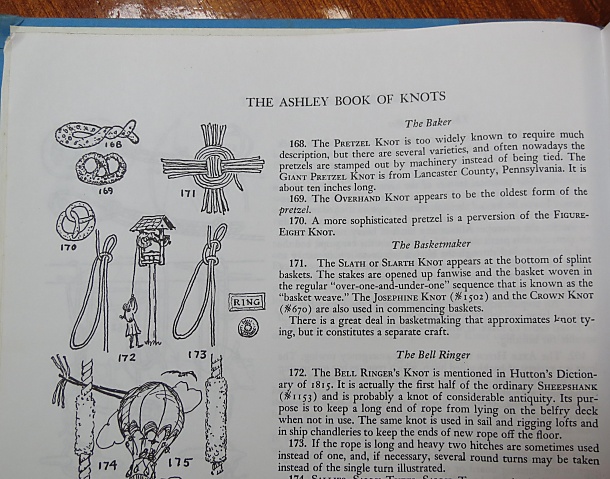
 

ashley knot for pretzel


I boil the pretzels before baking. I think it adds to the flavor and gives them a softer, firmer skin. The time they are allowed to boil is important. If they aren't boiled long enough, they will be too soft, while boiling them too long makes them tough.

Edible Knots
Recipe Type: Snack
Author: David Lynn
Ingredients
  • For 1 dozen pretzels
  • 1 tbsp (15 grams)yeast
  • 1 tbsp (12 grams) sugar
  • 1 tsp (5 grams) salt
  • 2 tbsp (30 grams) soft butter or margarine
  • 1 cup (250 ml) warm water
  • 3 cups (300 grams) flour
  • 2 tbsp (30 grams) coarse sea salt to sprinkle on Pretzels before baking
  • 2 tbsp (25 grams) baking soda mixed in 4 cups (1 liter) water in a saucepan (non-aluminum).
  • Greased cookie sheet
Instructions
  1. Put yeast, sugar, salt, butter or margarine, water and 1/3 of the flour into a medium mixing bowl. Stir mixture until it is smooth. When the yeast starts to bubble, add the remaining flour. Stir the mixture until it is too stiff, then begin kneading. Knead the dough until it is smooth and no longer sticky. Cover the bowl, set it in a warm place and allow the dough to rise until it doubles in size, about an hour.
  2. When the dough has risen enough, punch it down, and knead for a minute or so. Divide into 12 equal parts and roll each with your hands into 12-15-inch long ropes. Use the photos or Ashley's Book of Knots #169 to form each into a pretzel knot. While the pretzels rest for a few minutes, grease the cookie sheet and bring the the baking soda/water mixture to a boil on stove. Preheat oven to 475 F (250 C).
  3. Boil them for 1 minute on one side, then flip them over with a slotted spoon and boil one minute on the other side. When each pretzel is done, remove from the water and let it drip for a few seconds before placing on the cookie sheet.
  4. Sprinkle the pretzels with the coarse sea salt and bake for 12-15 minutes or until they are golden brown.
  5. Serve with mustard – either the basic yellow type or a spicy brown mustard.
  6. If they aren't eaten right away, they can be refrigerated and reheated at 250 F (120 C) for a few minutes.
  7. We're pretty sure this works, but we usually eat them so fast, there are none to re-heat.

The Blue View - A Good Stopping Point

good stopping point  

The fridge redo project is on hold while I rejoin Marcie in the U.S. The project has exceeded my most pessimistic time projections and still has a ways to go. I typically run over my time projections using the formula: expected time x 2, but I think I may have set a new record this time.

At least the project was at a good stopping point. The major part of the reconstruction is complete. I still have to paint the hatches and door interiors and varnish the exterior surfaces. The cold plate is getting cold, but the gas pressures aren't right and I think I will need to replace the dryer in the refrigeration line on my return.

Beyond that, I only have to replace a couple of counter-tops and the associated teak trim. Then I will re-varnish the entire galley area. A piece of cake - a week or two should do it (times 2 for my formula and then times 2 again for Marcie's formula).

I certainly did learn a lot doing the project. There are a number of shortcuts that could have saved time and all sorts of missteps that could have been avoided. So the next time I do this project I should be much closer to meeting the schedule. That will be when …


when pigs fly


Days and Ways to Celebrate
A daily list of mostly obscure holidays and fun ways to celebrate them.
Earth Day
Celebrated throughout the world, Earth Day's 2013 theme is the changing climate.
April Showers Day
Don't moan the showers; they bring May flowers. Really!

The Blue View - Tools of the Trade

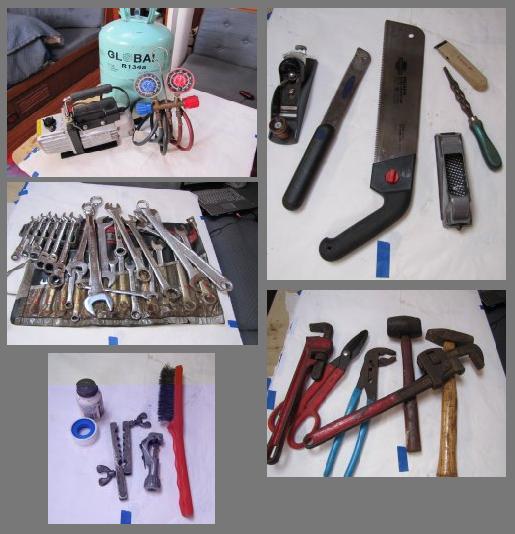
tools collage  

When we first “Sold Up and Sailed Off”, I parted with a lot of tools. Some clearly had no place on a sailboat, like the radial arm saw and drill press, but some were hard decisions. Just how much use would I get out of a router on a boat? The router and all the expensive bits I had collected over the years were reluctantly sold. I pared my tool set down to the bare minimum – maybe a couple hundred pounds of only the most “essential” tools.

As with most things, there are lots of differing philosophies as to how many tools one should have aboard. I met one cruiser who was crossing the Pacific with nothing more than a $39 K-Mart handyman tool set. I carry more tools than that on a long dinghy ride. On the other hand, I know a cruiser who converted a cabin into a workshop, complete with lathe, drill press and welding equipment. He's a single-hander – which is what I would probably become if I converted our forward cabin into a workshop.

Over the years, I have acquired enough tools beyond what we started with to measurably raise the water line. I have a rather large toolbox with tools just for keeping the boat running. I have lots of specialized tools that were purchased for a particular use, like the 15/16” deep well socket that fits the rear port side engine mount or the 28mm spanner that fits the nut on the front of the engine. I have tools for all of the various systems aboard – carpentry, carving, plumbing, electrical, electronic, refrigeration, metal working, fiberglass, engine repair, rigging, etc. Sometimes I acquire a new tool that is essential in making a repair. Most times it's cheaper to buy the tools to do a job than it is to hire a service technician.


makita power saw


A large number of my tools found their way out of their hiding places for the refrigeration redo. Three of the power tools in particular have really gotten a workout. The first is my Makita saber saw. It is one of the tools that was in the “essential” category and came with us when we first moved aboard. It has gotten a lot of use over the years and on this project especially.


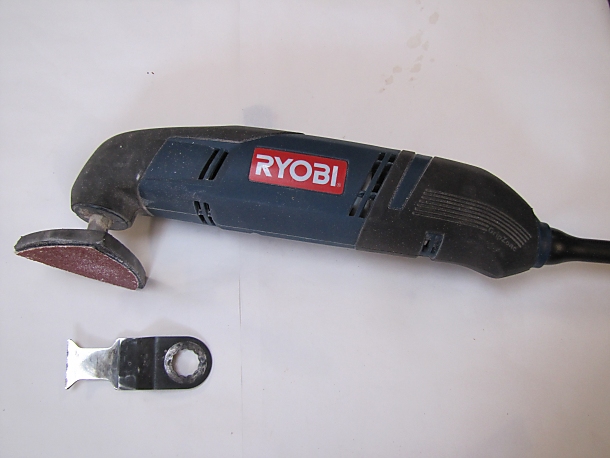
ryobi multo tool


The second most used tool on this project is my Ryobi Multi-tool. The cutting attachment was invaluable for removing the teak trim with minimal damage, and I used it for most of the demolition work. The sanding attachment also saw many hours of use in faring and shaping the new hatches and frames.
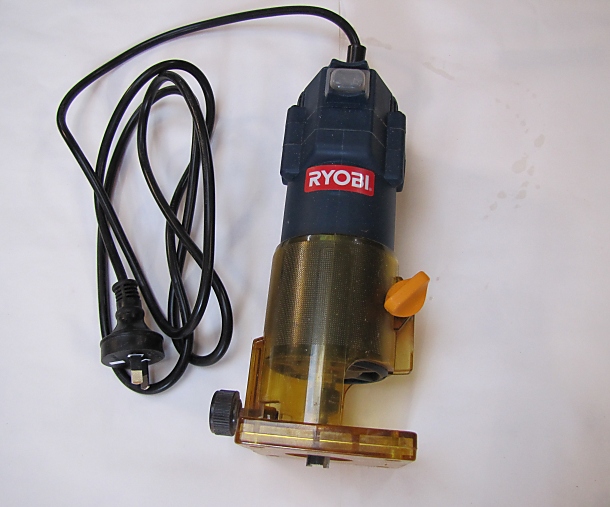
 

router


The third most used power tool is my router and laminate trimmer. That old router that I painfully parted with all those years ago, and which I thought would never get used aboard Nine of Cups, has been replaced. The new one is much smaller and more compact than the old one. It and the necessary attachments cost far less than the original, so replacing it wasn't actually all that painful.


clamps


One final comment about tools and I'll get back to work. Clamps – you can never have too many clamps.

Days and Ways to Celebrate
A daily list of mostly obscure holidays and fun ways to celebrate them.
Newspaper Columnists Day
This day is celebrated in memory of Ernie Pyle. Have you got a favorite? Dave Barry, Rona Barrett, Dear Abby? Learn more here.
Animal Cracker Day
The first animal "biscuits" originated in England and were introduced in the US in 1902 as Barnum's Animal Crackers. The most recent animal addition to the 37 animals in the cracker's history? The Koala.