The Blue View - Outboard Maintenance

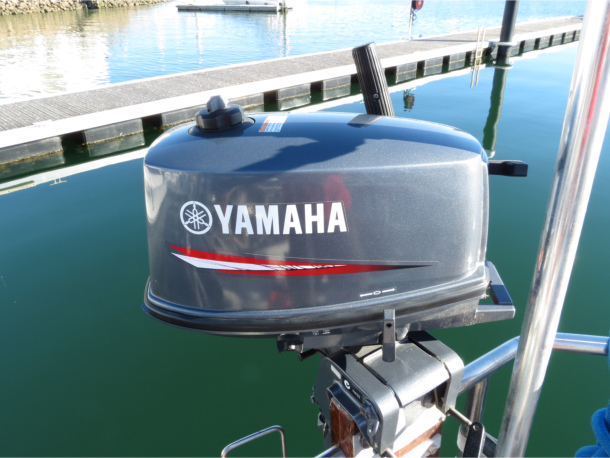
outboard engine  

Our two-stroke dinghy engine has been sitting, unused, on the stern rail for almost a year now, and before we set out for points west, I thought it prudent to do some preventative maintenance. As with most things aboard, it's much better to find any problems now, in the comfort of a marina with chandleries and hardware stores close at hand, than later in some isolated anchorage.

Gasoline engines, in particular, don't like to sit unused for long periods of time. Leave the engine sitting in a saltwater environment, and it is bound to be unhappy. In my experience, the two biggest issues will be the fuel and all the mechanical parts that, if not actually seized up, don't work as smoothly as they should.
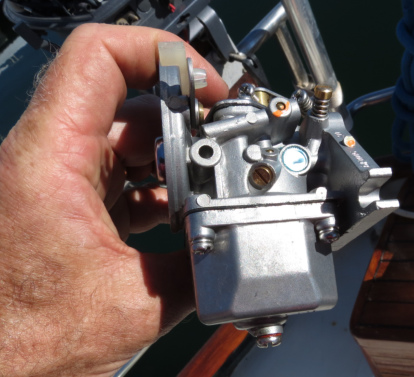
outboard carburator

Here is my checklist:
  • Carburetor. Gasoline evaporates, and as it evaporates it leaves a varnish like residue, especially gasoline with two-stroke oil added. This residue will quickly clog and/or gum-up the carburetor needle valve and jets. Before I even think of attempting to start the engine, I pull the carburetor, remove the float bowl and clean it out. This process, even with my fat fumbling fingers, takes 15-20 minutes and will save a whole lot of time later if the jets get clogged. While the carb is removed and partially dismantled, I give it a good visual check - does the float look good, is the needle valve sticking, do the gaskets look good, etc.
  • Fuel Pump. If the carburetor float bowl had any residue, more than likely the fuel pump will as well. I dismantle it and clean and inspect the various membranes and gaskets.
  • Fuel Filter. My 4 HP Yamaha uses a small disposable fuel filter. I replace it annually, if the engine has been sitting unused for awhile, or if the engine is showing the symptoms of a clogged filter. One symptom of a partially clogged filter is the engine coughing and dying after running at high RPMs for a few minutes.
  • Fuel. While the fuel filter is removed, I decant a cup or so of fuel from the fuel tank into a clear plastic bottle. If there is any water in the fuel, it will sit on the bottom of the bottle, and any dirt or rust in the fuel will be quite apparent.
  • Anode. I check the anode and replace if necessary.
  • Lubrication. I check and lubricate all the mechanical linkages and moving parts... shift linkage, mounting handles, tilt lever, throttle control cable, etc. Everything gets cleaned, lubed and exercised.
  • Spark Plug. I remove the spark plug (there's only one on our 4 HP) and clean or replace it.
  • Wiring. I check all the electrical connections and wiring for chafe and corrosion, and make sure everything is secure.
  • Prop. I check the propeller for damage. We can live with the usual dings and scratches, but it should be replaced if there is any significant damage. I keep a spare aboard just in case.
  • Gearbox. I change the gearbox oil annually.
  • Lifting Straps. Marcie made a cover with integral lifting straps for the engine. I check it all to make sure the stitching hasn't disintegrated in the sun and the straps are secure and look good.
  • Mounting Pad. As long as I'm spending all this time checking the engine, I inspect the rail mounted pad that holds the engine on the stern rail to make sure it is still secure.
  • Test Drive. The only thing left to do is mount it on the dinghy and take it out for a spin around the neighborhood. Ours started on the second pull, which is always very satisfying. After the test drive, if there is any chance the engine will be unused for more than a couple of weeks, I shut the fuel off and let the engine continue to run until it runs out of gas in the float bowl and fuel lines.


test drive


Spares

For spares, I keep the following on hand:

  • Propeller
  • Spark plug
  • Fuel filters
  • Impeller
  • Carburetor rebuild kit
  • Pull cord
  • Throttle cable
  • Gearbox oil
  • Anode

And when all else fails we still have the backup system...our trusty oars
The Blue View - Rebuilding the Chain Pipe

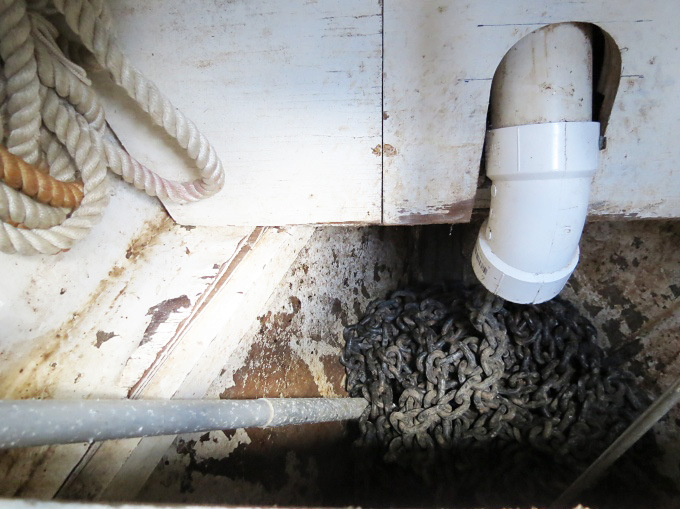
chain pipe with pvc  

One of the items on my list to get done while in Adelaide was rebuilding the chain pipe. This is the pipe that guides the anchor chain from the windlass to the chain locker below deck in the bow.

Originally, when we bought Nine of Cups, the chain would drop directly from the windlass into the chain locker. When we raised anchor and the windlass fed the chain down into the chain locker, as it dropped, the chain had a tendency to pile up rather than disburse evenly. When the pile got high enough, the windlass would jam up and it took a few minutes to clear it. We found that if whoever was raising the anchor (Marcie) climbed down into the forepeak locker and knocked the pile of chain down after every 40 feet or so of chain, the windlass wouldn't jam up. This wasn't too bad on a calm day when we only had 75 feet of chain out, but on the days when we had 250 feet out, the wind was blowing, and we were trying to get out of the anchorage in a hurry, the system was less than ideal.


chain pipe diagram


Early on in our cruising life, I added a chain pipe that would guide the chain further aft before dropping it into the chain locker. This had several advantages. First, the weight of the chain was a littler further aft rather than right on the bow. Second, as you go further aft, the chain locker becomes wider and deeper, so while the chain still piles up, it takes quite a bit more chain before it piles high enough to jam the windlass. And third, when it becomes necessary to knock the pile down, Marcie can do it with the deck brush handle from the deck without having to climb down into the forepeak locker.

The design is quite straightforward. A flange attaches the chain pipe to to the underside of the deck. A 3” (76mm) ID pipe is attached to the flange to clear the windlass motor, then a 45 degree elbow is attached to the pipe, followed by another straight section and another 45 degree elbow.

Since the chain is galvanized steel, the ideal material for the pipe would also be galvanized steel. Any other marine metal, like stainless steel or bronze would lead to deterioration of the chain due to electrolysis. I couldn't find galvanized steel pipe and flanges when I built the first one, so I used Schedule 40 PVC pipe instead. This is the very thick-walled pipe used in the U.S. for pressurized plumbing systems. There is no chance of electrolysis occurring, and the material is quite strong, but with time, the chain eventually wears through the 45 degree elbows. This, on average, seems to happen about every five years or so, and so it was that I noticed a spot wearing through on the upper elbow when I last checked out the chain locker.

Finding Schedule 40 PVC in Australia was difficult – it isn't used much here. I finally found it online at an irrigation supply company in Perth, and had the new fittings shipped here.

In theory, the job shouldn't be difficult. All I needed to do was remove the old chain pipe, replace the elbows with the new ones and re-install it. The hard part is crawling far enough into the chain locker to access the nuts holding the flange – an easy job for someone the size of a Hobbit, but quite uncomfortable for me. Once I got it out, changing the elbows was straightforward. I don't use adhesive to secure the elbows as would normally be done for pressurized plumbing. I grease the fittings, slide them together, and hold them in place using a screw, so removing the old elbows in not difficult. The only real glitch was after scrunching myself back into the chain locker and trying to fit the chain pipe back in place, I realized the slightly bigger OD of the new Australian Sched 40 elbows wouldn't quite clear the windlass. I think this was due to my foolishly thinking to myself that the project was going more quickly than I expected. Back out it came, and after a few modifications and a couple of trial fittings, it all went back together.

When I finally finished, I thought it might make a good blog post. Too bad I didn't think to take photos while it was out. If I was more ambitious, I'd slither back down there and take it out again – but I'm not and the photos will have to wait until the next time I replace the elbows in five years or so.

The Blue View - Faucet Replacement

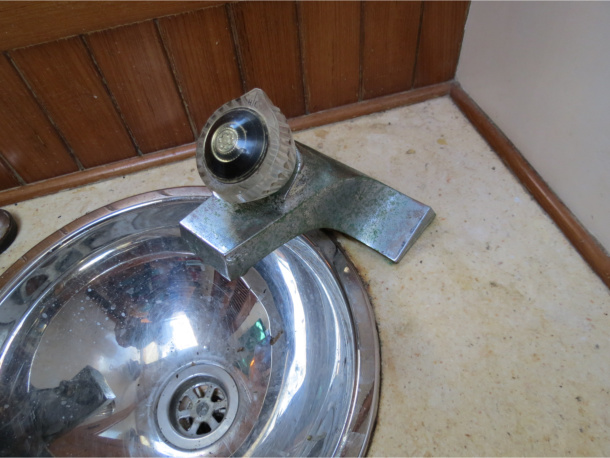
old faucet  

We have a pressurized water system aboard Nine of Cups. There is a small water pump that connects the water tanks to each of the faucets, and when we turn a faucet handle, the water pressure in the lines drops, causing the water pump to come on. So, when everything is working well, our faucets work just like those in a house. We also have a foot pump at the galley sink as a backup, in case we have a problem with the pressurized system.

The water pump is loud enough to be heard, under normal conditions, throughout the boat. You might think this would be undesirable, but it is actually a good thing. The pump should not come on unless a faucet is opened. If we hear the pump and no faucet is open, we know we have a leak somewhere. And so it was about a week ago - the water pump was cycling on and off for a second or two about once an hour – a sure sign of a leak.

Sometimes the leak is difficult to track down, since the pressurized lines run through a number of hard-to-get-to areas, but this time it was pretty easy. The shelf under the sink in the forward head was wet, and the fittings connected to the faucet were corroded. That particular faucet had been replaced several years ago with a household bar sink faucet. Household faucets are pretty and usually less expensive than marine grade faucets, but have a limited lifetime aboard a boat. In addition, since household faucets are designed to connect to household plumbing, which is usually different than boat plumbing, it is sometimes a challenge finding the right fittings to make the connections.

The faucet was definitely showing its age both above and below the counter, so we went in search of a replacement. The counter is some sort of a marble-like substance, and quite difficult to drill or cut, so we were hoping to find something that would fit the old holes. This, of course, didn't work out, but we did find a nice marine grade faucet at Whitworth's (the Aussie equivalent of West Marine), with a removable spout that can be used as a shower head. While it wouldn't fit the same holes, at least it would cover the old ones, so we bought it. It really doesn't look as nice as a conventional sink faucet, but at least it costs twice as much.


new faucet


As is typical of most of my projects, what should have taken an hour or two took closer to two days. I needed to convert the two drilled holes into a rectangular cutout, and the marble-like counters were even harder to cut than I expected. I tried hole saws, my multi-tool with a saw blade and my Dremel with a cut-off wheel, but none of the power tools seemed to make much of a dent in the counter. After drilling for 45 minutes with the hole saw, for example, I had completely worn it out and had only a 1/2” deep hole to show for my effort. It was too small an area to use a jig saw. I contemplated making a trip to the local Bunnings to see if I could find some diamond tipped tile cutting bits, but it's a three-hour round trip by train and bus, with no guarantee that they had the bits or that the bits would cut any better.


hacksaw blade


Eventually, I found that a hacksaw blade worked as well or better than anything else. It didn't exactly fly through the counter – it took 15 minutes of concerted effort to cut 1/8” (3mm) but it did make progress. I drilled 1/4” holes to make the radii in the corners, and used a chisel to connect the dots. After a day and a half of sawing, drilling, sweating and swearing, I finally finished the cutout.


the new hole


The rest of the job was pretty straightforward. I masked the faucet and caulked under it with silicone, then screwed it into place. The plumbing connections were easy – 1/2” reinforced vinyl tubing held in place with double hose clamps. When I turned the pump back on, no leaks and the pump now only comes on when it should. Another “two hour” project to check off the list. Actually, it wasn't on the list to begin with, so I had to add it to the to-do list before I could check it off.