The Blue View - In Search of the Perfect Anchor

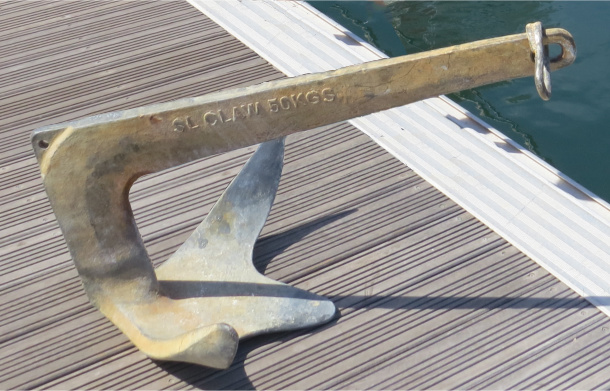
bruce anchor  

We have used a large Bruce anchor for the last 14 years. When we bought it, I did a lot of research on anchors and felt the Bruce, which is a claw or scoop type anchor, was the optimal anchor for us. I'm a firm believer that, all things being equal, a bigger anchor is always better than a smaller one, and we bought the largest anchor that would fit on our bow roller, all 50kg (110lb) of it, which is a couple of sizes larger than the recommended size for Nine of Cups.

In most bottoms, it sets well the first time, and the only problem we ever have is trying to get it unstuck when it is time to leave – a good problem, if ever there was one. In soft mud, it seems to drag very slowly when the wind pipes up – maybe 20 to 30 feet (6 to 9 meters) over the course of a day. It had difficulty in the heavy kelp we found in Patagonia and Tierra del Fuego, and we resorted to using two anchors in series and lines ashore to secure Cups at night. All anchors have difficulty in rock, and depend on wedging underneath, between or in some crevice of the rock to hold the vessel. Once hooked, it can be quite the exercise un-wedging the anchor. We almost had to leave our dependable old Bruce behind in a rocky anchorage in the Chatham Islands off New Zealand, before it finally came free.

Since we bought our Bruce, there have been a whole host of new anchors on the market, the Bugel, Rocna, Manson Supreme, Spade, and Bulwagga, to name a few, all of which claim to be much superior to the older designs. Over the years, we have been reasonably happy with our Bruce, however, and didn't feel compelled to change.
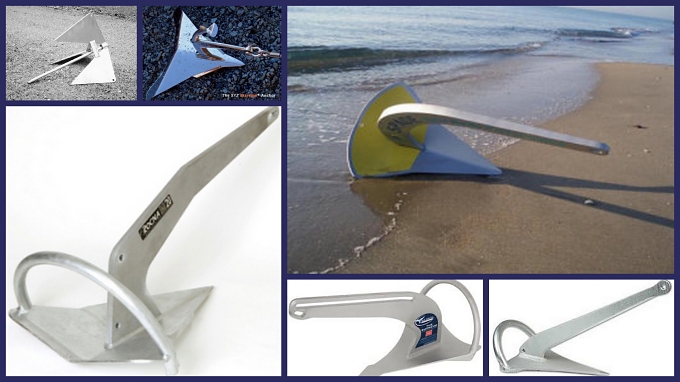
 

new anchors


We will be cruising the south coast of Australia for the next couple of months, which is known for its deep grass combined with hard sand bottoms. Our Bruce, as well as many of the other common anchors like plows and CQRs, has problems digging into the sand under all that grass, and so we thought it was time to look at other anchors in the hopes of finding one that would hold well here, as well as perform well in most other bottom types.

A walk around any of the local marinas quickly made it apparent what the local yachties prefer. I'd estimate that 75% of them use a Marsh Stockless anchor as the anchor of choice in the grassy bottoms here. (Picture in your mind a miniature version of a traditional ship's anchor). While the stockless may do quite well in this area, however, it isn't the best all around anchor. The holding power for its weight is nowhere near as high in mud and soft sand as the newer design anchors, or the Bruce for that matter. To offset this, we would need to buy a very large version which is difficult to manage in our bow roller and is quite expensive. A 52 kg stockless anchor, the size recommended for Cups in strong winds would cost over $1000.


stockless anchor


In the hopes of finding a good alternative to the stockless anchor, I spent a fair amount of time perusing the online forums and asking the local boat owners about their experiences with the various anchors, and I got a multitude of conflicting responses. Some swore by the new designs and some swore at them. Many of the stockless anchor owners had tried Manson Supremes and Rocnas in the past, and were unhappy enough with them to go back to their trusty Marshs.

Over the years, we've found that many marina boats the world over do not tend to venture out of their local territories very often. Their boats are reserved for weekends and holidays in fair weather and many prefer marinas to anchorages except for lunch and swimming stops. Though I listened to their input, I was more interested in receiving recommendations from experienced offshore cruisers, especially those with all weather experience in these waters.

I did get a few opinions that were based on personal experience in more extreme conditions. One was from our friends Jack and Jude on Banyandah who have been using a Manson Boss since last July on their latest circumnavigation of Australia. They have anchored in all types of conditions and bottoms and highly recommend it. The Manson Boss is a scoop type anchor like a Bruce, except it has a very sharp, reinforced point that should dig into the hardest sand. It also has huge, up-turned flukes that should give it tremendous holding power.


boss anchor


Another opinion came from the owner of a large power boat in our marina that has cruised this area for decades. He spends more time out and at anchor than he does in the marina, and highly recommends an anchor made by an Australian company called the Sarca Excel. It sort of looks like a cross between a plow and a scoop anchor with a very sharp point for digging into the hard sand. The owner of Anchor Right, the manufacturer of the Sarca Excel, is so sure of his anchor, he offered a full money back guarantee if we were unhappy with it after using it for awhile.
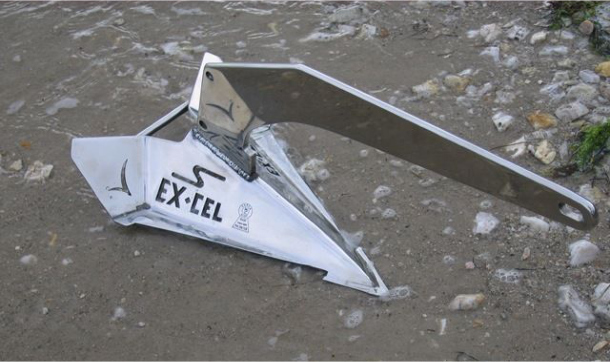
 

excel anchor


It was a tough decision, but in the end, we decided on the Manson Boss, and bought the 80 lb. version, which is a size up from the one recommended for Cups. Although it is only ¾ the weight of our big Bruce, it actually dwarfs our old trusty anchor in size. Delivery was fast and the courier actually delivered it right to the boat. The new Boss fits into our bow roller quite nicely and Marcie can deploy and retrieve it without having to help it along – unlike the Bruce which always required a bit of nudging and/or tugging. The hardest part of the whole process of switching to the new anchor was figuring out how to stow the Bruce.


bruce and boss anchors together


So far, so good. The next step to determine whether this is the perfect anchor – at least for us - is to see whether it actually holds in these south coast Australian anchorages.

To be continued...
The Blue View - Outboard Maintenance

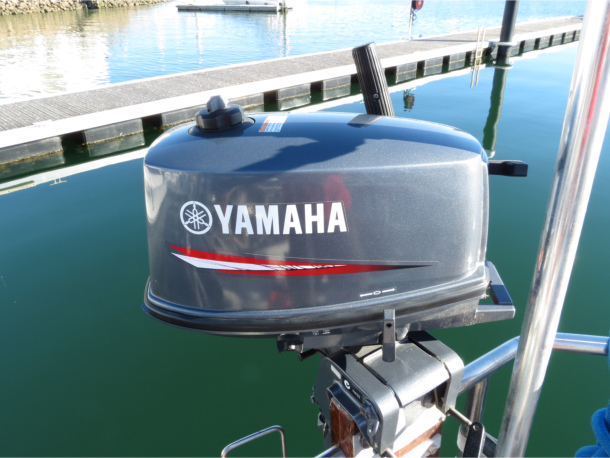
outboard engine  

Our two-stroke dinghy engine has been sitting, unused, on the stern rail for almost a year now, and before we set out for points west, I thought it prudent to do some preventative maintenance. As with most things aboard, it's much better to find any problems now, in the comfort of a marina with chandleries and hardware stores close at hand, than later in some isolated anchorage.

Gasoline engines, in particular, don't like to sit unused for long periods of time. Leave the engine sitting in a saltwater environment, and it is bound to be unhappy. In my experience, the two biggest issues will be the fuel and all the mechanical parts that, if not actually seized up, don't work as smoothly as they should.

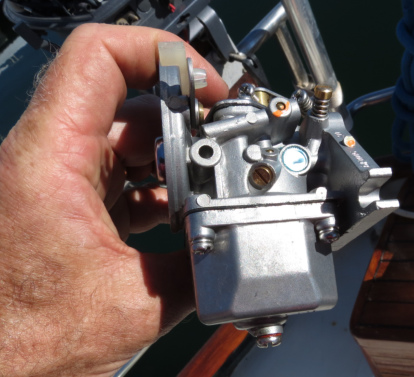
outboard carburator

Here is my checklist:
  • Carburetor. Gasoline evaporates, and as it evaporates it leaves a varnish like residue, especially gasoline with two-stroke oil added. This residue will quickly clog and/or gum-up the carburetor needle valve and jets. Before I even think of attempting to start the engine, I pull the carburetor, remove the float bowl and clean it out. This process, even with my fat fumbling fingers, takes 15-20 minutes and will save a whole lot of time later if the jets get clogged. While the carb is removed and partially dismantled, I give it a good visual check - does the float look good, is the needle valve sticking, do the gaskets look good, etc.
  • Fuel Pump. If the carburetor float bowl had any residue, more than likely the fuel pump will as well. I dismantle it and clean and inspect the various membranes and gaskets.
  • Fuel Filter. My 4 HP Yamaha uses a small disposable fuel filter. I replace it annually, if the engine has been sitting unused for awhile, or if the engine is showing the symptoms of a clogged filter. One symptom of a partially clogged filter is the engine coughing and dying after running at high RPMs for a few minutes.
  • Fuel. While the fuel filter is removed, I decant a cup or so of fuel from the fuel tank into a clear plastic bottle. If there is any water in the fuel, it will sit on the bottom of the bottle, and any dirt or rust in the fuel will be quite apparent.
  • Anode. I check the anode and replace if necessary.
  • Lubrication. I check and lubricate all the mechanical linkages and moving parts... shift linkage, mounting handles, tilt lever, throttle control cable, etc. Everything gets cleaned, lubed and exercised.
  • Spark Plug. I remove the spark plug (there's only one on our 4 HP) and clean or replace it.
  • Wiring. I check all the electrical connections and wiring for chafe and corrosion, and make sure everything is secure.
  • Prop. I check the propeller for damage. We can live with the usual dings and scratches, but it should be replaced if there is any significant damage. I keep a spare aboard just in case.
  • Gearbox. I change the gearbox oil annually.
  • Lifting Straps. Marcie made a cover with integral lifting straps for the engine. I check it all to make sure the stitching hasn't disintegrated in the sun and the straps are secure and look good.
  • Mounting Pad. As long as I'm spending all this time checking the engine, I inspect the rail mounted pad that holds the engine on the stern rail to make sure it is still secure.
  • Test Drive. The only thing left to do is mount it on the dinghy and take it out for a spin around the neighborhood. Ours started on the second pull, which is always very satisfying. After the test drive, if there is any chance the engine will be unused for more than a couple of weeks, I shut the fuel off and let the engine continue to run until it runs out of gas in the float bowl and fuel lines.


test drive


Spares

For spares, I keep the following on hand:

  • Propeller
  • Spark plug
  • Fuel filters
  • Impeller
  • Carburetor rebuild kit
  • Pull cord
  • Throttle cable
  • Gearbox oil
  • Anode

And when all else fails we still have the backup system...our trusty oars

The Blue View - Rebuilding the Chain Pipe

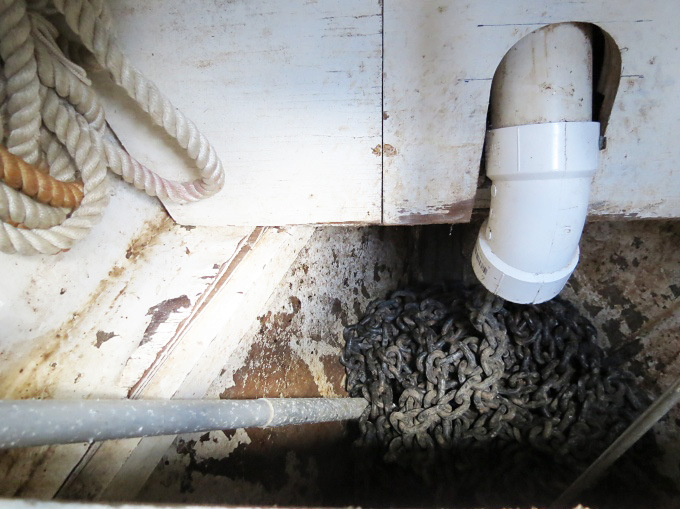
chain pipe with pvc  

One of the items on my list to get done while in Adelaide was rebuilding the chain pipe. This is the pipe that guides the anchor chain from the windlass to the chain locker below deck in the bow.

Originally, when we bought Nine of Cups, the chain would drop directly from the windlass into the chain locker. When we raised anchor and the windlass fed the chain down into the chain locker, as it dropped, the chain had a tendency to pile up rather than disburse evenly. When the pile got high enough, the windlass would jam up and it took a few minutes to clear it. We found that if whoever was raising the anchor (Marcie) climbed down into the forepeak locker and knocked the pile of chain down after every 40 feet or so of chain, the windlass wouldn't jam up. This wasn't too bad on a calm day when we only had 75 feet of chain out, but on the days when we had 250 feet out, the wind was blowing, and we were trying to get out of the anchorage in a hurry, the system was less than ideal.


chain pipe diagram


Early on in our cruising life, I added a chain pipe that would guide the chain further aft before dropping it into the chain locker. This had several advantages. First, the weight of the chain was a littler further aft rather than right on the bow. Second, as you go further aft, the chain locker becomes wider and deeper, so while the chain still piles up, it takes quite a bit more chain before it piles high enough to jam the windlass. And third, when it becomes necessary to knock the pile down, Marcie can do it with the deck brush handle from the deck without having to climb down into the forepeak locker.

The design is quite straightforward. A flange attaches the chain pipe to to the underside of the deck. A 3” (76mm) ID pipe is attached to the flange to clear the windlass motor, then a 45 degree elbow is attached to the pipe, followed by another straight section and another 45 degree elbow.

Since the chain is galvanized steel, the ideal material for the pipe would also be galvanized steel. Any other marine metal, like stainless steel or bronze would lead to deterioration of the chain due to electrolysis. I couldn't find galvanized steel pipe and flanges when I built the first one, so I used Schedule 40 PVC pipe instead. This is the very thick-walled pipe used in the U.S. for pressurized plumbing systems. There is no chance of electrolysis occurring, and the material is quite strong, but with time, the chain eventually wears through the 45 degree elbows. This, on average, seems to happen about every five years or so, and so it was that I noticed a spot wearing through on the upper elbow when I last checked out the chain locker.

Finding Schedule 40 PVC in Australia was difficult – it isn't used much here. I finally found it online at an irrigation supply company in Perth, and had the new fittings shipped here.

In theory, the job shouldn't be difficult. All I needed to do was remove the old chain pipe, replace the elbows with the new ones and re-install it. The hard part is crawling far enough into the chain locker to access the nuts holding the flange – an easy job for someone the size of a Hobbit, but quite uncomfortable for me. Once I got it out, changing the elbows was straightforward. I don't use adhesive to secure the elbows as would normally be done for pressurized plumbing. I grease the fittings, slide them together, and hold them in place using a screw, so removing the old elbows in not difficult. The only real glitch was after scrunching myself back into the chain locker and trying to fit the chain pipe back in place, I realized the slightly bigger OD of the new Australian Sched 40 elbows wouldn't quite clear the windlass. I think this was due to my foolishly thinking to myself that the project was going more quickly than I expected. Back out it came, and after a few modifications and a couple of trial fittings, it all went back together.

When I finally finished, I thought it might make a good blog post. Too bad I didn't think to take photos while it was out. If I was more ambitious, I'd slither back down there and take it out again – but I'm not and the photos will have to wait until the next time I replace the elbows in five years or so.