The Blue View - What Broke?

shaft seal  

The passage across the Great Australian Bight was pretty benign, all things considered, and we are counting our blessings. This stretch of water can be quite difficult, but we found places to tuck into when the wind wasn't cooperating. Benign or not, however, we had the usual list of items that needed attention or repair enroute or when we arrived in Esperance. The old, oft used adage that the definition of cruising is making repairs in exotic locations couldn't be more accurate.

Here is our list:

1. Shaft Seal. The propeller shaft seal tops the list. While were sailing along briskly at 7 knots or so on our last leg to Esperance, Marcie noticed that the bilge pump light was on. We have an indicator light located in the cockpit that lights up when the bilge pump is running. The automatic bilge pump rarely comes on unless we are taking a lot of water over the bow or there is a leak somewhere. Since we weren't taking any water over the bow, and the light was staying on, it was something that needed checking into – sooner than later.

After pulling up a few floorboards, I found the source, which was the prop seal. The propeller shaft is connected on one end to the back of the transmission, then extends about 3 feet (1m) or so where it passes through a hole in the hull to the cutlass bearing and then the propeller. There is a seal between the shaft and the hole that usually keeps the water on the outside of the boat. This seal consists of a substantial stainless steel disk that is attached to the shaft and a synthetic rubber bellows that is attached to a collar around the hole in the hull. To make the seal watertight, the disk is slid down the shaft until the bellows is compressed somewhat, and then the disk is locked in place using set screws (or grub screws for you non-Yanks).

The disk on our shaft had worked its way back up the shaft, no longer making a seal with the bellows, and was now leaking copious amounts of water. The fix was simple and completed in about an hour – loosen the set screws, coax the collar back into place with a hammer, pry bar and large screwdriver, then tighten the set screws. There was a slight complication because the shaft was spinning due to the flow of water against the prop, but once Marcie reefed us down and slowed the boat to about 3 knots, I was able to stop the prop and lock it in place using locking pliers. (Nine of Cups has a shaft brake, but I had removed it some time ago while I worked on a shaft generator – a project that is still in the works). It is a little disconcerting that the set screws were tight and the disk still slipped along the shaft.

So, add to the to-do list:

2. Put the shaft brake back on the shaft; 3. Figure out a way to make sure the disk doesn't slip again (maybe use a shaft anode?); and as long as I'm putting the shaft brake back on, I might as well (4.) check the engine mounts and (5.) engine alignment.

6. Jib Clew. The clew came loose from our 90% jib and needs repair. The old 120% genoa is back in place and doing well, but add the jib repair to the list.


clewless jib


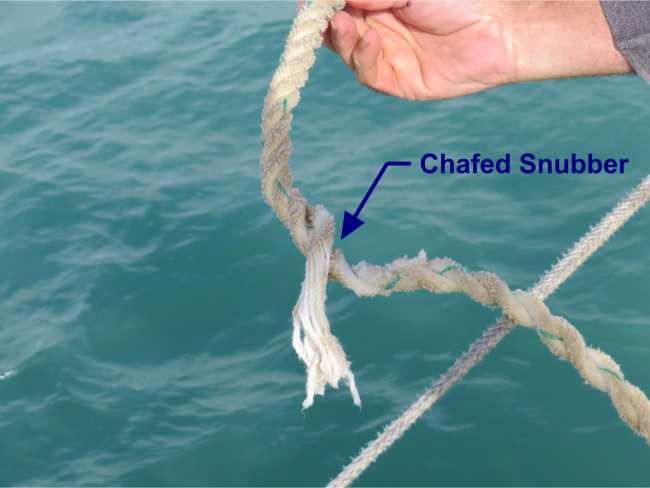
7. Snubber. The anchor snubber chafed part way though while anchored in Eucla. I replaced it with a fresh line.
 

chafed snub


8. Main halyard shackle. The shackle that connects the halyard to the mainsail was bent and was replaced en route.


 bent shackle


9. Whisker Pole. The wire attached to the jaw release on the whisker pole is corroded and needs replacing. Also, the (10.) topping lift and uphaul lines need to be marked to indicate the correct height for the 120% genoa.

11. Chartplotter/GPS. Our seven year old cockpit chartplotter and GPS died. It would simplify things if we could buy the same model, but is is no longer available. It appears all the new gear either won't talk to our other electronics or it is a different size, meaning the teak panel on which the current one is mounted will have to be modified or replaced. Meanwhile, one of the handheld GPS's, the nav station chartplotter and the Navionics App on the iPad is getting us by.

12. Chain Stopper. Once the anchor is deployed, the chain stopper locks the anchor chain in place and takes the load off the windlass until I can get a snubber attached. Ours is showing some wear and should be replaced.

13. Leak over Nav Station. There is a leak over the nav station, and we are getting a drip during hard rains or when we take a lot of water on deck. Not sure whether it is the deck prism or porthole above the area. Needs to be investigated and repaired.

14. Staysail furler. The staysail furler line needs adjusting.

15. Stern Light. One of the cable ties securing the electrical wire that powers the stern light has broken and needs replacing. Meanwhile, the wire is hanging loose and is sure to get snagged by something if it isn't corrected.

16. Dinghy Leak. The inflatable continues to leak water. This is more of an annoyance than anything, as the groceries and backpacks get wet as we transport them. It looks like it is a seam on the starboard side, but my previous attempts at patching the likely spots hasn't corrected the problem. I'd welcome any ideas on how to isolate a water ingress problem on an inflatable.

17. Water Tank. We have some contamination in the starboard water tank. When we fill a clear water bottle, there is quite a bit of sediment in the water. It probably won't hurt us, but is somewhat unappetizing. Probably something we picked up from a water fill somewhere along the line, and now that we are churning up the tanks during our passage-making, it is being passed along. Time to clean out the tanks, but in the meantime we will start filtering our freshwater.

Seventeen items... that's probably pretty average for 3-4 weeks of sailing. To our Esperance list, we need to add a host of routine things like transporting fuel and water to the boat, laundry and re-provisioning. Several items were checked off enroute (the shaft seal leak was something that certainly couldn't wait) while some will be done in Esperance. Some are 5 minute jobs (well, maybe 1-hour jobs – nothing ever takes only 5 minutes to fix on Nine of Cups), while some items like the engine alignment will take a full day. A few of the items like the chartplotter and water tank will have to wait until we are staying put for awhile – probably in Fremantle.

I've made my to-do list for Esperance and started my list for Fremantle. I should have plenty of time to get everything done - assuming Marcie doesn't want to do any frivolous, unimportant things like seeing the local sights or visiting museums. We'll see how that works out.

The Blue View - Where is Daw Island?

where's daw  

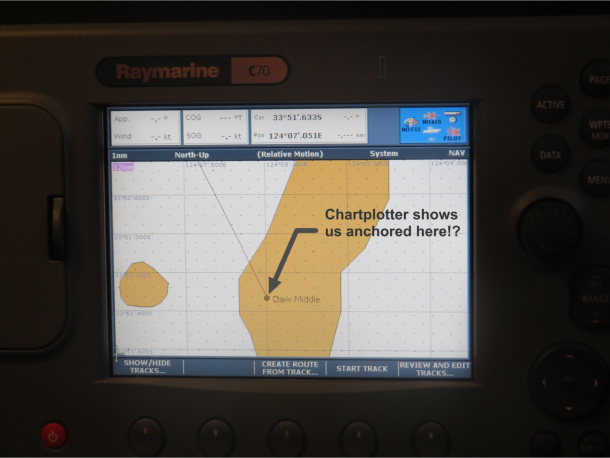
It is difficult to pin down the exact location of Daw Island, our destination on the west end of the Great Australian Bight. Our Australian paper charts give its position as 33S51, 124E04. Our Raymarine chartplotter gives the position of the anchorage as 33S50.55, 124E08.35, about 3.75 nautical miles further east. We use Navionics Gold software on the chartplotter, but also have Navionics on our iPad. Even the Navionics software on the two devices differed. The satellite view provided by Google Earth gives the position of the anchorage as 33S50.55, 124E08.04, about 0.25 nm west of the chartplotter location. So where the heck is it anyway? Which position do we use? Take the average?

Modern GPS based electronics will locate you on the earth's surface to within a few feet. This accuracy is astounding, and it becomes very easy to rely on those electronic marvels almost exclusively. Therein lies a danger.

Many of the nautical charts, both electronic and paper, are based on surveys that were done before the advent of the GPS. The GPS may locate you on the earth's surface to within a few feet, but the chart may be off by as much as half a mile or more. Thus, the chartplotter may show you being well clear of an offlying danger, for example, when in actuality you may be about to hit it. Conversely, there have been any number of times our chartplotter showed Nine of Cups being high and dry in the middle of an island when we were safely anchored in 50 feet of water a fair distance off the beach.


chartplotter


Fortunately, Daw Island is easy to find in the daylight. It is by far the tallest and largest island in the immediate area. We used the chart plotter to get us to the general vicinity, made sure we arrived in the daytime, then used a combination of the paper charts, electronic charts and our eyes once we could see the island. The shoals and rocks lying off its west and north ends were easy to spot, so it was relatively straightforward to find our way into the anchorage without running into any hard spots along the way.

So which position was correct? This time it was Google Earth. This isn't always the case, however. You would think that a satellite photo would be right on, but we have been in a number of places that Google Earth was also off by a significant amount, along with the chartplotter and paper charts, and all by differing amounts.

The speed at which navigation technology is evolving makes me think that all these issues are short term. A decade from now, we will all undoubtedly have 3-D systems that will safely navigate our vessels for us, between any two points in any of the oceans of the world. Until then, however, I don't think we will be relying entirely on our GPS and chartplotter to find the next anchorage for us, no matter how much it thinks it knows where it is.

The Blue View - Rigging for Downwind Sailing

nine of cups  

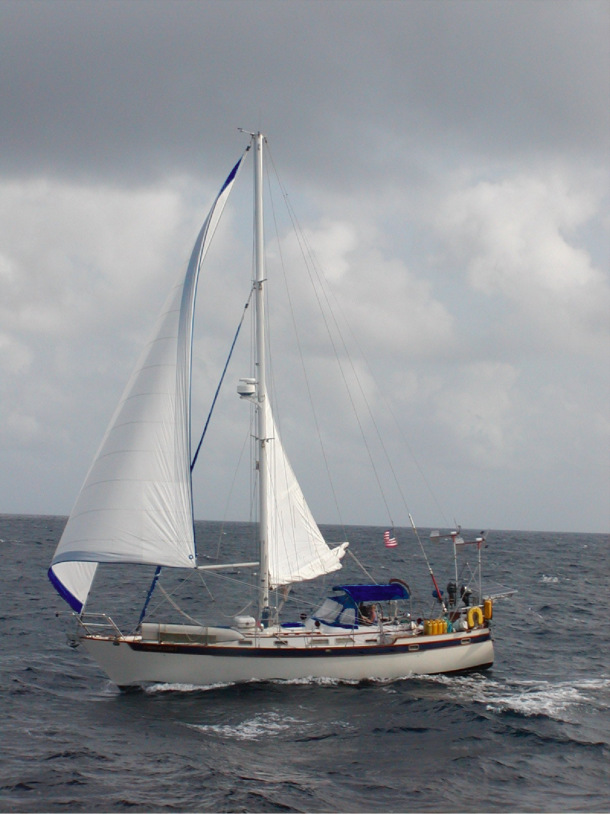
It's been awhile since we rigged Nine of Cups for downwind sailing. On our passage from St. Francis Island to Eucla, however, we saw light to moderate winds from the southeast to the northeast, and we needed to wipe the cobwebs off our whisker pole and rig it for poling out the genoa. We also needed to clear the cobwebs from our heads and try to remember how it was, exactly, that we rigged all those lines.

We used to use the whisker pole a lot when we were in the Caribbean, and occasionally when crossing the Pacific, but it has been at least two years since we last deployed it. How did we route the fore guy? What line did we use for the aft guy? (I didn't make a mat out of that line, did I?) What height should the pole be for the old genoa? Which blocks did I use last time? Lots of things to figure out again, but I suspect we will be using it a lot when we begin crossing the Indian Ocean next July, so it was good to get it all organized again.


pole rigged


We have an extendable pole that is mounted on a track on the front of the mast. When stowed in place, the car for the inboard side of the pole is located at the top of the track, and the outboard end is locked in place at the lower end of the track. Here is how we rig it to pole out our genoa.

We tie a four foot section of line to the lifelines just aft of the bow pulpit. This will be used to restrain the outboard end of the whisker pole and keep it from swinging around and smacking something or someone while we're deploying it.

We next route the fore guy and attach one end to the bottom of the whisker pole. The topping lift is always left attached to the outboard end of the pole and runs from there to a block about 2/3rds up the mast and back down to a cleat at shoulder height on the mast. We remove it from its cleat. The aft guy is routed from the cockpit, through a block near our sheet turning blocks, then forward, outside all the shrouds, and tied to the lifeline near the four foot section of line. Both of the genoa sheets are faked out in the cockpit, and the windward sheet is given some slack.

Once I unclip the outboard end of the pole from the mast, Marcie uses the fore guy to control the outboard end of the pole. I use the uphaul control line to lower the inboard end of the pole. As I lower my end, Marcie guides the outboard end towards the line attached to the lifelines. Once it is lowered enough that the outboard end can rest on the lifelines, Marcie uses the short line tied there to keep it in place. She ties a very loose loop around the pole with a reef knot.

I continue lowering the inboard end until it is at the bottom of the track. At this point, the pole is nearly horizontal and resting on the lifelines with the opening of the jaw facing upwards. The fore guy is attached to the underside of the pole and the topping lift is attached to the top of the pole.

Marcie uses a bowline to attach the aft guy to the underside of the pole and clips the genoa sheet into the jaw, making sure the release pin is locked shut. I slack off on the topping lift and pull on the line that extends the pole as Marcie helps it along on her end. We extend the pole to the length of the J dimension of our headsail – the distance from the bottom of the headstay to the mast – whether we are using our 90% yankee or our 120% genoa. On Cups, the J dimension is 20 feet, so the pole is extended about 8 feet beyond the lifelines. We have a mark on the pole that indicates how far it is to be extended, and when it has been extended to the correct length, I cleat the extension control line.

Marcie now heads back to the cockpit and takes in the slack on the fore guy and aft guy. Once she has them secure, I release the line holding the pole to the lifelines, return to the mast and raise the outboard end of the pole using the topping lift, while Marcie uses the two guys to keep the pole from swinging too much as it is raised. We want the pole to be about the height of the clew when the sail is unfurled, which is different for the yankee and the genoa. I have the topping lift marked in two places, so I know when the outboard end of the pole is the right height for either. Once it is at the correct height, I cleat the topping lift.

Next, I use the uphaul to raise the inboard end of the pole until it is at 90 degrees with the mast. As with the topping lift, I have marked the uphaul control line, so I know what height it should be for either headsail. Finally, both the uphaul and downhaul lines are cleated tight, and the guys are adjusted until the pole is at the desired angle to the wind.

The headsail is unfurled in the usual way, except that the sheet is winched aft until the clew just reaches the pole. We make sure that the clew is not winched so tightly that the knot attaching the sheet to the clew becomes wedged in the jaw of the pole.

As the apparent wind direction changes, we adjust the angle to the wind using the guys. The headsail can be reefed down or furled as needed.


pole lines


Jibing takes a bit of time. Let's say we are jibing from a starboard tack to a port tack. First, the headsail must be furled. The extended pole is too long to clear the deck behind the baby stay on Cups, so it must be lowered, secured to the lifeline again and retracted. The sheet is unclipped. The aft guy is removed and rigged on the port side. Since Cups is a cutter rig, the fore guy must be untied and rerouted from the port side of the boat as well. Another 4 foot line is attached to the lifeline on the port side, then the inboard end of the pole is raised back up towards the top of the track until the other end of the pole can be swung to the port side, where it is secured to the lifeline with the short line. Then the process is the same as before.

Like most things, it only seems complex until we've done it a few times and worked the kinks out. The first time we ever rigged the pole, it must have taken us an hour while we figured everything out. We've changed a few things to make the process easier, and both of us know what we are each supposed to do, so we can usually get the pole up in a few minutes – less time than it takes to read this blog post... or at least this is how long it will take once we get ourselves retrained and organized again.