Our Daily Bread (repost)

This is a repost of a blog from David about making fresh bread on passage. One of the first things we run out of when on a long passage is fresh bread. It is also one of the easiest problems to remedy. My night watches are the perfect time for making bread. It helps pass the time, and I can still pop my head up and take a look around every five minutes or so.

I make the dough during my 9 PM to midnight watch...

kneading the dough

let it rise while I'm sleeping...

rising dough

then try to time it so that it is hot and just out of the oven at the end of my 3 AM to 6 AM watch.

done

The smell of the freshly baked bread greets Marcie when she gets up, and we enjoy a slice or two over our morning cuppas while discussing whatever happened (or broke) during the night.

Kalamata olive bread is one of our favorites. This recipe makes one large loaf.

Kalamata Bread

Ingredients

Starter

  • ½ cup (100 ml) warm water
  • 1 tsp (3g) dry yeast
  • ½ cup (75g) flour

Dough

  • 1/3 cup (66 ml) warm water
  • 1 Tbs (20ml) honey or ½ Tbs (6g) brown sugar
  • 2 tsp (6g) dry yeast
  • 1 Tbs (5g) rosemary
  • 1 Tbs (5g) oregano
  • 1/8 cup (30ml) olive oil
  • 2-1/2 cup (375g) flour
  • 1 cup (200g) kalamata olives, pitted and sliced lengthwise
  • 1 tsp (15g) salt
  • optional: ½ cup (125g) sunflower and/or pumpkin seeds
  • cornmeal as needed

Starter:

Water should be just warm to the touch. If it is too hot, it will kill the yeast. Dissolve the yeast in the warm water, then add the flour and stir until thoroughly mixed. Cover and let it stand 30 minutes.

Dough:

Combine water, honey or sugar, and yeast, and mix until yeast is dissolved. Add herbs, oil, flour, the starter, olives, and seeds, and mix well. Move to a floured surface, and sprinkle salt over dough. Knead for 5 minutes, adding flour as needed. Put the dough in a greased bowl, cover and let rise until doubled, about 1 hour. Transfer to a floured surface, punch it down to get rid of air bubbles, and shape (don't knead again). Grease a cookie sheet and dust with cornmeal, then transfer the dough to the cookie sheet. Let rise in a warm place for two hours. (On my night watch, I let it rise for 3 hours during my off-watch).

Preheat oven to 450F (230C). Raise the upper oven rack to the second level above the flame and slide an oven proof pan onto the lower rack. About 5 minutes before putting the bread in the oven, add about 1 cup (250ml) of water to the pan. This produces steam for the first 5-10 minutes of baking. The steam keeps the outer layer of dough soft and flexible for a few more minutes, allowing the yeast to continue rising. The result will be a slightly lighter loaf with a brown crust. Score the top of the loaf with a sharp knife or razor and slide the bread into the oven. Bake at 450 (230C) for 10 minutes, then reduce heat to 400F (200C) and continue baking for another 20-30 minutes. Bread is done when you get a slightly hollow sound when the loaf is rapped with a knuckle.

The Blue View - Knots Revisited

A couple of weeks ago, I had the honor of presenting a seminar on anchors and anchoring techniques. One of the questions asked was what knot I used to attach a snubber to an anchor rode. This brought two things to mind: first, at least one person stayed awake for the presentation, and second, what a knot geek I am. I must have twenty books and apps for knots aboard Nine of Cups, but only two get used regularly. One is the terrific app, Animated Knots by Grog. This is loaded on my iPad, and includes dozens of animations showing how to tie many more knots than I’ll ever use. When I want to refresh my memory on how to tie a particular knot, a quick look at Grog’s app is all it takes. For example, I like the Zeppelin Bend, which is not only good for securing a Zeppelin, should I ever encounter one, but also works well for tying a loop in bungee cord, and glancing at the animation reminds me how to tie it.

The other reference is every knot geek’s bible, the Ashley Book of Knots by Clifford Ashley. I wrote a Blue View on the topic a few years ago, and thought it might be fun to share again.

Knots hold a real fascination for me. I particularly appreciate a well-tied knot that is perfect for a specific application. There are a handful of knots that most sailors know and use frequently…the bowline (BO-lin), the reef knot, and the clove hitch come to mind. Marcie knows the basic knots, and in fact, can tie a bowline faster than anyone I know. But beyond these, and maybe tying a bow in her shoelaces, she quickly loses interest in knots.

I have several books aboard that show how to tie a number of useful knots, but to my knowledge, the absolute best reference is The Ashley Book of Knots. If you’ve ever read The Shipping News by Annie Proulx, you might remember that each chapter begins with an excerpt from Clifford Ashley’s book.

He spent his life not only identifying and cataloging knots, but researching their uses and history. It took him eleven years to compile them in his book, which describes 3,854 knots. While the majority of the knots are intended for the sailor, there are knots for every purpose imaginable. Want to secure a bale of cotton? Knot #2073 is the one to use. Want to hoist a horse aboard your boat? Knot #2192 is the one for you. Want to make a snare? You might look at Knot #477.

A couple of decades ago, Marcie bought me a copy of Ashley’s for my birthday. It is now falling apart from heavy use. It’s water stained from a dousing it endured a few years ago. The dust cover has long since left this world. It still remains one of my favorite books.

One of my many uses for it is to identify a knot I’ve encountered somewhere. In a recent blog post, Marcie wrote about visiting the bell ringers at St. David’s Cathedral. Something I noticed was that all 12 bell ropes were secured in nice coils using the exact same knot. I asked the bell ringer whether this knot had a name and whether all bell ropes were secured in this fashion. He didn’t know if it had a name, but he said that that was the knot he was taught to use. When we returned to Cups, I looked through Clifford’s book, and sure enough, knot #172 is the Bell Ringer knot. Knot #173 is an alternative that is used if the bell rope is extra long or heavy.

bellringers knot

While we were traveling in the interior of Ecuador once, we happened onto a farmers’ market. All sorts of local animals, including dozens of pigs were being taken to the market for sale. I noticed that each of the pigs was being led by a rope using the same unusual knot. All the farmers seemed to know and use this knot for their pigs. It was a three-loop harness, one loop going around the pig’s neck, and the other two loops going around the pig’s front legs. I later found this exact knot in Ashley’s. It was Knot #1110, a knot originating in South America and used widely as a hackamore or emergency bridle. Apparently, it is also the preferred knot to lead a pig to market.

Ashley invented a number of knots as well. He was a modest man and never named them after himself, but over the years, many were given his name. My favorite of his knots is called the Ashley Bend. A bend is a type of knot used to unite two ropes or the ends of the same rope. The Ashley Bend, only referred to as Knot #1452 in his book, is easy to tie, is strong, but never jams or slips. I find it particularly good for tying bungee cord into a loop. The following photos show how to make it.

Ashley 1


Ashley 2


Ashley 3

The Blue View - Latest & Greatest Batteries - Part 4

battery bank 
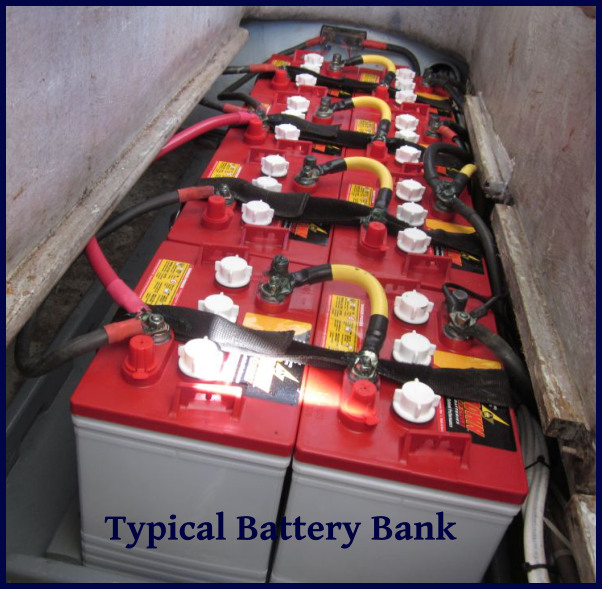
So, after all that, what’s the best battery for our application? Let’s start by comparing the true cost of each battery type over its life.

To recap our assumptions:

  • Recharge cycles: We will need to recharge 200 times a year – from 50% DOD to 80% DOD
  • Recharge cost: It costs us $3.50/hr to run the engine, and the alternator puts out 110 amps at that speed
  • Battery capacity: We have roughly 800 ah in our house battery bank

Since no engineering analysis is complete without at least one spreadsheet…

Actual Cost of Each Battery Type

Battery Type

Initial Cost

Expected Life in Years

$/Year

$/Year Recharging

$/Year Maintenance

Total $/Year

Flooded

$1,080

6

$180

$1,890

$546

$2,238

Gel

$3,180

6

$530

$770

$168

$1,762

Lifeline

$2,650

7

$379

$840

$462

$1,471

TPPL

$2,300

5

$460

$770

$252

$1,566

SpiralWound

$2,230

4

$558

$770

$336

$1,412

CarbonFoam

$3,400

10

$340

$910

$84

$1,334

Lithium Ion

$9,000

10

$900

$700

$84

$1,600

Some surprising results…

  • Given our kind of usage, the flooded lead acid is actually the most expensive, even though it is the least expensive to buy. Obviously, if we weren’t on the hook as much or had a less expensive method of recharging, the results would be totally different.
  • The Lithium-Ion, even though it costs significantly more initially, falls in the middle of the cost range.

Deciding which one…

Starting with the ones I’m ruling out:

  • Flooded lead acid because of the total cost and all the maintenance that’s required
  • Gels because they can’t be equalized and are the heaviest and most expensive of the remaining candidates
  • Spiral Wound because they can’t be equalized, have the least technical information available, and seem to only be available in smaller battery sizes

Of the remaining candidates, all are viable candidates for our application. Here are a few further thoughts:

  • Carbon foam seems the best candidate, but I am somewhat reluctant because of the limited track record – and anyway, they are on back-order with no information regarding shipping date.
  • Lithium-Ion look quite good, but the upfront cost is painfully high
  • Leaving TPPL and Lifelines… both good quality batteries, and I think I’ll be happy with either.