Yard Sales... Weekend Bliss

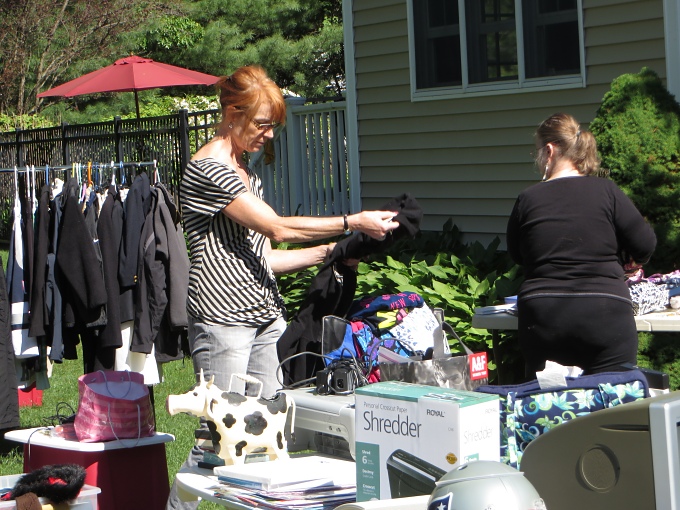
yard sale collage  

Right up there next to Thrift Shops, Op Shops for our down under friends, are yard sales. Yard sales, boot sales, estate sales, garage sales, rummage sales, block sales … I don't care what you call them … count me in. Lin pours over the local paper beginning on Thursdays and we look for all the local listings of sales for the weekend. We rule out the ones that emphasize baby clothes and toys. We plan the route carefully … we're efficient.


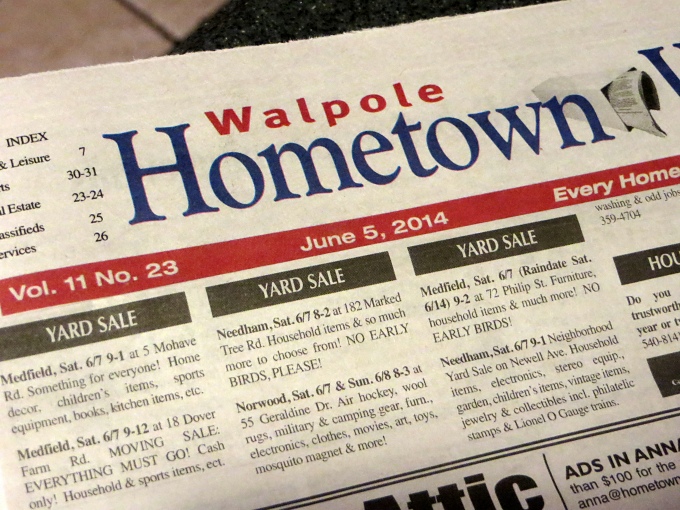
yard sale ads


We're up early, review the travel plan and we're off to rummage through what some people would call unwanted “stuff” … maybe even trash. We are, of course, searching out the treasure. Do we have anything specific in mind? Of course not. Treasure isn't always identifiable in advance. You know it when you see it. As we make our way to the first yard sale, we notice lots of posted signs for other sales along the way. The anticipation rises.


yard sale signs


We arrive at the first sale by 8am. There are already cars parked along the street. They've got a Garage Sale flag flying which probably means they do this regularly. No prices are marked. We have to ask for prices on everything we're interested in. $5 for a necklace? Is she crazy? Does she want to sell this stuff or not? We check everything out quickly, but we've already moved on. This one is a bust.


garage sale flag


The next one has lots of antiques. They're cleaning out a barn full of old stuff ranging from kegs of nails to 1980's TVs and “vintage luggage”, read that luggage with no wheels, no handles and in rough condition.


vintage luggage


Actually, it's not about the conquest, but rather the chase. We love looking at every little thing to determine if we've found the deal of the century. Lin got a lovely Delft compote for $2 last year. This is not David's cup of tea, so it's good he's not here to endure it. We bought all of our camping equipment a couple of years ago on Craigslist or at yard sales. David's idea of yard saling is a quick glance and a question to the owner. “Got any camping gear?” “No? ... okay, thanks” and moving on. Lin and I need a bit more time to look and digest the fact that they don't have anything we need or want.


lin looking


Finally, we find a place that has reasonable prices and things we might need. Lin picks up a new yard rake for $5. I walk around with some fabric for ten minutes or so and finally put it back where I originally found it. I can't justify where I'll put it in my luggage to take back to Australia. The next sale, however, nets me a package of cool nautical-motif napkins, some artists brushes and a package of birthday balloons marked David … all for 75 cents. Cheap entertainment, I'd say!

Make Your Own Courtesy Flags

Someone asked the other day if we always fly an Australian flag while we're in Australia and the answer is definitely yes. When traveling to other countries, flying a miniature version of the host country's national flag at the starboard spreader is considered proper boat etiquette and is customary in foreign ports. It's called a courtesy flag. Since Sailrite has just come aboard as a sponsor for our blogsite and web page, we thought this might be an appropriate time to chat a little about courtesy flags. Plus, we're only sailing the Great Australian Bight at the moment and it's not always that interesting.  

chilean courtesy flag


There are times when courtesy flags for the countries we intend to visit are difficult to locate in advance. More often though, they're just prohibitively expensive ($20-50 US). Do the math … we've visited 31 countries … that's quite a hit to the old budget. Plus flags don't last all that long in the salt, wind and elements, so if you stay awhile in a country, you find yourself having to replace the courtesy flag. Cha...ching!

Over the years, I've found that simply making our own is the easiest, least expensive and most convenient solution to this problem. The results aren't always perfect, but our courtesy flags easily pass the 20-foot visual test when they are aloft flying from the flag halyard. Quite honestly, beyond saving money, I try to save time as well, so I cut corners whenever possible. A simple courtesy flag, not counting labor, costs under $1. Adding an emblem to the canton or detail to the charge increases the cost, but no courtesy flag I've made has ever cost me more than $4US.


cutting out stars


When we first moved aboard, I purchased a little book showing country flags of the world primarily to identify foreign-flagged vessels and also with a mind for making our own courtesy flags. Nowadays, I wouldn't even buy the book; it would just as easy and cheaper to download free clip art of country flags for those countries on our itinerary. There are several books and kits available for making courtesy and signal flags, but since they weren't as easily available when I first started constructing my own, I've just continued to make my own flags as we go along.
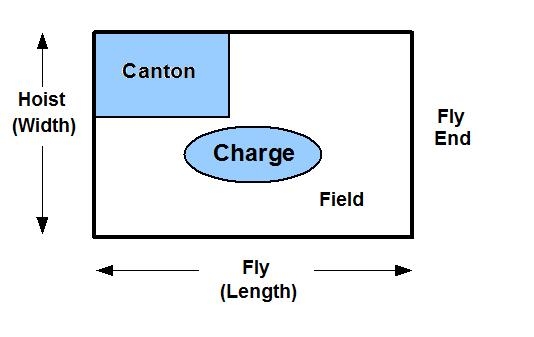
 

parts of a flag


I purchased a yard in various colors (red, green, blue, white, yellow, black) of nylon flag fabric and all other materials I needed from Sailrite when we first started cruising in 2000. You can use other fabric, but the flag nylon seems to hold up the best. I've never had to replenish my stock though I've made lots of flags. I'm sure there are other sources, but Sailrite had everything I needed in one convenient catalog (now conveniently on-line) and the prices were very reasonable. I always keep a hard copy of their catalog on the boat for planning purposes on those occasions when internet is not available.


flag supplies


Additionally, I bought various colors of sail tape and some felt squares of colors I couldn't get in regular nylon, like the turquoise required for Fiji's flag, for instance. It's not very hard to make a basic flag. There are a few basics to remember and several shortcuts that can save you time.

The basics:

1. Decide what size flag you want to make and the ratio of width to length. I usually opt for a finished 12”x18” courtesy flag on Nine of Cups.

2. Measure and cut the fabric. Allow the standard 1/2” seam allowances for the top and bottom edges and, if the flag you're making has stripes, allow 1/2” more on the side(s) that is to be joined to another color. The “fly”, the end that flies in the breeze, should be increased by 2” in order to reinforce it and triple-stitch it. The “hoist”, the end that gets hoisted up the halyard, should have a 1” allowance, to allow plenty of material to add webbing. I use double-stick basting tape to keep everything in place. Use double-stitching on the top and bottom hems as well as for the joining of stripes. Remember to mark which end is up so you avoid making any upside down flag … a grievous error and a show of disrespect to your host country.


this end up

3. Next sandwich the “hoist” end of the flag (the end that gets hoisted up the halyard) between two pieces of webbing. I usually sew a 24” piece of 1/8” line inside the sandwich so I can attach the flag to the halyard. You can also just sew up the webbing and then insert brass grommets to use with flag clips on the halyard. I use old jackline webbing to avoid having to buy new.
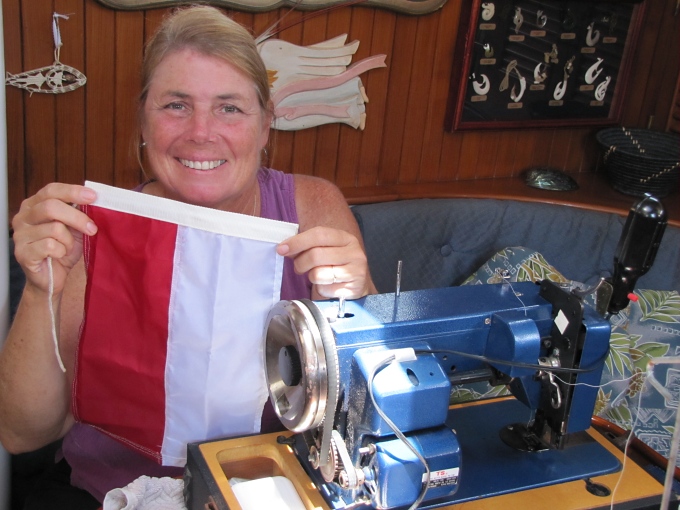
 

finished indonesian flag


That's it! You've got a courtesy flag … at least a simple one. If you want an easy first project, try making a “Q” flag. It's the solid yellow quarantine flag that must be flown on the starboard flag halyard when entering a new country.

Some shortcuts and ideas:

Mark the name of the country and the direction the flag should fly on the flag hoist in black permanent marker.

For most flags, the charge is not all that important. The color construction and overall design of the flag itself is what really counts

If you're in a boatyard or in a marina for an extended period of time, it's reasonable and acceptable to stow your courtesy flag and national flag while you're there.

Many Caribbean islands actually belong to Britain, France or the Netherlands. Having the courtesy flags from these three countries aboard goes a long way to being prepared for visiting these islands.

If the flag wears out while you're visiting, you can usually find inexpensive flags at local “dollar stores”. I just sew a reinforced hoist on them and they work out just fine for a short period and it's easier than making a new one.
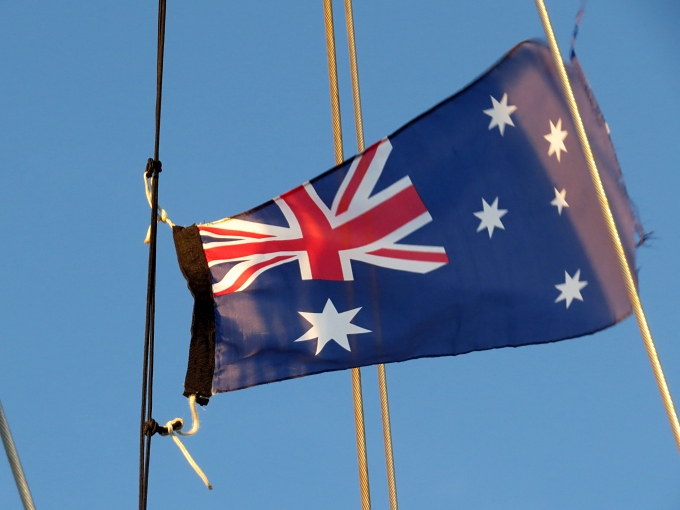
 

australian courtesy flag


Some countries have very similar flags, e.g. Ecuador, Venezuela and Colombia, though there are some subtle differences. I used the same flag for all three countries.

Since many courtesy flags incorporate the British ensign as part of their design, I bought several small (3x5”) flags for about $1/each on eBay and then incorporated them into the flags I made, e.g. BVIs, Cayman Islands, Bermuda, Turks and Caicos.

All design motifs on the flag (e.g. stars) are cut out of colored sail tape or felt and stuck or stitched in place. Once I make a cardboard pattern for a design, e.g. a star, I keep it for future use.

For more detailed information and illustrations, see my article “Courtesy Flags on the Fly” in the July 2013 issue of Good Old Boat.

And if you go to the Sailrite ad and order a free catalog, for instance, or a new sewing machine or some supplies, will you mention that you saw the ad on JustALittleFurther or the Nine of Cups website? We'd appreciate it.

7 Ways to Save Money and Time with a Credit Card Abroad

7 ways to save
7 ways to save

Whether you're traveling to Mexico or Australia, if you're out of the USA and plan to get cash with your ATM or use your credit card, be ready to pay some hefty bank fees unless you plan ahead. It took us awhile to figure out these money-saving tips and hopefully you'll benefit from them.

1. Exchanging currency.

oanda currency converter

In our experience, ATMs in the country you're visiting will provide about the best exchange rate there is. It's really not necessary to carry much US currency with you and traveler's checks can be cumbersome. Buying local currency before you visit provides an extremely poor exchange rate and buying from the local banks once you arrive isn't much better. Some of the worst exchange rates are at the airport at the arrival gates. If you must exchange money here for taxi fares or whatever, make it a small amount. Black market exchanges on the street are never a wise choice. We usually check with a currency converter on-line before heading ashore to get an idea of what we can expect. We hit the ATM as soon as we arrive and are always amazed to see colorful currency spewing from the cash machine. BUT...although you're getting a reasonable exchange rate, you may be paying exorbitant ATM bank fees. Read on.


2. ATM fees – getting hit from both ends

westpac bank
westpac bank

Depending on your bank, you can be assessed an ATM fee on the USA side, as well as well as another fee on the cash dispensing side. And they really add up quickly. We have a Bank of America account in the US that does not charge any fees for use of international ATMs if they are part of the Global ATM Alliance. Check with your bank to see if they have a similar arrangement. Additionally, even if YOUR bank doesn't charge, the dispensing cash machine may impose a fee...sometimes a percent of your withdrawal amount or, more frequently, a fixed fee of $5+. As if that wasn't enough, some ATMs limit the amount you can withdraw at one time to $100 - $200 and charge you another fee for each withdrawal. Bank of America's reciprocity agreement with several worldwide banks, Scotia Bank in Canada and the Carib and WestPac in the Pacific, Australia and New Zealand, for instance, have saved us a tremendous amount in bank fees.

3. Have more than one credit/debit card.

visa mastercard logos

I know this sounds redundant, but we've visited some places that do not take Visa cards and others that don't take Master Card. Forget American Express and Discover unless you're in a larger metro area. By the way, look for the Visa and Master Card logos to see if they're accepted. I asked about using our Master Card in one place and they said they didn't accept it. In actuality, they did accept Master Card, but called it by another name, i.e. EuroCard.

4. EFTPOS.

Electronic Funds Transfer at Point of Sale. This is widely used in New Zealand and Australia and it took awhile for us to figure it out. It's a debit card, but we found it doesn't work everywhere. In Australia, for instance, unless you have an in-country bank account, the charge will often be rejected. This is unfortunate when you're trying to buy fuel at a fuel dock that is unattended. We've found that if you choose “credit card” instead of “debit card” when prompted by the machine, it will most times, accept the card and you're on your way.

5. International bank transaction fees.

This is a biggie. It can add an additional 3% to your purchases. This is the amount the credit card company tacks on as a service fee for your international transaction. This means that $1,000 you just spent for boat parts or a hotel bill is now costing you $1,030. We found that Capital One credit cards do not charge an international fee. This saves hundreds and hundreds of dollars on fees if you travel internationally pretty much all the time as we do.

6. Let the credit card company and bank know where you are.

Let your bank and credit card company know that you're traveling aboard. It saves time and embarrassment if they know you're planning to be in Australia and the international charges start coming through. Usually you'll have to update your location every 90 days or so. Who the heck travels for longer than that? Except us and other cruisers, that is?

David at ATM
David at ATM

7. Watch out for scams.

Don't let a stranger “help” you with your ATM transaction. Even if you don't know the language, you'll be able to figure it out.

Don't let strangers hover around you when you're inputting your information. We've politely asked people to step back a bit when making an ATM withdrawal.

Don't use the ATM if there's an external reader on it or anything that looks out of the ordinary. We found an ATM like this in Peru one time and a clever, helpful fellow nearby who told us this was the newest protection device for ATMs. Just slide your card through the external reader and then do it again when prompted. Really?

Got your cash? Put it away quickly and securely before leaving the ATM.