The Blue View - Finding DC Electrical Faults
/Note: This blog is the condensed version of the article I wrote for Good Old Boat magazine in the June 2016 issue. For the complete version, visit their website at www.GoodOldBoat.com.
Introduction
The electrical wiring on the typical boat has a tough life. The combination of salt, water, copper wire and electricity inevitably leads to poor connections, faulty circuits and corrosion. With a little time and persistence, some basic tools and a plan of attack, it is usually not that difficult to ferret out and correct those pesky electrical problems.
Test Equipment
Some electrical problems can be found just by observation - a green, corroded terminal or a broken wire, for example, are usually easy to spot. Most electrical faults, however, will require at least a basic inventory of test equipment. The following is a list of test equipment ranging from the most basic to the more specialized.
Test Lamp
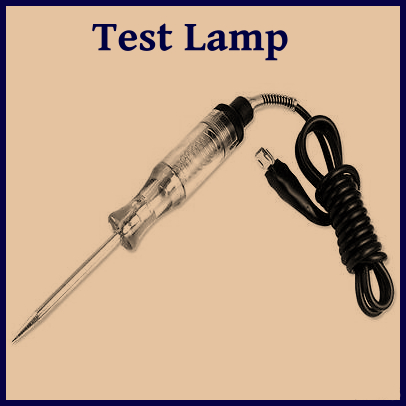
This is the most basic fault-finding tool. Connect one wire to ground and the probe tip to the circuit being tested, and if the bulb lights, there is a voltage present. A test lamp is a quick and easy tool to use and will help find blown fuses, broken wires or defective breakers. They typically cost a few dollars, or you can make your own by soldering wires to a bulb or bulb socket. If you buy one, make sure the test lamp is intended for DC circuits – most test lamps sold at hardware stores are designed for household AC circuits and won't light up when connected to 12 or 24 VDC.
Inexpensive Multimeters
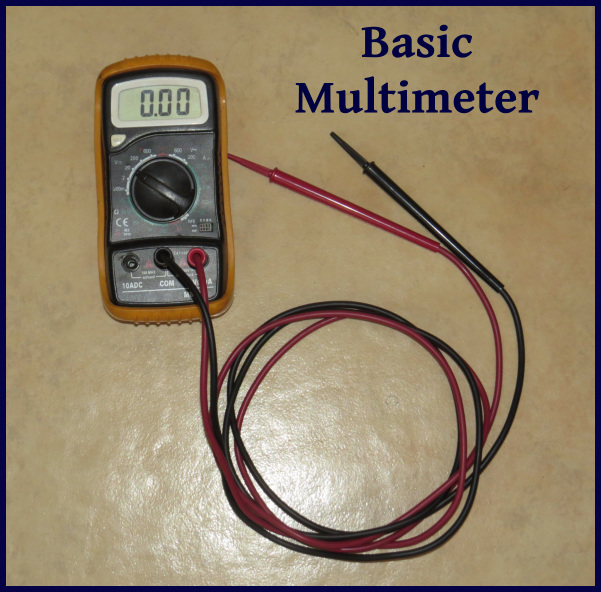
For a few dollars more, typically between $10 and $35, you can purchase a basic multimeter, and no boat should be without one. A multimeter allows you not only to determine whether a voltage is present, but to quantify it as well, e.g. is the voltage at the positive power terminal of that flaky VHF 10.5 volts or 12.5 volts? It will also measure DC currents up to about 10 amps, and make resistance measurements.
High End Multimeters
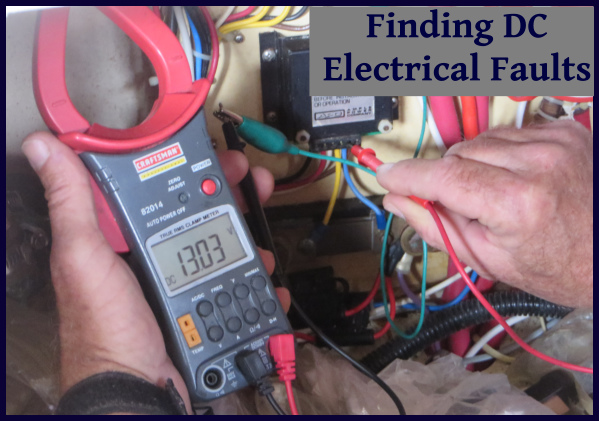
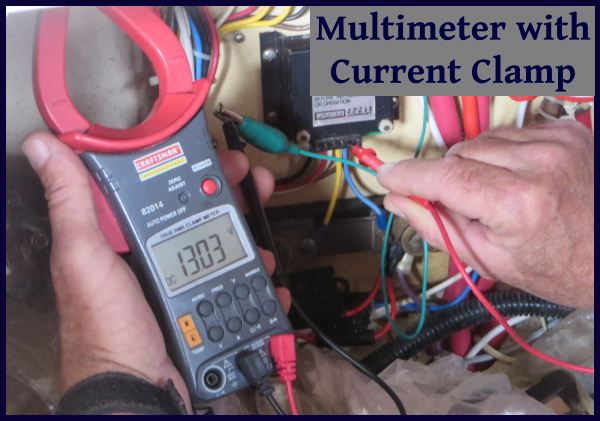
The next step up is a multimeter with a DC current clamp. An inexpensive multimeter can measure small DC currents, but the multimeter must be in series with the circuit to do so. For example, if you want to measure the amount of current your refrigerator compressor is drawing, you must remove one of the power wires, then connect one lead of the meter to the wire and the other lead to the terminal. If the current is more than 10 amps, the internal fuse of the meter will blow. To measure the same current using a multimeter with a current clamp, all that is necessary is to clamp the current probes over one of the power wires and set the meter to measure DC current. The current clamp is very easy to use and will typically measure currents exceeding 400 amps – more than adequate for the circuits on a typical boat. The price for a multimeter with a DC current clamp ranges from about $40 to $250
Jumper Wires
I keep a cache of jumper wires of various lengths, each terminated with alligator clips. The shortest is about 6” long, while the longest is about 30'.
Finding and Correcting Faults
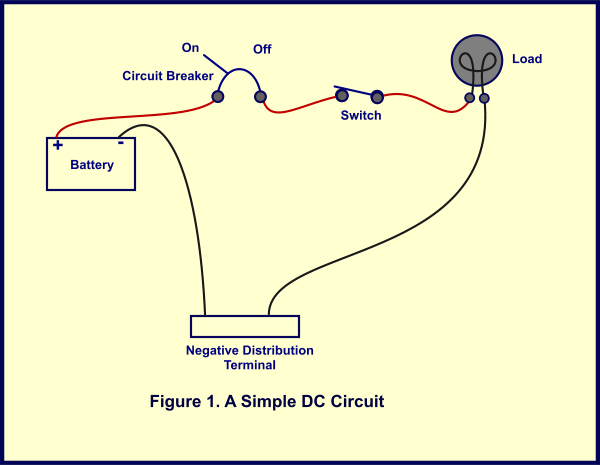
A basic DC circuit aboard a boat is shown in Figure 1. A wire leads from the battery's positive terminal, through some sort of circuit protection device, like a fuse or breaker, through a switch, and then on to the load, whether it be a lamp or a windlass. A return wire is used to complete the circuit from the load back to the negative distribution terminal, and then to the negative terminal of the battery.
In a normal circuit in good condition, when the circuit breaker is turned on and the switch is closed, current flows to the load and the lamp lights up.
If the lamp doesn't light or the windlass doesn't turn, I have a number of steps that I follow to determine the cause of the problem. Before diving in, however, I first think about any clues. Was something recently changed? A new circuit added or modified? Do some parts of the circuit work while others don't. I remember more than one instance where I modified a circuit to add some new gear and in the process, inadvertently disconnected something else. Often the newly introduced problem didn't become apparent until weeks later.
Next, I do a check for obvious problems. Is the breaker on? Are there any fuses in the circuit, and if so, are they blown? Are any of the connections corroded or questionable? Do the terminal blocks and splices look good?

If I haven't discovered the problem by now, I get out my trusty multimeter and jumper wires, and start checking voltages. A very likely place for the fault to occur is in the load itself … the bilge pump has pumped its last drop of water, the LED light has emitted its last photon or the windlass has hoisted its last foot of chain. I set the multimeter to DC volts and to the appropriate range. Once all the switches and breakers in the circuit are in the “On” position, I measure the voltage across the load as shown in Figure 2. If I measure a voltage close to the battery voltage, then the problem lies in the load.
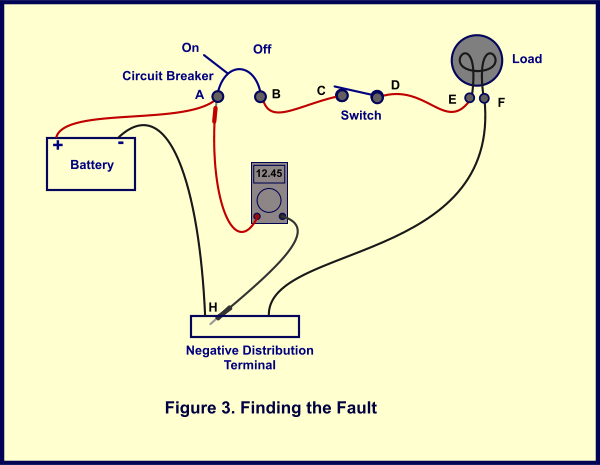
If the problem lies elsewhere, I methodically work my way through the circuit until I find it. Figure 3 illustrates the same DC circuit with several test points added. My plan of attack is to check the voltage at each point until I find the fault.
Using jumpers as necessary, I attach the negative lead of the multimeter to the negative distribution terminal, (if your boat doesn't have one, connect the negative lead directly to the negative terminal of the house battery) and starting with Point A, check each voltage in the circuit. If I see a voltage close to the battery voltage at Point A, but not Point B, I know there is a problem with the breaker. If I see the correct voltage at Point B, but not Point C, I know the fault lies in the wiring between the breaker and the switch. I continue working my way through the circuit until I find the problem. The only point I shouldn't see a voltage is at Point G. If there is a voltage there, I know there is a break in the return wire.
Additional Tips
In a perfect world, the fault would be readily apparent. The switch is defective and there is no voltage at Point D, for example, or there is a voltage at Point D and not Point E, indicating a broken wire between the two. Many times, however, the problem is more difficult to figure out. Here are some additional tips that might help.
- There are many times when I can't access a particular point to measure the voltage. I sometimes use sewing needles to pierce the wire to make contact with the conductor, then connect it to the multimeter with a jumper wire. When I'm done making the measurement, I use silicone caulk to seal the hole.
- Many times a problem won't be apparent unless there is a substantial current flowing through the circuit. A windlass, for example, has a very high current draw. If the breaker or foot switch has dirty contacts, voltage measurements taken while the windlass is idle may all appear normal. The same measurements taken while the the windlass is energized may show a large difference in voltage. The same is true for any device with a large current draw – a refrigerator compressor, starter motor, autopilot drive, etc. Make sure you make the voltage measurements while the load device is energized. This may require the assistance of a helper on occasion.
- I don't look for just the presence or absence of a voltage. If I see 12.45 VDC at one point, and only 11.20VDC at the next, I know there is a significant voltage drop between the two points. The usual culprits are corroded terminals or wires, or dirty switch contacts. If it is a new installation, another possibility is that the conductors that are too small.
Good hunting!