

Blue View – Publishing Your Own Book – Pt. 2
/This part is all about templates.
When I open a new document in my word processor program – whether I’m using MS Word, LibreOffice, or OpenOffice – the paragraph and page styles are usually set to the default style, and 99% of the time, the default style is just fine for what I’m doing. I just start typing my document, whether an article for Good Old Boat Magazine, a blog or a letter, and use the default settings for font, font size, indenting, etc. If I want to change the font or font size, make some of the text boldface or italicized, it’s easy to highlight the text and make the style changes that I want.
I could do the same with my book manuscript, but using the default settings of my word processor will make the process of converting my manuscript into book form considerably more difficult. For example, let’s say I want the beginning of each chapter to have the chapter number and title in a bold Liberation Serif, with a font size of 24. Further, I want the chapter to start on a new page, and add the equivalent of four lines of spacing between the header and the first line of the first paragraph. Finally, I want the first character of the first paragraph to be a ‘Drop Cap’, and the font to change to Liberation Sans with a font size of 12.
One way to accomplish this with my word processor would be to go to the beginning of each chapter and format each title the way I want it. There’s several steps involved, so it will take a few minutes to change the font, font size, indentation, alignment and spacing on each chapter title. Next, I would add the ‘Drop Cap’ to the first paragraph and change the font, font size, etc. Not too difficult, but then, of course, I have to repeat the process again with each chapter. There’s a good chance I will have to use different formats for the eBook versions versus the print version, however. For example, the eBook readers don’t handle consecutive line returns well. So, once I had the printed book version done and saved, I would go back through and modify the beginning of each chapter once more to make the eBook readers happy, and save this version. Now suppose, after completing all this, I decide I really like the Trebuchet font better than the Liberation. There’s not much chance I’d want to go through the entire process again, just to change the font – no matter how much I like Trebuchet.
A much better way is to take advantage of some of the lesser known features of my word processor. All the better word processor programs allow me to define different styles for any number of different paragraph types that might be used in the eBook. I can create a style that defines just how my chapter title should look. Once I’ve created the style, I can name it - ‘Chapter Title Style’, say - and save it. Likewise, I can create styles for my book title, header, footer, and text body and save them. In addition, I can specify how special paragraph types will look: first paragraph of a chapter; a quote with a drop cap quotation mark; a highlighted, bold style for hints or warnings; bullet lists; numbered lists… Once I’ve created all these styles, I can save them all in what’s called a template.

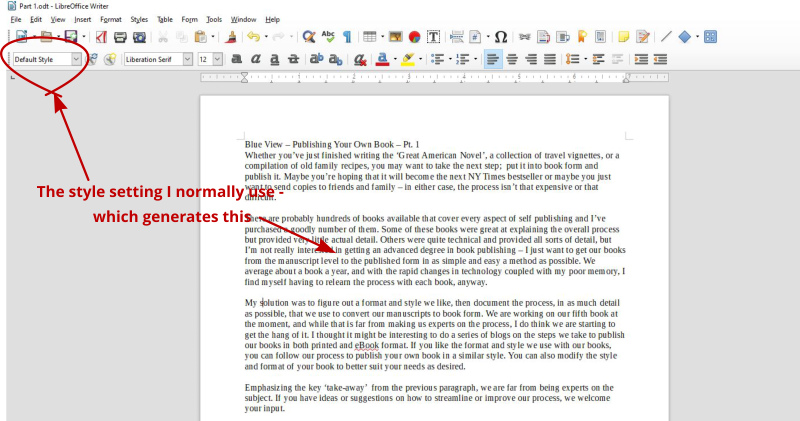
Example of a page layout and style I like
If I decide later that I want to change a style – maybe change the font used for my chapter titles - I can make the change to the ‘Chapter Title Style’ and the new font is immediately applied to every chapter title throughout the manuscript. Additionally, if I want to use a different style for the formatting of the printed book versus that used for my eBook versions, I can save the two different templates. Word processors are way cool!
The different paragraph styles I use for our eBooks are listed below:
Cover Title. The title of the book as it will look on the title page.
Cover Sub-Title. Sub-title, if any. We use “Just a Little Further” as our subtitle,
Cover – Author. How the author’s name will look on the title page. I use this same style for the copyright information
Heading 1. Used for chapter titles and the TOC title. These headings are included in the TOC.
Heading 2. Used for section headers. Included in the TOC.
Text Body – New Chapter. The first paragraph of a new chapter.
Text Body. A normal paragraph.
Contents – Chapter. How the chapter names will look in the TOC.
Contents – Sections. How the section names will look in the TOC.
Page Header – Title. I like to put the book name in the header of the odd numbered pages – print version only.
Page Header – Author. The author’s name goes in the header of the even numbered pages – print version only.
Page Footer. I put the page number in the center of the footer of each page – again, only in the print version.
Quotation. Uses a drop cap quotation mark to make the quote stand out.
Highlight. A bold, shadowed style with a drop cap character – usually an exclamation mark – to make hints, comments and warnings stand out.
Caption. Used under pictures, sketches, tables, etc.
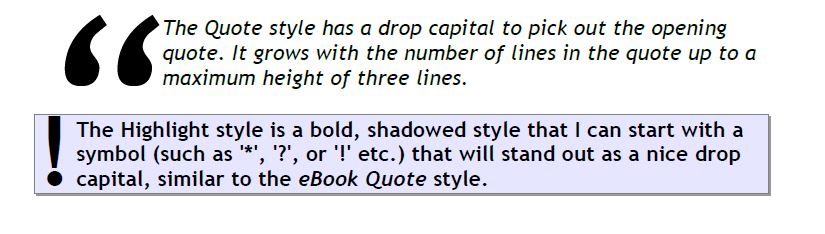
Examples of the quotation style and the highlight style
I can also define my page parameters: page size, headers and footers, number of columns, etc. I can even specify a different header on odd versus even pages, and, of course, I can create a different page style for eBooks versus printed books. These page parameters are also saved as part of each template.
That’s a lot of different styles and it does take a fair amount of work to figure out and create them all. Fortunately, I didn’t have to start from scratch – there are a number of templates available online that can be downloaded and used by my word processor. The prices range from free (my favorite) to $50 or so. Two that I like are available from Mark Hughes - theWebalyst and Robert Woods. Both are free to use in making your own eBook. (These particular templates are intended for use with LibreOffice – my word processor of choice – but there are many more that can be used with MS Word, if that’s what you use).
None of the downloadable templates I found matched my preferences in every respect, but they were a good start. They are quite easy to modify, which is one of the topics of Part 3 of the series. I’ll also talk a little about LibreOffice and why I like it – beyond the fact that it’s free - and I’ll show how I create different templates for both a printed book and an eBook.