Blue View – Publishing Your Own Book, Part 6
/Designing the Cover
Everyone has heard the old expression, “You can’t judge a book by its cover”. While that’s certainly true, most of us do just that.. at least in the literal sense, if not the figurative sense. If I pick up a paperback and there’s a picture of a half clad woman next to a bare chested Chippendale-built guy on the cover, I make the snap judgment that the book is a bodice-ripping romance novel. Likewise, it’s usually easy to tell, just by looking at the graphics and title, whether the book is a murder mystery, a suspense novel or a non-fiction book. If I still think the book might be something of interest to me after a scan of the front cover, I’ll read the synopsis and the author’s bio on the back, and then make the decision as to whether or not to buy it. There are, of course, other things that influence my reading choices – like have I read other books by the same author, or have I read good (or bad) reviews about the book, but generally for me, the cover is the biggest part of the decision process.
For an eBook, the cover is just as important. When perusing digital books on Amazon or my local library website, only a thumbnail of the front cover is displayed, but I still make an initial decision as to whether the book looks like something I’d be interested in based on the cover. If the book looks interesting based on the cover, I’ll delve deeper to make the final decision. Is there a synopsis in the description? Anything about the author? Can I look inside at the first few pages? Is a sample chapter available? No matter how good the book might be, however, if the cover looks amateurish or not something to my liking, I probably won’t be buying or borrowing it.
Thus, in my mind, the cover of the book, whether the print or the digital version, is extremely important, so let’s make it good. The last time I went through the process a few years ago, it required a good graphics program and a lot of time… now, however, there are some great tools to speed up the process.
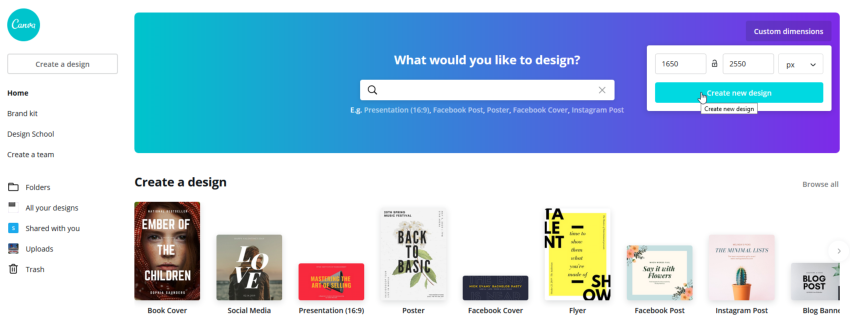
This time around, I used a free online software program named Canva to create the front cover. The printed version of the book requires a high resolution cover image – at least 300 dpi. For our book, which will be 5.5” x 8.5”, this translates to an image of 1650 pixels x 2550 pixels. Canva makes this easy to do. I start a new design using custom dimensions as shown below.
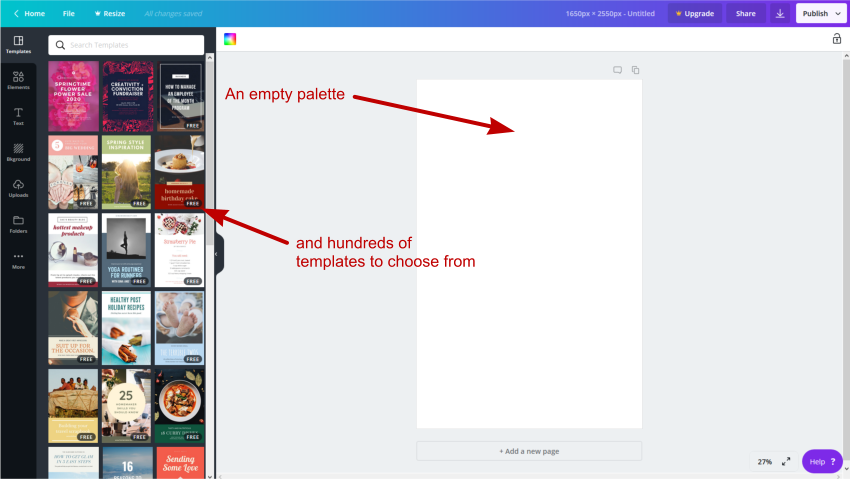
Canva opens a blank palette and displays a number of cover templates on the left side of the screen.
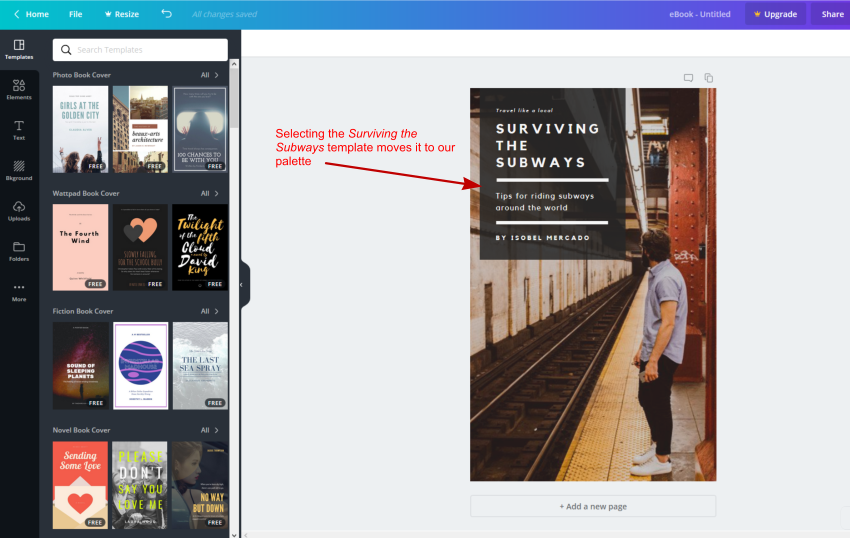
There are literally hundreds of templates to choose from, most free or available for a small fee, and I scroll down until I find one I like. In this case, I chose one called Surviving the Subways. By clicking on it, the template gets loaded into our palette.
I want a different image on the cover, so I delete the stock image by clicking on it and clicking on the trash symbol in the upper left corner.
Delete the stock image, which leaves a plain background
For my cover, I can either use one of the thousands of stock images Canva provides or upload my own. To browse through the Canva images, click on ‘Elements’ and scroll through the candidates, many of which are free, or at most a dollar or two to use. If I want to upload my own image, I click on ‘Uploads’, and then ‘Upload an Image’, which will allow me to find the file on my computer and upload it.
Canva fits the chosen image onto the palette, cropping it as necessary. It took me a few tries to get my photo to fill the area without too much cropping. I used a photo editing app to resize the photo until it was the right size. Alternatively, the enhanced version of Canva (the purchased version) will resize the photo rather than crop it.
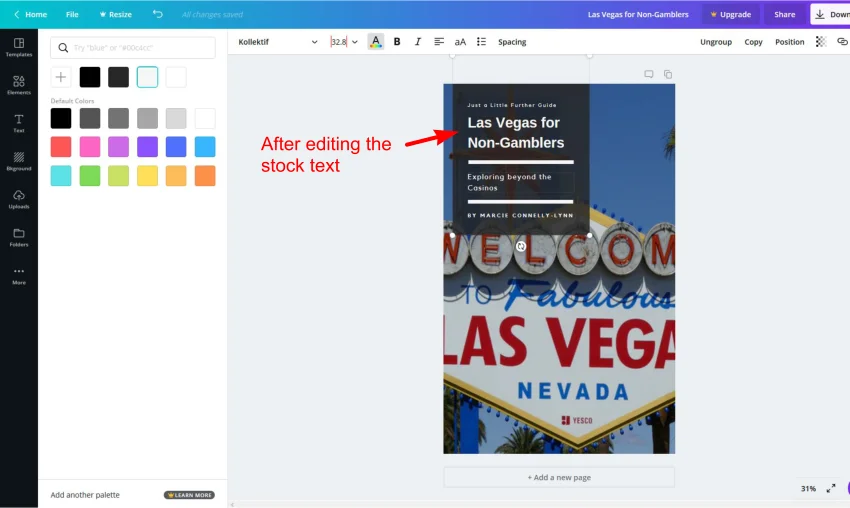
Next, I edited the text. I clicked on ‘Text’, which opened the text dialogue, and modified the text.
If I’m making a print copy of the book, I’ll also need a back cover. I start by clicking on ‘Add a New Page’ and go through the same process, perhaps using a different template and image. This is where I’ll put the compelling synopsis and quotes from famous people who read and liked the book (if we had any – LOL). I may add a photo of Marcie and a short bio. I also need to leave room for the barcode, which will be added later.
The last step is to download the cover images. Click on the ‘Download’ button, select .PNG format and download it to your computer.
Now that we’ve designed our cover, the next step is to add it to our manuscript and make our book – the topic of next week’s blog. See you then.


