

The Blue View - A DIY HF Antenna
/Probably 95% of the offshore sailboats we see that have either a marine or HAM radio use a long-line type antenna. This is simply a wire that runs from just above the deck to the top of the mast, with insulators at each end to electrically isolate the wire from the other metal parts of the boat. While there are a few subtleties to be considered, the antenna itself is quite simple. In this blog, I'll describe how we built a simple, inexpensive antenna. The wire is actually only half of the antenna. The other half consists of a ground plane or counterpoise. On a land based antenna, the earth is sometimes used as the ground plane, but often a network of wires is run radially out from the base of the antenna, and this type of ground system is called a counterpoise. On a boat, the seawater acts as a great ground plane as long as there is a good connection between the antenna ground and the water. In next week's blog, I'll talk about options for the ground plane/counterpoise design, and what we used.
Finally, in the third part of this series of blogs, I'll talk about other antenna options. I know – it doesn't get much more exciting than this, but please try to control your enthusiasm.
First, a caveat. While I am an electrical engineer, my expertise is not in radio electronics. (Actually, I'm not sure where my expertise lies, but I know it's not antenna design). I understand the basics, but there are a lot of other websites and blogs that were written by people far more knowledgeable on the subject than me, and I've provided links to a few of these at the end of this blog. What I plan to accomplish here is to describe an inexpensive design that works for us on Nine of Cups.
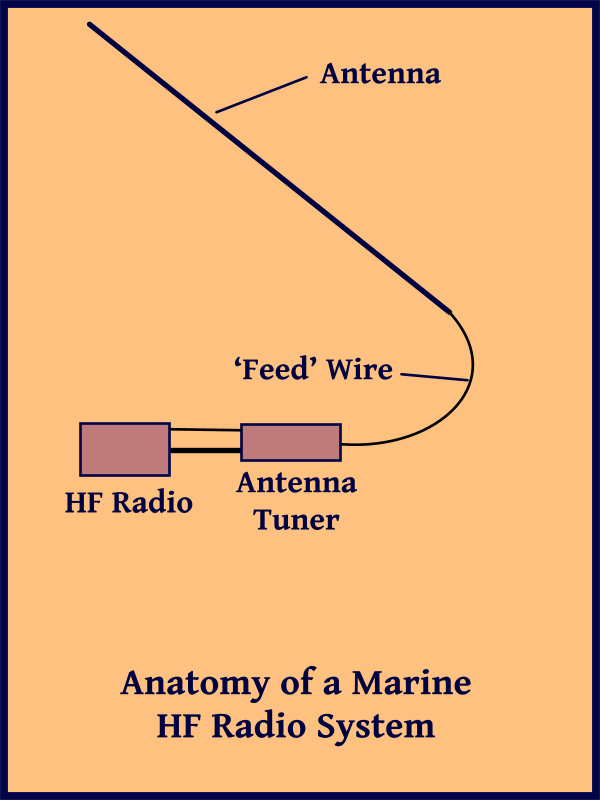
The sketch shows an overview of the radio system. The signal from the radio first passes through an antenna tuner. If we were only planning to transmit at a single frequency, we could adjust the length of the antenna to optimize it for that frequency. When we change frequencies, however, a mismatch between the radio and the antenna occurs, resulting in power being reflected back into the radio instead being transmitted. If the mismatch is big enough, the radio will actually be damaged. The tuner uses variable inductors and capacitors that are switched into and out of the circuit to match the radio output impedance to the antenna's input impedance, thus protecting the radio from the reflected radio waves. A common misconception is that the tuner 'tunes' the antenna to improve its performance at different frequencies. In actuality, the same mismatch and power losses still exist, only now it is between the tuner and the antenna. A good tuner will be able to withstand a large reflected wave and still protect the radio.
The radio connects to the automatic antenna tuner via two cables. One is a coaxial cable that carries the radio waves. The other cable provides power and control signals for the tuner. With our Icom radio, whenever the transmit frequency is changed, the radio sends a command to the automatic antenna tuner, and it matches the radio and tuner to the new frequency.
The output of the tuner is connected to the antenna via an insulated, single conductor wire. (I'll call it a feed line for simplicity, but it is actually part of the antenna system rather than a feed line.) It should be kept as short as possible. I mounted our tuner in a locker in the aft cabin to put it as close as possible to the actual antenna. The 'feed line' should be separated from any grounded metal like stanchions. I used small, 3” PVC tubing as separators.
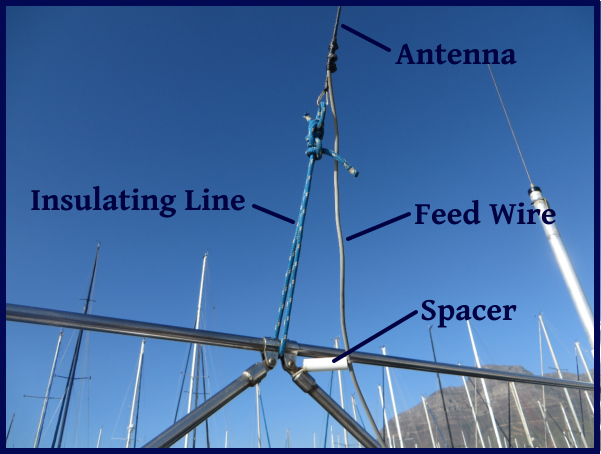
The antenna itself is a single, dedicated wire that runs from above the stern to the top of the mast. Over the years I've used uninsulated galvanized wire, electrical wire and even lifeline wire for our various antennas. Anything larger than about AWG8 wire is probably large enough as long as it is strong enough to be strung to the mast head and tensioned, and is able to withstand the occasional errant halyard. I spliced a loop into both ends of the wire using small hose clamps.
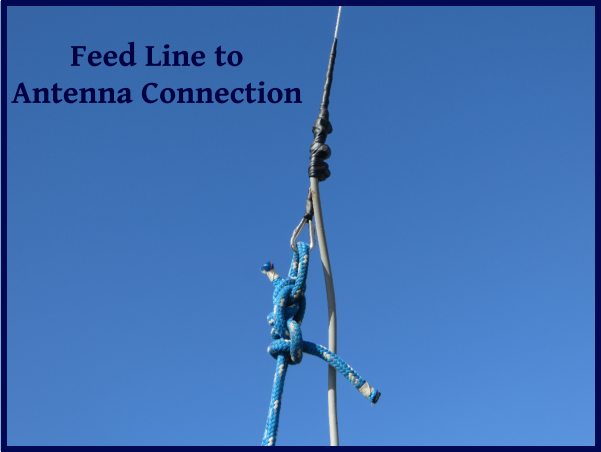
To connect the feed line to the antenna, I stripped several inches of insulation from the end of the feed wire and if the antenna I was using had an insulating cover, I removed several inches of insulation from it as well, just above the loop in the end. I wrapped the feed line around the antenna wire, secured it in place using cable ties, then weatherproofed the connection with amalgamating tape. Riggers' tape also works well.
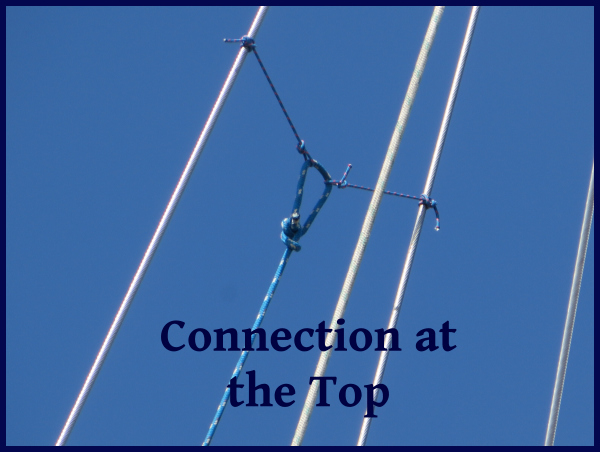
I insulated the ends of the antenna from the connections at either end using short lengths of line. Nine of Cups has a double backstay, so I attached the antenna to both backstays near the top. The bottom was attached with line to the pole supporting our windgen. If we had a single backstay, I would have attached the top to a tang on the mast, and the bottom of the antenna to the stern on either the port or starboard side, ensuring that it would always clear the mainsail.

Stay tuned for Part 2 in next week's Blue View.
Links: