The Blue View - Chainplate Issues
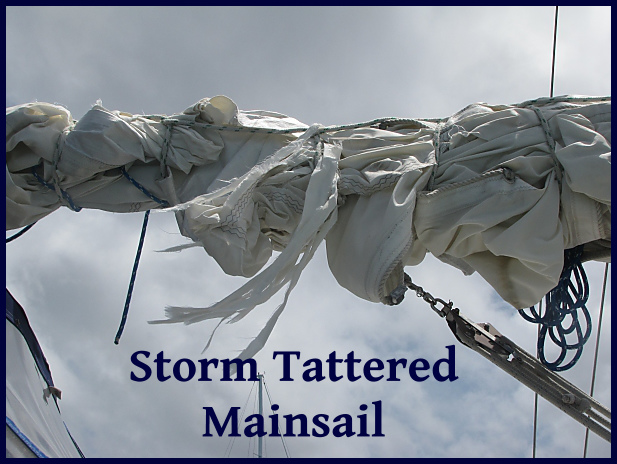
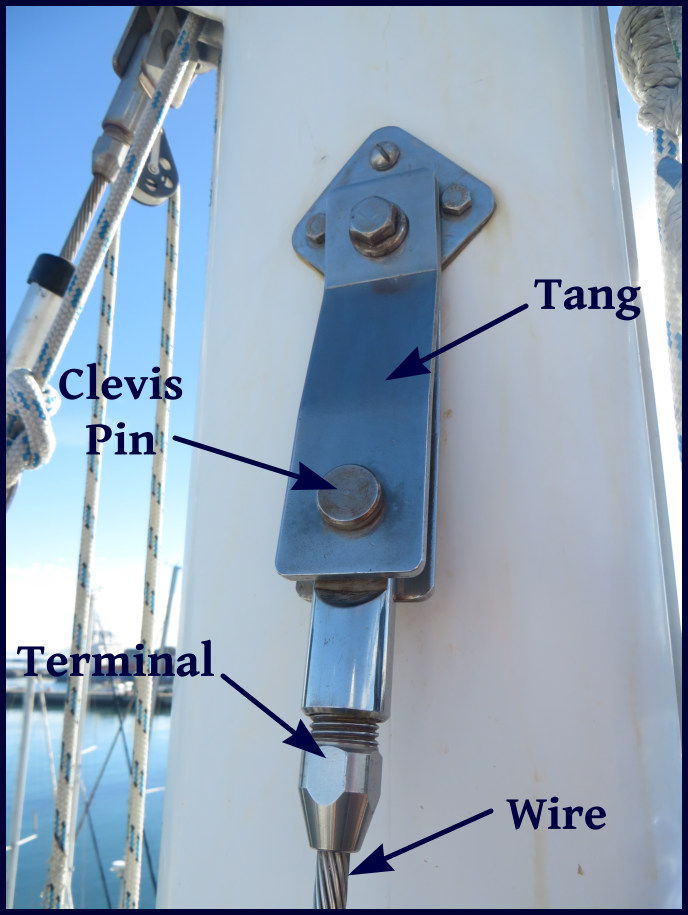
The typical lifetime of the standing rigging on a sailboat is 10-15 years, while the typical lifetime for the chainplates is 20 years. We replaced the rigging in Colombia about 13 years ago, so it is now due to be redone. The chainplates, however, were never replaced, and are now well past their “use by” date. They are totally fiberglassed into the hull, making a thorough inspection impossible without removing a lot of interior  cabinetry and grinding out large sections of the hull. I routinely inspect the exposed portions, and while they never showed the least sign of internal corrosion or water ingress, I knew we were sailing on borrowed time. crevice corrosion

A few days ago, when I was doing our pre-passage rigging check, I noticed a salty, vinegar-smelling substance coming from the chainplate cover on one of the starboard shrouds – not a good sign. There was no doubt in my mind that it was now time to replace the old chainplates, and since the rigging was nearing the end of its life, I decided to replace it as well. In addition, if we were going to get everything done before our South African visas and the customs permit on the boat expired, we would have to hire the work out instead of doing it ourselves. This was going to be an expensive few weeks.

refit chainplate

Because it was not feasible to remove and replace the old chainplates, my plan was to attach stainless straps to the outside of the hull. Holes would be drilled all the way through the hull and the old chainplates, and the straps attached to the hull using bolts secured on the inside with nuts and washers. I've seen this done on another Liberty 458, as well as several similarly designed boats. If the straps are polished, the bolt heads countersunk flush, and the carpentry done right, the end result is, hopefully, not only be strong, but attractive as well.

Cape Town is a great place to get boat work done. They have an active boat building business, and there are hundreds, if not thousands, of local boats, as well as many more boats passing through, all of which support a number of skilled marine tradesmen. Once the decision was made to replace the chainplates, I wanted the advice of experts to make sure I did it right. I talked with the local marine services expert, who quickly contacted a marine architect (to evaluate and design the chainplates), a rigger (to  replace the standing rig), a stainless steel fabricator (to make the chainplates), a marine carpenter (to modify the cap rail, rub rail and interior cabinetry with minimal damage), and a shipwright (who will be drilling the holes). With all these experts, what could possibly go wrong?

Photos were taken and sent to the marine architect, and the various experts conferred with each other. A few days later, Dave, who owns the marine services company called to say the plans were done and the quote prepared. If I came by and signed off on it, we could get started. I checked the quote and the drawings, and thought the price was quite reasonable. But then I noticed there weren't enough chainplates in the quote – we need eight and there were only six in the quote. Dave thought about it, made a trip down to Nine of Cups, and agreed that the quote was wrong. He said he would get it redone and get back to me.

The next day Dave called again and said the quote was revised. I stopped into his office and looked everything over. The price, as expected, had gone up because of the added chainplates. In South Africa, as well as most of the world outside the U.S., everything is done in metric. I'm used to seeing things in millimeters and centimeters, but I still have to convert a dimension to feet and inches to get a feel for the size. While I was checking the drawings, I saw that they were 350mm long, and mentally estimated that that would be equivalent to about 13-14 inches. This just didn't seem long enough to me, so I asked for a copy of the drawing to take to the boat and make some rough measurements, just to convince myself everything was right. Sure enough, the chainplates were too short. Some of the bolts would have passed through the bulwarks instead of the hull, and two holes in each chainplate would have been drilled right into the deck.

Dave apologized again, and conferred with the marine architect who lengthened the chainplates and reworked the drawings. The new quote was considerably higher, and had yet another problem. The fourth quote appeared correct, but was just about double the first quote - not so reasonable anymore. I signed off on it and the stainless fabricator was given the go-ahead.

carpenter delivers the news

That was Thursday. Friday was a holiday, and on Saturday the carpenter stopped by. I told him about the lengthened straps, and he pointed out yet another problem. The hull has a small step just under the rub rail. It isn't obvious because the rub rail hides it. If the chainplates are lengthened, we will need a spacer behind each chainplate, which may or may not be a problem. Dave will need to check with the marine architect on Monday, and hopefully, the machinist hasn't started on the chainplates in case there is another change needed.

Other than that, everything is going just fine.

The Blue View - Pre-Passage Rigging Check pt. 2

Deck Level

Note: this is Part 2 of our pre-passage rigging checks – the deck level checks. Part 1, in the last Blue View, detailed the checks I do aloft.

wire terminals

General Checks These are much the same as the general checks when going aloft. I do a close eyeball check on all the fittings and wire before cleaning the rust – sometimes the rust can point to a problem. Then I clean the fitting with a good metal wax and inspect the part again, looking for any cracks, distortions, worn or stressed parts, elongated holes, missing split pins, loose or missing bolts, etc. - in general, anything that doesn't look right. I also look closely at the wire for any strands that look cracked or broken. We have Stalock fittings throughout, but if we had swaged fittings, I would also check for cracked or swollen fittings. I renew any worn or loose whipping on line ends.

turnbuckles

Mast, Shrouds and Stays I first check the mast alignment. It should be straight side to side, but may have a slight curve aft towards the top. I check the tension in the stays and shrouds – they should all be tight and there should be minimal or no sag in the forestay and staysail stay. I closely check all the turnbuckles to make sure none are cracked or galled, and that the legs of all the split pins are inboard. I remove the cover over the mast boot and check for cracks or deterioration in it, as well as the mast collar. I check all the blocks at the mast base.

Chain Plates The chain plates attach the standing rigging to the hull. Ours pass through the caprail and are glassed into the hull. Except for the very tops, which are exposed, they are virtually impossible to inspect. I check them closely, looking for any hairline cracks, elongated holes, or signs of moisture that might be making its way downward.

chainplate

Boom Like the mast, the boom is aluminum and has a number of stainless screws attached to it, all of which are subject to galvanic corrosion, and I check each of these. A sure sign is bubbling or swollen paint around the screw head. I check the ends, connections, sheaves and welds for corrosion and cracks. I check the outhaul and reefing lines for smooth operation and any signs of chafe. I spend a few minutes examining the gooseneck for cracks and tightness.

gooseneck

Halyards, Topping Lift, Sheets My checklist for halyards, topping lift and sheets includes: Check all for chafing Check all fairleads, blocks and sheaves Check the mainsheet traveler for cracks and general operation.

Furlers Furler checks are a bit time-consuming, but I'd rather fix a problem here in port than at sea. Remove the sails and check both furlers for smooth operation. Flush the bearings with fresh water. Inspect the lower swivel, furler drum, etc. for any signs of corrosion, especially around the stainless screws. On our Harken furlers, I loosen and re-tighten each screw, adding Tef-Gel to any that show signs of seizing or corrosion. Check that all shackles are in good shape and properly seized. Check the furling lines for chafe, and inspect the fairleads and blocks.

Rope Stoppers, Clutches and Cleats I check all for burrs and tightness and check the operation of stoppers and clutches.

Tracks and Cars I check all tracks for corrosion, burrs, etc. Then, I check that all cars are secure and move freely.

Whisker and Spinnaker Poles Since I just reworked the whisker pole, I gave this check a pass. Usually, I would check both ends for cracks, deterioration, missing or loose rivets. Check the outhaul, topping lift and guys for chafe and insure smooth operation. I'd extract and retract the pole to check operation.

Lifelines We have Dyneema (actually Amsteel) lifelines, and really like them. (Here is a link to an article in Good Old Boat magazine on the subject – although I doubt this particular author knows what he is talking about.) They have two issues, however. First, Dyneema exhibits creep, which means the lifelines continue to slowly stretch over time and need to be re-tensioned every few months.  Second, the Dyneema should be replaced every 3-5 years, due to UV degradation. The degradation is not readily apparent, so it is important to keep track of how long they have been in place and when they should be replaced. I also check for any wear at the stanchions, and check all turnbuckles, pelican hooks and shackles for cracks. All split rings should be in good shape and facing inboard. Inspect the stanchions for cracks or looseness.

lifeline

So, what did I discover from our rigging check? Several small issues were corrected: Lifelines re-tensioned; several split rings needed replacing; first reef line, port side was chafed -  I was able to remove a few feet from the end and re-use it; a few screws were missing or loose on the stanchion bases; several lines needed re-whipping.

Unfortunately (or perhaps fortunately), a potential show stopper was discovered. The chainplates on the starboard side are showing some evidence of water ingress and possible corrosion. The chainplates are stainless steel, which is generally very corrosion-resistant and performs quite satisfactorily in marine environments.  It is very susceptible, however, to something called crevice corrosion. Crevice corrosion is a localized form of attack which is initiated when the metal comes in contact with moisture when there is a low availability of oxygen – such as in a crevice.  If moisture, especially saltwater, makes its way past the caulking around a chainplate and lies against the stainless, a perfect environment for crevice corrosion develops. Since the internal chainplates on Nine of Cups cannot be inspected without literally dismantling the cabinetry in the saloon, there is no easy way to determine how much corrosion has developed.

Losing a chainplate will almost certainly lead to losing the mast – not a pleasant prospect anywhere, least of all in the middle of a major ocean crossing. Many sailboats of the same vintage as Nine of Cups  that have glassed in chainplates have replaced them with external versions, heavy duty stainless steel straps that are bolted through the hull. We need to call in an expert or two to confirm our suspicions, but we are now thinking our departure from Cape Town, will likely be delayed.

Stay tuned...

The Blue View - Pre-Passage Rigging Check pt. 1

Upper Rigging

Before heading out on a major passage, I spend a day or two checking most of the systems aboard Nine of Cups. The engine, prop shaft seal, steering, bilge pumps, nav lights, thru-hulls, windlass, and a host of other items are all scrutinized and/or tested. Near the top of the list are the rigging checks.

up the mast

The rigging consists of all the lines, wires and metal parts that hold the mast upright (the standing rigging) and which hoist, move and control things (the running rigging). A single failure in the standing rigging will quite likely cause the mast to break. A failure in the running rigging will, at the very least, cause damage to the boat – a torn sail due to a chafed reefing line, for example. In the worst case, a running rigging problem can cause serious damage to the boat, or serious injuries to the crew – the combination of a jibe and a chafed boom preventer, for example, could cause the boom to swing with such force that it bends or breaks on hitting a shroud, and/or knocks a crew member overboard.

Even worse is that a problem with the rigging is most likely to occur when it is being stressed, like during a storm, causing even small problems to quickly become big ones. That small tear in the mainsail due to a chafed reefing line will, within seconds, cause the main to become totally shredded if it happens in the middle of a storm.

shredded sail

Thus, I think it is important to find and correct any problems before we leave. In this blog, I'll discuss the checks I do aloft, and in the next blog, I'll talk about the deck level checks.

Tools It is always a dilemma as to which tools to take up the mast with me. Take too many and it's hard to find the right one when it is needed. On the other hand, it's a hassle when I am up the mast and realize I need another tool. My compromise is to take the minimum I'm likely to need, and a small line, 60 feet (18m) or so, with a weight attached. If I need another tool, I lower the line, then tap on the mast to get Marcie's attention, and she attaches the tool to the line. Here are the basic tools and supplies I take with me: A large and medium sized screwdriver, both flat and Phillips; large needle nosed pliers, large pliers, adjustable wrench, metal polish or wax; rags, spray bottle of water; and a pencil and paper for taking notes. Sometimes I take a small digital camera to document potential problems  and take pictures for Marcie.

General Checks I usually go straight to the top of the mast and slowly work my way down. I do a close eyeball check on all the fittings and wire before cleaning the rust – sometimes the rust can point to a problem. Then I clean the fitting with a good metal wax (I like Collinite metal wax) and inspect the part again, looking for any cracks, distortions, worn or stressed parts, elongated holes, missing split pins, loose or missing bolts, etc. - in general, anything that doesn't look right. I also look closely at the wire for any strands that look cracked or broken. We have Stalock fittings throughout, but if we had swaged fittings, I would also check for cracked or swollen fittings. The aluminum (aluminium for you non-North Americans) mast probably has a hundred stainless screws attached to it, all of which are subject to galvanic corrosion, so I check each of these. A sure sign is bubbling or swollen paint around the screw head.

tang

Sailtrack Our sailtrack fits into a channel on the mast and is riveted in place. I check the track for loose rivets, especially where two sections join. I also clean the track as I work my way down. We often collect a lot of dirt and grime while in a marina, and Cape Town seems especially prone to it. I use a spray bottle of fresh water and a rag – nothing else. I used to use waxes and lubricants like SailKote, but I found that, while they make the track really slick for a short while, they seem to collect more dirt and gum the track up after a few weeks.

Lights I check all the lights for corrosion, questionable electrical connections and that they actually work. All our mast lights are now sealed LED lights, but when we had non-sealed lights, I opened them all up and checked for corrosion inside. Our tri-color and anchor lights at the top of the mast have an ambient light detector inside, and it is sometimes hard to fool it during the day. It is also difficult to see the LEDs in bright sunlight, so to check that these are working, I wait until dark, then turn them on, and either check them from the jetty or the dinghy.

Spreaders I check the welds and the connection to the mast. I look carefully at the ends where the shrouds contact the  spreaders – a good place for galvanic corrosion to occur.

furler

Furlers In addition to the general checks, I check the sheaves for cracks and the halyards for any chafing. If the upper furler bearings bind, the halyard will wrap around the furler, so I check that the upper swivels move freely. I check that all shackles are properly seized and that any knots look good.

shackle

Masthead All the general checks completed,  I then check the VHF antenna for corrosion and looseness, and inspect the wiring and coax connector. I check the wind instrument to make sure it turns freely and is not damaged, and disconnect the electrical connection to check for corrosion on the pins. I check all the masthead sheaves for burrs, and when possible, check that they turn freely.

The time required for all the checks aloft, including the time it takes to clean all the fittings and the sailtrack, is usually 2-3 hours for our double spreader rig. That's a long time to sit in a bosun's chair. I'm usually a little “stove-up” when I finally extract myself from the climbing gear and try walking again. Make sure you wear a hat and have applied lots of sunscreen – and don't forget to pee before going up.

Stay tuned for part 2 for the deck level rigging checks.