The Blue View - Decanting Propane

decanting propane One of the chores to complete before leaving Trinidad was to fill our propane tanks. Running out of propane on a passage, while not exactly life threatening, would certainly be a hardship. Actually, if I went a few days without my morning coffee, the first mate might be ready to jump overboard - or throw me to the sharks – so, truth be told, it might very well be a life threatening situation.

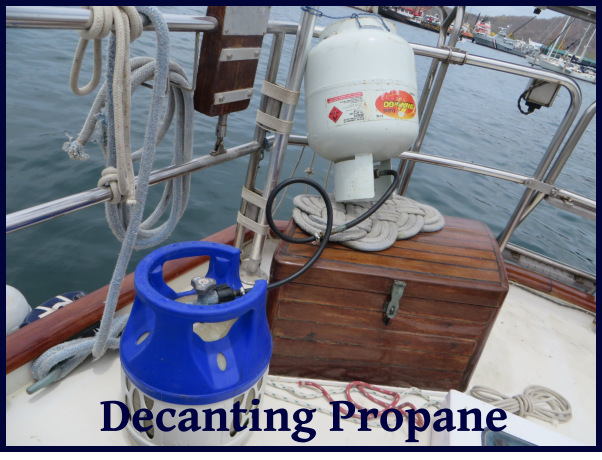
We have three tanks aboard Nine of Cups; two fiberglass 10 lb. (4.6 kg) tanks that fit down into our propane locker, and a standard 20 lb. (9.2 kg) steel tank that sits on deck inside a nice, made-to-purpose ditty bag. When one of the smaller tanks becomes empty, I refill it using the large tank.

In many parts of the world, it is expensive and/or quite difficult to get our tanks refilled. There are often places that will swap filled tanks for empties, or refill the local tanks, but just as often, either the tank fittings are different, or local codes prohibit the filling of any but their approved tanks, or there isn't a refill station within walking distance of Nine of Cups. So, we usually buy or borrow a local tank, and use it to fill our tanks.

full tank

Decanting propane isn't difficult. A full tank contains mostly liquid propane with a little propane vapor at the top. To move the liquid propane from the full tank to the empty tank, I connect the two with a hose, set the full tank upside down and higher than the empty and open the valves on both tanks. The liquid propane runs out out of the full tank and into the empty. That's the principle anyway – in reality there are a few complications.

bleed screw

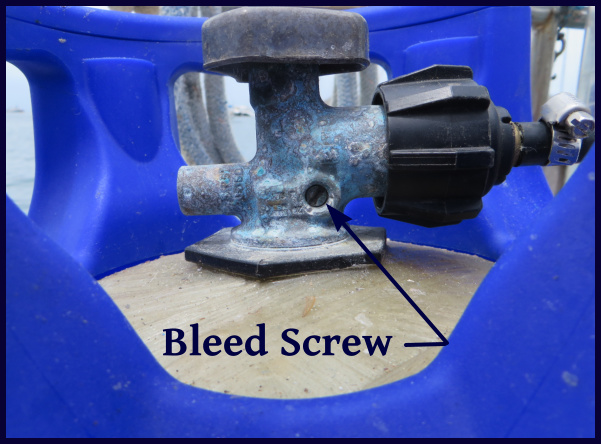
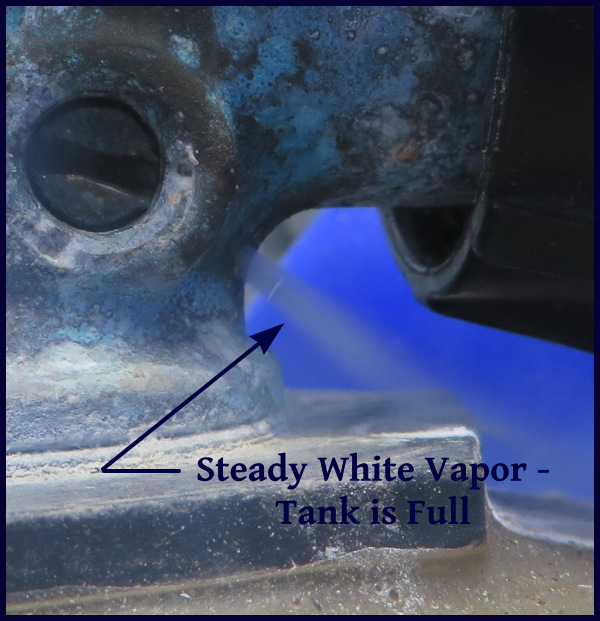
  • The liquid needs a little help to flow into the empty tank once the vapor pressure builds up in the partially filled tank. Most tanks have a small bleed screw that allows the vapor to escape as the tank fills up. I can hear the flow of liquid as it moves from one tank to the other, and once I hear the initial flow of liquid slowing down, I loosen the bleed screw until the vapor begins to escape from the partially filled tank. I watch the escaping vapor - it will be clear with spits of white liquid until the tank is full. Once the tank is full, the escaping propane will turn white, and I know it's time to tighten the bleed screw. Some propane is lost using this technique. If there is no bleed screw or I want to avoid losing any propane, the liquid from the full tank will eventually fill the empty without loosening the bleed screw, but it sometimes takes 24 hours or so.

vapor

  • When I set the full tank upside down, I keep it at a small angle rather than positioning it completely vertical. It likely has rust in the bottom which I don't want transferred to my tanks.
  • If I am not using the bleed screw, before opening the valve on the empty tank, I loosen the connection between the tanks so any air in the line will be purged and not forced into the empty tank. When using the bleed screw, this step is unnecessary since air is lighter than propane and will be purged via the venting process.

fittings

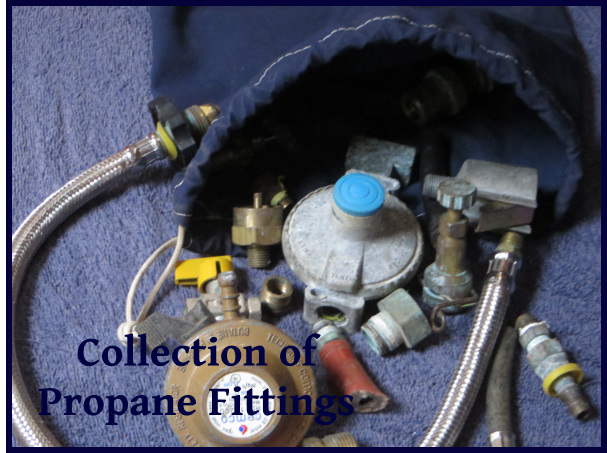
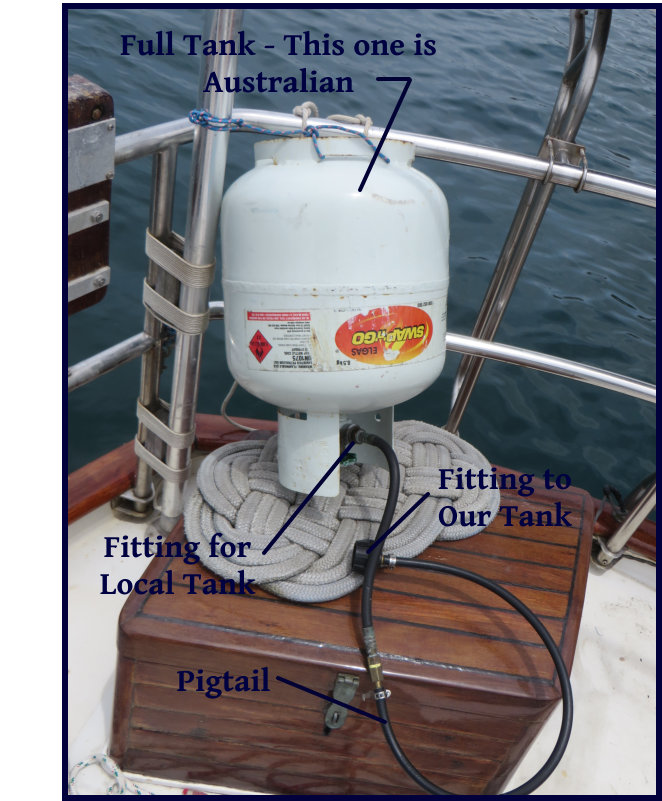
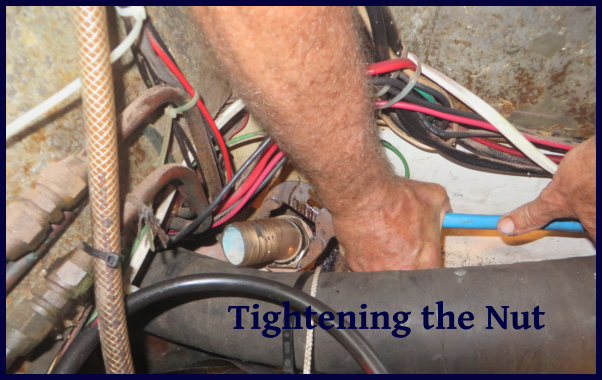
  • Many countries have a different fitting on their propane tanks than what we are used to in the U.S. It seemed like every South American country we visited had a different standard. Part of the adventure was visiting hardware and plumbing stores until I found a fitting (or combination of fittings) that would allow me to connect the local tank to the hose and pigtail connection for my tanks. I have a ditty bag chock full of adapters from around the world.
  • I always secure the full tank in its upside down position so it can't fall over or overboard if there is an unexpected wake or surge.
  • Propane is heavier than air, and any propane that leaks or is released inside the boat will collect in the bilge. If enough collects down there, an explosion and/or fire may result. We had acquaintances on a French boat that blew a hole in the side of their boat after a propane leak. The boat was partially sunk and the wife was badly burned. It happened in a remote part of Patagonia, and they spent a week or so surviving ashore until the Chilean navy found and rescued them. I always make sure any escaping propane vapor is blown overboard – or better yet, I do my decanting ashore when I can.
  • Obviously, the escaping propane vapor is highly flammable – I make sure there are no open flames, sparks, etc. anywhere near.

Our three tanks give us enough cooking fuel for 3-4 months – a little less in the cooler climes when we bake more and a lot longer in the tropics when we avoid baking. We no longer have a BBQ grill which seemed to be less efficient. That's been enough propane to keep the crew happy between refill opportunities, whether a long ocean passage or extended gunkholing in Patagonia or the nether regions of Tasmania.

The Blue View - Replacing a Seacock

seacock sketch 
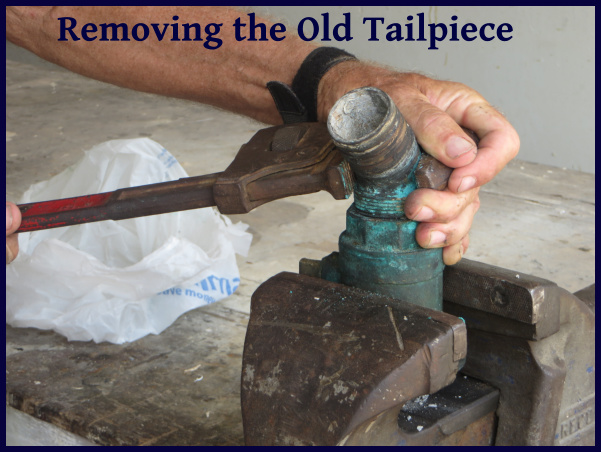
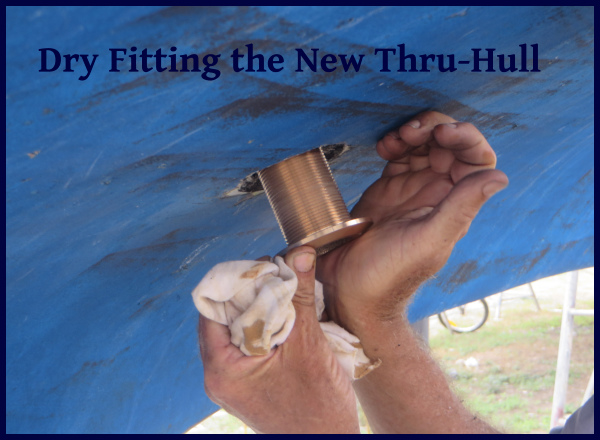
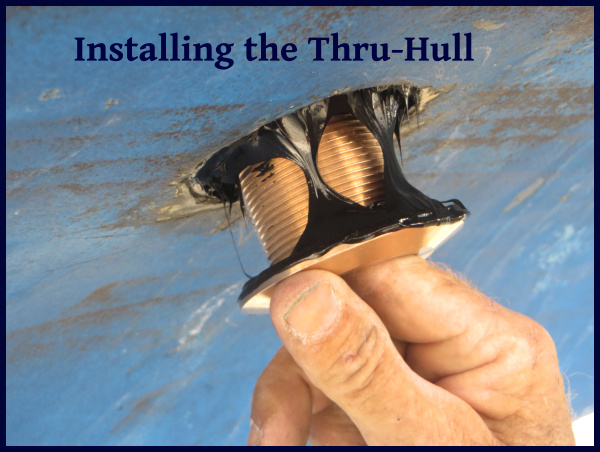
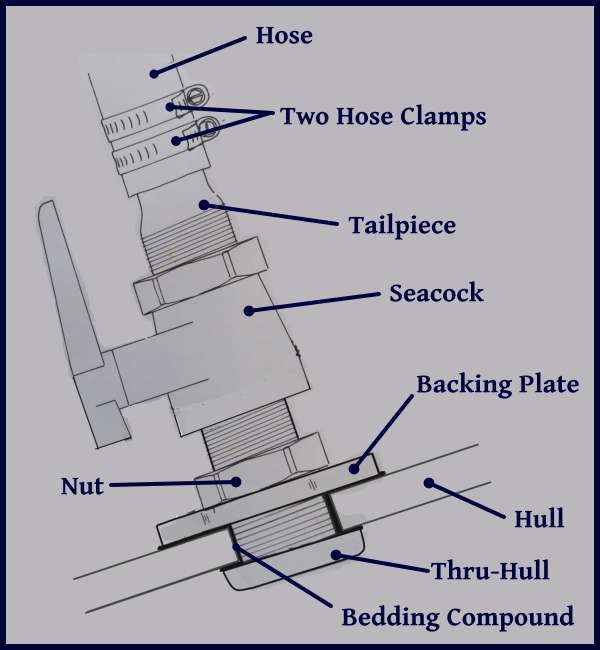
Nine of Cups has 16 thru-hulls – holes in her bottom. A couple of these are for depth and speed transducers, but 14 are used to allow water into or out of the boat. For example, one is used as an engine cooling water intake, another is connected to the galley sink drain, another serves as the water intake for our desalinator, and so on. Since it could be a real disaster if a hose connected to one of these thru-hulls broke or came loose, each of the 14 thru-hulls is fitted with a shut-off valve - or seacock in sailor's parlance. As part of our annual haul-out chores, we check, lube and exercise each seacock, and examine all the hoses and hose clamps.

thruhull map

This process is more easily done with two people. In our case, Marcie is outside the boat equipped with a q-tip taped to the end of a screwdriver and a pot of either vaseline jelly or a silicone based lubricant, while I am on the inside of the boat. We start with the most forward thru-hull on the starboard side, and I work the seacock half a dozen times or so to limber it up, then close it and tap the hull a few times. That's Marcie's cue to grease the ball valve with a dab of lubricant, after which she taps on the hull. We repeat this three times for each seacock, then move on to the next seacock. While she is greasing, I examine each seacock and thru-hull for corrosion, make sure the bonding wire is still attached and intact, then check each hose for signs of deterioration and each hose clamp to make sure none have broken or begun rusting.

The whole operation takes about a half an hour or so, and is well worth doing. There are always a few seacocks that are quite stiff, but which are soon operating smoothly again after working and lubing them. Invariably, I discover a few hose clamps or a hose that looks questionable, and it goes on the list for replacement before we splash again. And every few years, I find a seacock that has totally frozen up and which will also need replacement before going back in the water.

This time, the seacock for the port cockpit drain was seized. It has been with Cups since she was built, and after 30 years, it finally seized up. This particular one is located behind and below the engine, right next to the large engine exhaust hose – probably the most difficult-to-access seacock on the boat.

removing the seacock

The usual steps involved in removing a seacock are to remove the hose clamps and hose from the tailpiece, then, using the biggest pipe wrench that will fit into the space, unscrew the seacock from the thru-hull. These parts are made of heavy bronze, and were sealed with a copious amount of bedding compound 30 years ago, making them somewhat stubborn. I got my biggest pipe wrench out, wriggled my way down to the seacock, then spent the next hour pushing, pulling, grunting, sweating and cursing trying to get the damn thing to budge. After several new cuts and abrasions, a few bruised knuckles and absolutely no movement of the seacock, I went to find Raymond, the boatyard mechanic.

removed seacock

Raymond is a big, strong guy, and his helper is even younger and stronger. I was sure that between the two of them, the seacock would give it up, but after half an hour of concerted effort on their part, it still wouldn't move. We had a brief conference and decided that the only way to get it out would be to grind off the bottom of the thru-hull, and push it up and out of the hull. I was quite apprehensive – it would take some finesse and care to accomplish this without damaging the hull – but Raymond assured me he could do it. Sure enough, after another twenty minutes or so, the thru-hull and attached seacock were free with no collateral damage at all.

removing the tailpiece

Installing the new parts was much easier. The new thru-hull was pushed into the hole from beneath, and a backing plate was installed and the nut screwed into place on the inside of the hull. I did a dry fit first to make sure everything fit, then took it all apart, applied bedding compound to the hole, under the backing plate and onto the threads, then reassembled everything. I tightened the nut moderately tight, making sure bedding compound was oozing out from under the backing plate and around the end of the thru-hull, then let it sit overnight. The next day, I tightened the nut as much as possible. This ensures that not all the bedding compound gets squished out from the mating surfaces.

dry fit

installing

tightening

Next, I applied bedding compound to the threads on the tailpiece and screwed it into the seacock. Then the sea cock was screwed onto the thru-hull, again, after a light application of bedding compound to the threads. It was tightened down, making sure it was oriented so that the handle could be operated. Finally, a new hose and two new hose clamps were fitted into place.

All done, and just in time for a beer while I admired the finished job. All that's left is to check it when we splash to make sure there are no leaks. With any luck, it will last another 30 years, which is just about how long I want to wait before I have to repeat the job.

The Blue View - Replacing the Shaft Seal

pss shaft seal 
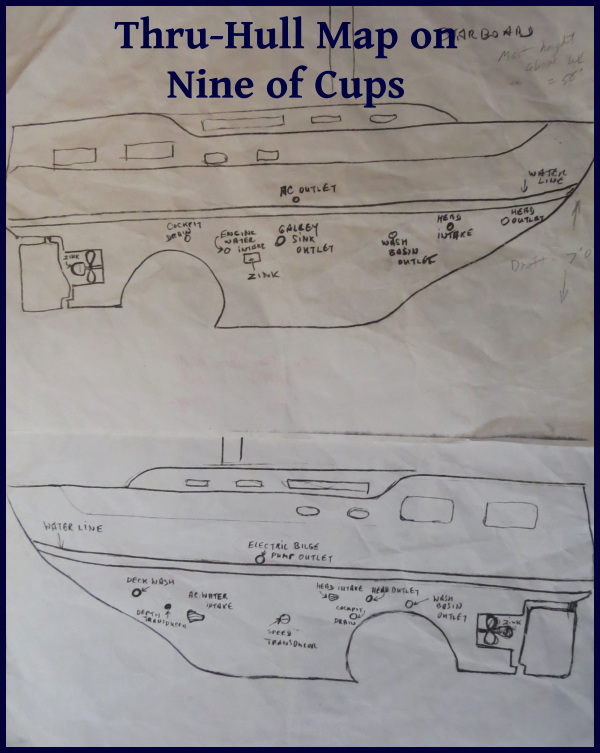
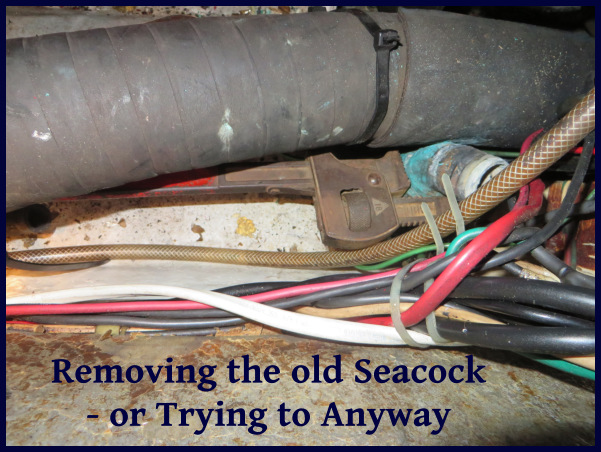
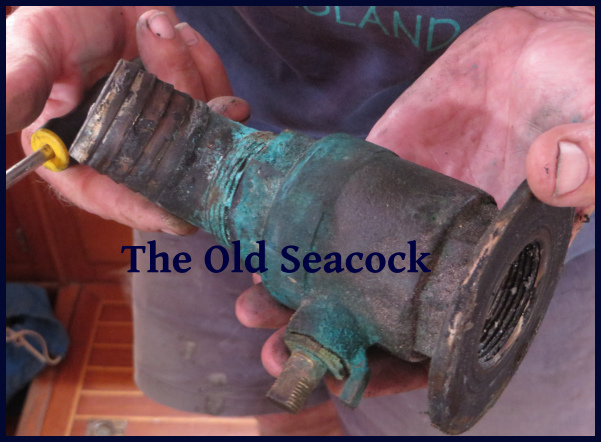
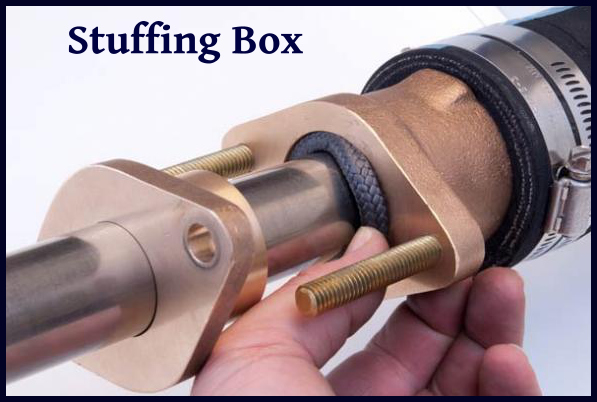
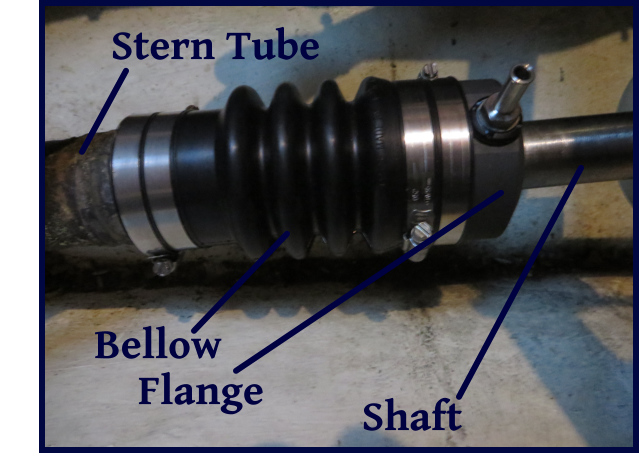
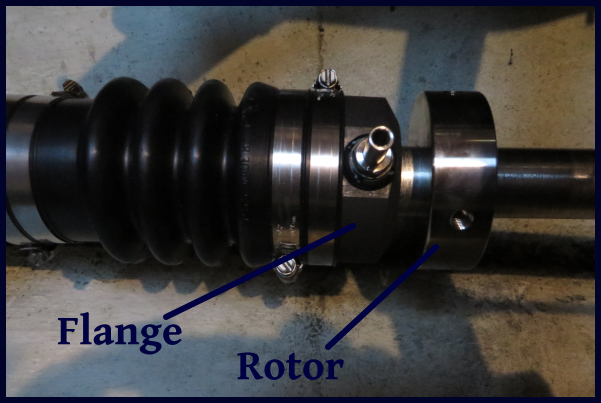
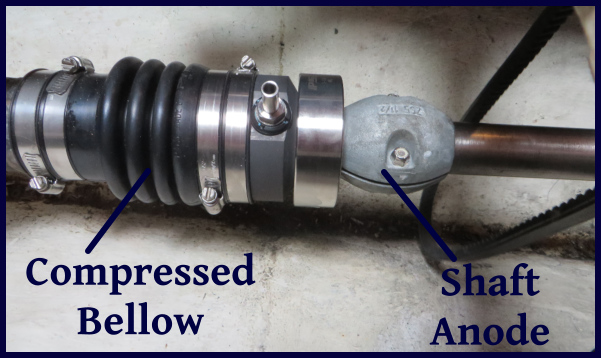
As part of the process of replacing the cutlass bearing, the old shaft seal had to be removed. I installed a 'dripless' shaft seal about 14 years ago, and while I've serviced it regularly over the years, I thought it might be a good time to replace it as well.

If you're not a yachtie or a boater, you may be asking “What the heck is a shaft seal and why do I care anyway”. Or, more likely, you've tuned out by now and decided to wait till Marcie's next blog tomorrow. If you're still with me, however, I'll talk about installing a new shaft seal.

The shaft seal, as its name implies, forms a seal around the propeller shaft as it exits the bottom of the boat through the stern tube. It prevents water gushing into the boat without causing any wear on the shaft while it rotates. Traditionally, this was accomplished by something called a stuffing box, which consisted of a threaded sleeve attached to the stern tube and a large nut. The sleeve was filled with wraps of a packing material – typically woven flax impregnated with wax, grease or lubricants, then the nut was tightened down until the flax was compressed against the shaft, forming a seal.

stuffing box

To keep the flax from drying out or overheating, it needed to be lubricated with seawater. The packing nut would be tightened or loosened from time to time to ensure the amount of water the stuffing box was leaking was optimal – on a sailboat this was about 10-15 drops per minute. Over time, the flax would harden and wouldn't seal effectively, so it had to be dug out and replaced every few years. Stuffing boxes are still quite common, but the packing material is now synthetic, rather than flax, and require less maintenance.

Nine of Cups originally had stuffing boxes on both the prop shaft and the rudder. Shortly after we bought her, I replaced the stuffing box with a new 'dripless' shaft seal. There were a few varieties available, and I chose the P.S.S. Shaft Seal made by PYI, Inc. It consists of a stainless steel rotor that attaches to the shaft and a carbon graphite flange that attaches to the stern tube with a bellow.

bellow

The stainless rotor is held in place with two set screws. I removed these, lubricated the shaft with some dishwashing soap, then slid the rotor off the shaft. The bellow is secured to the stern tube with two hose clamps. I removed these, worked the bellow free of the stern tube and slid it off the shaft as well. Note that we are on the hard... the stern tube will admit an amazing amount of water once the rotor is allowed to slide away from the flange if the boat is in the water.

rotor

Installing the new shaft seal is straightforward, and complete instructions are provided by the manufacturer. Slide the new bellow-flange assembly in place over the stern tube and secure it with two hose clamps. Lubricate the shaft with dishwashing soap and carefully slide the new rotor into place. The rotor has two o-rings that seal it against the shaft, and some care should be taken to avoid damaging them as it is slid over the end of the shaft. Position the rotor so that it just touches the flange, slide it another inch or so, compressing the bellow, then tighten the set screws.

compressed

A few years ago, while we were sailing along the south coast of Australia, the rotor slid back along the shaft and we began taking on water. There was an adrenaline-filled hour or so while we figured out the problem and corrected it. A friend, John on Active Transport, had the same problem, and he prevented the possibility of a re-occurrence by mounting a shaft anode on the prop shaft. That seemed like a good idea, so we did the same.

anode

The shaft seal is lubricated and cooled by seawater. To make sure there is no airlock and that water is getting to the bearing, it is important to 'burp' the seal once the boat is back in the water. I do this by compressing the bellow, making sure water flows out.

So there you go … new shaft seal installed. Time to move on to the next project.