The Blue View - Flares, and More Flares
/ Marcie was doing her annual ditch bag inspection not too long ago, and noted that our flares were due to be replaced. Flares have a shelf life of 3.5 years, which seems like a long time, but it also seems like we are always buying them.

There are a host of different flares available, ranging from handheld flares, to orange smoke flares to signal rocket flares with parachutes. We’ve got quite an assortment. The prices vary accordingly, from expensive to really expensive.

We also have a 12-gauge flare pistol. Just like in the movies, a shotgun shell sized flare is loaded into the pistol, which is then fired into the sky, sending a bright red flare 500 feet or so high. Unfortunately, this type flare gun is considered a weapon in some countries, and must be declared and held in bond until the vessel leaves the country.
The U.S. Coast Guard requires us to carry at least three flares for daylight use and three flares for night use as a minimum. (Some types of flares are approved for both day and night use, in which case only three flares in total are needed.) In addition, because we sail offshore, we felt we should follow the International Sailing Federation (ISF) guidelines for offshore vessels, which requires 6 red parachute, 6 red handheld and 2 orange smoke flares. That’s a lot of flares, and did I mention that they ain’t cheap? It’s about $600 for the complete set – ouch!
Our approach was to carry the ISF flares in our sealed life raft, which has to be opened and inspected every three years. If we ever had to abandon ship, we’d be sure to have a good set of flares in the life raft, even if we lost our ditch bag. The coast guard is authorized to board any vessel in U.S. waters (or any U.S. flagged vessel anywhere in the world for that matter) to do a safety check. Since it isn’t practical to open the sealed life raft, we also keep an in-date set of the USCG required flares in our ditch bag to ensure we meet their requirements – and to have on hand if we have an emergency that doesn’t require abandoning ship.

Once the flares pass their “Best if Used By” date, they are most likely still usable and can still be kept aboard, as long as we have sufficient in-date flares to meet the USCG requirements. Thus, we have kept the majority of our outdated flares over the years to use as backups, and we’ve accumulated quite the collection.
Disposing of used flares is difficult. They can’t be tossed in the trash. They can’t be set off without the possibility of creating a false distress alarm. The coast guard won’t take them, nor will most local fire or police departments, and the manufacturers won’t take them back. In some places, the local coast guard auxiliary or sea scouts may take them for use in training. When we decide to start thinning our inventory of old flares, we’ll do what everyone else does - ask around and make lots of calls until we find a solution.

This year, we decided to use a different approach. The coast guard allows an alternative to the usual pyrotechnic flares. It’s now possible to buy an LED electronic flare that is USCG approved and which never expires, as long as the batteries are replaced each year. It is waterproof and floats, and once turned on, it flashes a very bright S.O.S. signal.

Since this is only a night time signal device, it is also necessary to have flares for day use. The coast guard also allows the use of a large orange flag with a black circle and black square printed on it, in lieu of the usual daylight flares. Weems & Plath, the company that manufactures the electronic flares, very cleverly sells a package that includes both the light and the flag.
We ordered the electronic flare package on Amazon
Our life raft will be due for inspection this January, and the ISF flare set that is stowed inside will be near its expiration date. Should we invest $600 or so on the replacements or should we scale down a bit? We aren’t planning to cross any more oceans in the next three years, so maybe it’s okay to cut back.
This post contains affiliate links to Amazon for your convenience. If you shop Amazon through any Amazon links on our site, we get a small commission at no extra cost to you. Thank You!
 One of the items on my to-do list was to replace the galley freshwater foot pump. We have pressurized water for the freshwater system, but fresh water aboard the boat is precious, and we try hard to conserve it. When a constant stream of water is not required, like when brushing teeth or washing hands, a pump or two on the foot pump sends a long squirt of water to the faucet above, and provides just the right amount of water without wasting much at all. Our foot pump died while enroute from Puerto Rico to St. Augustine, FL, and it's been on the repair list since then. Now that we are tied up next to a boatyard in Chesapeake, VA, I am finally getting to it.


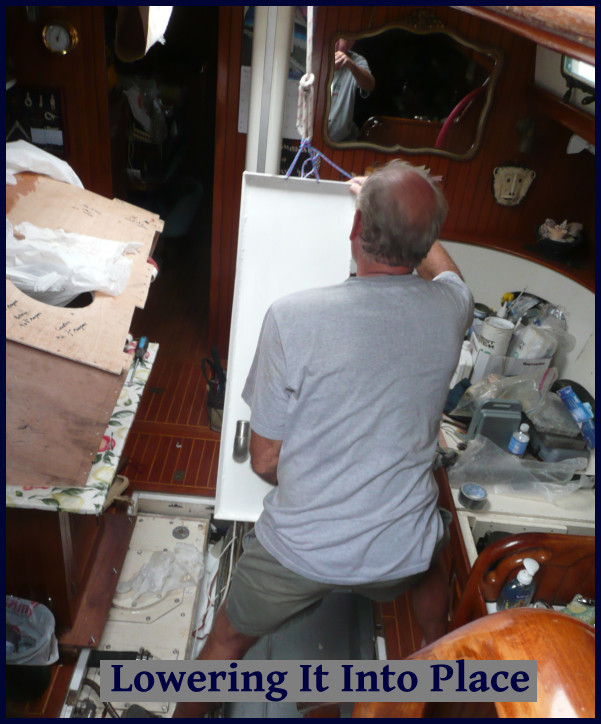
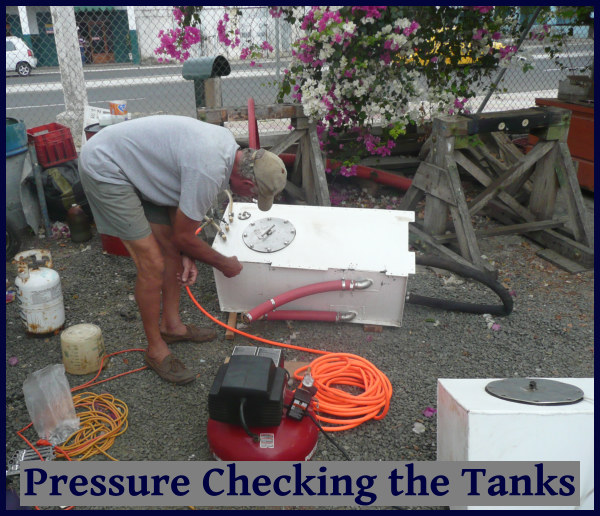
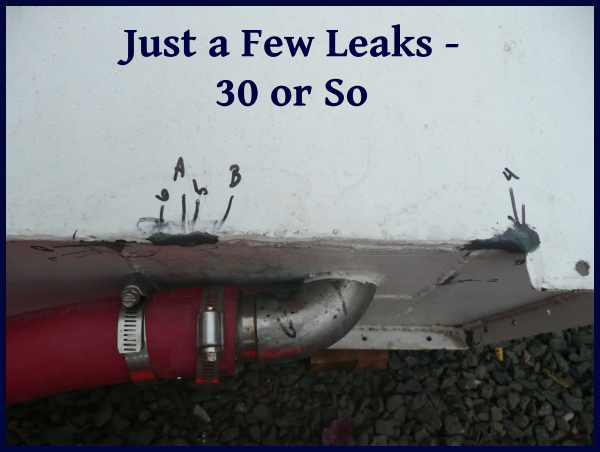
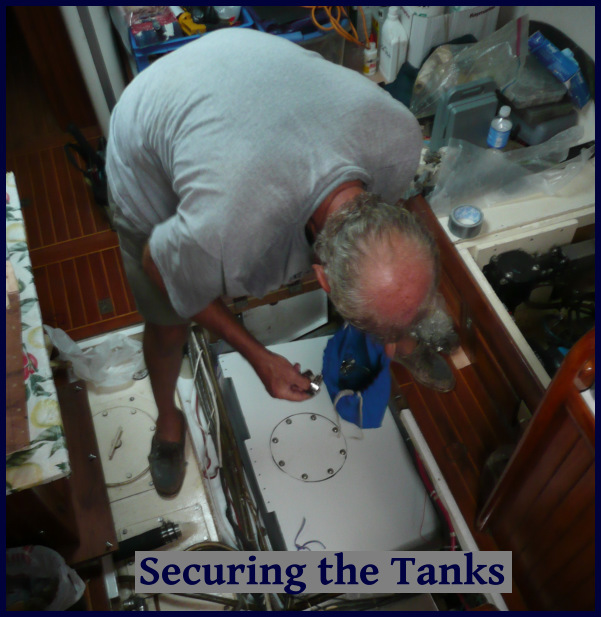
 In last week's Blue View, I talked about removing the tops from the old fuel tanks, making the drawings for the new tanks, then building mock-ups out of plywood. Once I was happy with the fit and the drawings, I hired a “flete”, sort of a combination small truck and taxi driver, and made the trip to the metal fabricator. After a lengthy discussion that required Marcie's reasonable Spanish, my crappy Spanish enhanced with a great deal of hand gestures, the drawings and the mock-ups, the fabricator assured us he understood what was needed. He gave us a quote and promised delivery in about a week.